Updated March 27, 2023
Introduction to Button in ASP.NET
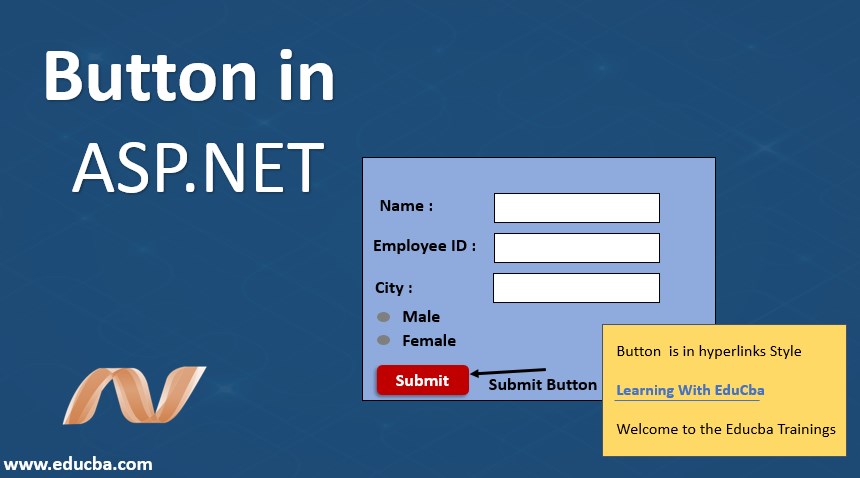
Button in ASP .NET is the basic controls in ASP .NET. Usually, this is used to display a normal push button. This button may be a submitted button or maybe a command button. By default, its control is a submit button. It provides three basic button controls. This type of control is basically used to perform events. It will submit the client request to the server.
Below are the three buttons provided in ASP.NET:
- Button: This will display text within the rectangular area.
- Link Button: This will display text which has a hyperlink
- Image button: This button will display an image.
When the user clicks a particular button, two events are raised one is Click and another one is Command. To create a button, we can either write code or we can use the drag and drop facility available in the visual studio IDE.
Syntax
Let’s have a look at its basic syntax for the button.
1. Button Control
2. Hyperlink Button
3. Image Button
How does Button work in ASP.NET?
Let’s see how the button works in ASP.NET.
- When we drag and drop the button control from the toolbox. On the button, we see the text which is the standard button which appears to be a push-button.
- By changing its text property of button control we change its text on the button. Like we want the button to appear as a “submit”. so we change its text to submit.
- As soon as we click the button an event handler gets generated.
- Now suppose we need to write a message in response to clicking the button. We will write inside the event handler by using Response.write(“button clicked”).
- As we click this submit button message will appear which we pass in Response.Write.
Let’s see how the hyperlink works now. It has its control properties namely ImageUrl, NavigateUrl, Text, and Target. Basically it will use one of these properties for setting a hyperlink on the web page which will redirect to its destination. The destination might be an image or only text or it can be both on the other page.
- If we want to navigate on the other page or on the section of the same page hyperlink control is used.
- Its main and important property is NavigateUrl
- NavigateUrl property stores the address of the destination web page.
- net Hyperlink Control is used to navigate the user to another page in the asp.net via its NavigateUrl property.
- When the user clicks on the given hyperlink it will directly get redirected to its target page.
- We can set both the properties that are ImageUrl as well as Text. If the image is not available, then it will search for the text to display.
- If we set an image path to the ImageUrl property, it will display the image we want in our web page application
Examples to Implement Button in Asp.Net
Let’s see with an example of the “submit” button.
Example#1 – Submit Button
We will implement it by adding a simple button. This submit button is used to click and submit the entire form.
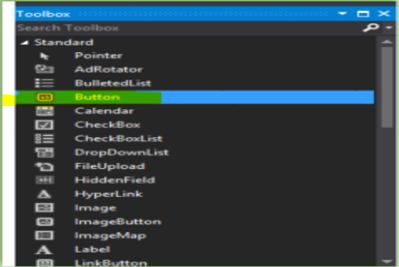
Step 1: From the toolbox, Drag the button control onto the Web Form as shown below in the highlighted snippet.
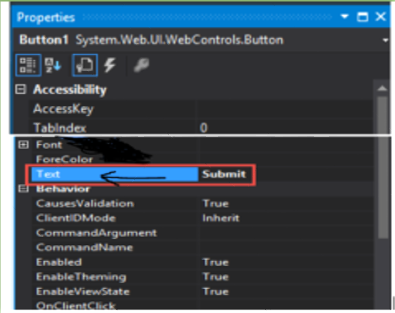
Step 2: After dragging the button, it will be added. now we need to go to the properties window by clicking on the button control. Change its text property of the control button to the submit. Also, change its ID Property to ‘btnSubmit’.
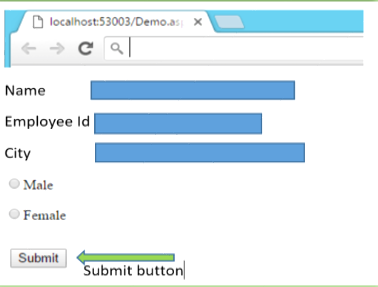
Step 3: once all the above changes have been done. we will see the below output. We can see the Submit button now at the end of the form. so now the button has been added.
Example#2 – Image Button
Step 1: Create a new web application by opening it in visual studio.
Step 2: Drag and drop the image button on the web page from the toolbox as shown in the example of the button in the above section.
Step 3: Now we need to Set ImageUrl property of ImageButton control for the display image on control.
Step 4: After that, we need to set PostBackUrl Property to its destination web page name so that it will redirect to another page.
Step 5: For writing the code on image button control, we need to go to the CLICK Events of Imagebutton control.
Example#3 – Link Button
Below is the code for LinkButton.aspx:
Code:
<%@ Page Language="C#" AutoEventWireup="true" CodeBehind="WebControls.aspx.cs"
Inherits="WebFormsControlls.WebControls" %>
<!DOCTYPE html>
<html xmlns="http://www.w3.org/1999/xhtml">
<head runat="server">
<title></title>
</head>
<body>
<form id="form1" runat="server">
<div>
<p>Button is in hyperlink style<p>
<asp:LinkButton ID="LinkButton1" runat="server" OnClick="LinkButton1_Click">learning with EduCba </asp:LinkButton>
</div>
</form>
<br />
<asp:Label ID="Label1" runat="server"></asp:Label>
</body>
</html>
Inline Code: It refers to the code which is written inside an ASP.NET web page which will have an extension of .aspx. it will allow the code to be written along with HTML source code using <Script> tag. Its deployment with the webform page whenever the web page is deployed. Especially its physically in the .aspx file.
Code Behind:
using System;
using System.Collections.Generic;
using System.Linq;
using System.Web;
using System.Web.UI;
using System.Web.UI.WebControls;
namespace WebFormsControlls
{
public partial class LinkButtonDemo: System.Web.UI.Page
{
protected void LinkButton1_Click(object sender, EventArgs e)
{
Label1.Text = "Welcome to the EDUCba online trainings”;
}
}
}
Explanation to the above program: Here, to handle the click event of LinkButton1, we have another file which has extension as aspx.cs. Whatever code write in this class is called a code-behind. This code gets compiled and gives the output as a .aspx file. For each of .aspx pages, we can have separate code in either in .cs of .vb format since all web pages get compiled to a DLL. This allows webpages to get hosted without any inline server code.so let’s see the output for the above code written.
Output:
It will display the text with the link “Learning with EduCba”.
The message “Welcome to the EDUCba training” will be shown as the link button is clicked.
Conclusion
So far we have learned about buttons and how it works with the help of an example. we also have a piece of knowledge about how it works and its syntax. we can say that it is used to allow the user to click on a button that will start the processing of the form. Also, these web server controls are used in data controls.
Recommended Articles
This is a guide to Button in ASP.NET. Here we discuss the introduction to Button in ASP.NET, how the button works along with appropriate syntax and respective examples. You can also go through our other related articles to learn more –


