Updated August 25, 2023

Introduction to Change Color in Photoshop
Photoshop software is nothing but image editing software that deals with raster images. It is the software that the professionals of graphics editor widely use because of its multipurpose features. We can use this software for Image editing, Logo and Banner designing, Animating graphics, and many more things. Changing the Color of any object in this software is very interesting and simple work, and it will help you in a lot of professional editing works. Here in this article, we will learn ‘How to Change the color of an object in Photoshop software?’ by two methods. You can use any one of them according to your suitability.
How to Change Color in Photoshop Software?
Before starting our article about changing color in Photoshop software, let us have a quick look at the working environment of Photoshop software and know about some features, which are present on the working screen for making our working easy in this software.
We have a very user-friendly working environment in this software with some useful sections areas that are Menu Bar as the top section of the working area, Property Bar as the second top section of the working area, Tool Bar as left side section of the working area, and the last one is Color and layer panel as right side section of the working area.
We will see the ‘Color Changing’ term in the context of ‘How to change Color of Cloth in Photoshop software?’ For this, just follow the below step one by one, and you will get your result in just a few steps.
Step 1: First and foremost, you need to learn about ‘Changing color in Photoshop software’ by downloading any image from the internet, or you can take any of your own images taken by yourself.
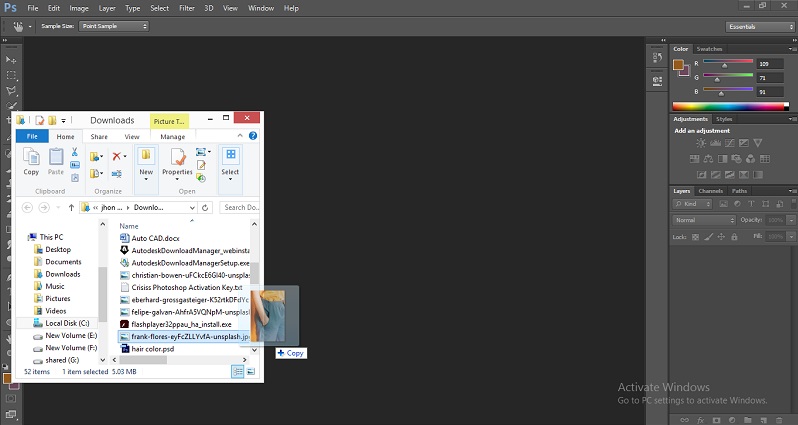
Step 2: Go to the folder of your personal computer where you have saved your image and open it, click on that image which you want to edit and drag it into Photoshop software by holding the left click button of your mouse and then drop it in the working of software by releasing the mouse button.
Step 3: The image will be placed in the layer panel of this software’s working area as a background layer. You can change the size of the image according to your requirements.
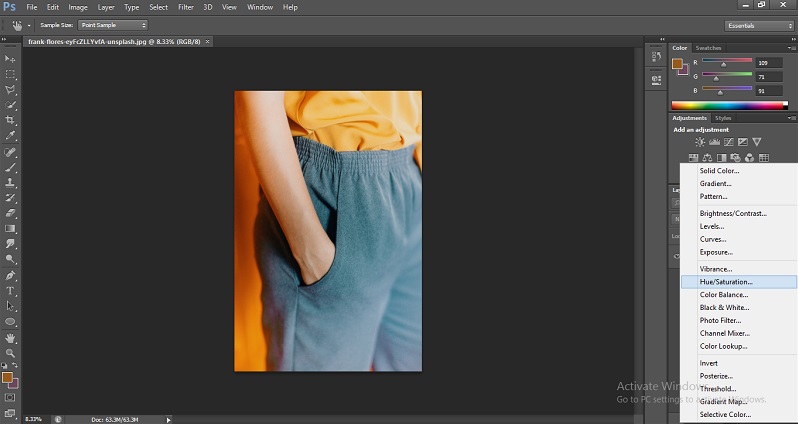
Step 4: Now, we will see the first method of Changing the colour of our image’s cloth in Photoshop software. Click on this small icon, which is at the end of the Layer panel, for making the adjustment layer. The adjustment layer will work as an editing layer for us, and our original layer will be saved for future use.
Step 5: A drop-down list of the adjustment layer will be opened. Choose the Hue/Saturation option from this list to make the Hue/Saturation adjustment layer.
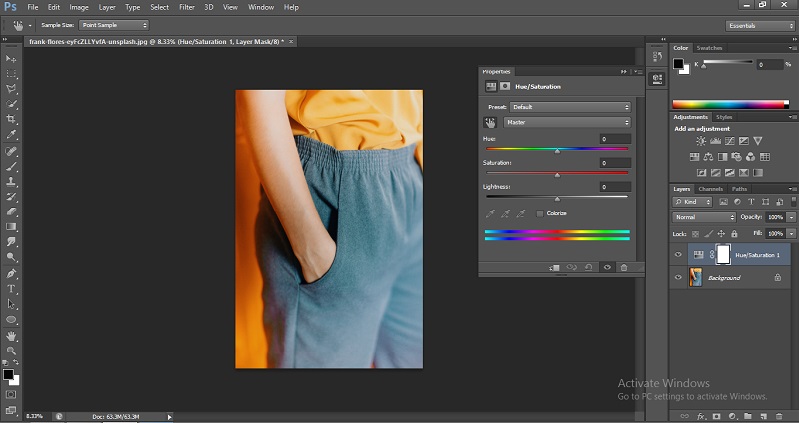
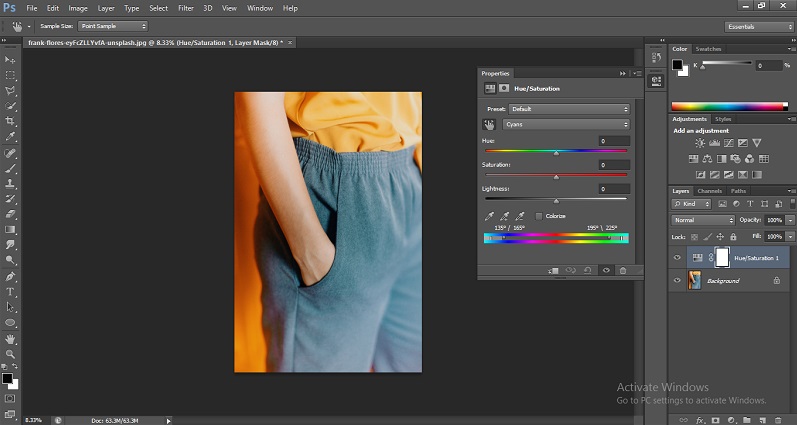
Step 6: An adjustment layer of Hue/Saturation will be generated in the section of the layer panel. You can see it in the above background layer.
Step 7: A Hue/Saturation Property box will be open.
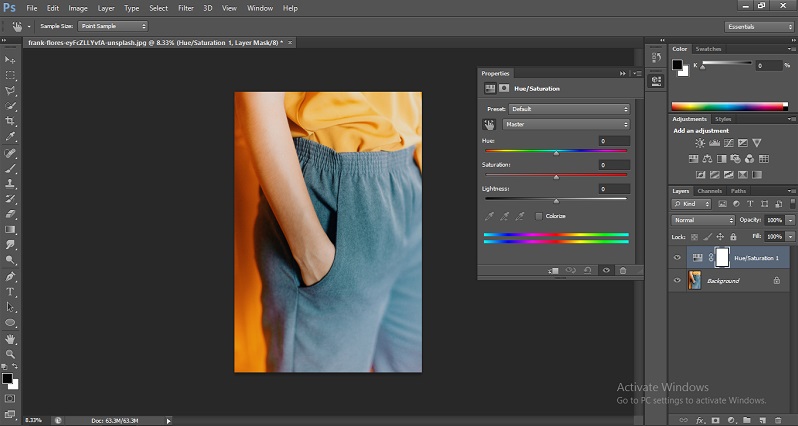
Step 8: Click on this Hand icon in the Hue/Saturation property box to activate the eyedropper tool and click on the area of the color you want to change using the eyedropper tool.
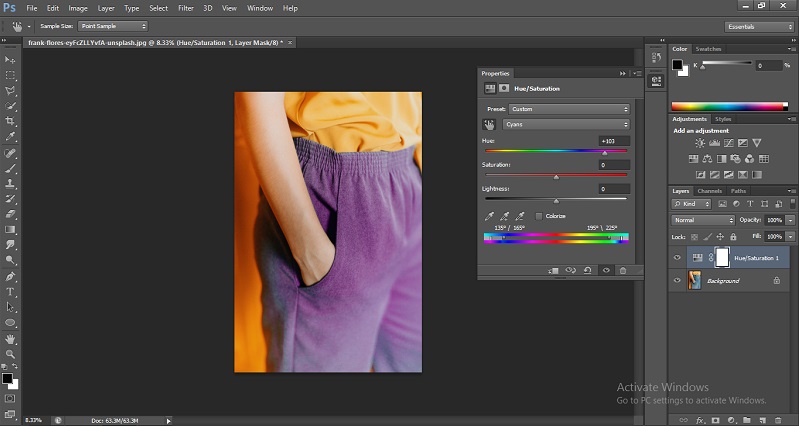
Step 9: Now increase the Hue by moving the hue slider, and you will see the color changes when the Hue slider is moving. Choose your desired color from here.
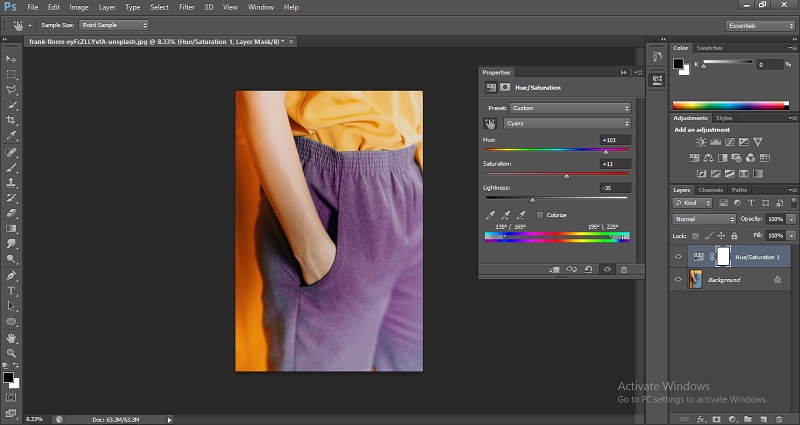
Step 10: Now, make some variation in the value of Saturation and Lightness by moving your sliders to the natural look of the selected color with your image.
Step 11: In this way, with the first method, you can change the color of any object in your desired color, and this is the final result of your changed color image.
Step 12: Let us move to the second method of ‘Changing color in Photoshop software’. Take a fresh image from your folder.
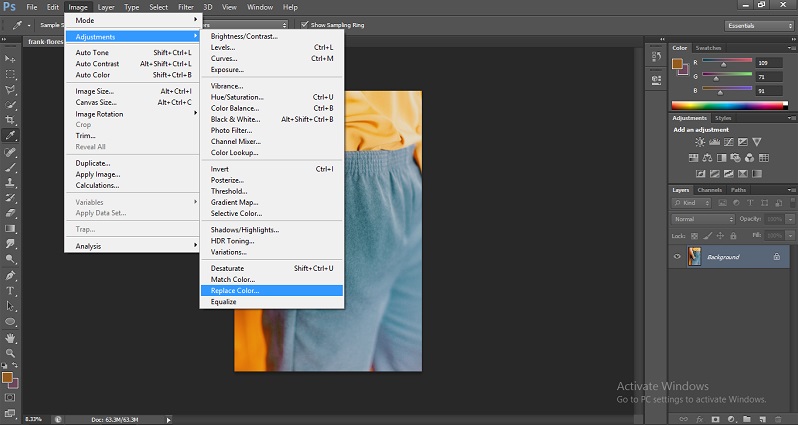
Step 13: Go to the Image menu of the Menu bar at the top of the working area and click on it. A drop-down of the Image Menu bar list will be open. Go to the Adjustments option and choose to Replace Color option from this list.
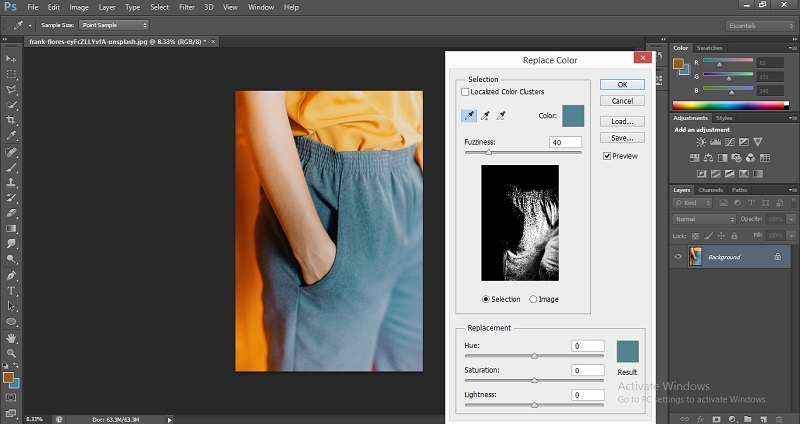
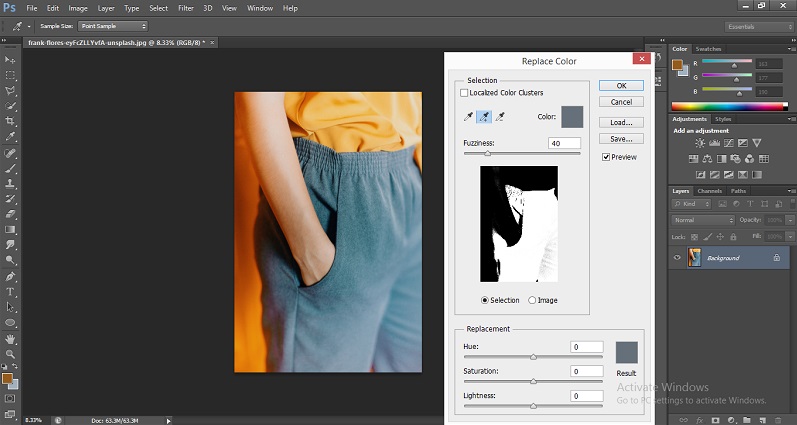
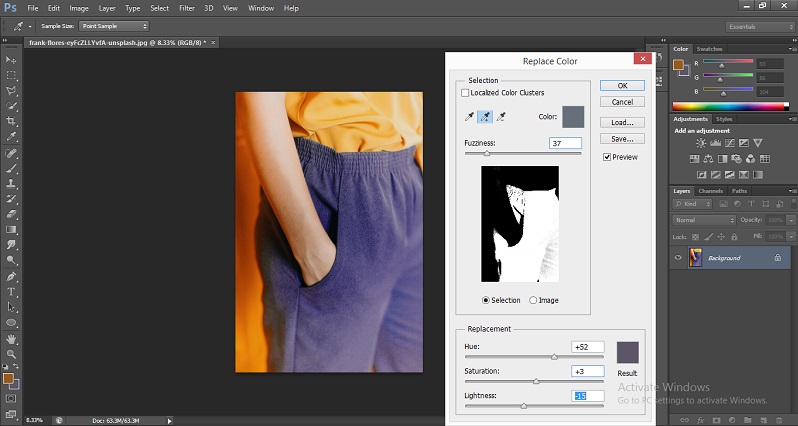
Step 14: A box named ‘Replace Color’ will be open. Click on the area of which color you want to change with the eyedropper tool. Once you click on your desired area, it will be highlighted as a white color in the box of ‘Replace Color’. Make sure the radio button of Selection (below the selected area in the box of Replace Color) is On.
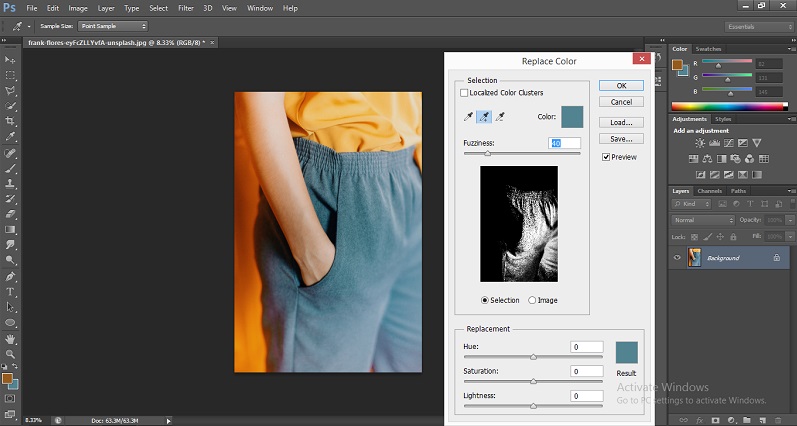
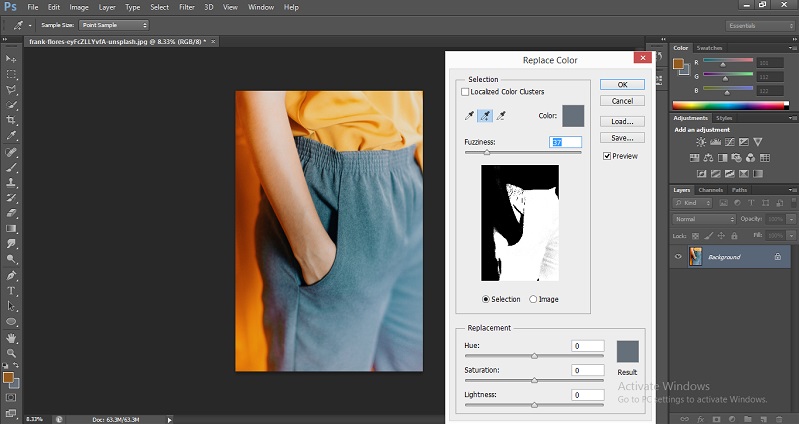
Step 15: Decrease the value of Fuzziness for a fine selection of the selected area.
Step 16: Now take the eyedropper plus tool by click on it with the mouse button and make multiple clicks on the selected area with the mouse left click button for a better and fine selection of our desired area. Selection will become more and finer with each click of the mouse button on the selected area of the image.
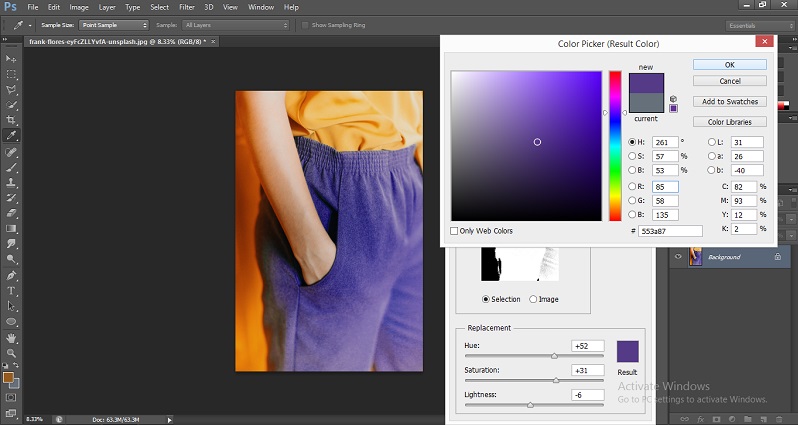
Step 17: Now click on the square color box, which is at the button of the Replace Color box and named as ‘Result’.
Step 18: A color panel will be open once you click on the Result box. Choose your desired color from this color panel for your selected area of the image and press the Ok button with a mouse left-click.
Step 19: Now, make some changes in the value of Saturation and Lightness for a better result of the changed color of the selected area of an image.
Step 20: This is the final image with the changed color of the selected area of your image. You can change the color of more than one object in an individual image by following all steps of changing the color of an image once you did the color-changing work of one object.
Conclusion
Now you can understand that changing color in Photoshop software is not a very big task for you. By learning the color-changing technique of any object in this article, you can enhance the skill of image editing and add a plus point to your working methods. This task will definitely improve your commanding quality of this software, and you can explore your own idea in your work very easily.
Recommended Articles
This is a guide to Change Color in Photoshop. Here we discuss the introduction and steps to change color in photoshop with various color-changing techniques. You may also look at the following articles to learn more –

