Introduction to Change Hair Color in Photoshop
Adobe Photoshop is a software of raster graphics editing, which Adobe Inc developed. It is a part of the Creative Cloud desktop app of adobe systems. You can do any type of editing work in this software. Changing hair color in Adobe Photoshop is one of the interesting editing works in Photoshop software.
Is it a big question, that ‘How to Change Hair Color in Adobe Photoshop?’ Now don’t worry about this question. Here in this article, we will discuss this question in the step by step manner, and you will find it very interesting during the article.
How to Change Hair Color in Photoshop?
So let us start our learning of ‘How to change hair color in Photoshop?’
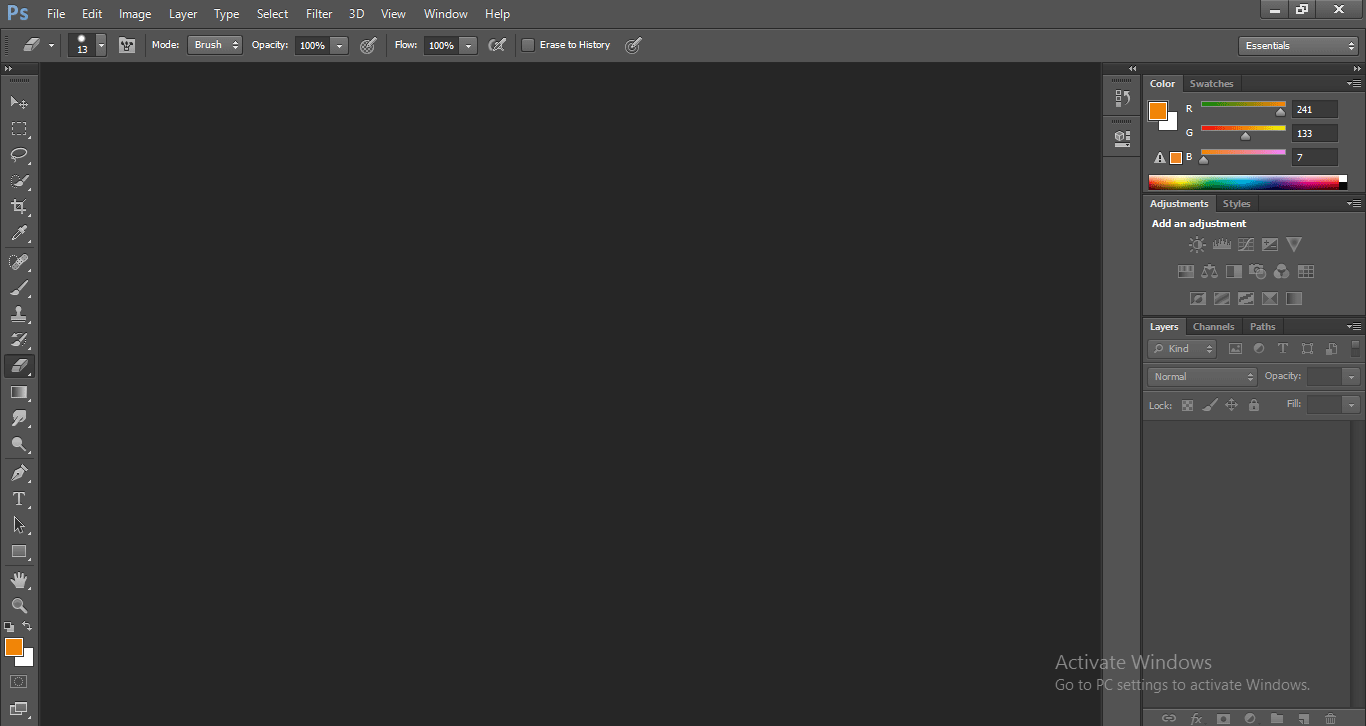
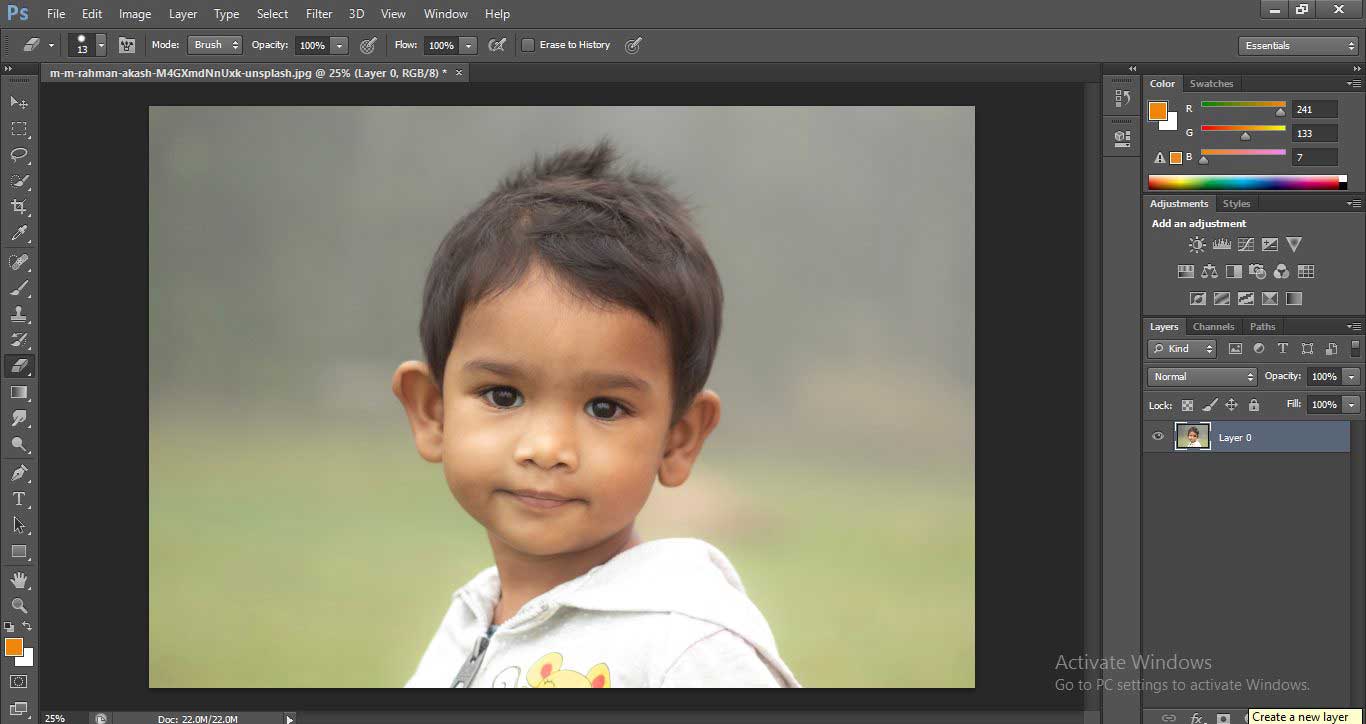
In this interface, we have many different sections that are Menu Bar at the top section for making a different setting in this working area, below Menu Bar we have Property Bar here of active tool for making some changes in the property of that tools, at the left side of document area we have Tool Panel, where we have different type of tool for making our work easy in this software, at the opposite side of Tool Panel, there is Color and Layer section, which shows active object’s properties. So now you can say that it is a very user-friendly environment for any type of working.
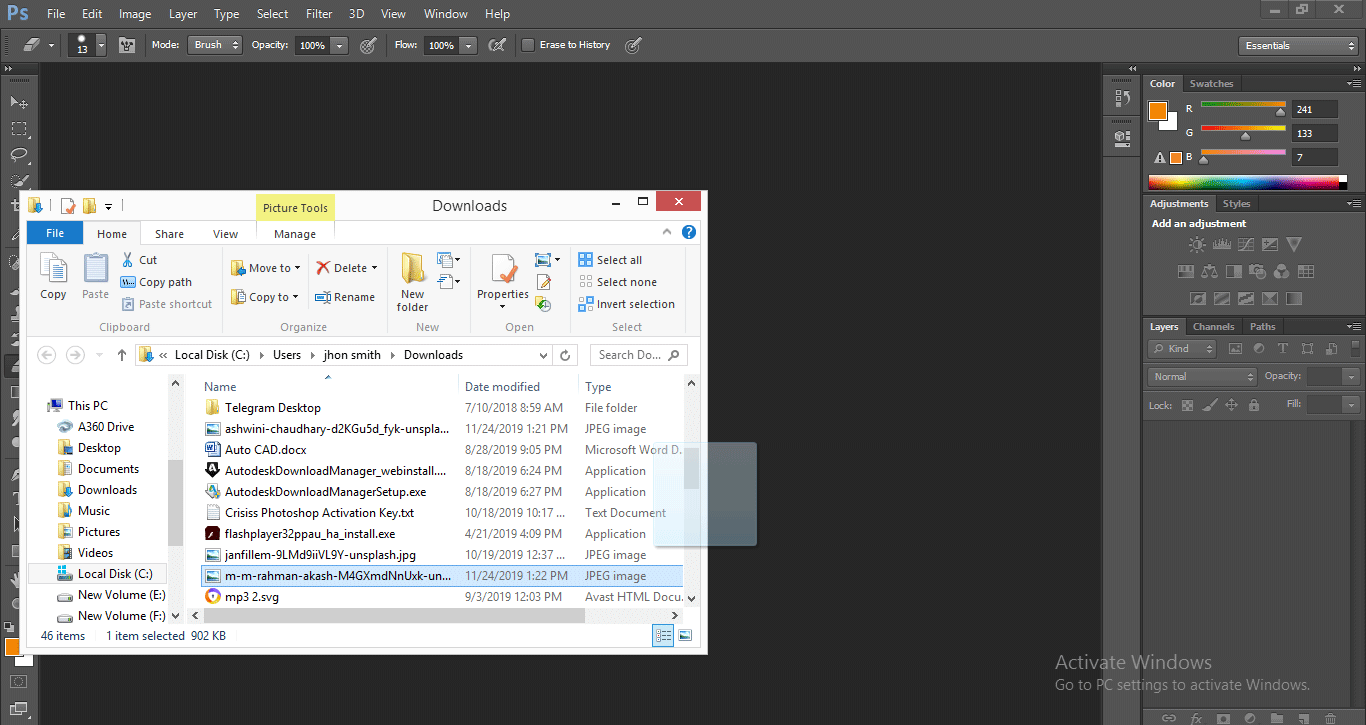
Step 1: For our learning, we will download an image from the internet. You can take any of your own images for this learning purpose. Now take this image in Photoshop software. For taking an image, just open the folder where you have saved the image and drag that image from that folder and drop it in the working area of Photoshop software.
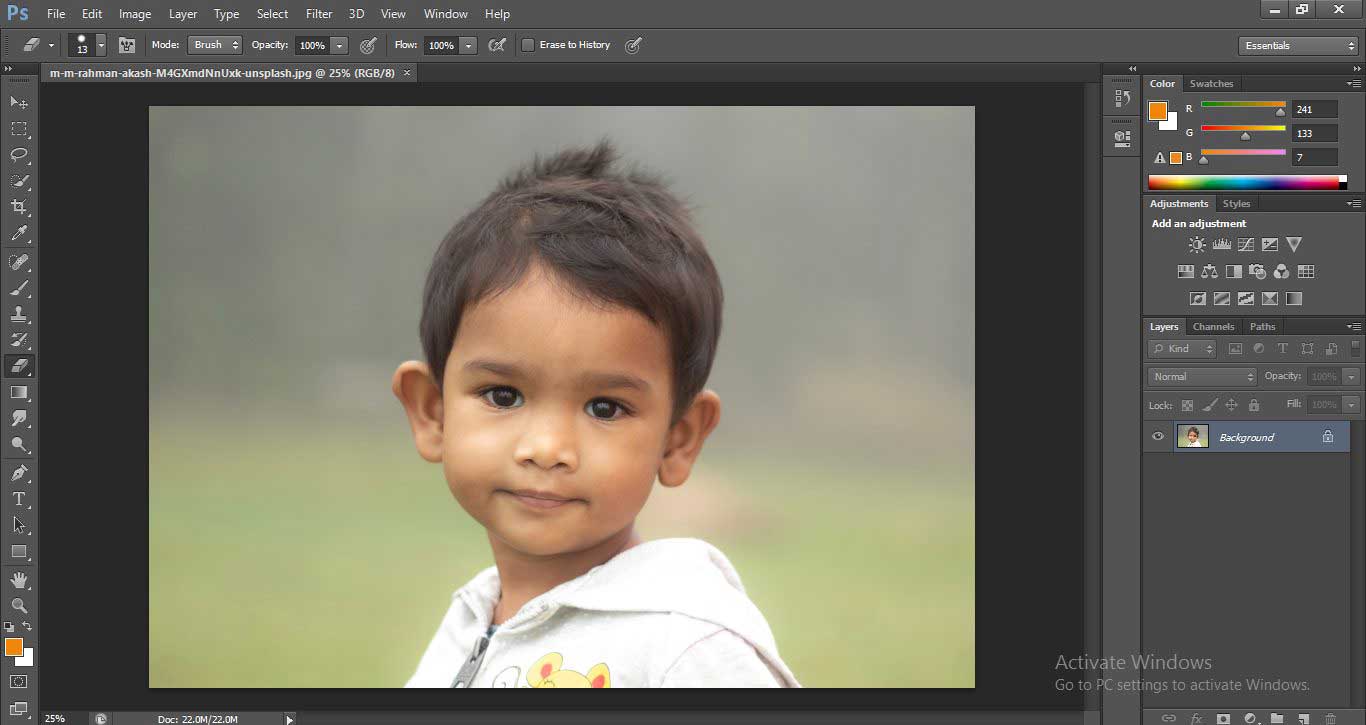
- This is the image that has been removed, and you can adjust its size according to you. This image will come as a background layer in Photoshop software.
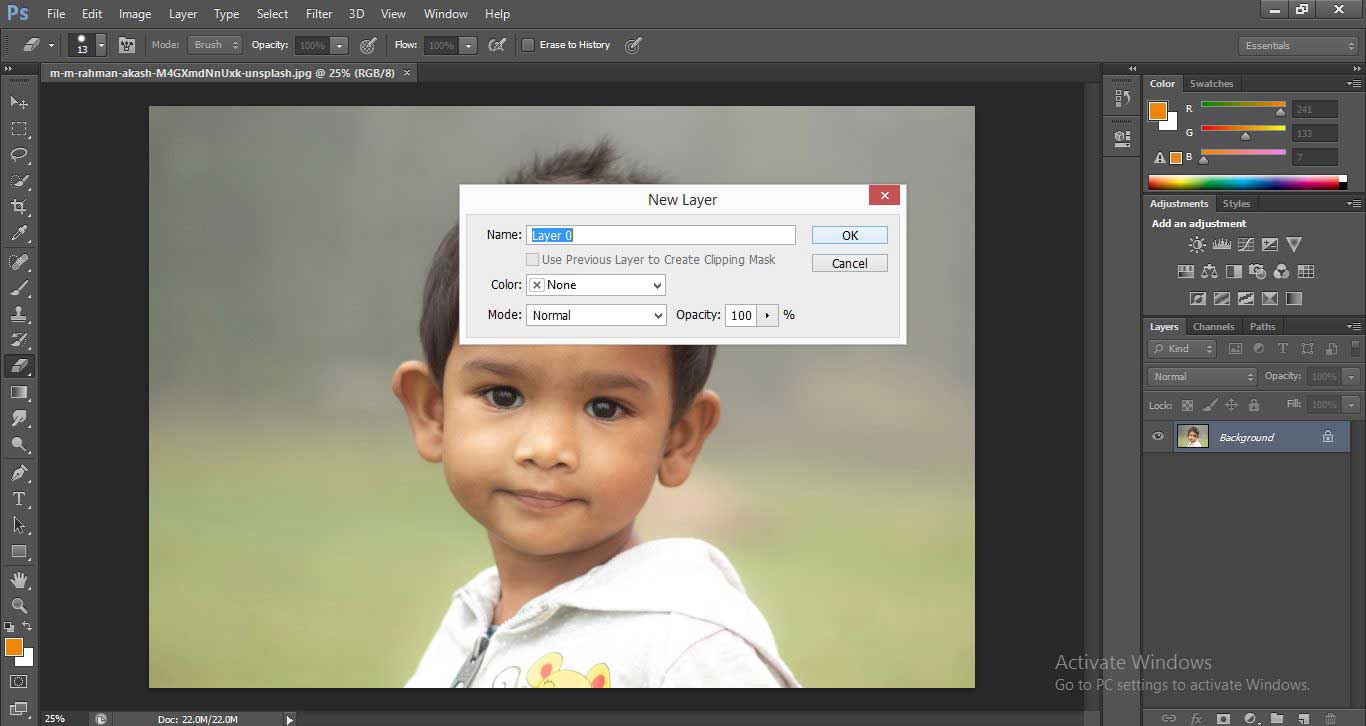
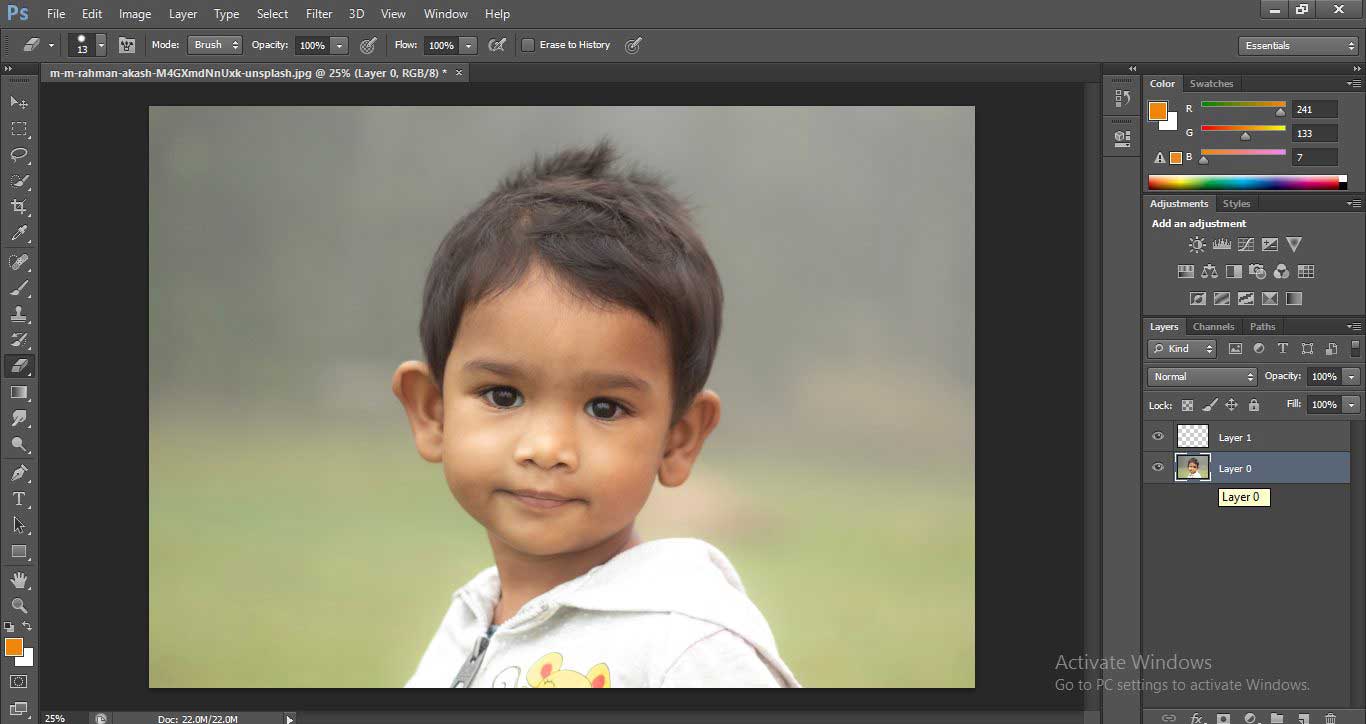
Step 2: Now go to the layer section and double click on the background layer with the mouse button to unlock the layer. The dialog box will open, named as the New layer box; click Ok to unlock the layer.
- The layer will become unlocked now; you can see it in the image layer, the Lock icon will be removed from the layer.
Step 3: Now click on the ‘New layer’ icon present at the bottom of the layer section. A new adjustment layer will be generated above the background layer.
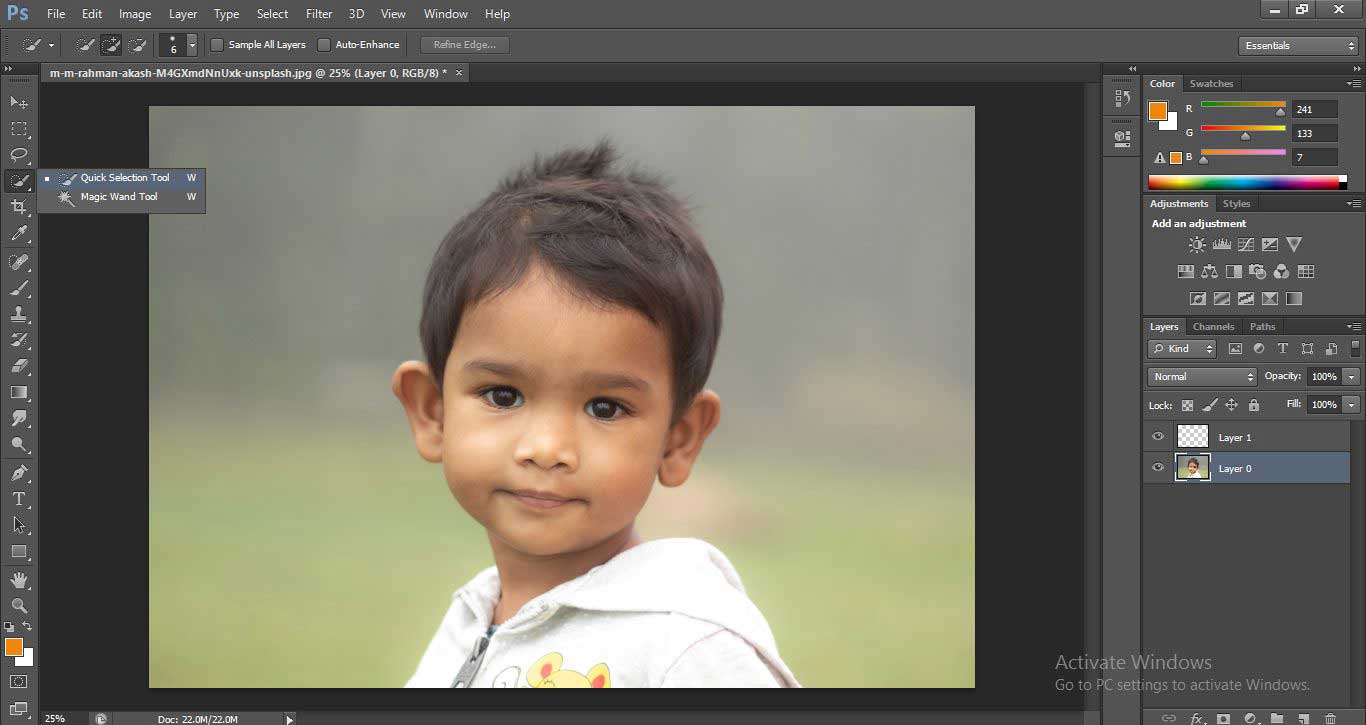
Step 4: Now go to Tool Panel on the left side of the workspace and choose Quick Selection Tool from here by clicking on it.
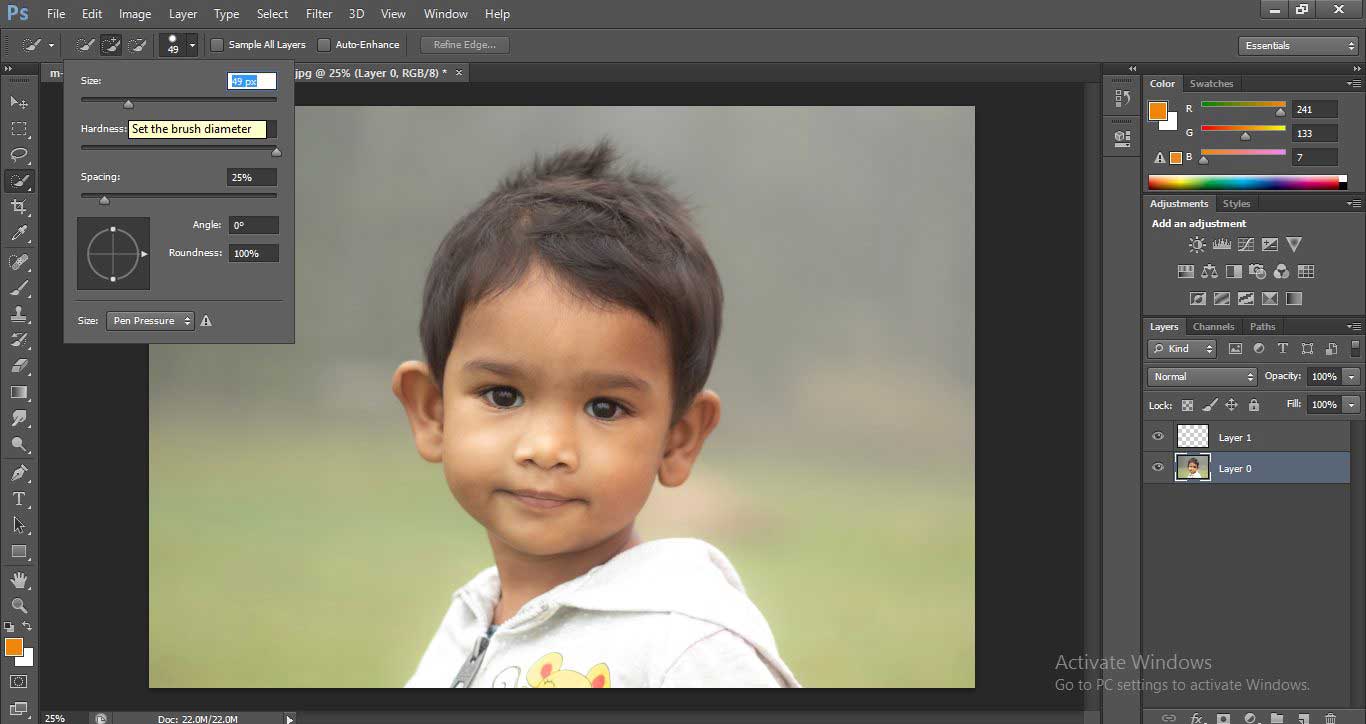
- Now change the size of the selection tool brush according to your requirement for the better area section with this tool. To change the size of the brush tip, click on the rounded icon at the property bar of the Quick Selection Tool and make your changes.
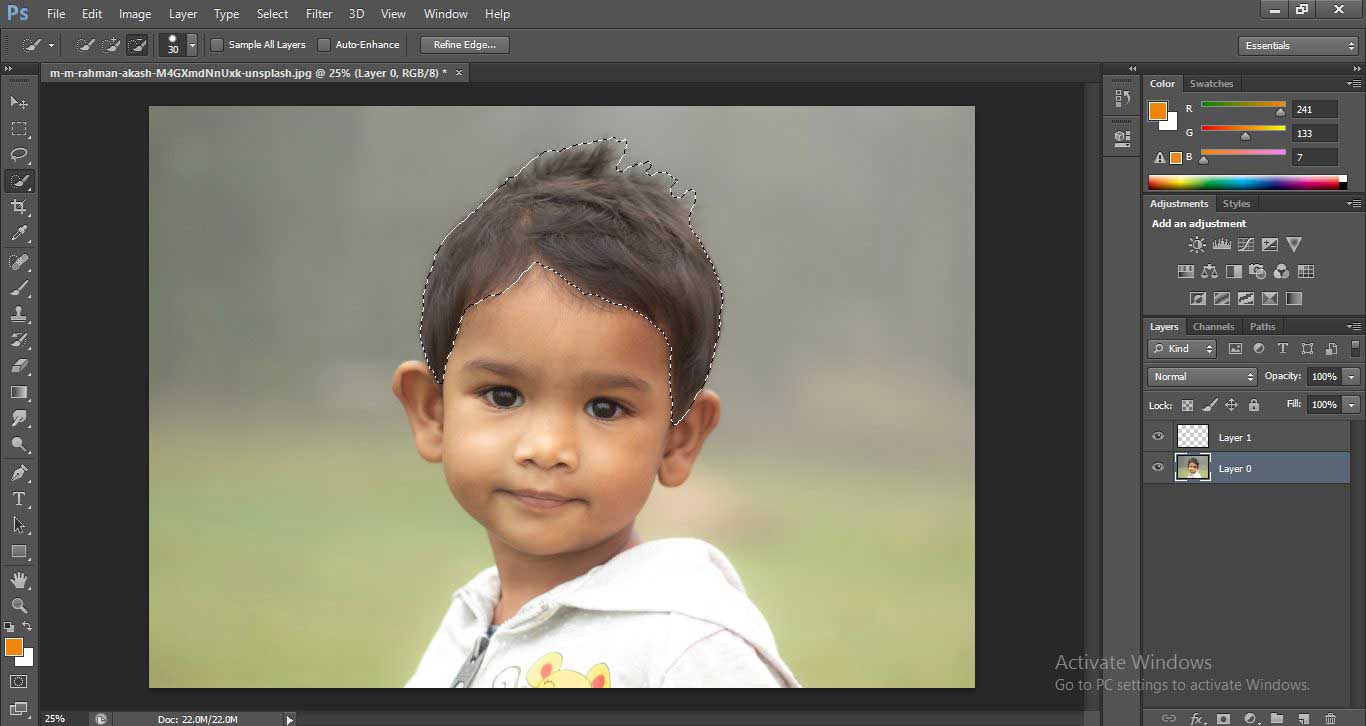
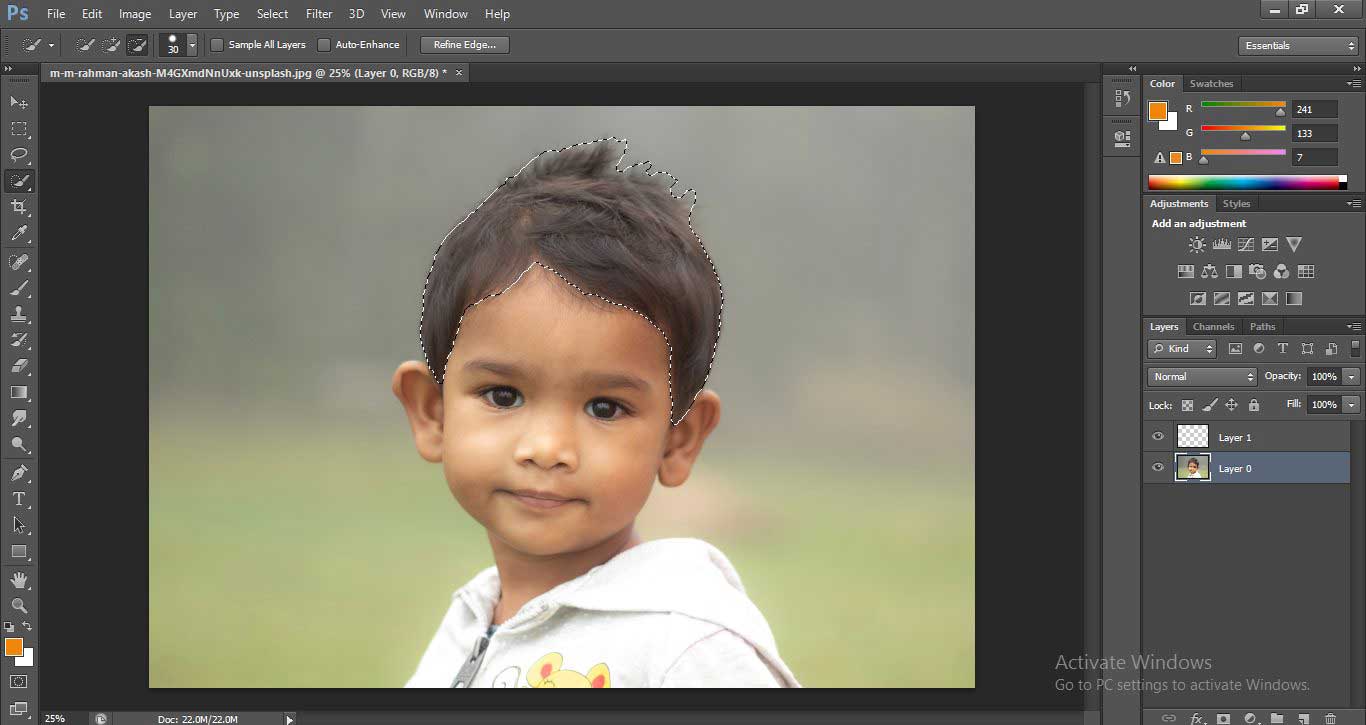
- Now go to the layer section and click on Layer 0 with the mouse button to activate the layer for our next step.
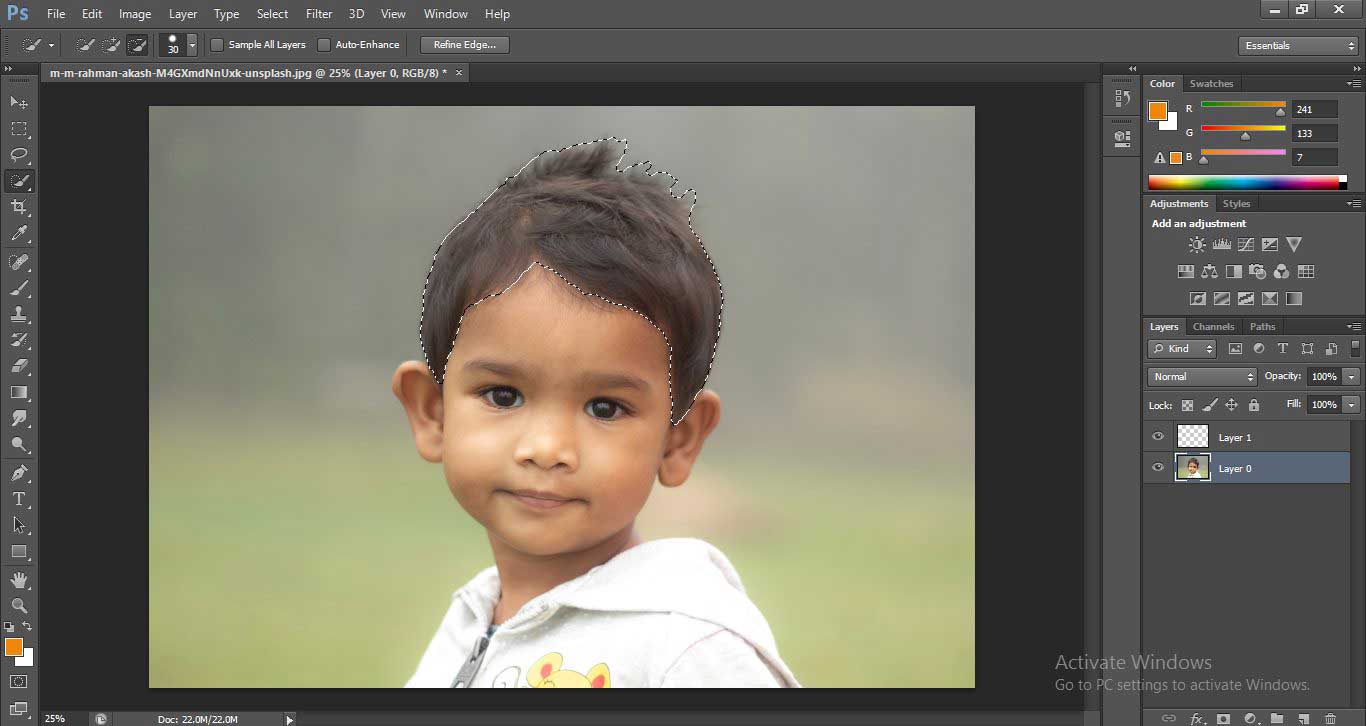
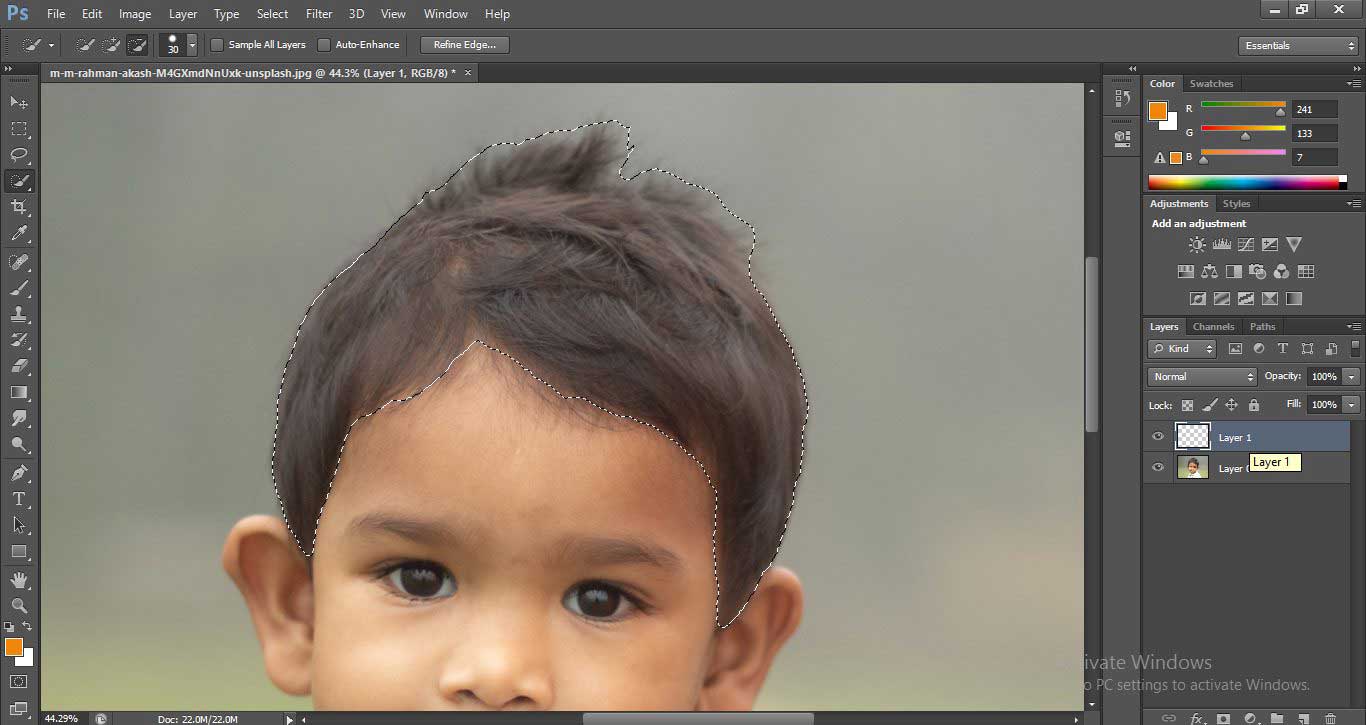
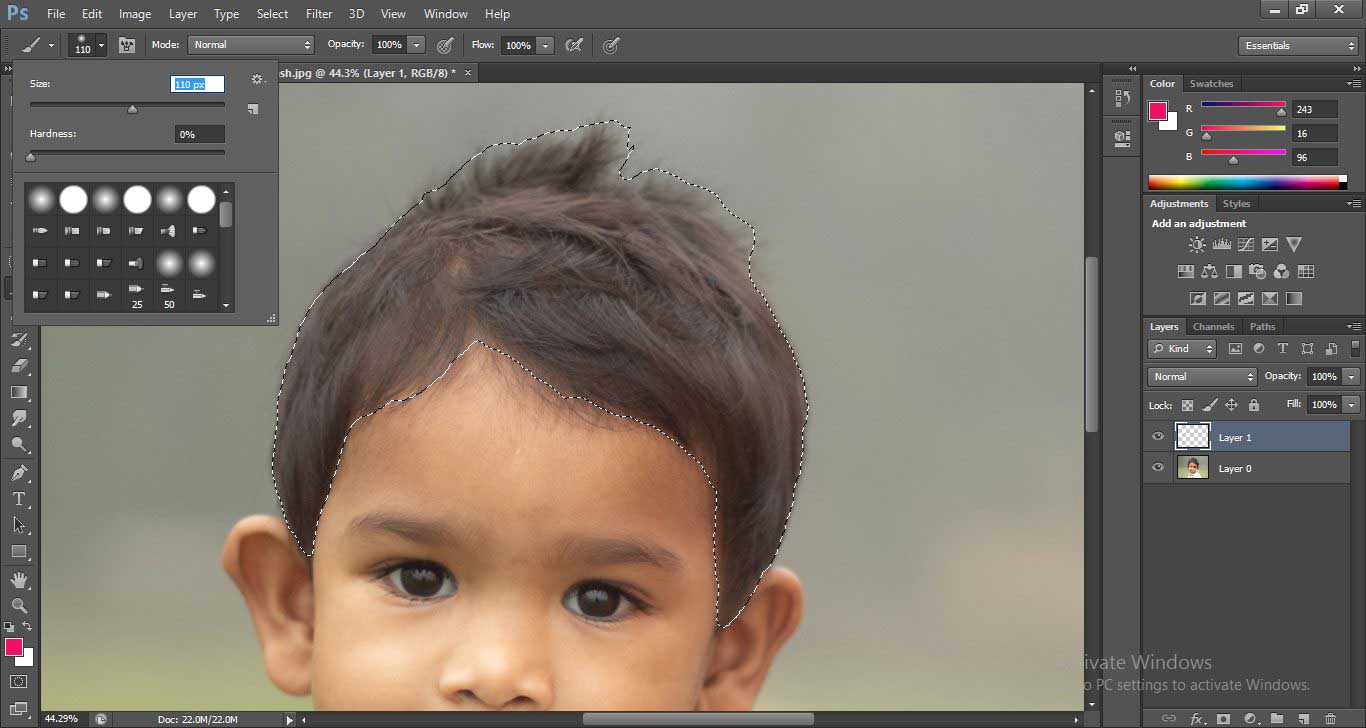
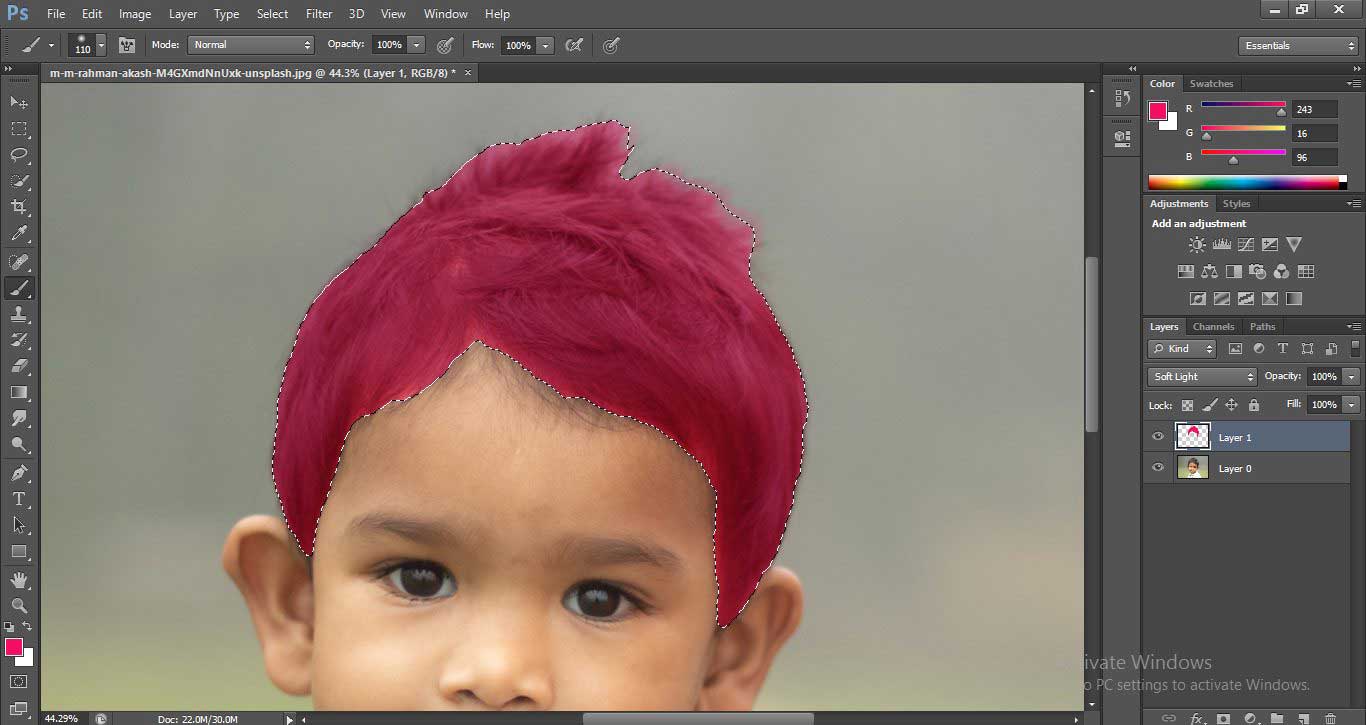
- Now make a selection in the Hair section of the image using the Quick selection tool as I did in the image.
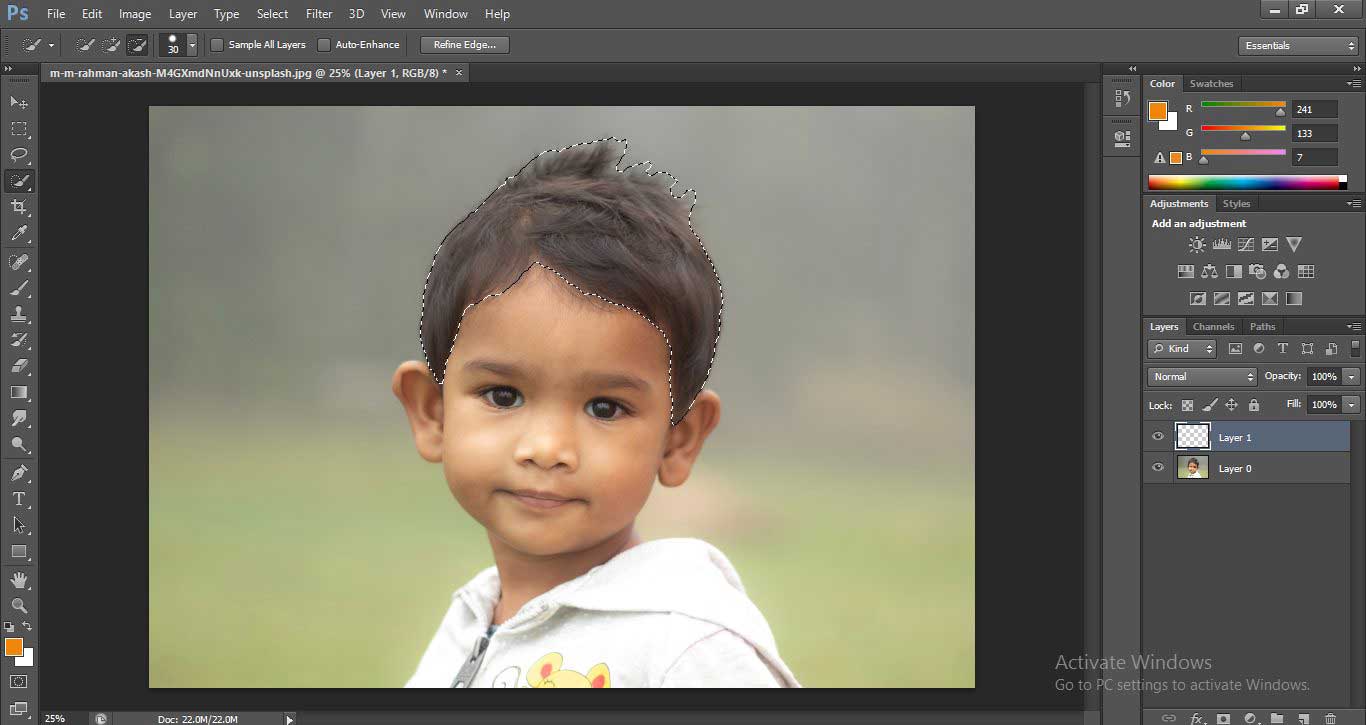
Step 5: Now go to the layer section and click on the Layer 1 using the mouse button to enable the layer.
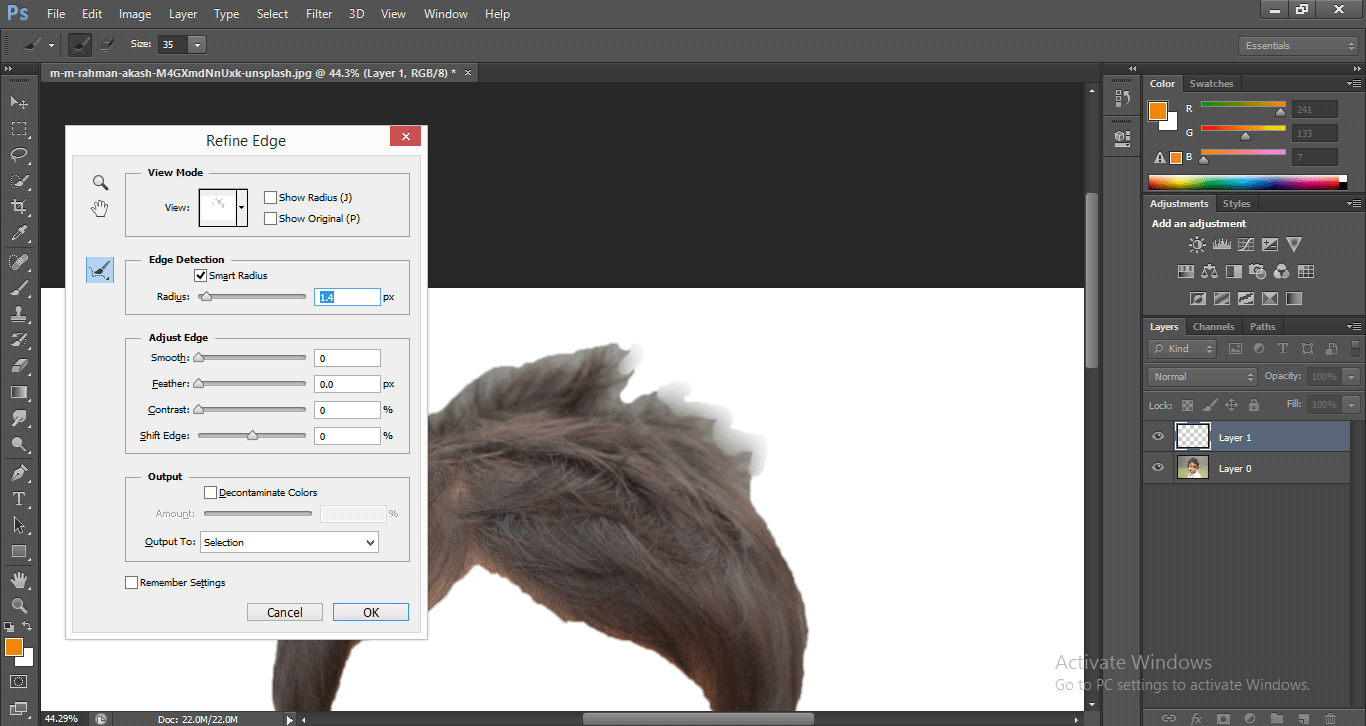
- Now click on the Refine Edge option at the property bar of the Quick Selection tool.
- A dialog box will be open. Set the radius of the tool here and find the selection in the hair section; that is not perfect.
- Now the selection is perfect.
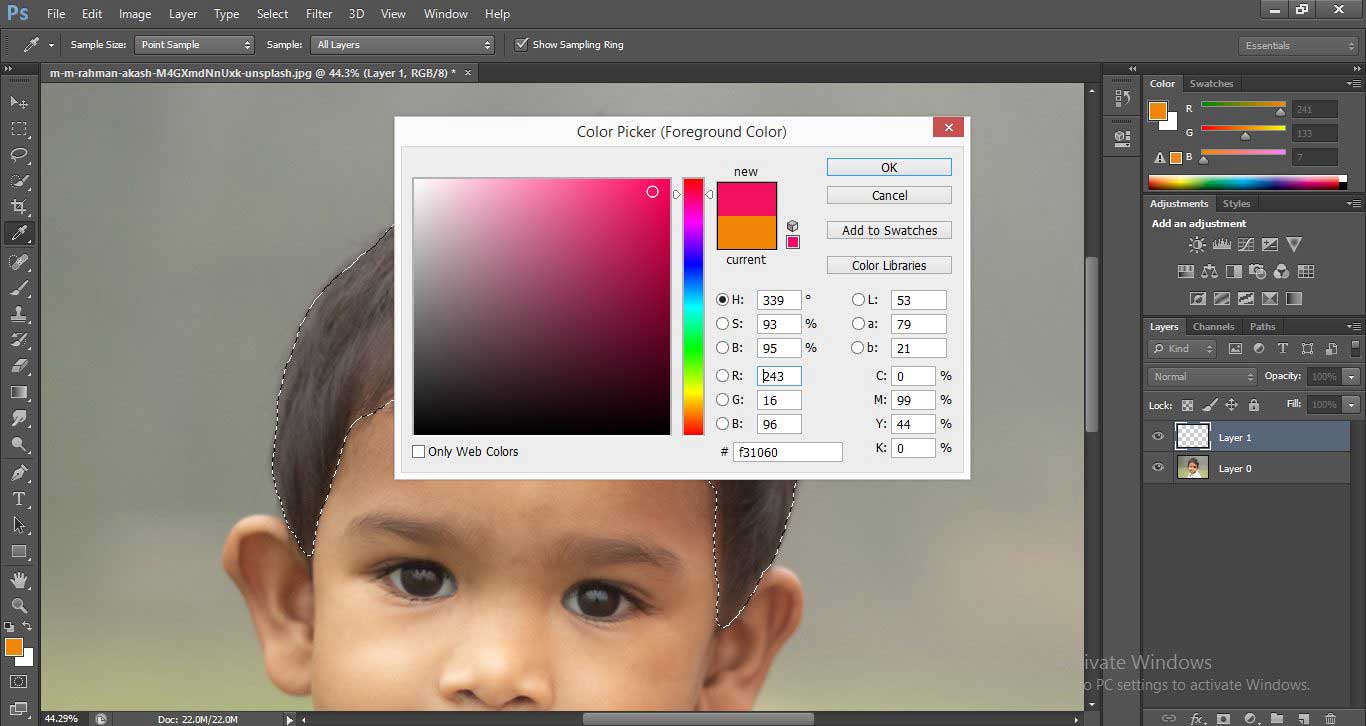
Step 6: The next step is to go to the color panel at the bottom of the tool panel or in the color section at the right of the workspace. Click on the square box icon of the color; a Color panel will be open. Choose your desired color from here that you want to give as the hair color of the image.
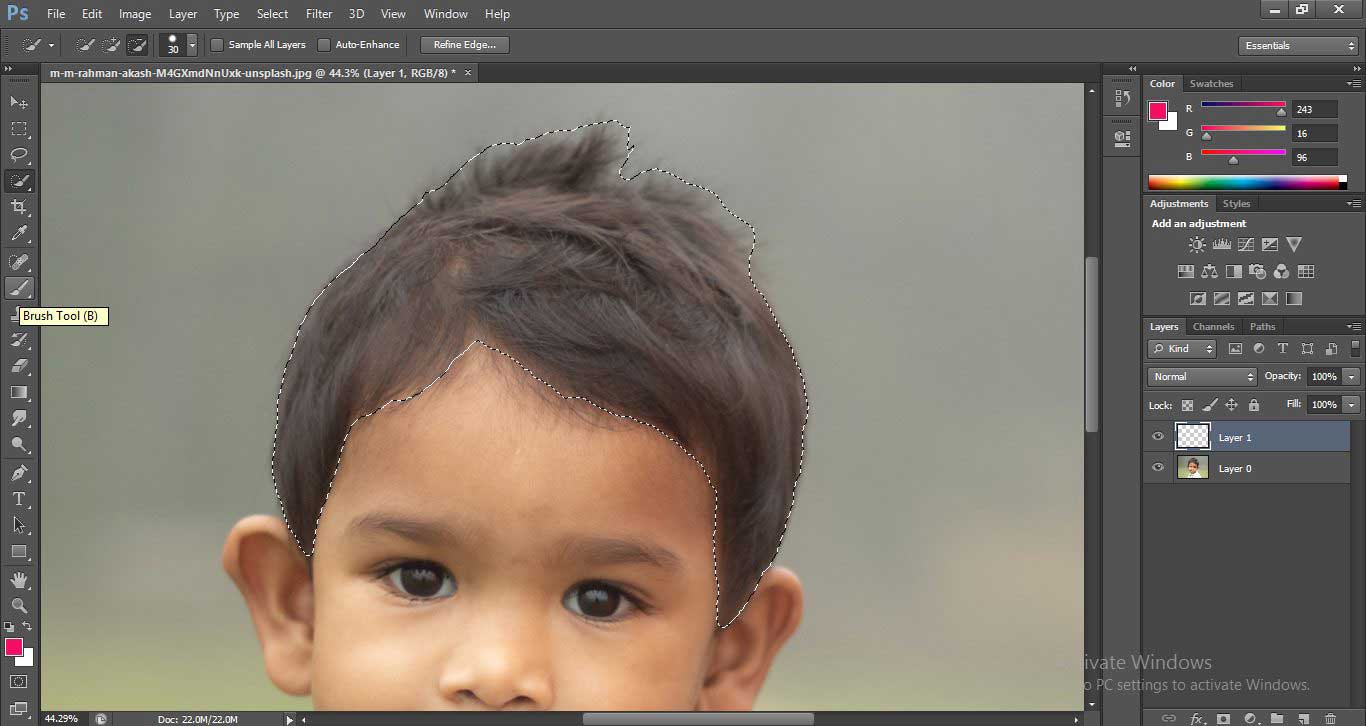
- Now go to the Tool Panel and click on the Choose Brush Tool using the mouse button.
- Go to the property bar of the brush tool and change the size of the brush according to the area of selection.
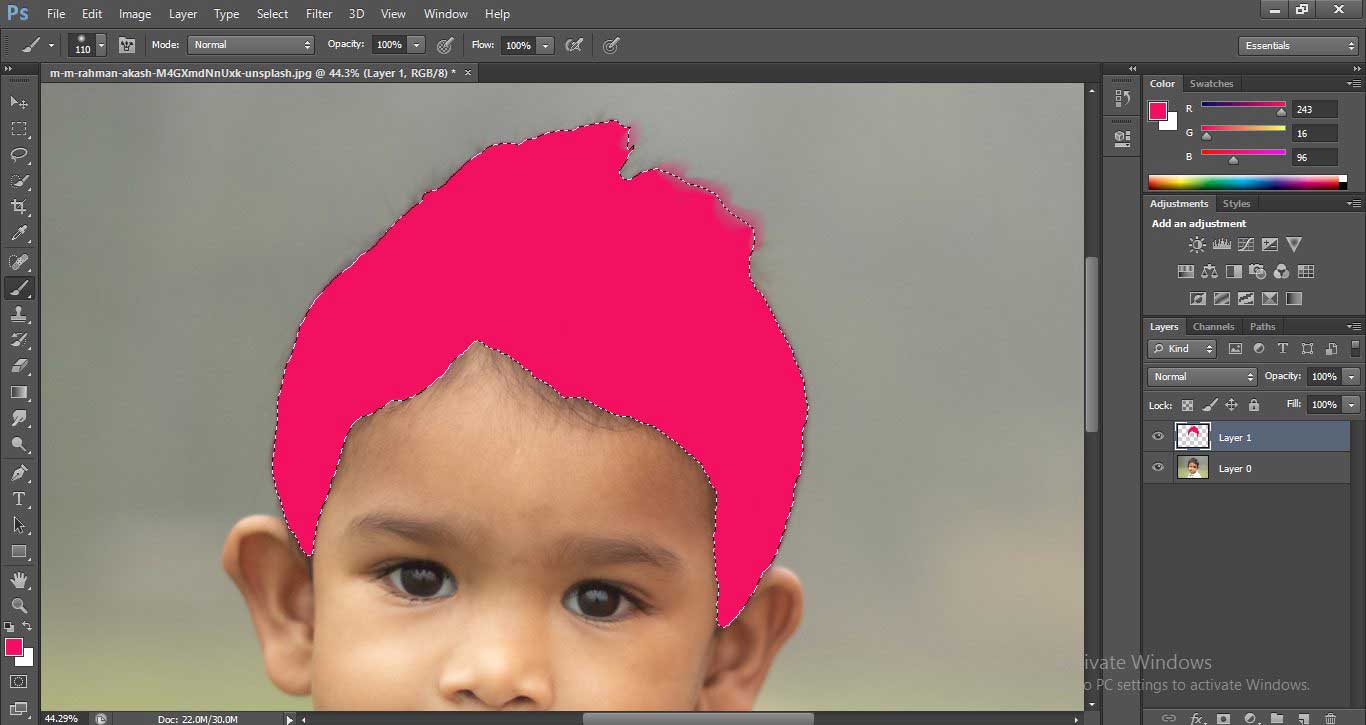
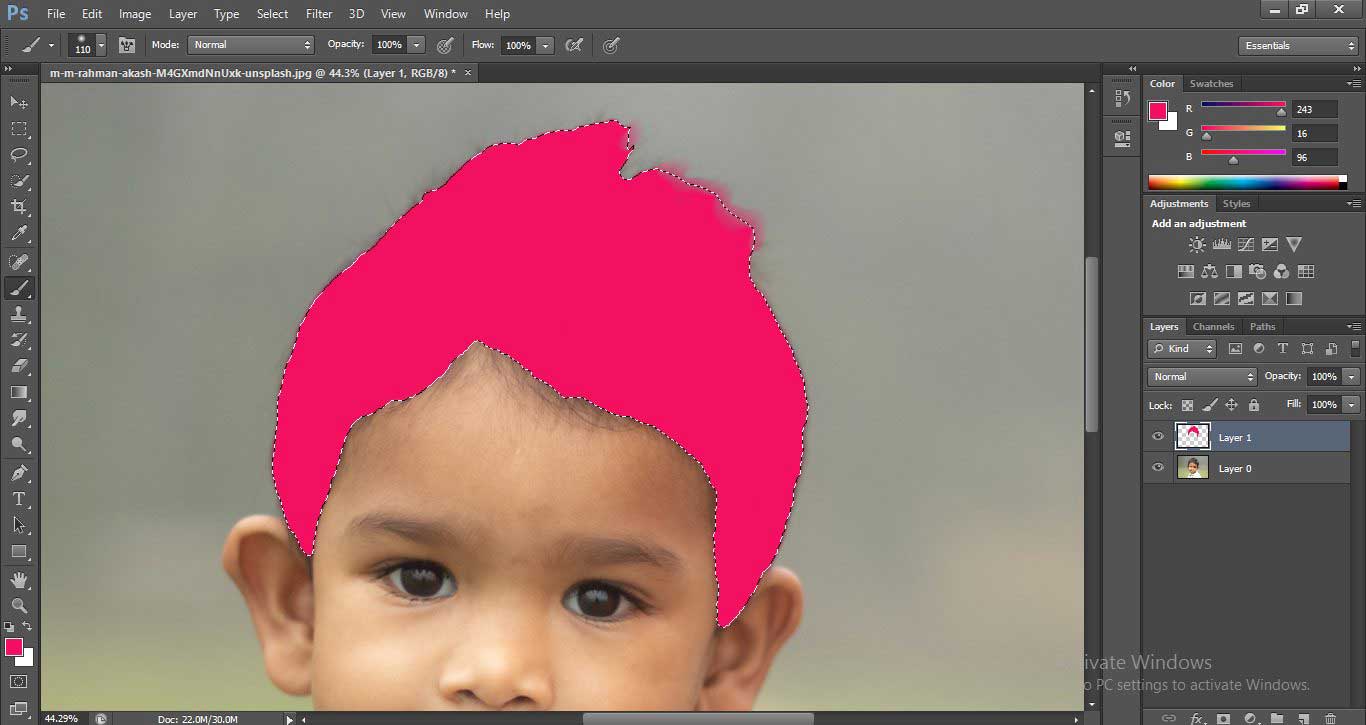
- Now cover the all selected section with selected color using the brush tool as I did.
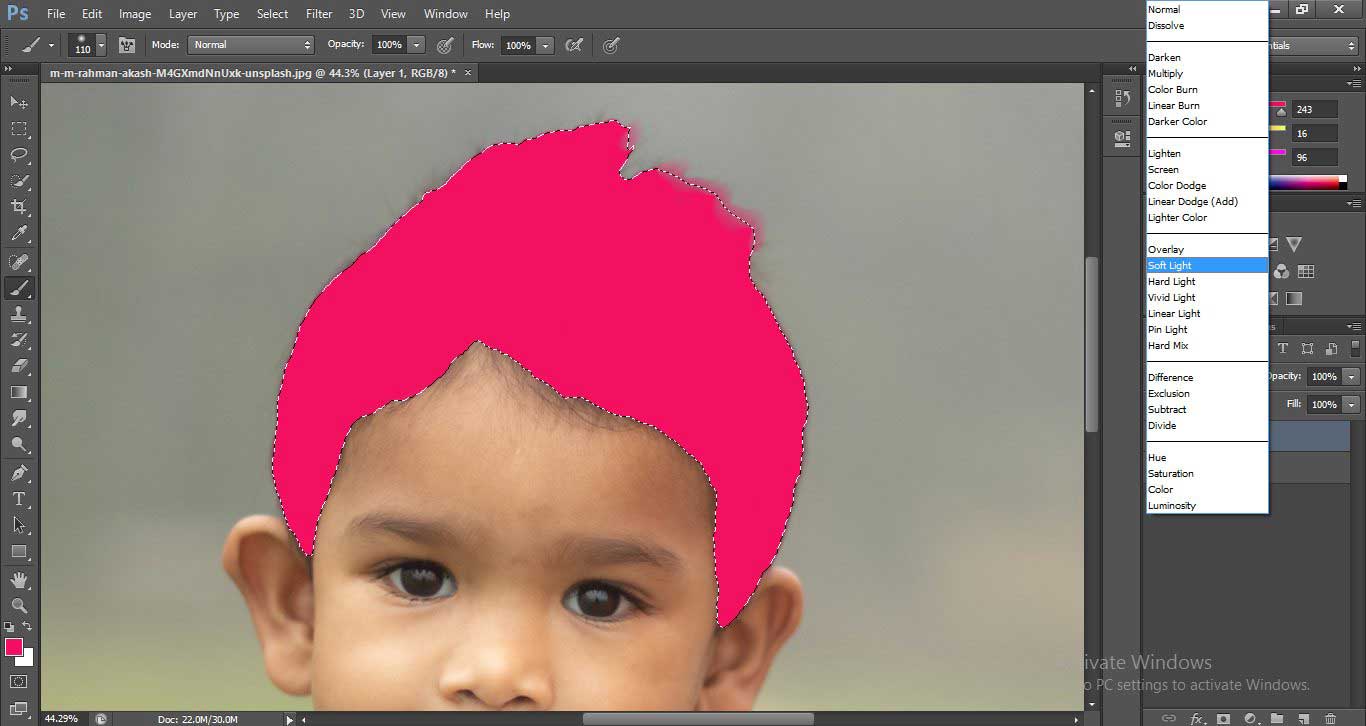
Step 7: The next step is to change the mode of the layer. For changing the mode, go to the layer section and click on the drop arrow button of the Normal option.
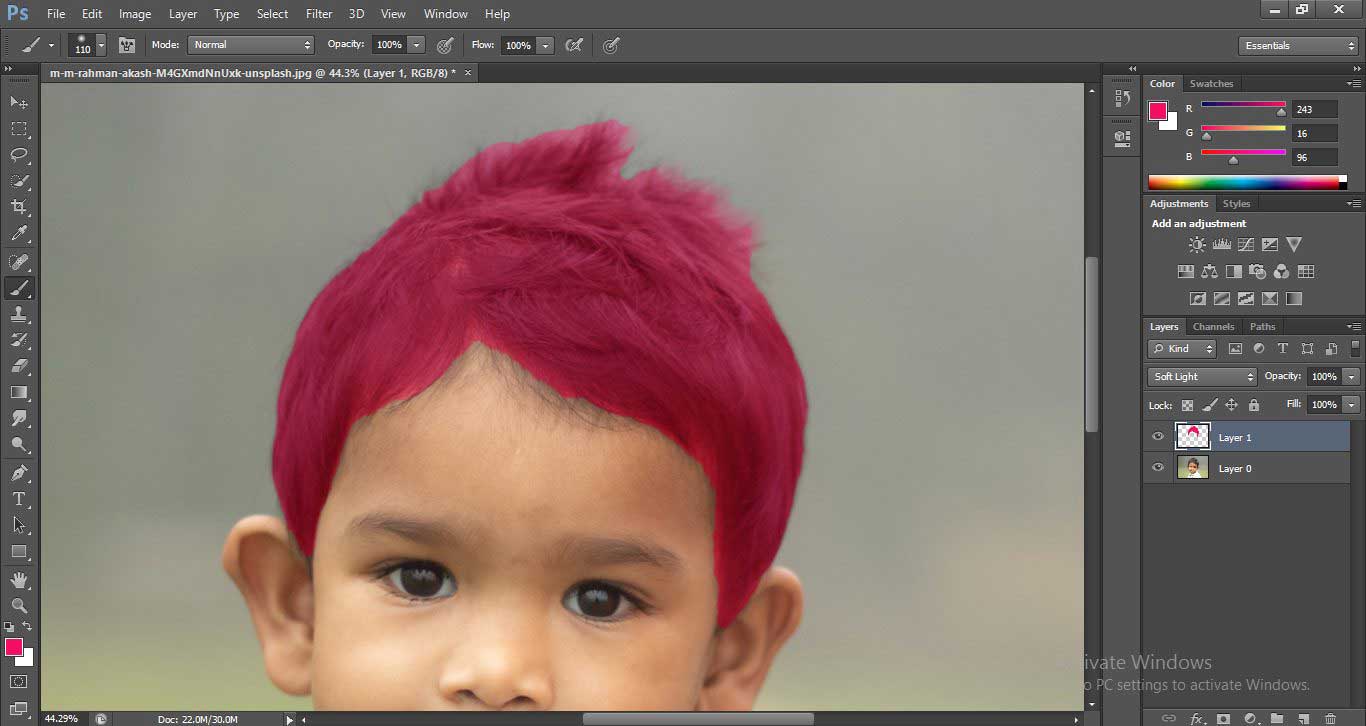
- A drop-down list will be open. Choose a Soft light option from here to give a natural look to the selected hair color.
- After selecting this option, the color will be changed like this.
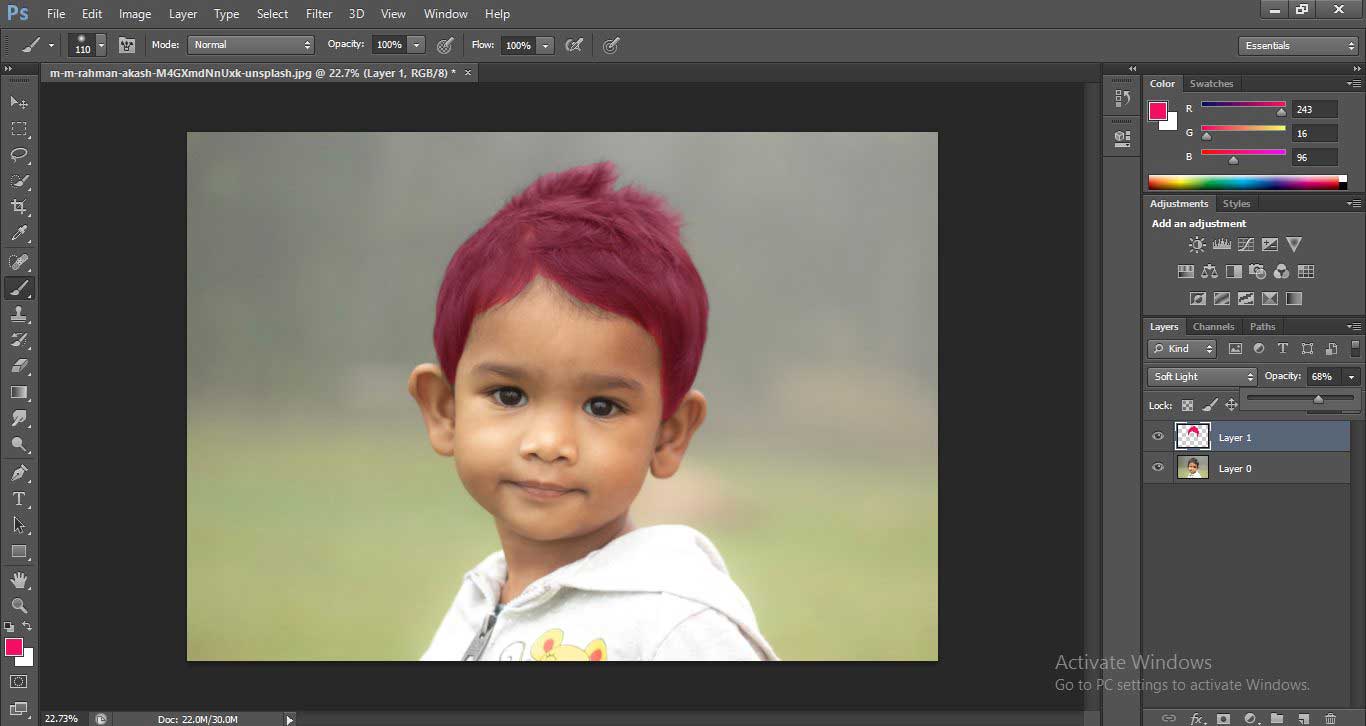
- Now press the Ctrl+D button from the keyboard to de-activate the selection.
- This is your final image with the modified color of the hair.
- You can change the hair color again and again and save it with a number of different hair color styles.
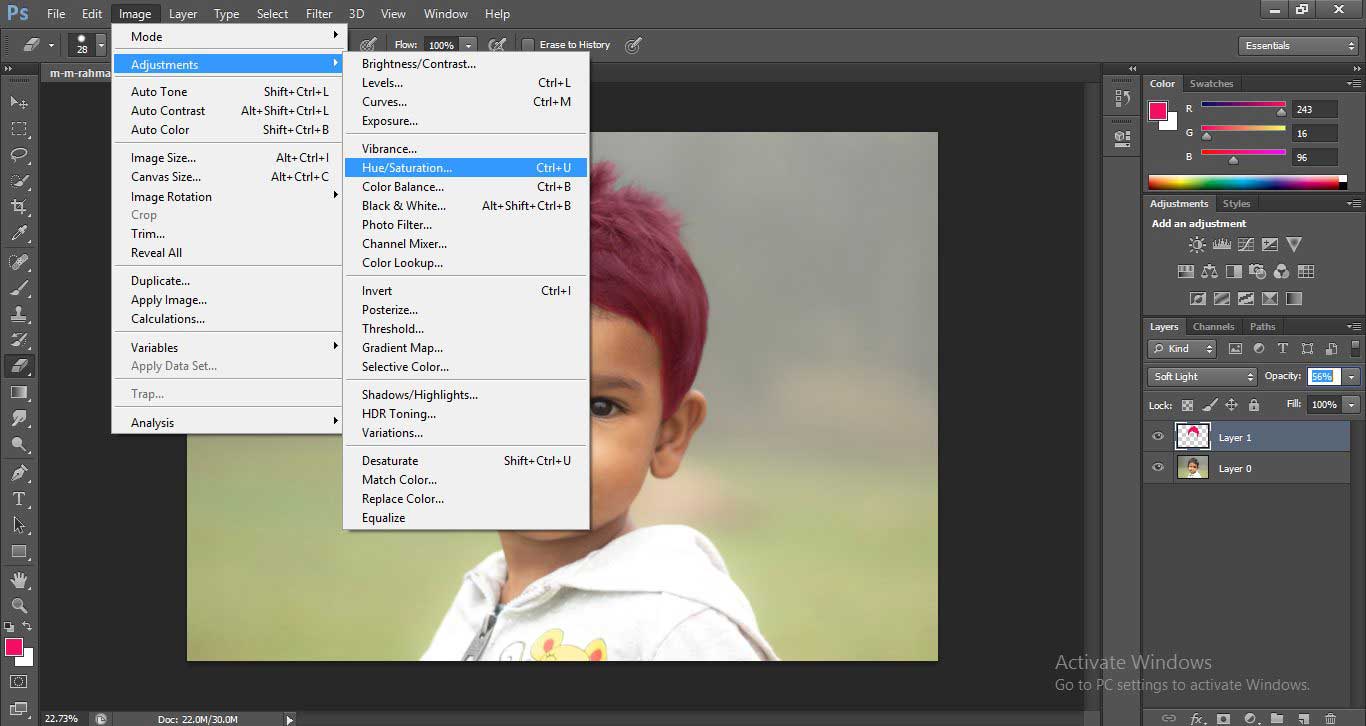
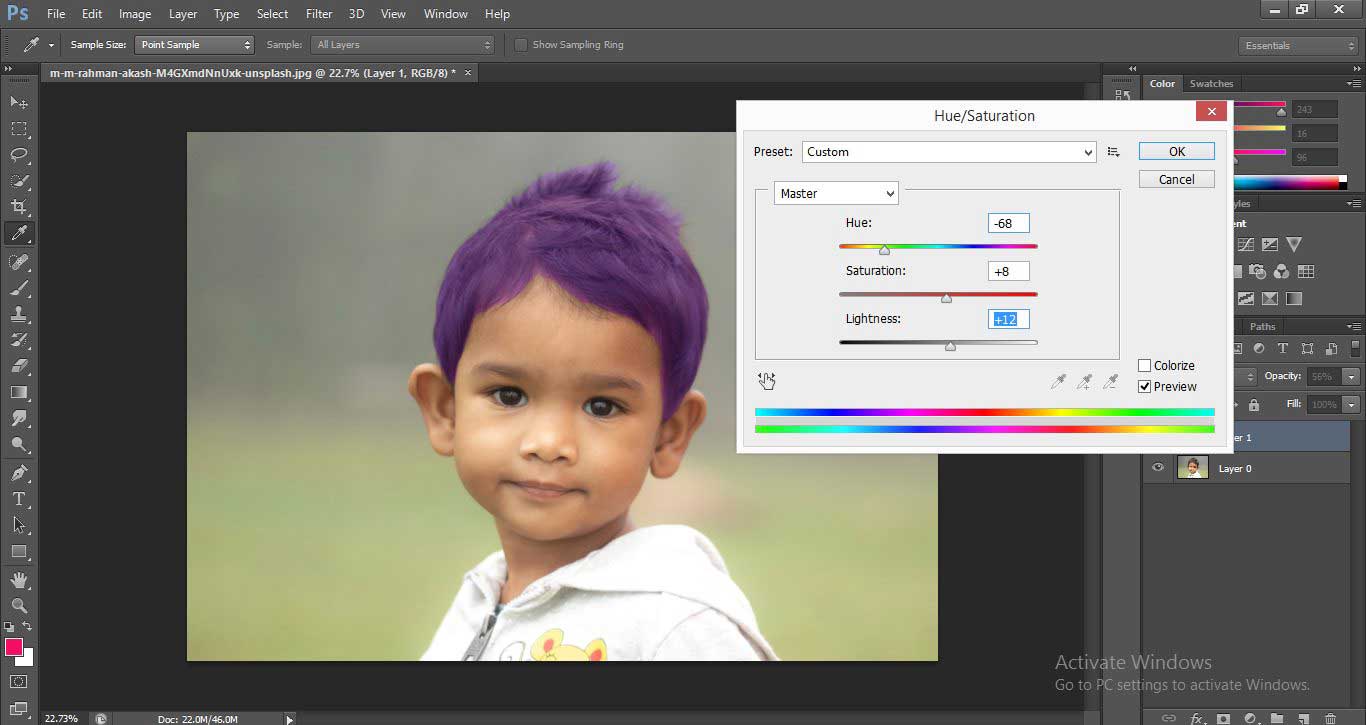
- For this step, go to the Image option and click on the Menu Bar. A drop-down list will be open. Go to the Adjustments option; again, a drop-down list will be open; click on the Hue/Saturation option using the mouse button.
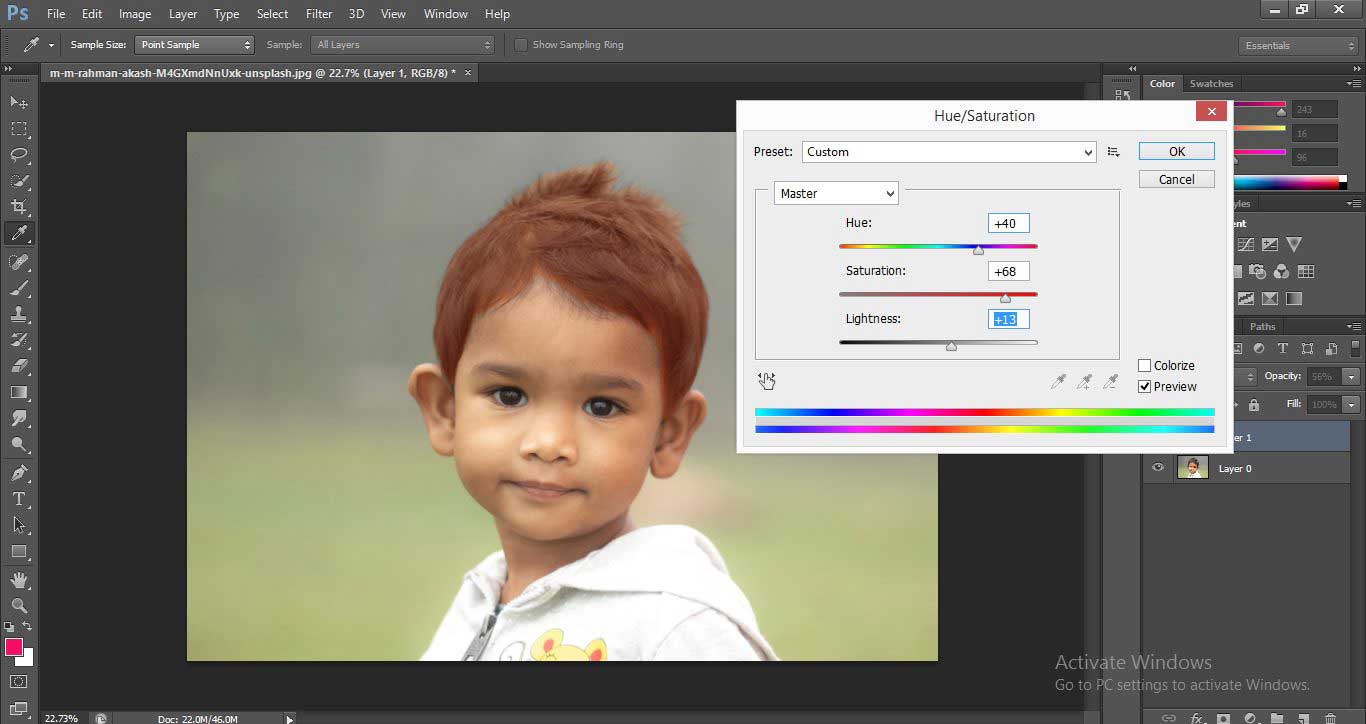
- A dialog box of Hue/Saturation will be open.
- Now adjust Hue by moving the slider of the Hue option, and you can make changes in color as I did in the below figures.
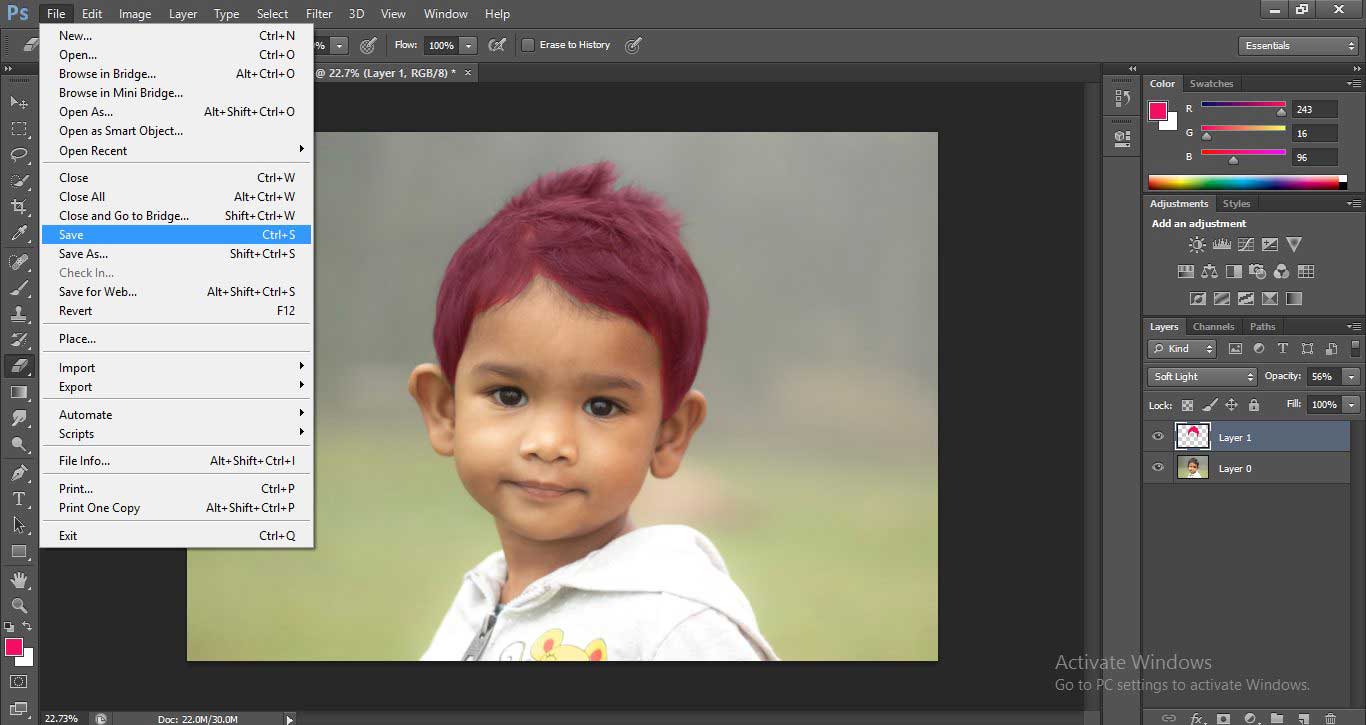
- Now go to the File Menu of the Menu Bar to save this image. A drop-down list will be open click on the save option.
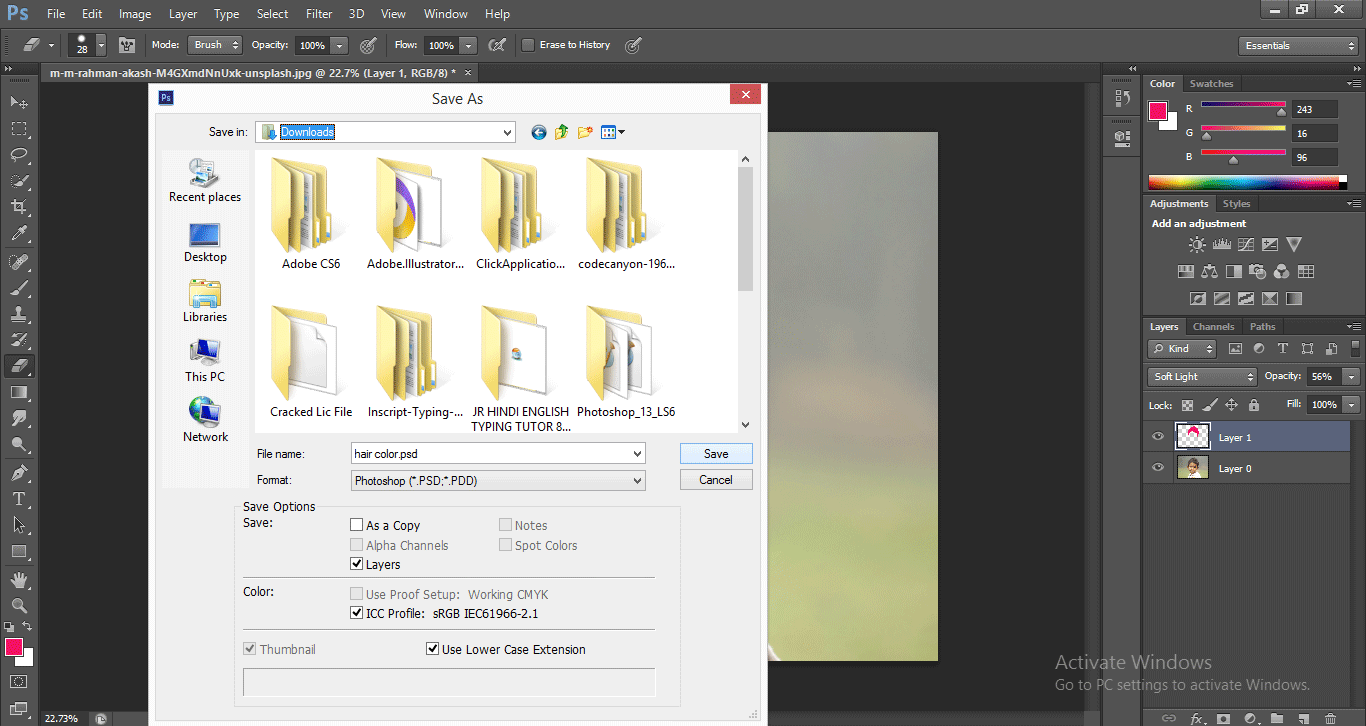
- A dialog box will be opened to choose the location from where you want to save this image, and click on the Save button of this box to save this image.
You can repeat this step to save the image with different hair colors, or you can use Black Tape-In Hair Extensions for a uniform appearance.
Conclusion
Now, after this article, you can understand the question ‘How to change the color of hair color in Photoshop?’. By learning this technique, you can easily manipulate any image for better use of that image in the context of your project purposes and get more and more perfection in your works.
Recommended Articles
This is a guide to Change Hair Color in Photoshop. Here we discuss the introduction along with how to change hair color in photoshop. You may also look at the following articles to learn more –
