Introduction to ChatGPT Discord Bot
The ChatGPT Discord bot is an AI-powered virtual assistant that can be integrated into Discord servers. It enables users to have natural language conversations with the bot, facilitating various interactions, from answering questions to providing entertainment and utility functions. This versatile bot is designed to enhance the Discord experience by offering real-time responses and assisting with various tasks, making it a valuable addition to any Discord community.
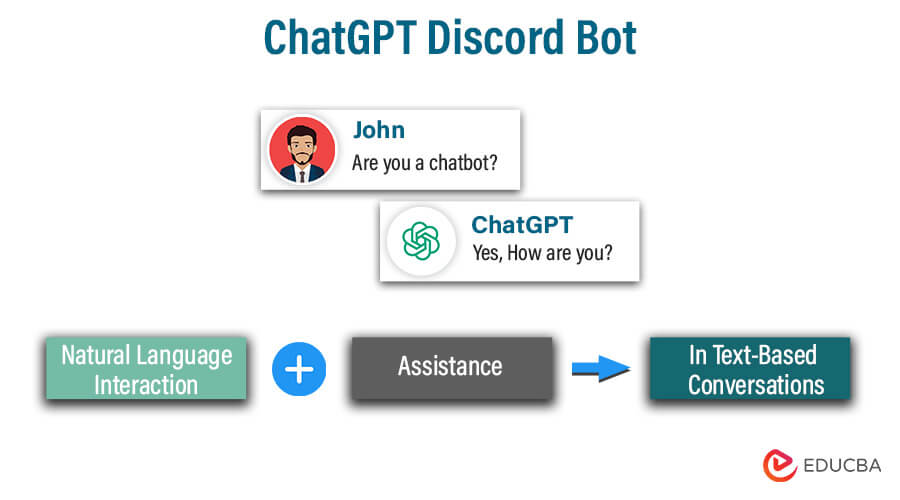
Table of Contents
- Introduction to ChatGPT Discord Bot
- What is a Discord bot?
- Key Considerations Before Constructing an AI Chatbot
- Popular Discord bots
- Why host a Discord bot on a server?
- How do I install ChatGPT on Discord
- How do you make a bot on ChatGPT?
- How to remove bots on Discord servers
What is a Discord bot?
A Discord bot automates and enhances interactions in Discord. Various tasks performed by bots include moderating chat, providing information, playing games, and engaging in conversation. They’re programmed to respond to commands and triggers from users, making servers more interactive and efficient. Discord bots are widely used in gaming communities, social groups, and businesses to streamline activities and provide entertainment. They contribute to a dynamic and customized Discord experience, offering features like music playback, automated moderation, and information retrieval designed to augment server functionality.
Key Considerations Before Constructing an AI Chatbot
Before constructing an AI chatbot, consider these key factors:
- Purpose and Goals: Define the bot’s objectives – whether it’s for customer support, information retrieval, or entertainment.
- Audience: Understand your target audience and tailor the bot’s personality and responses accordingly.
- Platform and Integration: Choose the platform (e.g., website, messaging app) and ensure seamless integration.
- Data and Training: Gather and prepare data for training the AI model and ensure data privacy and security compliance.
- Natural Language Processing (NLP): Select a suitable NLP model or framework for conversation understanding.
- User Experience: Prioritize user-friendly design, intuitive UI/UX, and error handling.
- Testing and Iteration: Rigorously test the bot and iterate to improve its performance and responsiveness.
- Compliance and Ethical Considerations: Ensure the bot adheres to legal, ethical, and privacy standards.
- Scalability and Maintenance: Plan for scalability, ongoing maintenance, and updates to keep the bot relevant and efficient.
Popular Discord bots
Discord provides a variety of bots to improve server functionality and user experiences. Here are some of the most popular Discord bots:
- MEE6: A moderation and leveling bot, it offers features like auto-moderation, custom commands, and role management.
- Dyno: A versatile bot with moderation tools, automated announcements, and custom commands.
- Groovy: A music bot that allows users to play music from YouTube, Spotify, and other platforms.
- Carl-bot: Known for its extensive auto-moderation and reaction roles features.
- Tatsumaki: Provides leveling, reputation, and server management tools, as well as mini-games.
- Rythm: Another music bot for playing high-quality music in Discord channels.
- YAGPDB (Yet Another General Purpose Discord Bot): Offers custom commands, moderation tools, and role management.
- Pokecord: Allows users to catch, trade, and battle Pokémon in Discord.
- Dank Memer: A bot that adds fun commands, memes, and games to your server.
- ProBot: Offers a range of moderation, utility, and fun commands for your server.
Why host a Discord bot on a server?
Hosting a Discord bot on a server rather than your local machine offers several advantages:
- 24/7 Availability: A server can keep your bot online 24/7, ensuring it’s always available to respond to user commands and events, even when your local computer is turned off or disconnected.
- Improved Performance: Servers typically have better hardware and internet connections, leading to faster response times and efficient handling of multiple concurrent requests.
- Scalability: Servers can accommodate multiple bots and handle high traffic levels, making it suitable for larger servers with numerous users.
- Stability and Reliability: Servers offer excellent reliability, minimizing downtime due to power outages, network disruptions, or system crashes.
- Security: You can implement robust security measures on a server to protect your bot and its data. This includes firewalls, security updates, and intrusion detection systems.
- Resource Management: Servers allow you to allocate dedicated resources for your bot, preventing it from affecting the performance of your local machine.
- Remote Management: You can monitor and manage your bot remotely without physical access.
- API and Database Integration: Servers enable easier integration with external APIs, databases, and web services, enhancing your bot’s capabilities.
- Compliance: If your bot handles sensitive data or needs to adhere to legal requirements, server hosting can provide the necessary security and compliance measures.
Overall, server hosting offers a more stable, reliable, and scalable environment for Discord bots, making it the preferred choice for bots that serve larger communities or require uninterrupted availability.
How do I install ChatGPT on Discord?
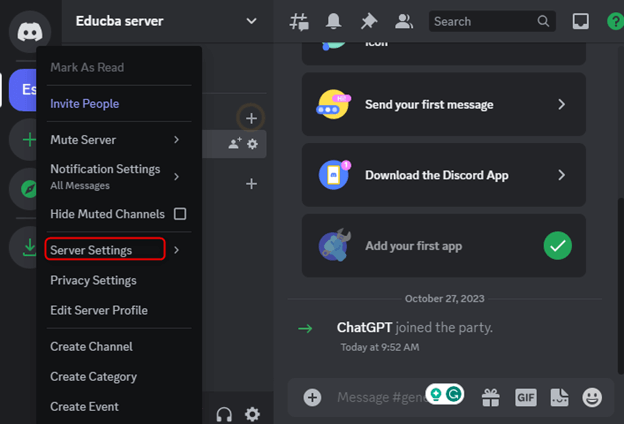
Assuming that you are managing your own Discord server, open the server settings as shown below:
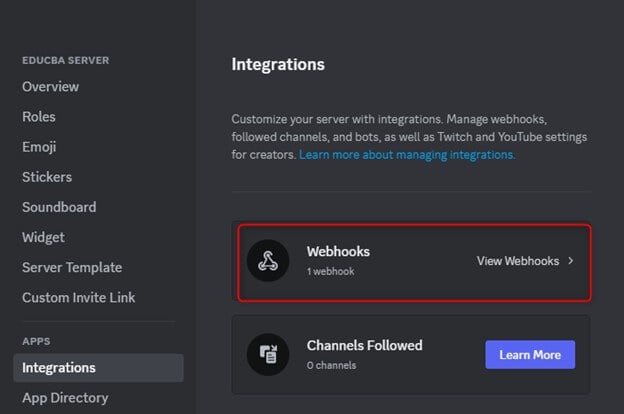
To access WebHooks, you need to click on Integrations and then select the WebHooks option.
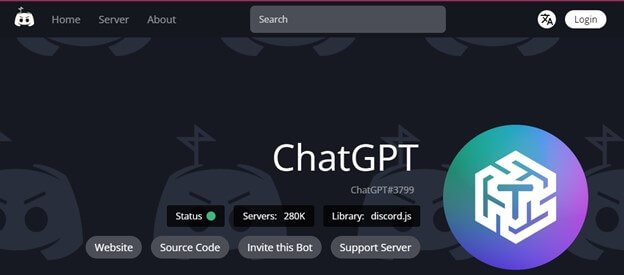
To access the external Bot, please click on the link provided.
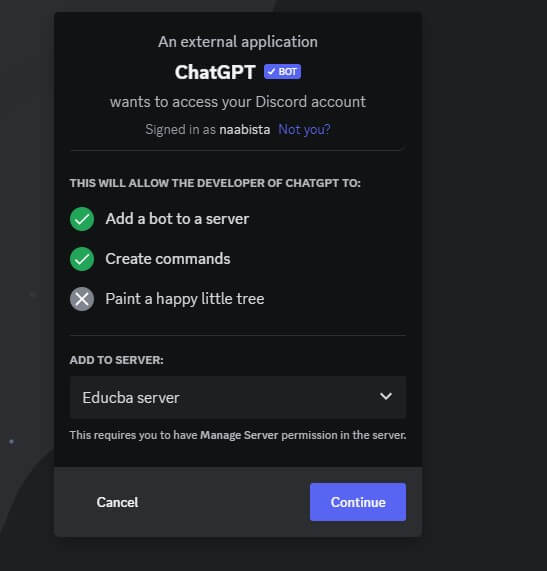
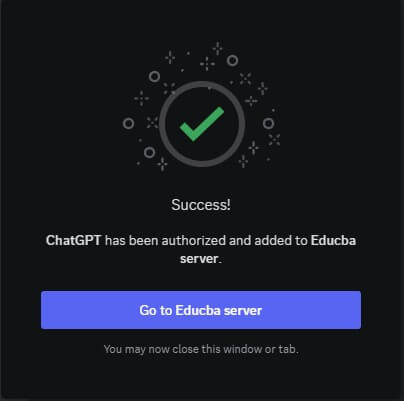
Please grant permission to the ChatGPT Bot to access the Discord Server.
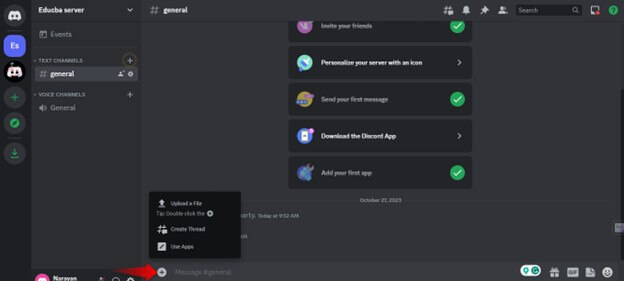
After you grant permission, you will get to see the below screen
To begin using the ChatGPT bot, click the “+” sign.
How do you make a bot on ChatGPT?
Register for the ChatGPT API.
1. Go to the OpenAI website at https://www.openai.com/
2. To start the registration process, click the “Sign up” button.
3. Fill out your name, email address, and desired password.
4. Click “Create Account” after agreeing to terms and conditions.
5. Kindly follow the instructions sent to the email you provided during registration to verify your email address.
6. After completing email verification, log in to your OpenAI account using your credentials.
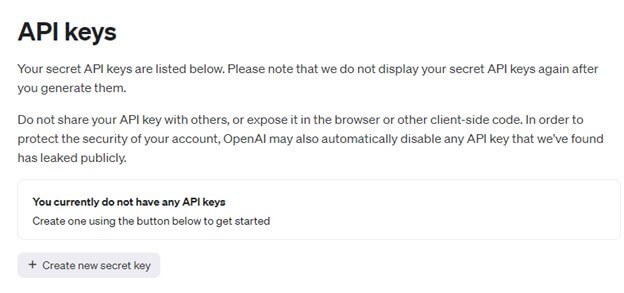
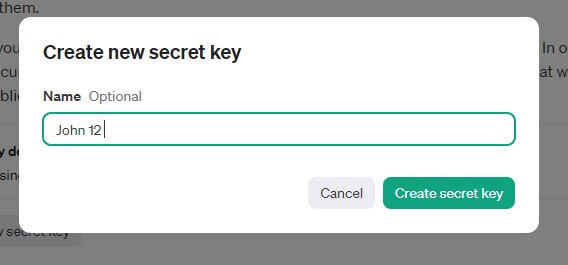
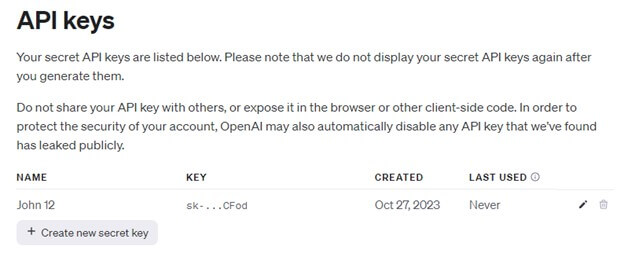
7. To begin your ChatGPT journey, generate your API keys by clicking the “Create new secret key” button and following the necessary steps.
8. Here, I have mentioned the name John 12 to create the secret key.
9. Now, you can see that the key has been generated.
Install Python
To create a chatbot or AI platform like ChatGPT, download and install Python. For a detailed, step-by-step guide on installing Python, refer to this link.
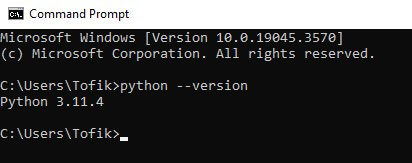
To check if Python is installed correctly, open a terminal or command prompt and enter “python –version.” The version number of the installed Python interpreter will be displayed.
Pip Upgrade
To check the current Pip version installed on your system, you can run the following command: Pip –version.
To upgrade Pip, run the command: python -m pip install –upgrade Pip. If Pip is up to date, it will display a message indicating no upgrade is necessary.
Set up OpenAI and Gradio Libraries.
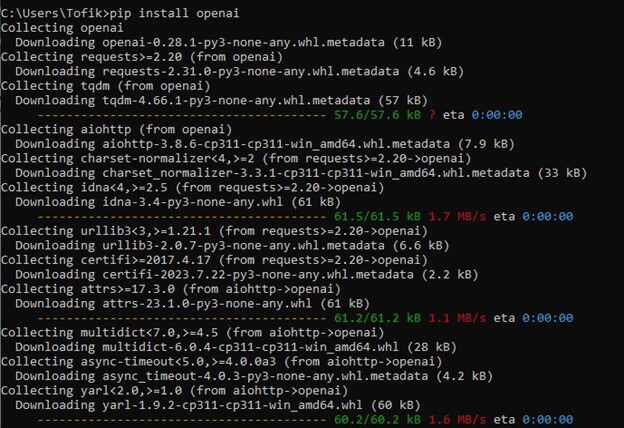
The next step is integrating the OpenAI and Gradio libraries into your Python environment. To install the OpenAI library, open the command prompt and run pip install openai.
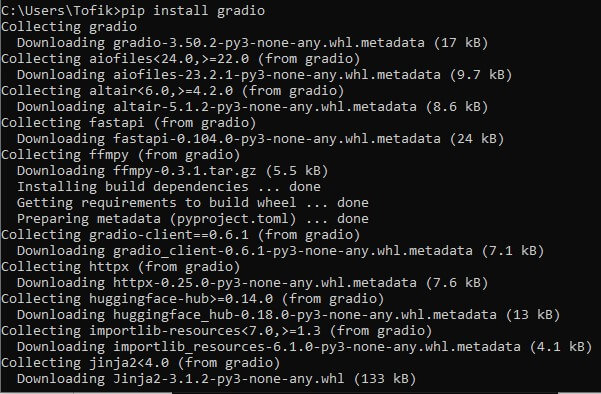
To install the Gradio library, use the command prompt and type: pip install gradio.
Download the Code Editor
An essential tool for writing and editing AI chatbot code is a code editor. Numerous code editors are available in the market, and you can choose one based on your preferences. Visual Studio Code (VS Code) is a popular and free code editor offering many features and extensions. Here are the steps to download it:
- Visit the official website at https://code.visualstudio.com/
- To download the software, click the “Download” button for your OS: Windows, macOS, or Linux.
- After downloading, please run the installer and carefully follow the installation instructions.
- You can refer to this link for a step-by-step download of visual code.
Testing Chatbot
It is crucial to test chatbots before deploying them. Here are some reasons why:
- Testing helps ensure chatbot functionality aligns with requirements and identifies and fixes errors and flaws.
- Chatbot testing helps identify incorrect or misleading information, enabling model refinement to improve text generation accuracy.
- Chatbot usability, language understanding, and satisfaction can be evaluated by simulating real-world scenarios. Receiving feedback is crucial in enhancing the overall user experience. It provides valuable insights and helps in identifying areas for improvement.
- Testing the chatbot’s performance under different loads is essential for simulating high-user requests or concurrent conversations.
Deploy the AI Chatbot
Deploying virtual assistants makes them available for users. Let’s take a look at the process:
- When choosing a hosting platform or service for your chatbot, ensure that it can meet your bot’s requirements. You can opt for cloud providers like Amazon Web Services (AWS), Microsoft Azure, or Google Cloud Platform (GCP). Alternatively, you can choose a platform for deploying conversational agents, such as Heroku or PythonAnywhere.
- Ensure your chatbot has the necessary infrastructure: operating system, networking, and required services and libraries.
- Transfer the code for your chatbot, along with all dependencies and configuration files, to the hosting environment using FTP, SCP, or other methods.
- Integrate your chatbot code with web servers, load balancers, and API gateways for hosting. This step ensures incoming user requests are appropriately directed to your chatbot for processing.
- Validate chatbot accuracy, performance, and load handling with thorough testing.
- It is essential to set up monitoring tools that track the chatbot’s performance, including response times, error rates, and resource utilization.
- Regularly analyzing user feedback and data is crucial for maintaining a chatbot and identifying areas for improvement.
How to remove bots on Discord servers?
If you want to remove a bot from your Discord server, you can follow these simple steps:
- Server Permissions: To remove a bot from your server, you must have the necessary permissions. You should typically have the “Manage Server” access or be the server owner.
- Server Settings: Go to your Discord server where you want to remove the bot.
- Bot in the Member List: Look for the list of members on the right-hand side of your server window and locate the bot. Bots are usually tagged with “BOT” next to their username and may have a different color.
- Right-click on the Bot: To access additional options related to the bot, you can right-click on the bot’s username in the member list.
- Kick or Remove: A context menu will appear. From there, choose “Kick” or “Remove” to remove the bot from the server. The wording may vary based on your Discord client or permissions.
- Confirmation: You may be asked to confirm the action, especially if you don’t have the “Kick Members” permission. Confirm the removal if prompted.
- Bot Removed: Once confirmed, the bot will be removed from your server and no longer have access to your server’s channels or interactions.
Conclusion
Creating a Discord bot with ChatGPT can be a powerful addition to your server, enhancing engagement and functionality. While ChatGPT doesn’t offer a pre-packaged bot, you can integrate its capabilities into your own bot. Remember to ensure 24/7 server availability, security, and a user-friendly design. Maintaining compliance with both Discord and OpenAI’s policies is essential. Developing and deploying your bot thoughtfully can create an interactive and beneficial experience for your server’s users. Stay updated with the latest developments from Discord and OpenAI for ongoing improvements.
Recommended Articles
We hope that this EDUCBA information on “ChatGPT Discord Bot” was beneficial to you. You can view EDUCBA’s recommended articles for more information,
