Introduction
ChromeOS Flex, a lightweight, fast, and secure operating system developed by Google, is not just a solution for older PCs and Macs, but a gateway to a cloud-centric experience similar to ChromeOS found on Chromebooks. With easy installation process and minimal hardware requirements, ChromeOS Flex offers a thrilling opportunity for educational institutions, businesses, and individuals to rejuvenate their aging devices and explore a new world of possibilities.
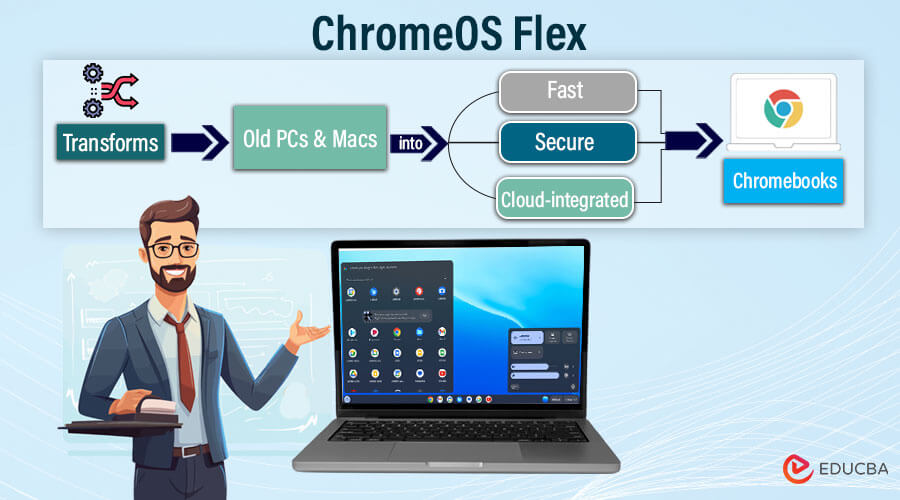
Table of Contents
Prerequisites
Compatible Devices:
ChromeOS Flex isn’t compatible with every computer but can run on various devices originally equipped with Windows or macOS. While Google doesn’t publish an official list of compatible models, they do specify some key hardware requirements:
- Processor: An Intel or AMD x86-64-bit processor.
- RAM: Minimum of 4 GB RAM for a functional experience.
- Storage: A minimum of 16 GB of internal storage space accommodates the ChromeOS Flex installation.
- Boot Capability: The ability to boot from a USB drive is essential. Check your device’s BIOS/UEFI settings to confirm this functionality.
Necessary Equipment:
- USB Flash Drive (8GB or larger): USB Flash Drive (8GB or larger): This will serve as your installation media, holding the ChromeOS Flex files needed for the process. Opt for a drive with at least 8GB of storage capacity.
- Internet Connection: Internet Connection: An active internet connection is crucial. ChromeOS Flex is a cloud-centric operating system; internet access is necessary for downloads, updates, and various functionalities.
Preparing the USB Installer
Creating the USB Installer
Using Chrome Recovery Utility extension
This is the most straightforward and most user-friendly method.
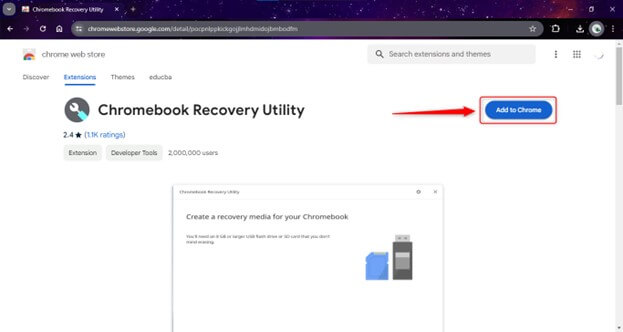
- Head over to this link and download the Chromebook Recovery Utility extension: chromewebstore.google/detail/chromebook-recovery-utili/pocpnlppkickgojjlmhdmidojbmbodfm
- Now, Insert your USB flash drive (at least 8GB) into your computer.
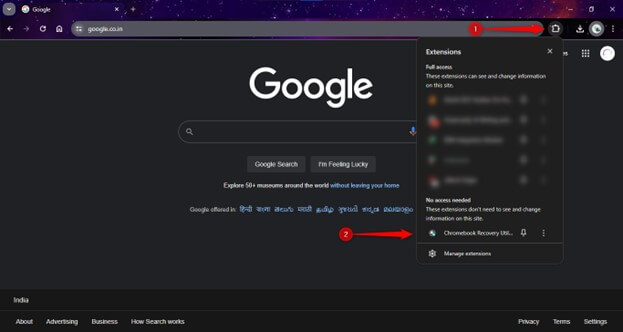
- Open the Chrome browser and launch the Chrome Recovery Utility extension. This tool is crucial for creating your USB installer.
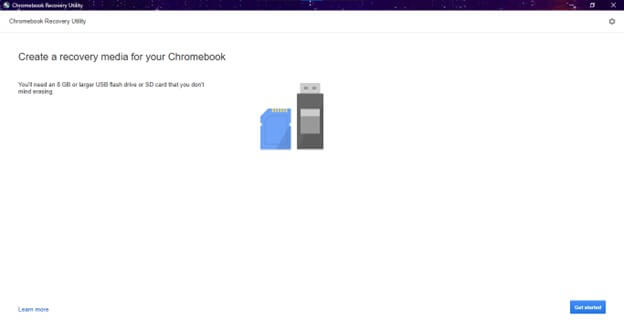
- This is how the Chromebook Recover Utility interface looks like
- Click on the blue “Get started” button
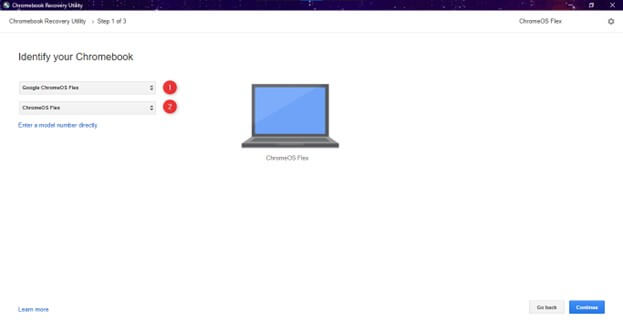
- Now, match your settings with the settings given below, then click the blue continue button
- Select your USB drive and click Proceed.
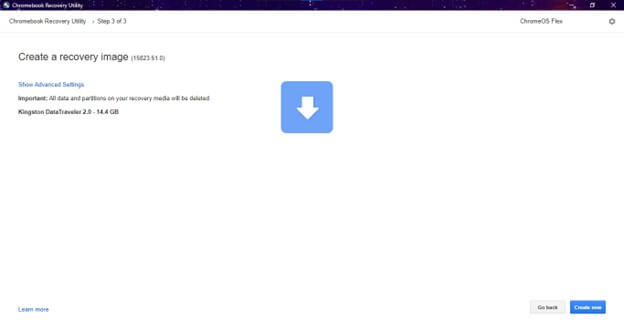
- A warning page will appear saying it will delete all the partitions and erase all the data on the USB.
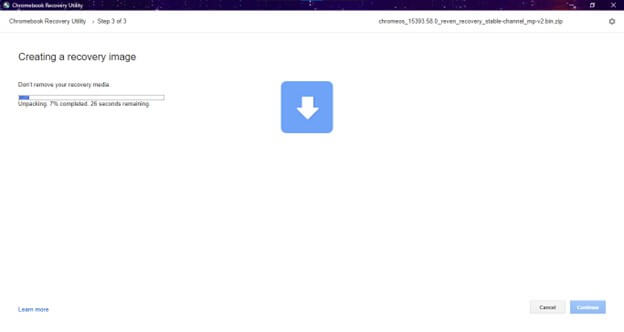
- Click on the blue “Create now” button. It will proceed to create a bootable media.
Using third-party utility
For advanced users who prefer more control, a third-party tool named Rufus is available to create bootable USB drives.
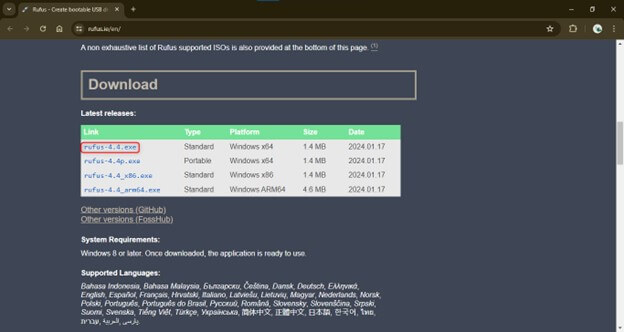
- Download Rufus
- Visit the official website of Rufus: https://rufus.ie/en/
- Downloading ChromeOS Flex ISO
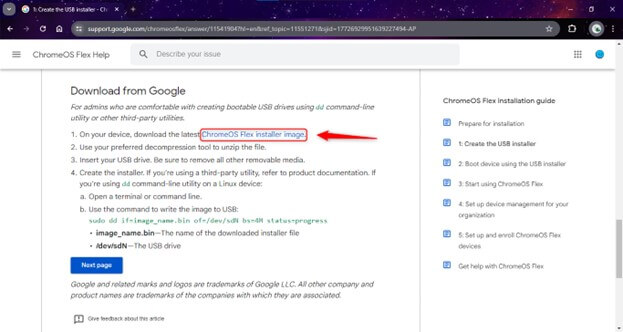
- Head over to the official ChromeOS Flex website: https://support.google.com/chromeosflex/answer/11541904?hl=en&ref_topic=11551271&sjid=17726929951639227494-AP.
- Scroll down and click the blue link.
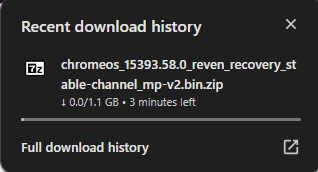
- The download will start automatically.
- Create a bootable device on Rufus.
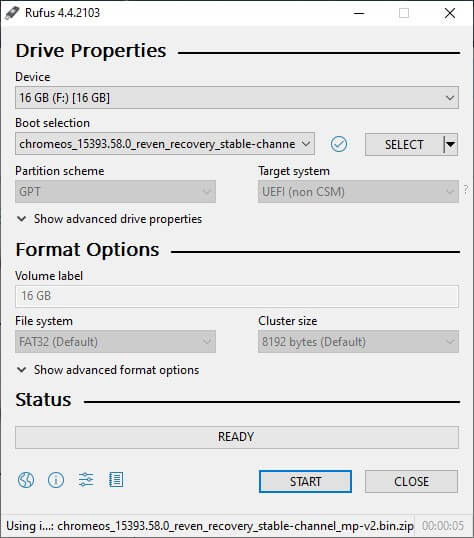
- Open Rufus, select the downloaded ChromeOS Flex recovery image and choose the USB flash drive.
- Click on START to begin the process.
Installing ChromeOS Flex
With your USB installer ready, you can install ChromeOS Flex on your device.
- Shut down your computer completely.
- Insert the bootable ChromeOS Flex USB drive into a readily accessible USB port on your target device.
- Power on your computer. The boot process might be slightly different depending on your device’s manufacturer. Our aim is to access the boot menu, which allows you to choose what device to boot from (usually your hard drive or the USB drive).
- Boot Menu Key: Press the boot menu key during the initial startup. Common keys include F12, Esc, F2, F10, or Del. You might see a prompt on the screen indicating which key to press. If you need help, refer to your computer’s manual else search for your specific model online.
Accessing the Boot Menu & Selecting the USB Drive
Once you’ve successfully entered the boot menu, you’ll typically see a list of bootable devices available on your system. This might include your hard drive and the newly inserted USB drive.
- Using the arrow keys on your keyboard, navigate and select the option that represents your USB drive. The label might vary, but it should mention “USB” or the brand of your USB drive.
- Press Enter to boot from it once you’ve selected the USB drive.
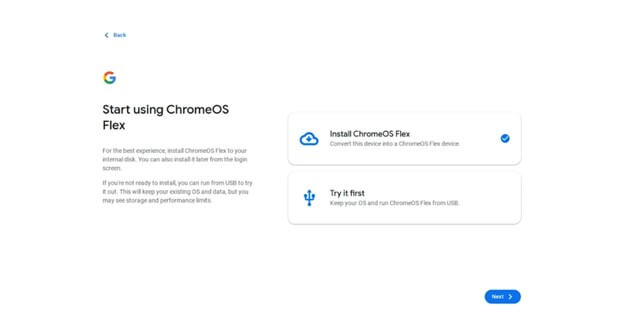
- After booting from the USB drive, you’ll see the ChromeOS Flex initial setup screen. This interface might look similar to the setup process on a new Chromebook.
- Select “Try ChromeOS Flex“: This option allows you to run ChromeOS Flex directly from the USB drive without changing your computer’s operating system or data. This is useful for testing compatibility and performance before committing to a complete installation.
- Experience the OS: You can use ChromeOS Flex as if it were fully installed, but performance may be slower due to running from the USB drive.
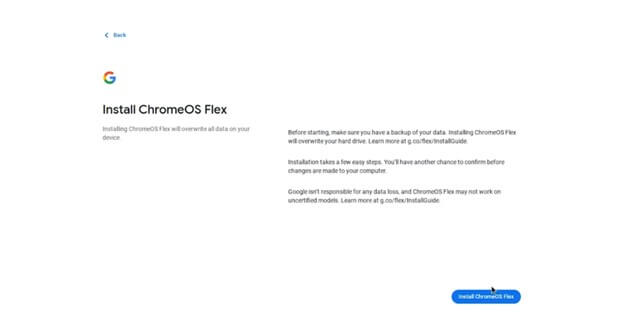
- Select “Install ChromeOS Flex”: This option installs ChromeOS Flex on your computer’s internal storage, replacing the existing operating system.
- Warning: Installing ChromeOS Flex will erase all data on the computer’s internal drive. Ensure you have backed up any important data before proceeding.
- Follow The On-Screen Instructions: The installer will guide you through the installation process.
- Accept Terms: Agree to the terms & conditions.
- Select Installation Drive: Please choose the internal drive to install ChromeOS Flex.
- Start Installation: Confirm your selections and start the installation process.
- Wait for Installation to Complete: The installation process may take several minutes. Once complete, the computer will automatically restart.
- Remove USB Drive: After the restart, remove the USB drive to ensure the computer boots from the newly installed ChromeOS Flex on the internal drive.
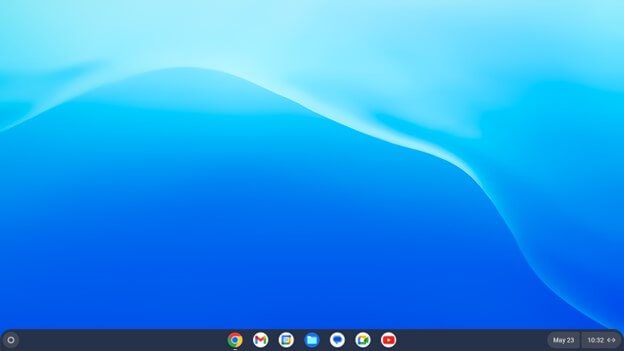
- Desktop View: This is how ChromeOS Flex looks like when fully installed
Post-Installation Setup
You must complete the post-installation setup after successfully installing ChromeOS Flex on your device.
First Boot Configuration
- Initial Boot: Power on your device. It will boot into ChromeOS Flex and display the welcome screen.
- Language and Keyboard Settings: Select your preferred language and keyboard layout, then click “Get Started.”
Setting Up a Google Account
- Connect to Wi-Fi: Choose your Wi-Fi network from the list & enter the password to connect. The setup process requires a stable internet connection.
- Google Account Sign-In:
- Sign In: Enter your Google account credentials to sign in. If you don’t have a Google account, create one by clicking “More options” and selecting “Create account.”
- Sync Settings: Choose whether to enable synchronization with your Google account. This syncs your bookmarks, apps, settings, and extensions across devices.
Configuring System Preferences
- Personalize Your Device: Customize your ChromeOS Flex settings to suit your preferences.
- Profile Picture: Choose a profile picture for your account.
- Wallpaper: Select a wallpaper from the gallery or upload your own.
- Themes: Choose between light, dark, or auto theme settings.
- Privacy Settings: Configure your privacy settings.
- Location Services: Enable or disable location services based on your preference.
- Usage Statistics: Choose whether to send usage statistics and crash reports to Google to help improve ChromeOS Flex.
- Keyboard and Input Settings: Adjust keyboard shortcuts, language input methods, and accessibility features.
Updating ChromeOS Flex
- Check for Updates: Ensure your ChromeOS Flex is up-to-date with latest features and security patches.
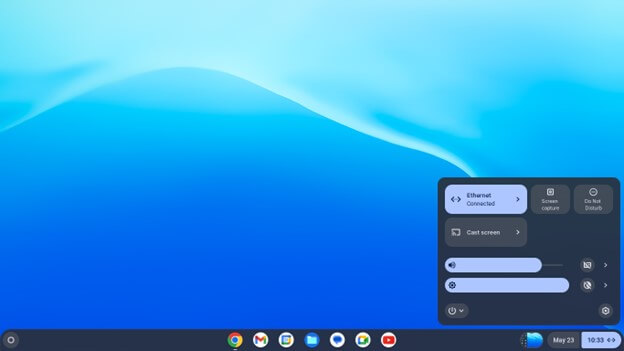
- Open Settings: Click on the system tray at the bottom right corner, then click on the gear icon to open Settings.
- About ChromeOS: Scroll down and click on “About ChromeOS”.
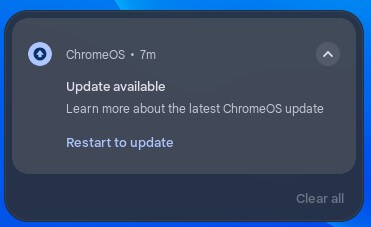
- Check for Updates: Click “Check for updates” & install any available updates. The system will download & install the updates and then prompt you to restart if necessary.
Installing Additional Apps
- Access the Chrome Web Store: Open the Chrome Web Store to browse and install additional apps and extensions.
- Web Apps: Search for and install web apps that enhance productivity and entertainment.
- Extensions: Add browser extensions to customize your browsing experience.
Troubleshooting
USB Drive Not Recognized
- Check the USB Port and Drive:
- Try a Different Port: Insert the USB drive into a different USB port to rule out port-specific issues.
- Verify Drive Functionality: Test the USB drive on another computer to ensure it functions correctly.
- Reformat the USB Drive:
- Reformat to FAT32: On another computer, reformat the USB drive to FAT32 to ensure compatibility.
- Use Disk Management (Windows): Open Disk Management, right-click the USB drive, select “Format,” choose FAT32, and complete the process.
- Use a Different USB Drive:
- New USB Drive: Sometimes, the USB drive itself may be faulty. Try using a different USB drive.
Boot Issues
- Check Boot Order:
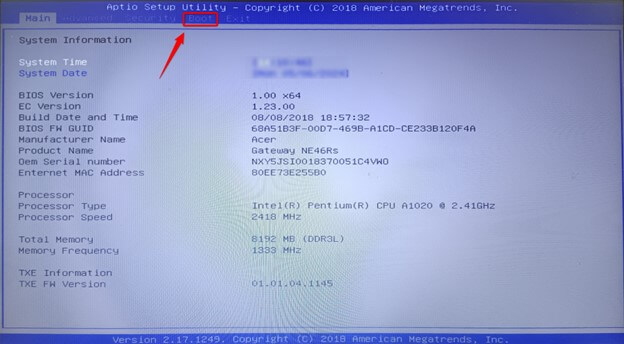
- Access BIOS/UEFI: Restart your computer & enter the BIOS/UEFI settings by pressing the designated key during startup (commonly F2, F12, Esc, or Del).
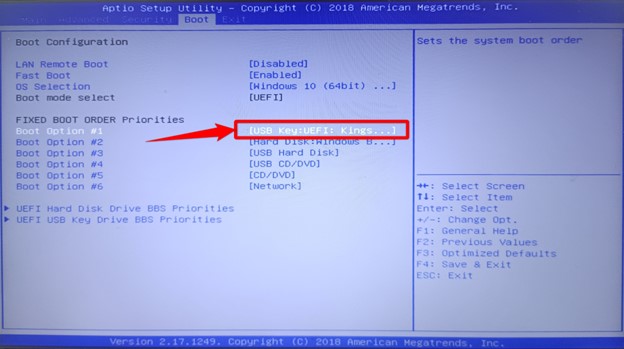
- Set USB Drive as First Boot Device: Navigate to the Boot menu and set the USB drive as the primary boot device. Save changes and exit.
- Disable Secure Boot: Sometimes, disabling Secure Boot can resolve boot issues. You can typically find this option in the Security or Boot menu of the BIOS/UEFI settings.
Solutions and Workarounds
Recreating the USB Installer
If the USB installer is not working correctly, you may need to recreate it:
- Redownload ChromeOS Flex Image: Ensure you have the latest ChromeOS Flex recovery image version.
- Use Chrome Recovery Utility:
- Repeat the Creation Process: Follow the steps to create the USB installer using the Chrome Recovery Utility.
- Alternative Tools:
- Third-Party Utilities: Use tools like Rufus or Etcher to create the bootable USB drive as an alternative to the Chrome Recovery Utility.
Adjusting BIOS/UEFI Settings
Sometimes, adjusting specific BIOS/UEFI settings can resolve installation issues:
- Access BIOS/UEFI:
- Enter Setup: Restart your computer and press the designated key to enter BIOS/UEFI settings.
- Adjust Boot Settings:
- Set Boot Priority: Ensure the USB drive is the first boot device.
- Enable USB Boot: Remember to enable USB booting in the BIOS/UEFI settings.
- Disable Fast Boot: Disabling Fast Boot can help recognize the USB drive during startup.
Additional Tips and Resources
After installing ChromeOS Flex, you can enhance your experience by optimizing performance, accessing support, and exploring advanced features.
Optimizing ChromeOS Flex Performance
- Regular Updates:
- Keep Software Up-to-Date: Regularly check for and install system updates, it will ensure optimal performance and security.
- Automatic Updates: Enable automatic updates to ensure you always have the latest features and fixes.
- Manage Extensions and Apps:
- Remove Unnecessary Extensions: Disable or remove Chrome extensions you don’t use to improve browser performance.
- Uninstall Unused Apps: Regularly review and uninstall apps you no longer need to free up system resources.
- System Settings:
- Optimize Startup: Disable unnecessary startup apps to reduce boot time.
- Adjust Display Settings: Lower screen brightness and disable animations to improve battery life and performance.
- Regular Maintenance:
- Clear Cache and Cookies: Periodically clear your browser cache and cookies to keep the system running smoothly.
- Powerwash: If you encounter significant performance issues, use the Powerwash feature to reset ChromeOS Flex to its factory settings.
Exploring Advanced Features
- Linux (Beta):
- Run Linux Apps: Enable Linux (Beta) to run Linux applications alongside ChromeOS apps, providing a powerful toolset for developers and advanced users.
- Terminal Access: Use the built-in terminal to execute Linux commands and manage packages.
- Virtual Desktops:
- Multitasking: Use virtual desktops to organize your workspace and improve productivity. Access the overview mode to manage multiple desktops.
- Keyboard Shortcuts:
- Custom Shortcuts: Customize keyboard shortcuts to streamline your workflow and access frequently used functions quickly.
- Remote Desktop:
- Remote Access: Use Chrome Remote Desktop to access other computers remotely, allowing for flexible work and support options.
Conclusion
ChromeOS Flex is a transformative, cloud-first operating system that breathes new life into old PCs and Macs. With its fast boot times, automatic updates, and robust security features, it offers a seamless user experience. Its compatibility with various devices & easy installation make it accessible to everyone. Users can optimize the system’s performance for efficiency, and online support & documentation are available for troubleshooting. Advanced features further enhance its functionality. ChromeOS Flex is a flexible, efficient, and secure solution for today’s computing needs. It’s a game-changer in the realm of operating systems.
Frequently Asked Questions (FAQs)
Q1. Can I install Android apps on ChromeOS Flex?
Answer: Some versions of ChromeOS Flex support Android apps via the Google Play Store. To check if this feature is available on your installation, enable the Google Play Store in the settings.
Q2. How much HDD space does my ChromeOS Flex device need?
Answer: It needs at least 16 GB of available hard drive space to install ChromeOS Flex on a device successfully.
Q3. What is the difference between ChromeOS & ChromeOS Flex?
Answer: ChromeOS is pre-installed on Chromebooks and optimized for specific hardware, while ChromeOS Flex is designed to be installed on various existing x86-based devices. It offers similar features but with broader hardware compatibility.
Q4. Can I dual-boot ChromeOS Flex with another OS?
Answer: ChromeOS Flex devices do not support dual booting.
