What is Color Correction in After Effects?
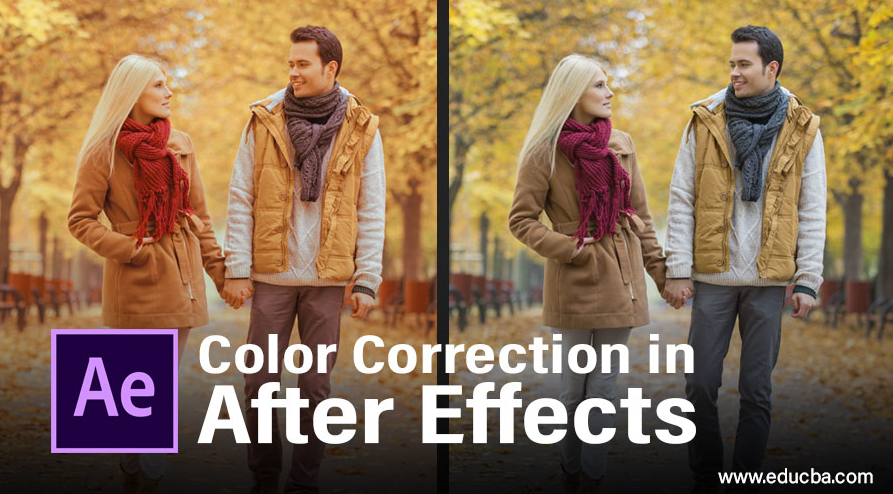
Color Correction is the basic part of Adobe After Effects software. It is used to balance the color formation in any image or during cinematography to make the image of the perfect color combination. Color Correction allows you to use a wide range of color formation effects for your object. Adobe After Effects software has developed and maintained by Adobe Systems. It was originally developed in January 1993 by David Herbstman, David Simons, Daniel Wilk, David M. Cotter, and Russell Belfe at the company of Science and Art; after that, it was hired by Adobe in 1994. Adobe After Effect is used for Visual effects, Motion Graphics, Compositing and different types of Animation in our project.
How to Color Correct in Adobe After Effect?
Color Correction in After Effects gives perfect Color Balance to our Object. Color Correction allows you to use your own idea for giving a realistic view of your object. Here you will learn how to use color correction in your project with me step by step. Let’s start our tutorial in a very interesting way.
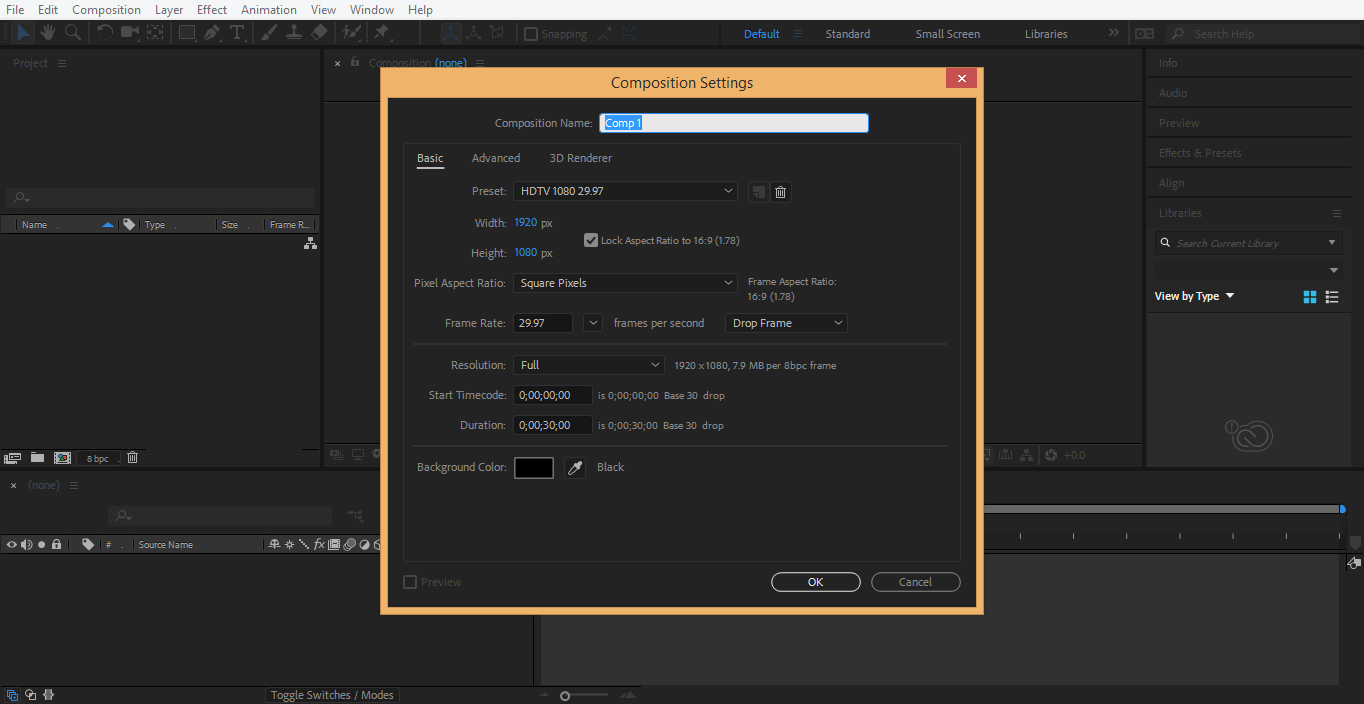
Step 1: First of all, we set some composition settings in this step. For this setting, the dialog box of composition setting will automatically open when you start the software, click right and click anywhere in the work area, click on the Composition setting option. We will not change the width and height of the background layer; from here, you can change it according to you.
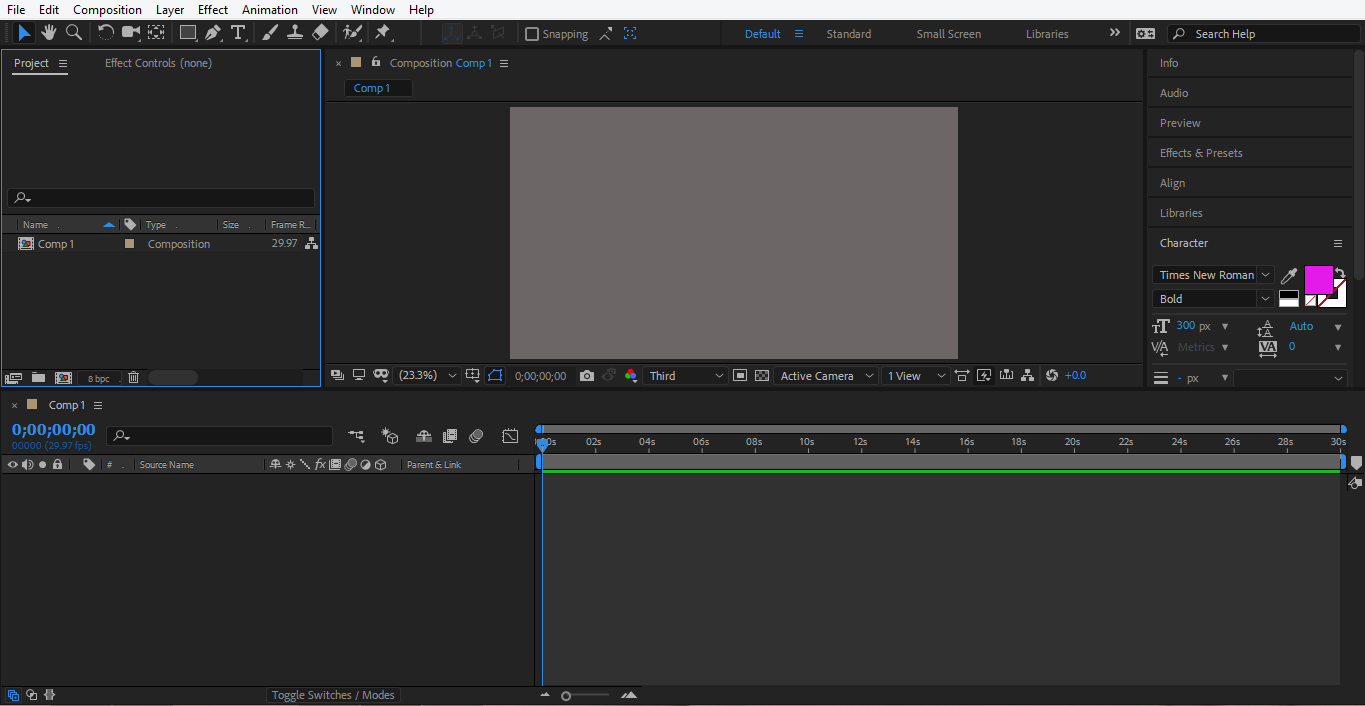
Step 2: We can change the color of this layer by clicking on the background color tab of this dialog box. I will choose the gray color from here you can choose as you like. Click Ok to apply this color.
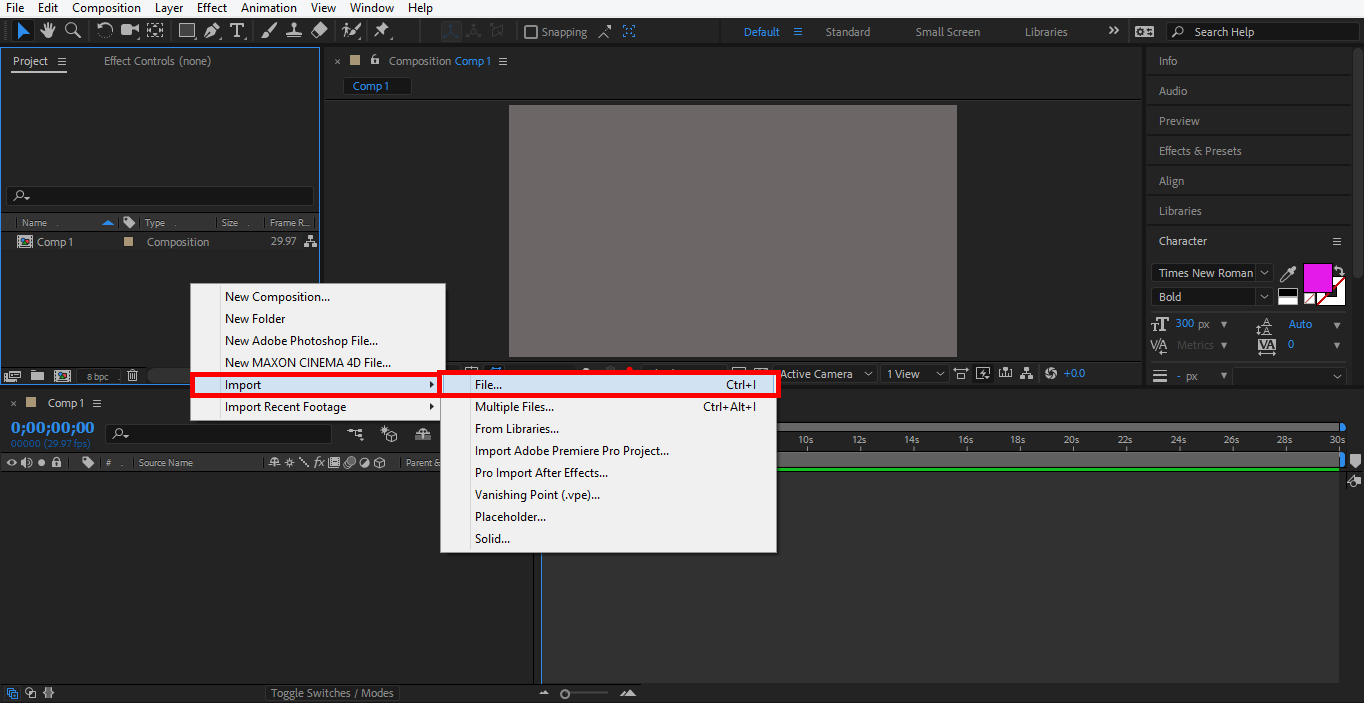
Step 3: For color correction, we will import an image. For importing the image, right-click on this section of adobe after effect, go to the import option and click on the file option here.
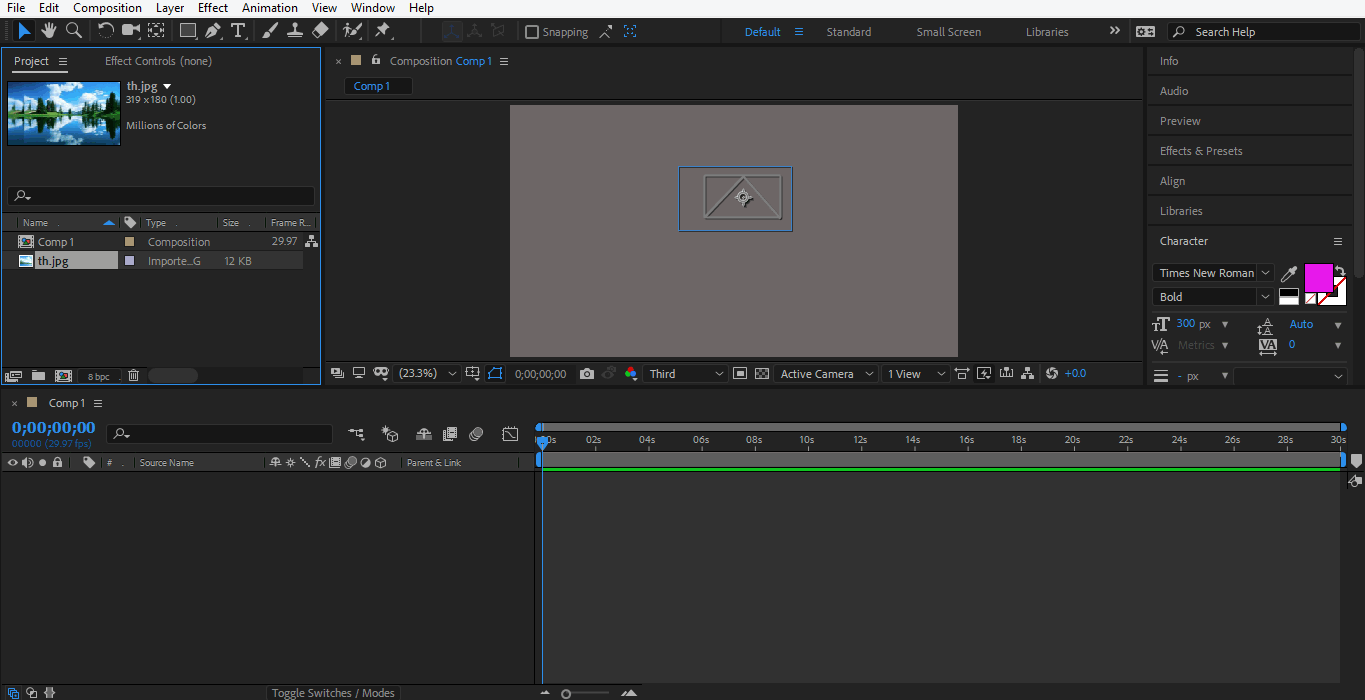
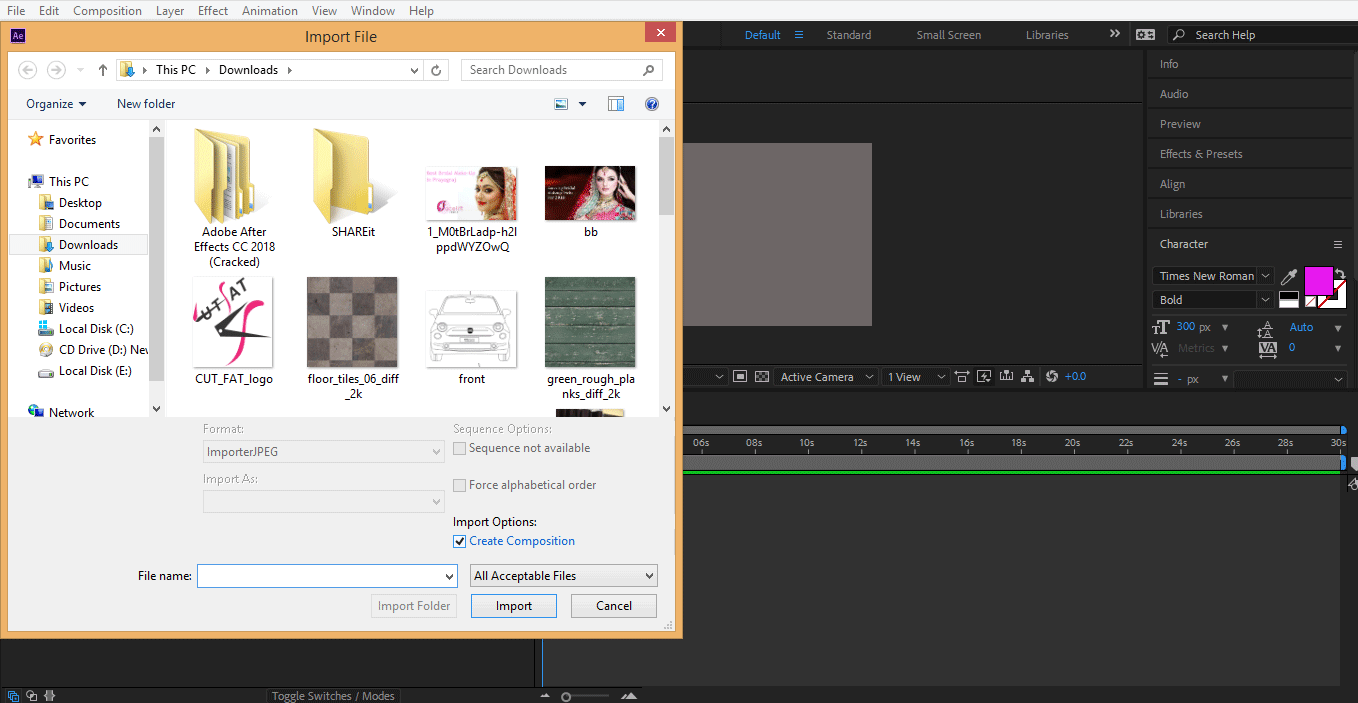
Step 4: A dialog box will open. Select the image from the folder in which you saved your image; click on that image, then click on the import tab of this dialog box to import the image in your work area.
Step 5: Now drag the image from this section to your workspace by holding it with the mouse’s left click and leaving the click to place it.
Step 6: Or you can import the image by clicking on the checkbox of Create Composition option on for importing your image as composition.
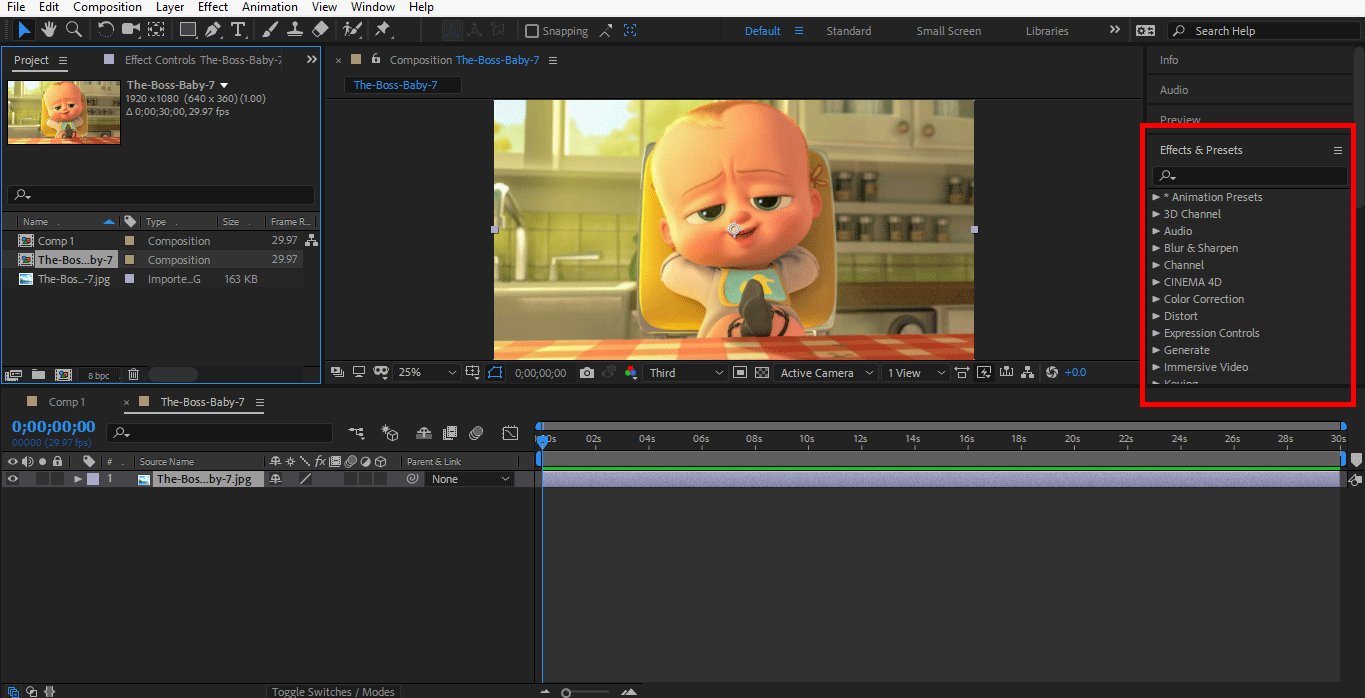
Step 7: Now click on the Effects & Presets option on the right side of the workspace of Adobe After Effect.
Step 8: Click on the color correction tab of the Effects & Presets option on the arrow button.
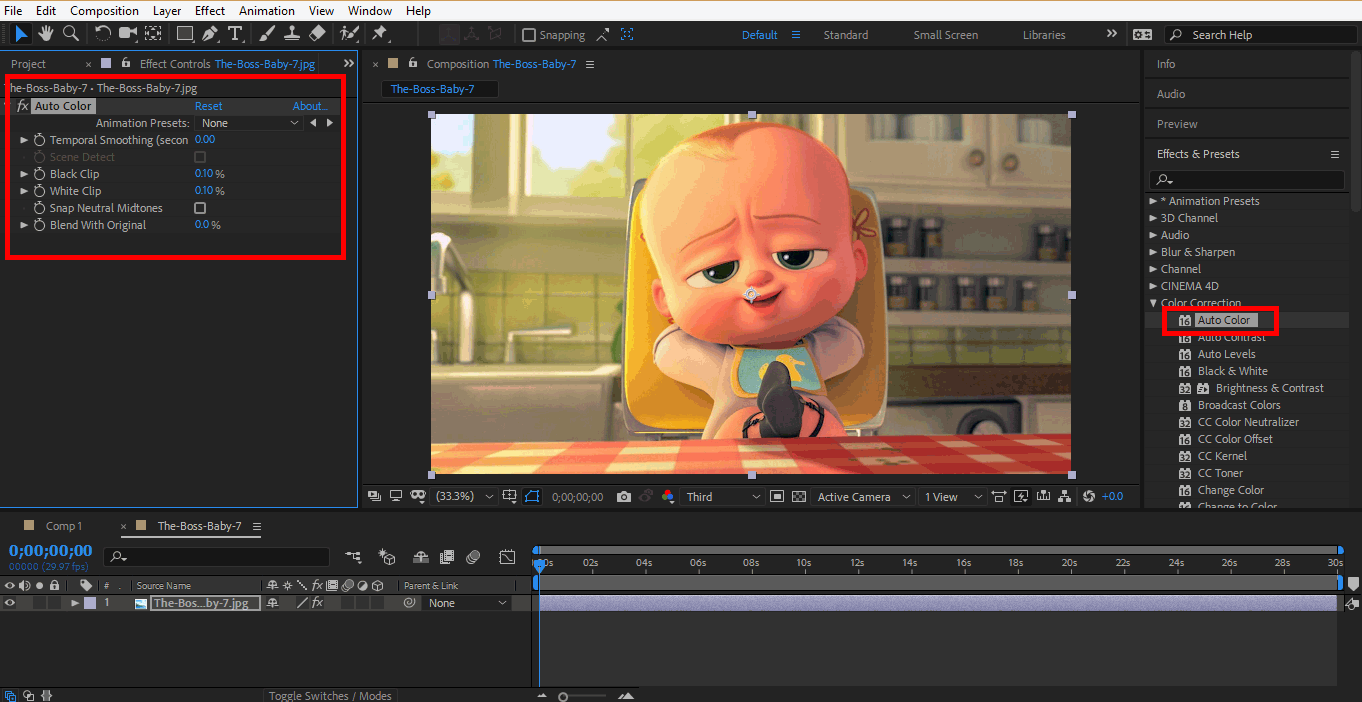
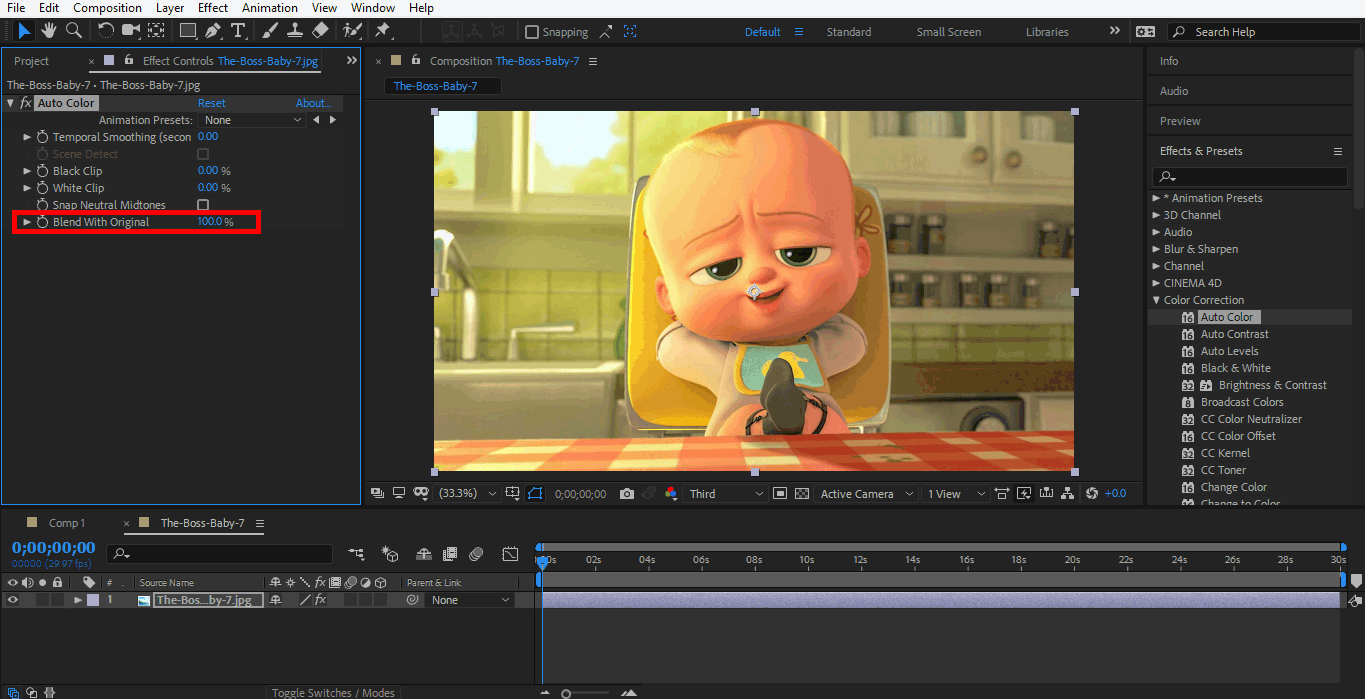
Step 9: Now, we will see all the options of the color correction one by one. Double click on the Auto Color tab, the parameter of Auto Color will be open on the left side of the work area of Adobe After Effect; auto color sets the color of the image automatically for giving it a realistic look.
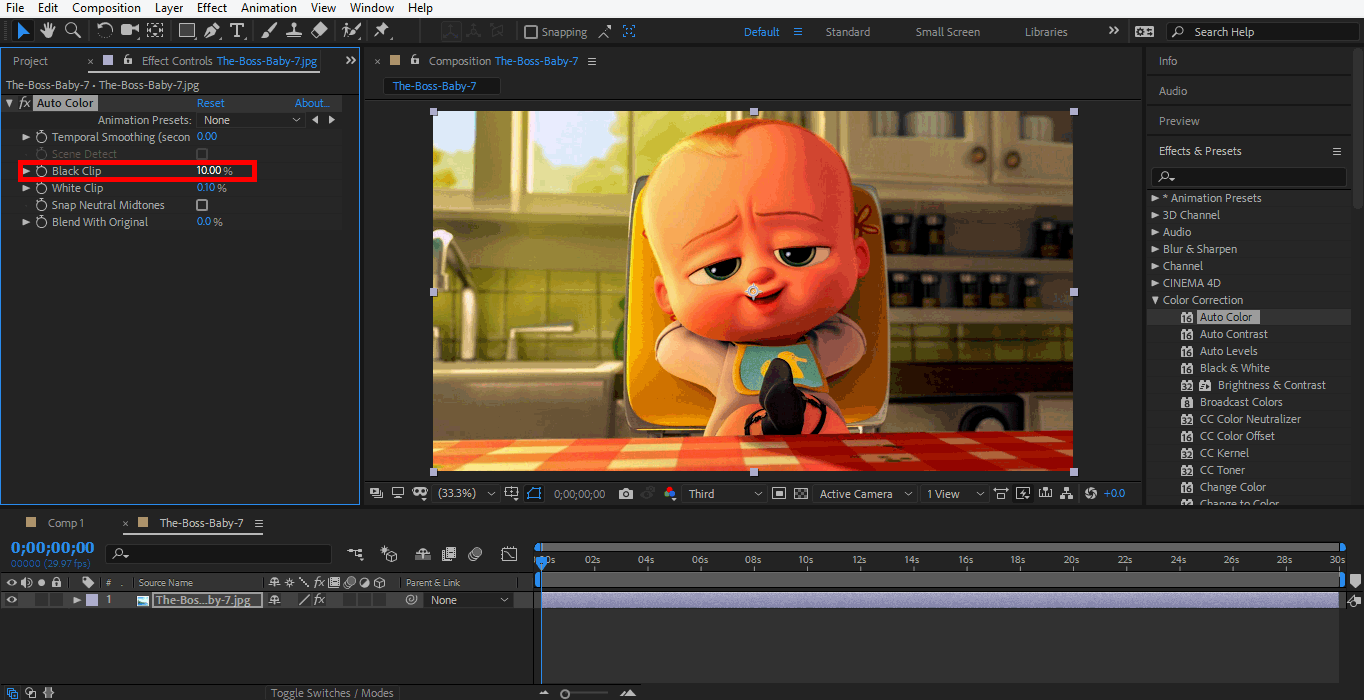
Step 10: You can check the changes in the auto color option by changing some parameters. Just like I changed the Black clip parameter, so you can see the image becomes darker.
Step 11: Here is the Blend with the original option. This option blends your changes with the original image and gives it a different look.
Step 12: If you want to delete this color correction option from your image, then click on the tab of this option and press the delete button from the keyboard.
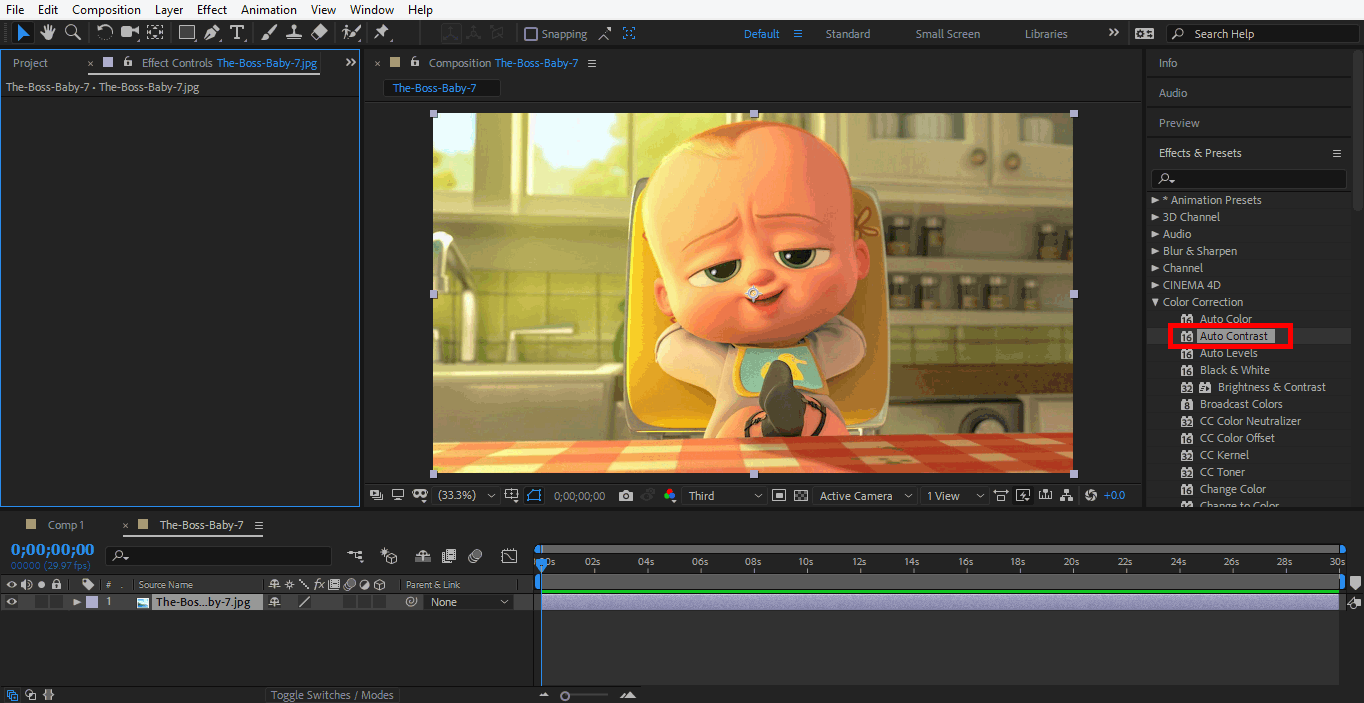
Step 13: Auto Contrast option is very similar to the Auto color option; you can check it by applying it to your image.
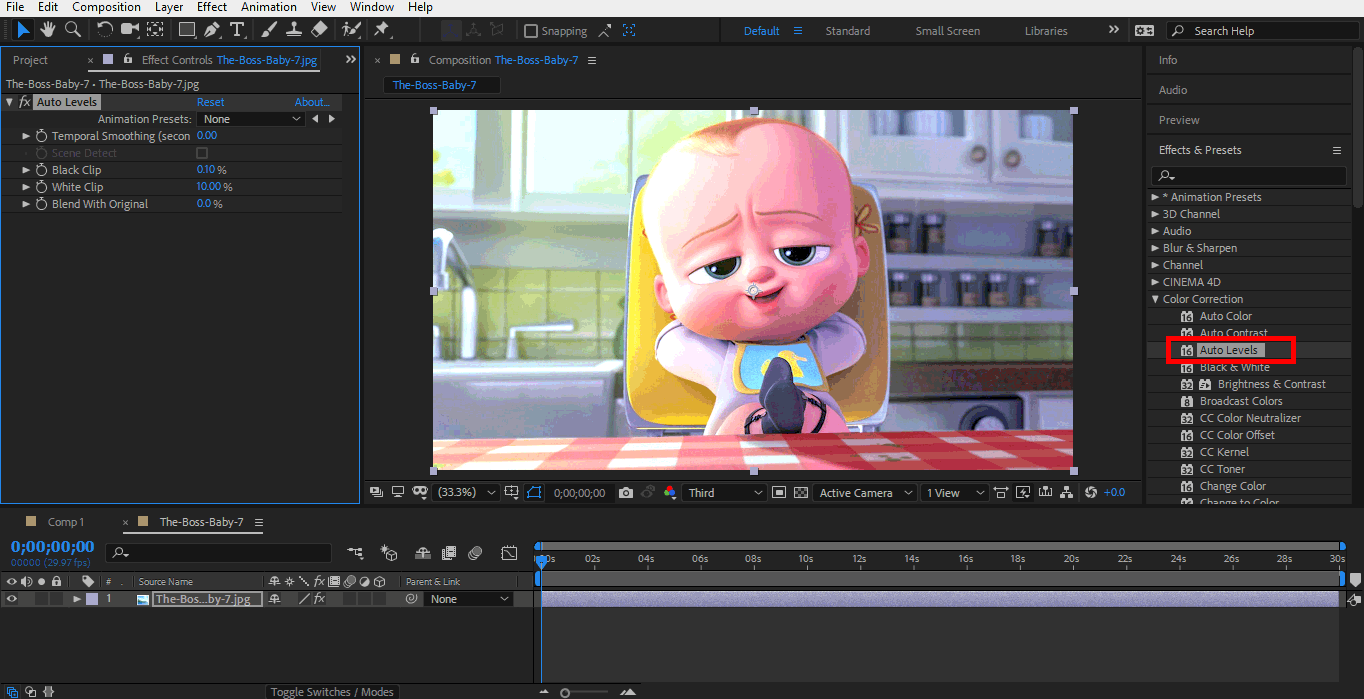
Step 14: Auto Level will give a natural look to your image.
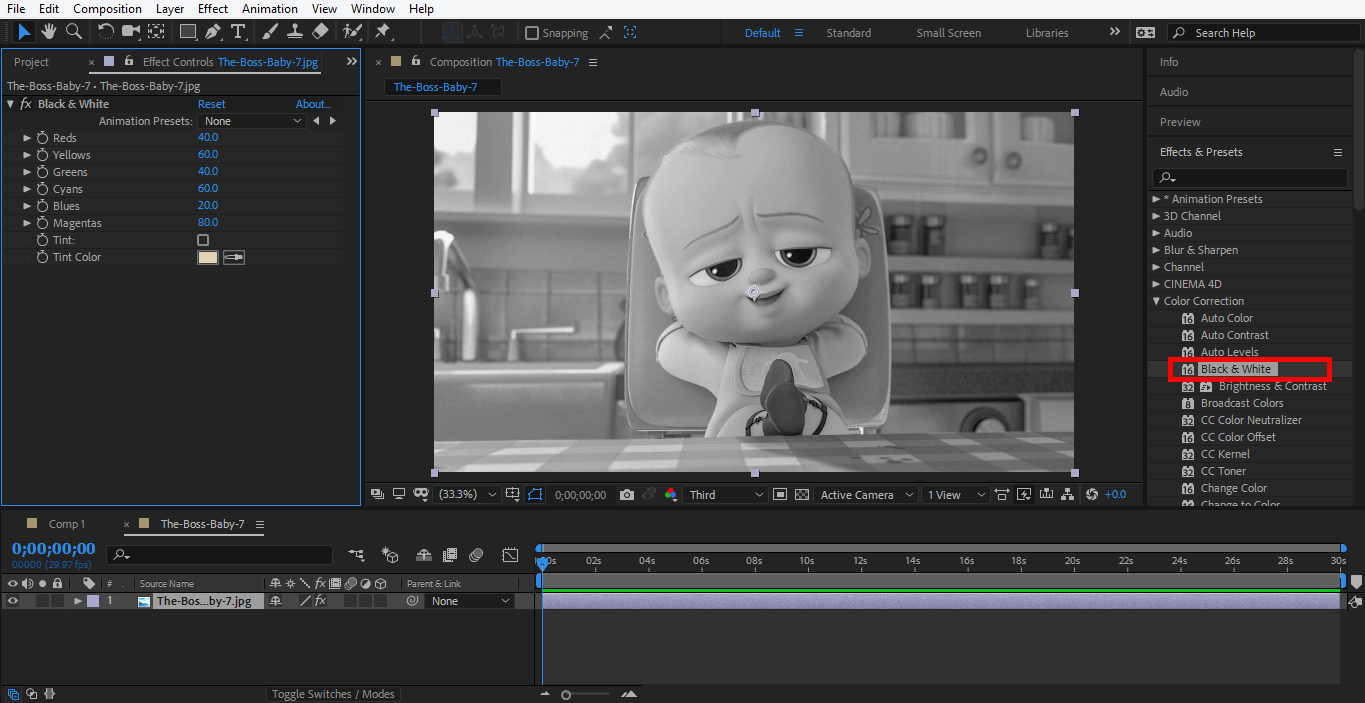
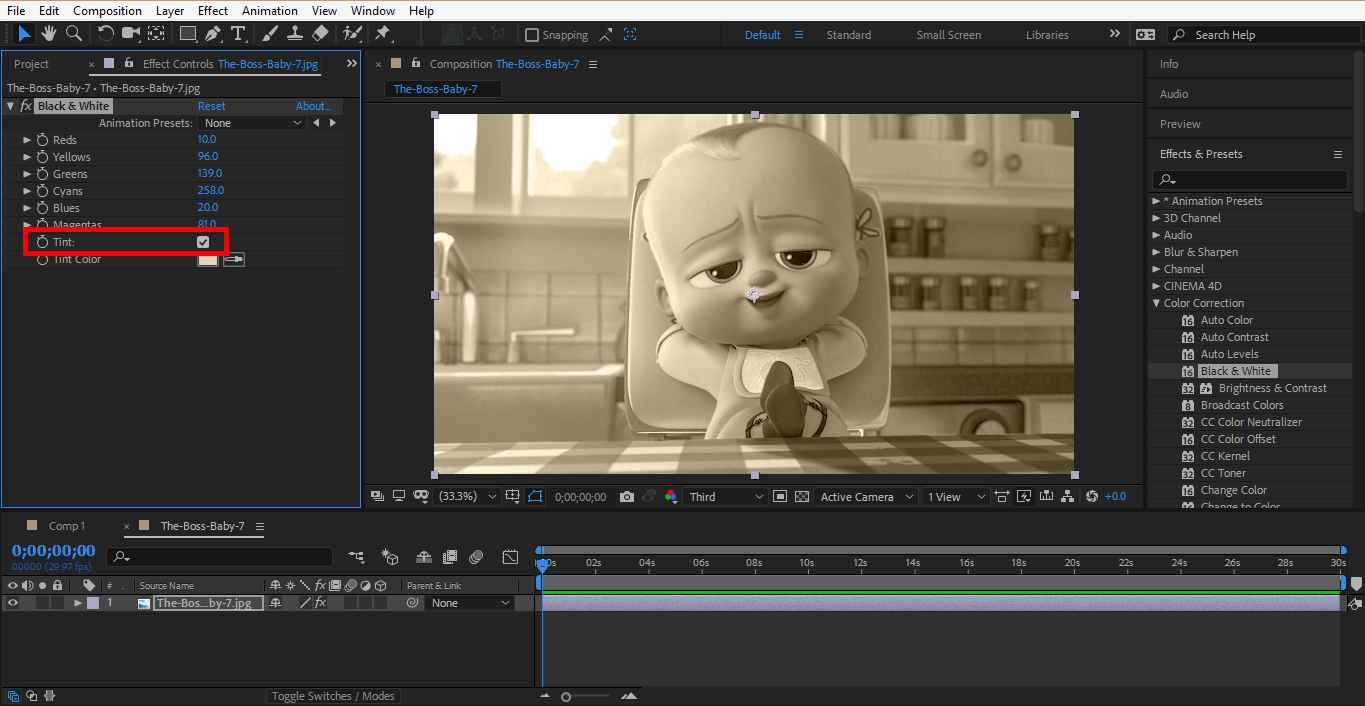
Step 15: Black and White’s option gives the black and white combination to your image.
Step 16: You can make some changes by setting the parameter. You can also give tinted form here.
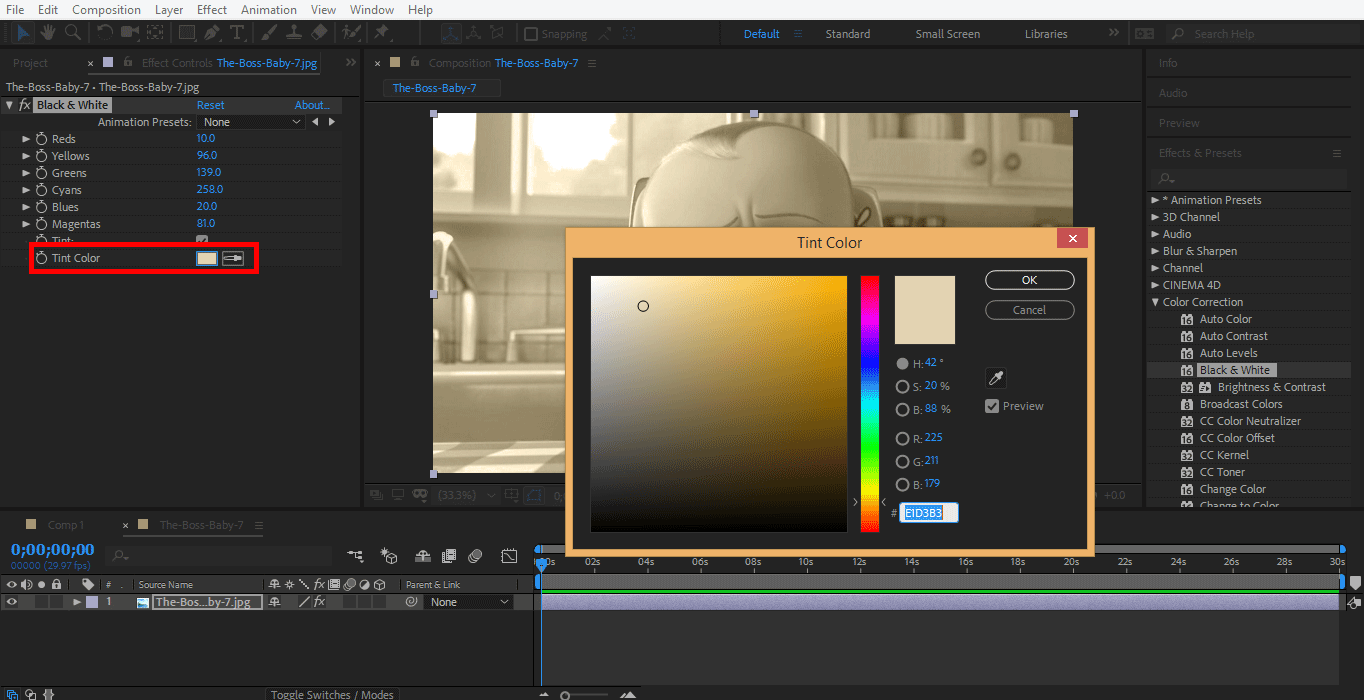
Step 17: You can change the color of the tint by the tint color tab. Double click on the Tint Color tab, choose the color from the color panel.
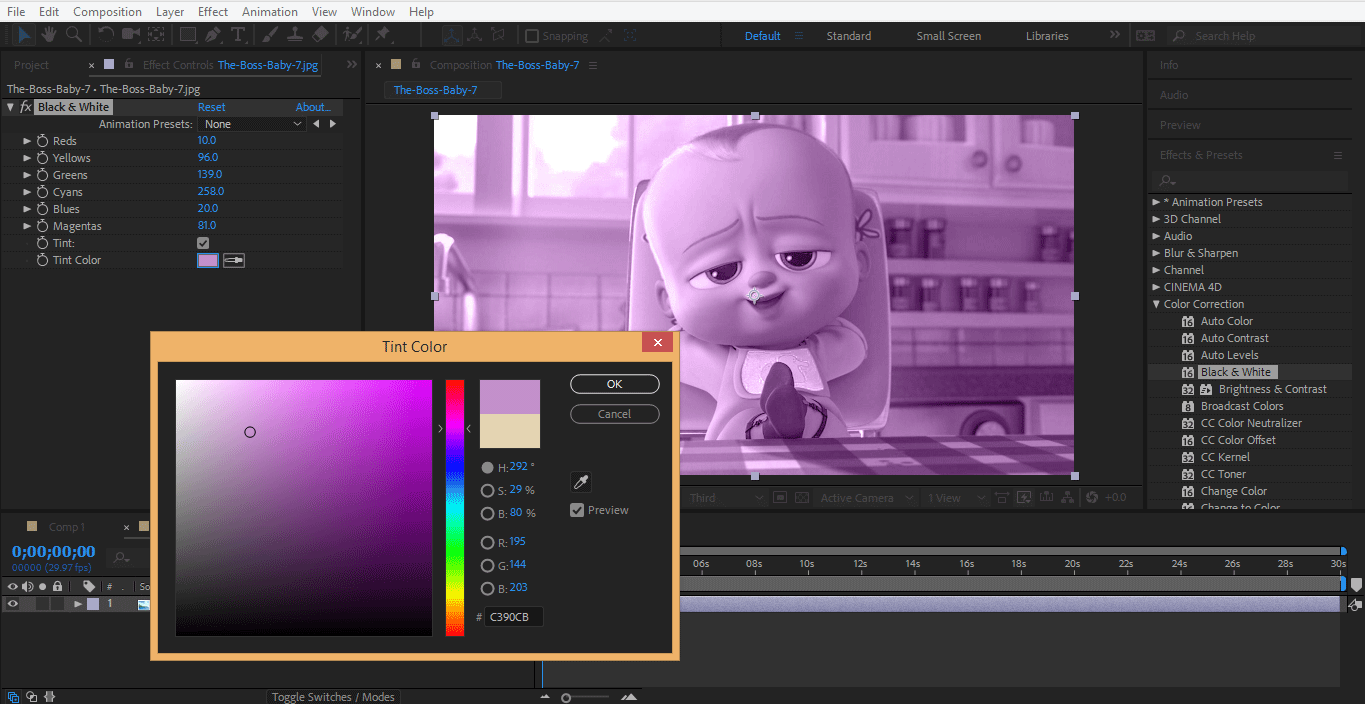
Step 18: See the color of the tint changes when you change the color from the color panel.
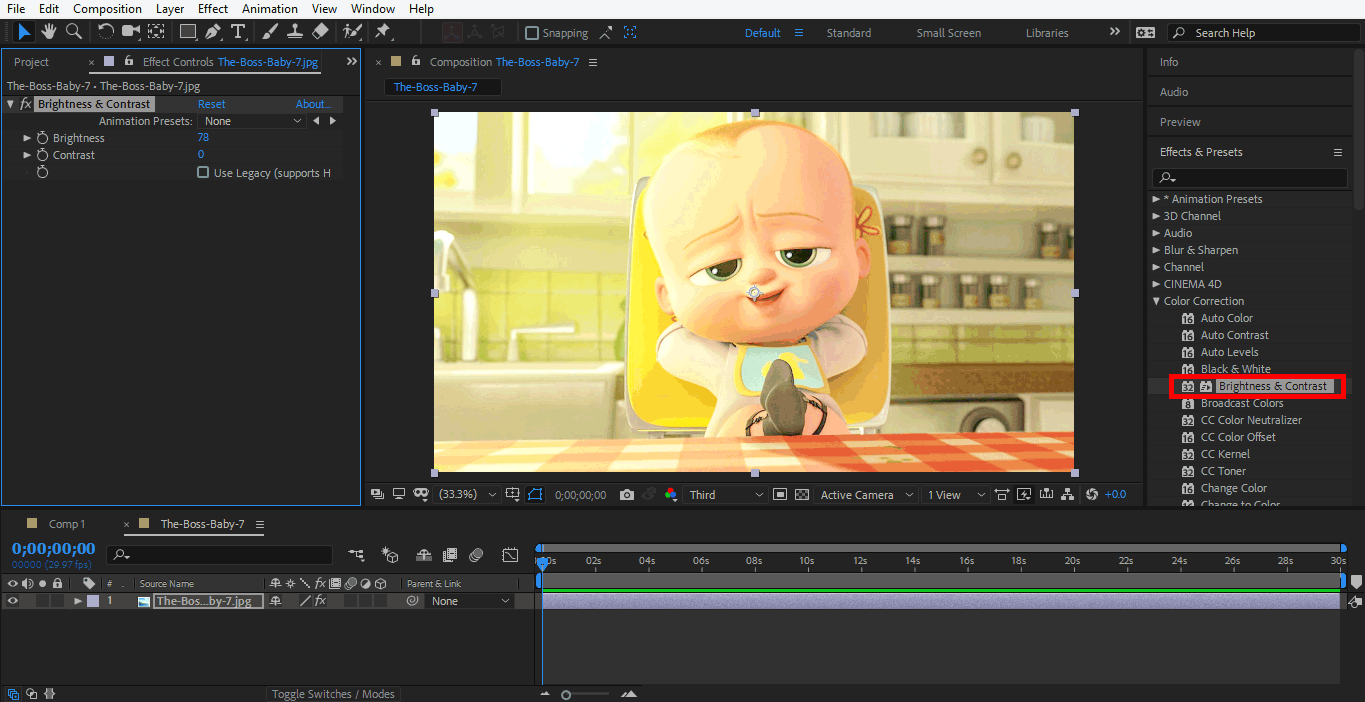
Step 19: Brightness & Contrast is used for giving brightness and contrast to your image.
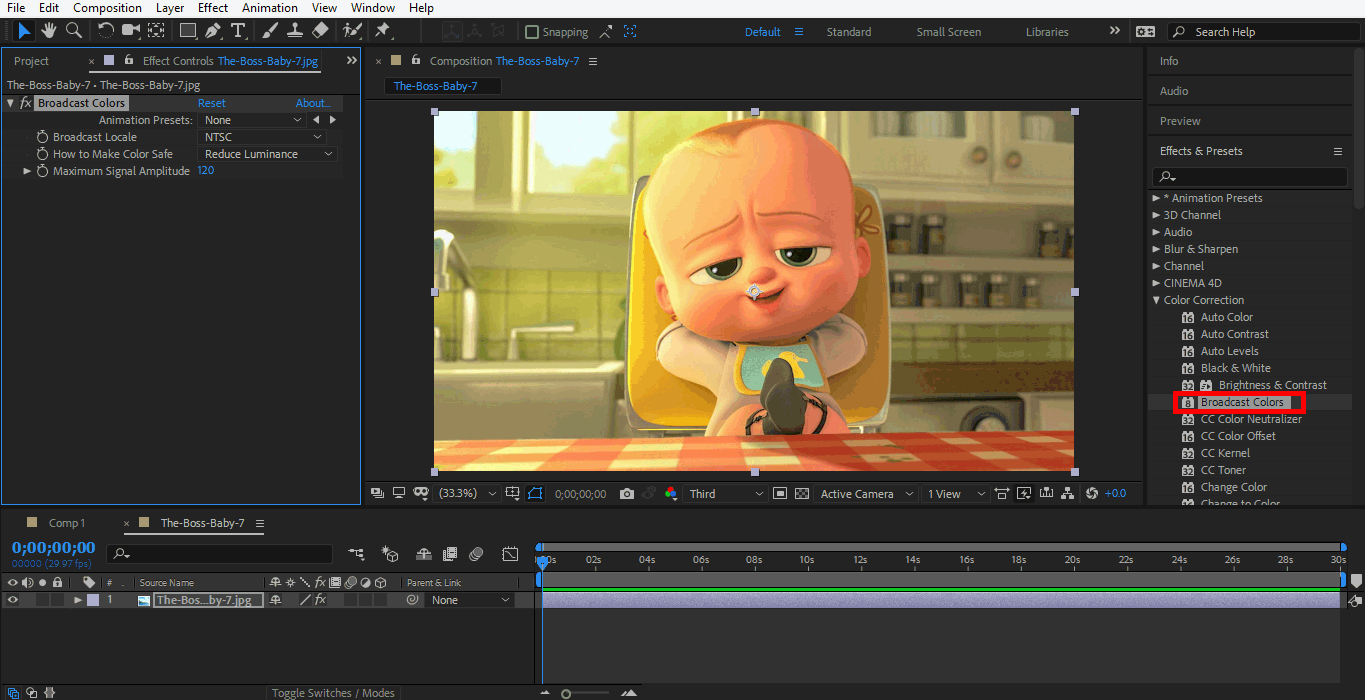
Step 20: Broadcast Cast is a color mode just like CMYK and RGB and used for Broadcast images.
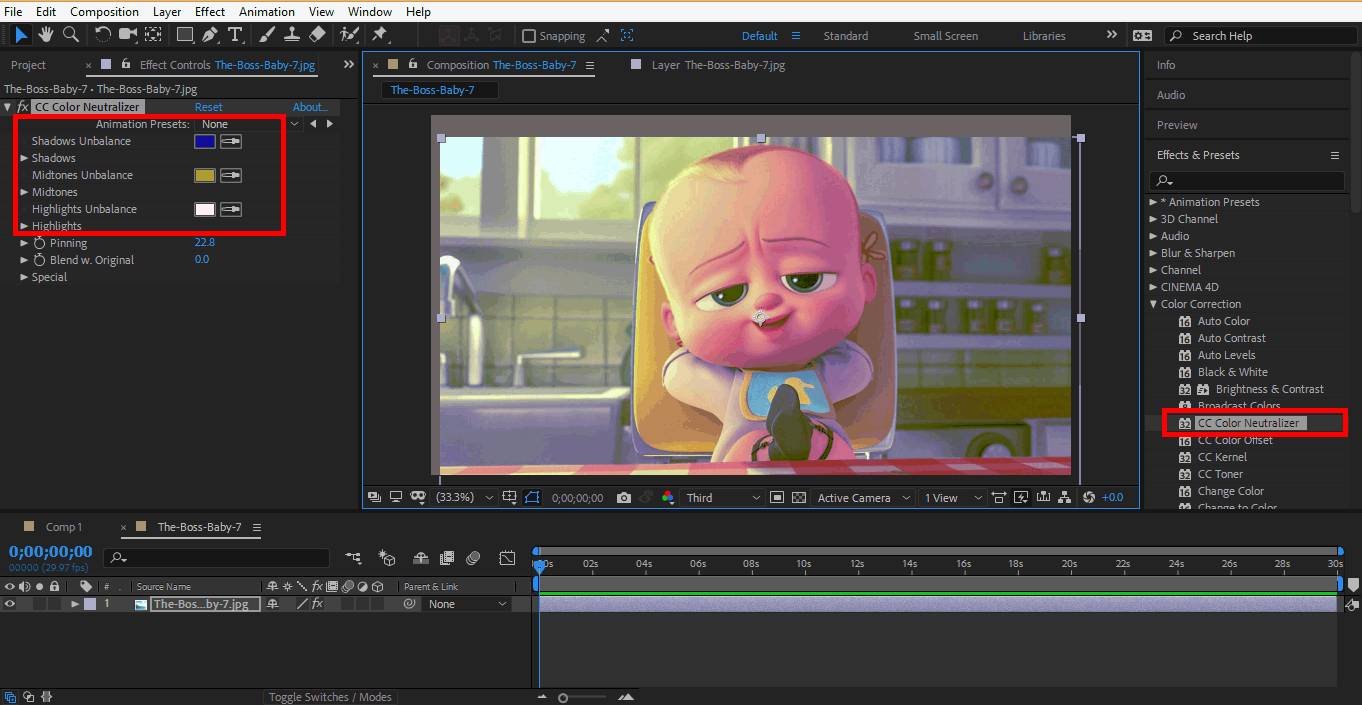
Step 21: You can use Color Neutralizer for setting the color of the shadow.
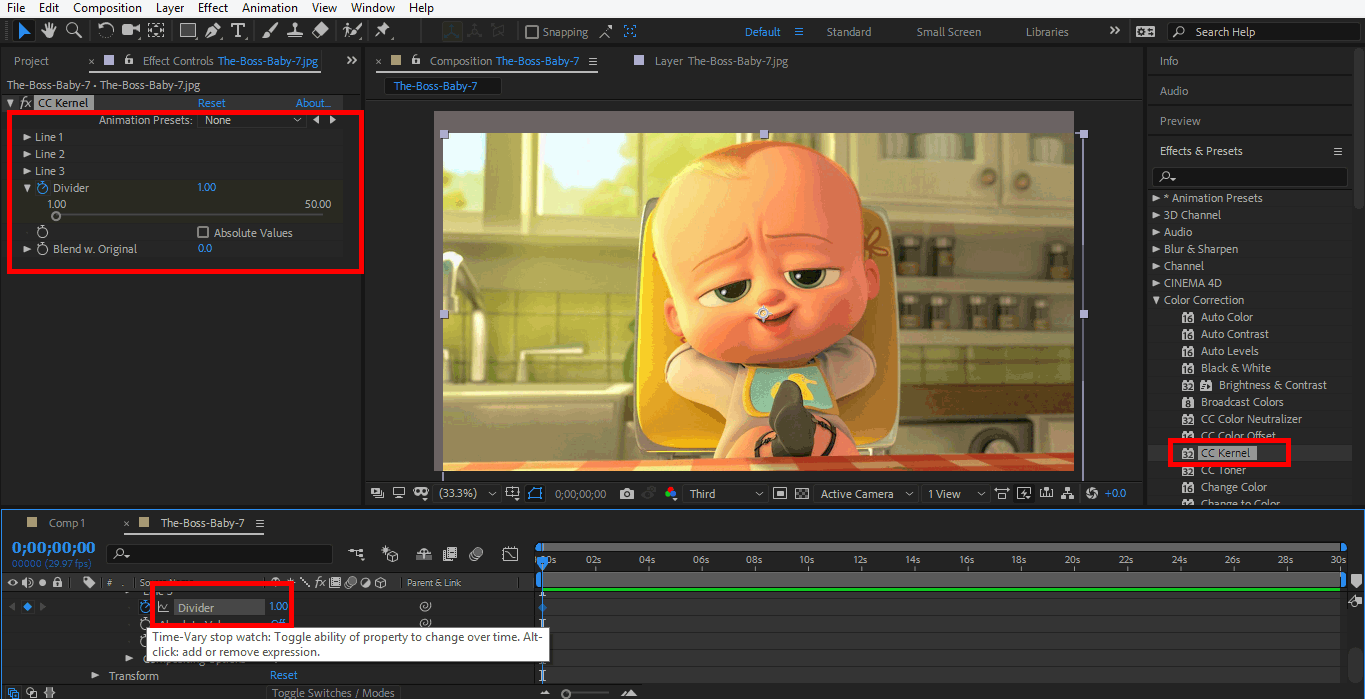
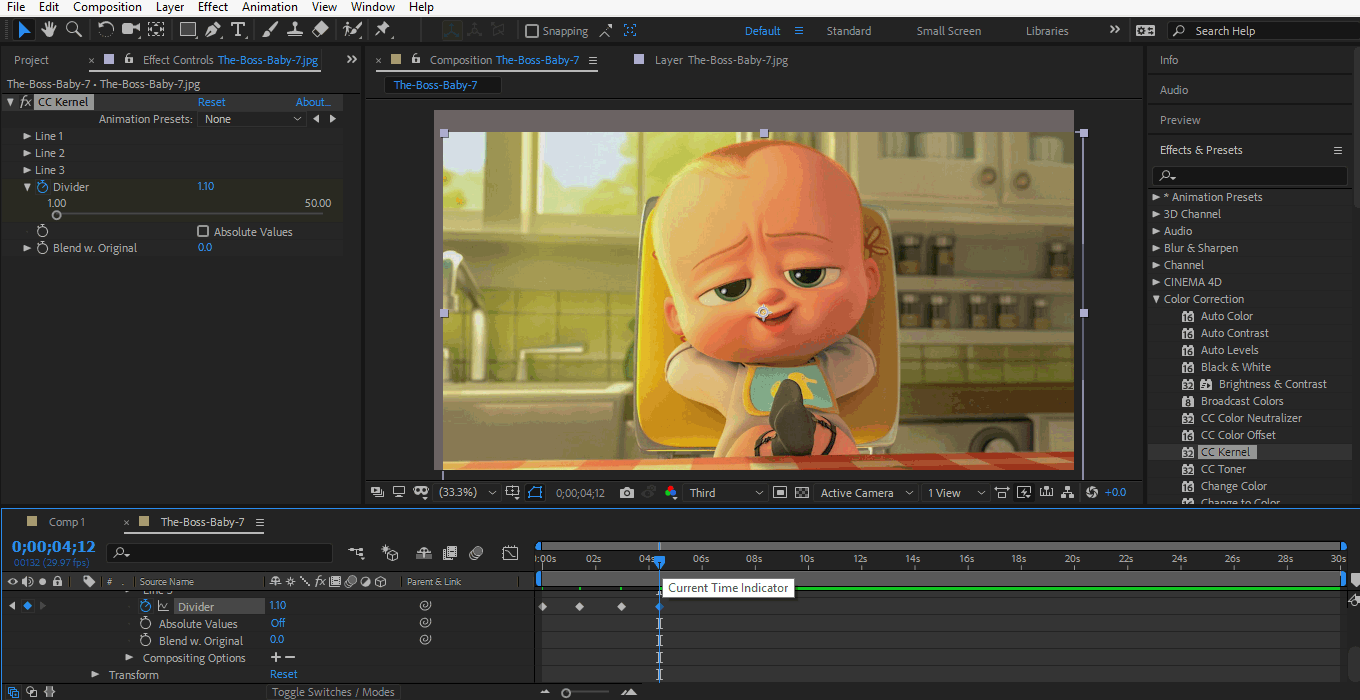
Step 22: You can animate any color correction option. Here I will show you one of them. I will choose CC Kernel; you can animate any one of them. Now click on the layer of the image and choose any property of this color correction that you want to animate. I will animate the divider of this click on the lock icon to generate the key.
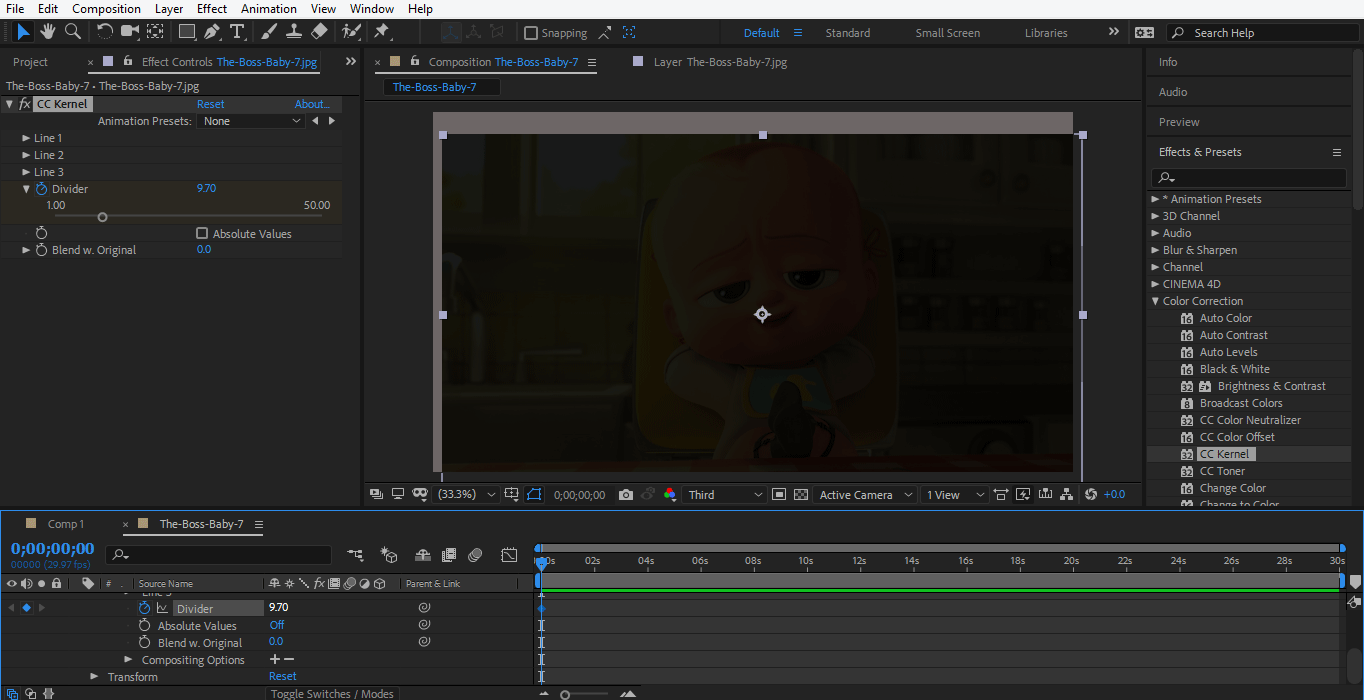
Step 23: Now, I will change the parameter of this property in this way so that the image becomes darker.
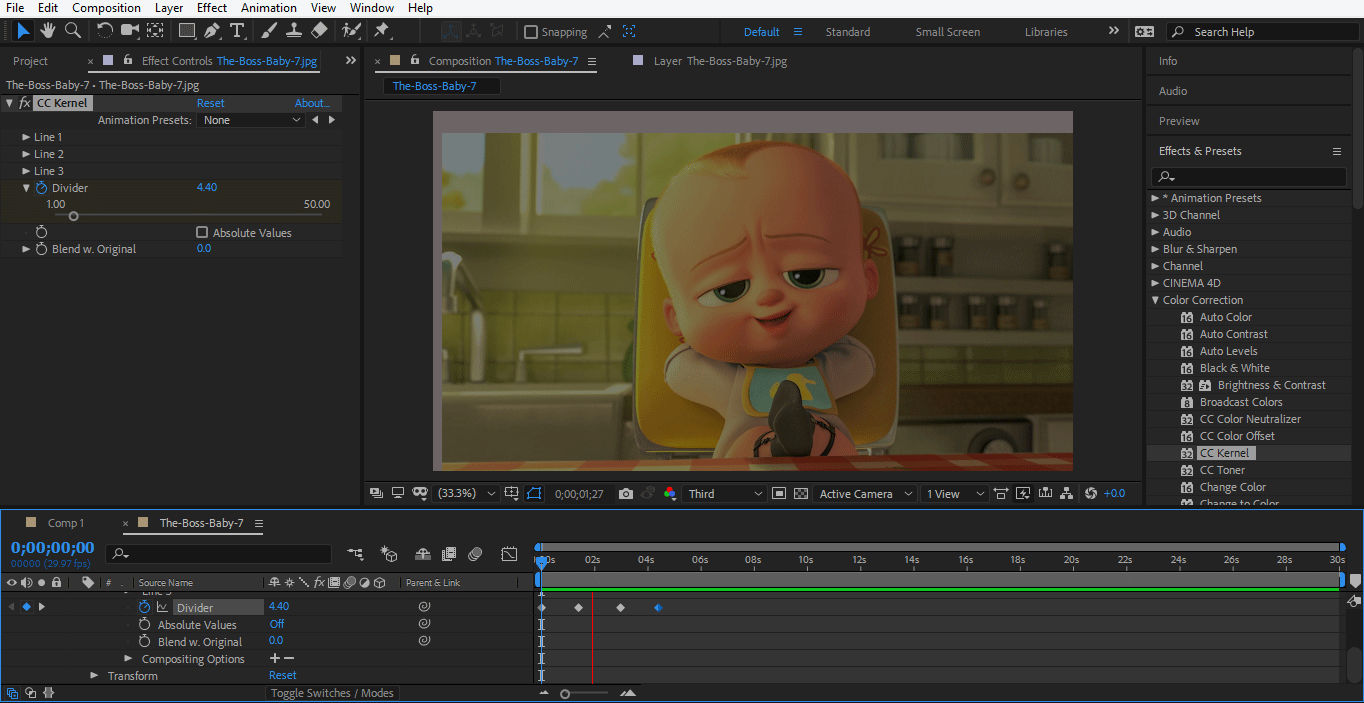
Step 24: Now, set the time keyframe in this way so that the image becomes visible by and by with time.
Step 25: Now, see the effect by playing the animation.
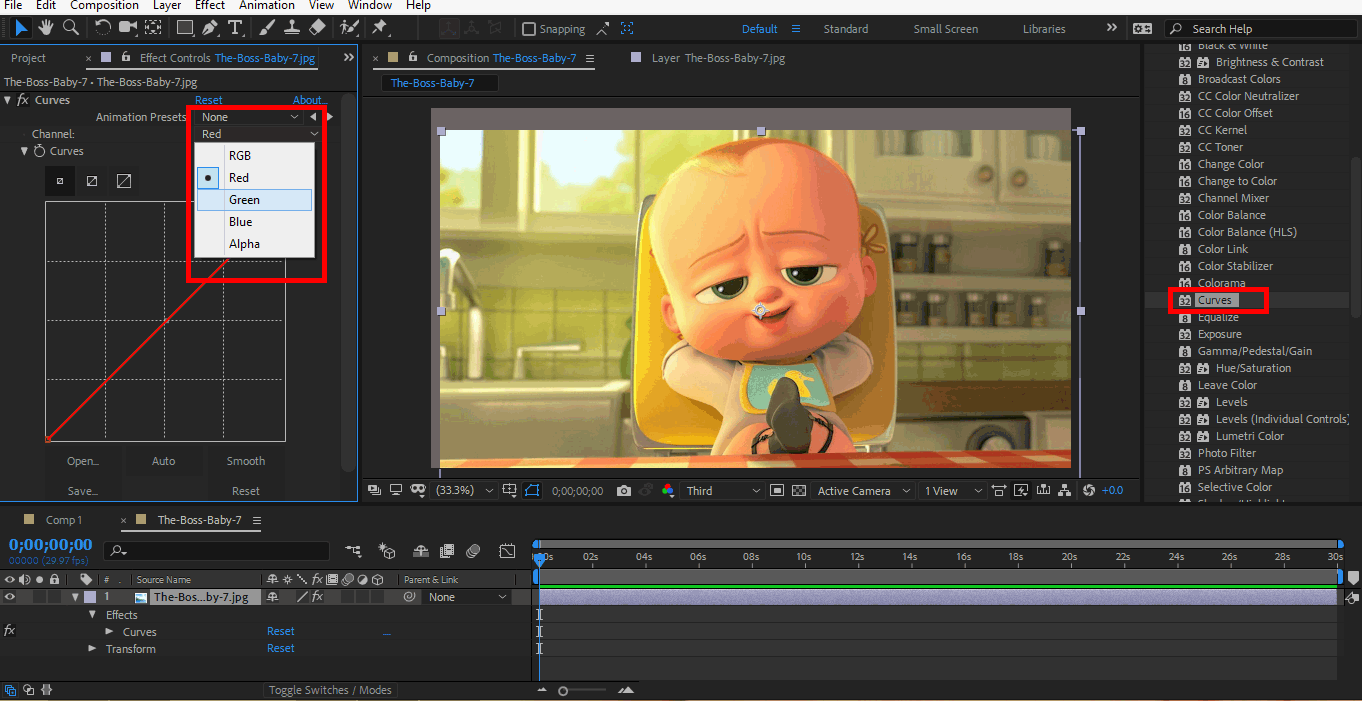
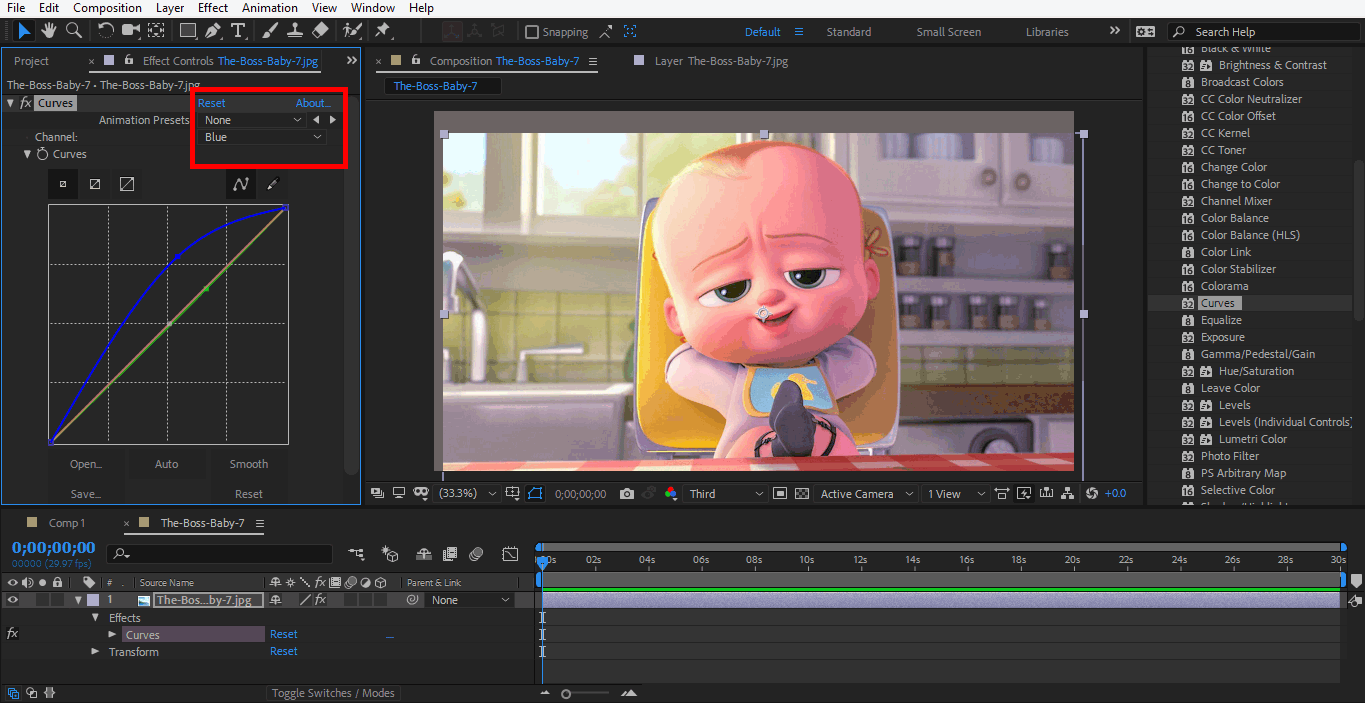
Step 26: Choose the Curve option of color correction from here. You can set or remove the individual color from your image and choose the color from here by clicking on it.
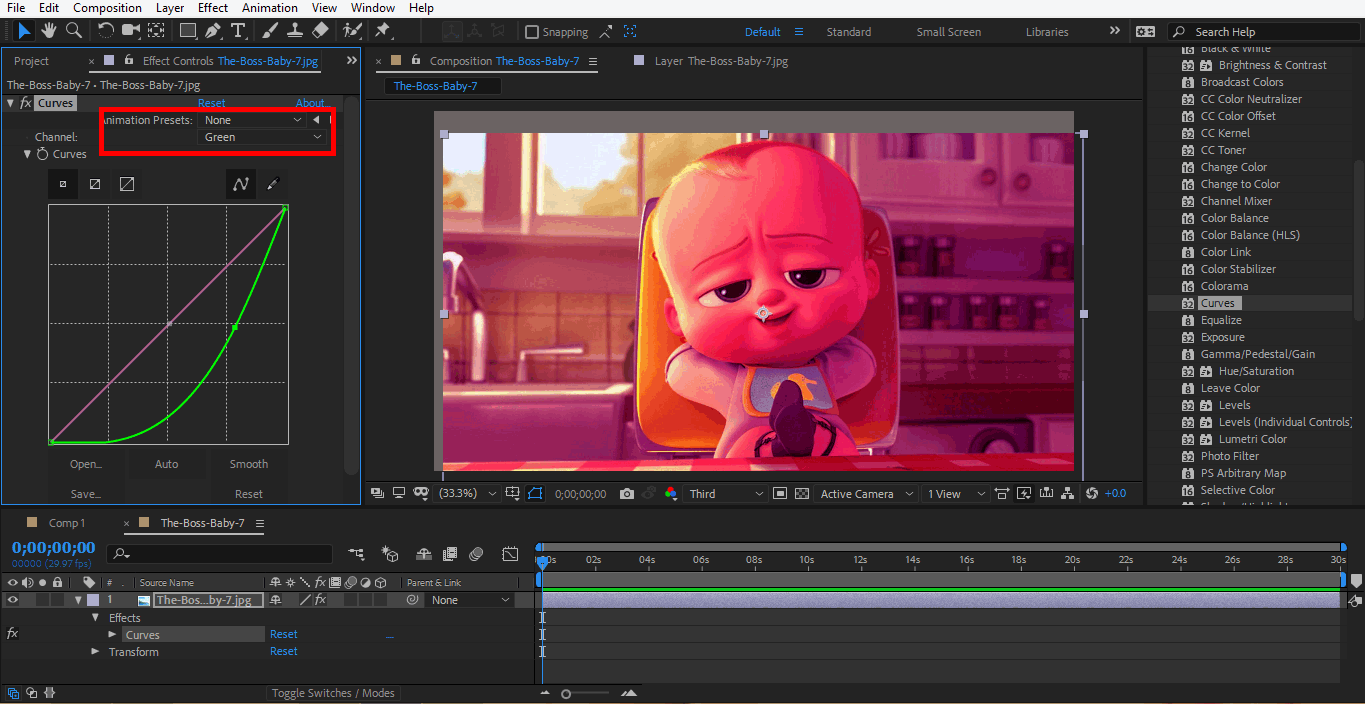
Step 27: I will choose the green color from here. You can see all the green color resolution changes by changing the curve of the green color.
Step 28: Now, I will choose a blue color.
There are many more options in the color correction panel of Adobe After Effect; you can choose any one of them according to your image. Each and every color correction option shows its actual effect differently in different images. You can learn it by practicing more and more on color correction.
Conclusion
In this way, you can easily animate or set the color of your model for any purpose by using the color correction option of adobe after effect. After having command on the color correction, you will be able to give your project an effective and interesting view for viewers. Effective animation and color combination in your project attracts the viewer and gives them a sense of your project in the real world.
Recommended Articles
This is a guide to Color Correction in After Effects. Here we discuss Steps for Color Correction in Adobe After Effect and giving perfect Color Balance to our Object. You can also go through our other related articles to learn more –
