Updated August 28, 2023

Introduction to Color Grading in After Effects
In this article, we will see an outline of Color Grading in After Effects. When we shoot in a bad light or a dull background we can create good color grading in graphic applications, whatever light we use in production we can give more effect in post-production with the help of color corrections. Color grading is the most important thing in VFX, most of the graphics company’s core business is color correction only because in every video and cinema color grading became a common thing. Nowadays we have a lot of applications for color correction but working on professional software After Effects is different that can perform well for the color correction and we can expect a perfect output.
Types of Color Grading in After Effects
There are a lot of types in color grading with the below steps we can perform various color correction in our image.
Type #1
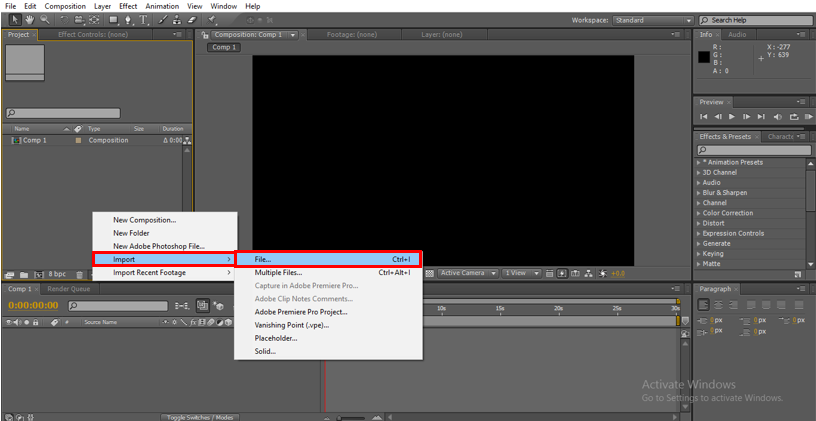
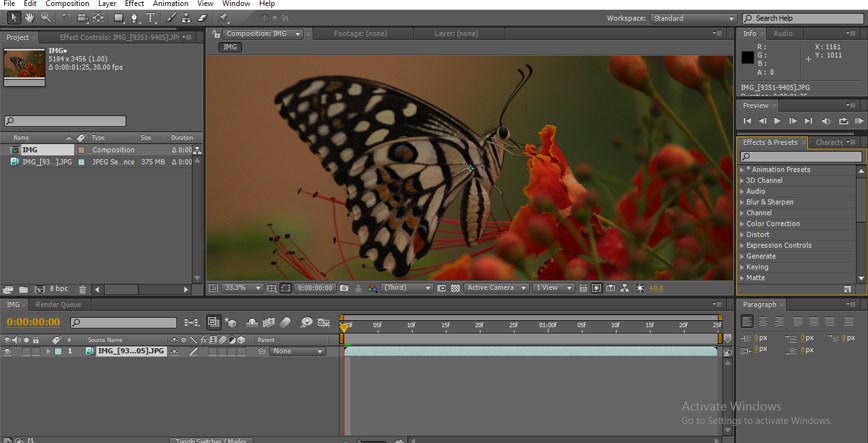
Step 1: Start a new project and import a video or an image file that we like to change the color grading.
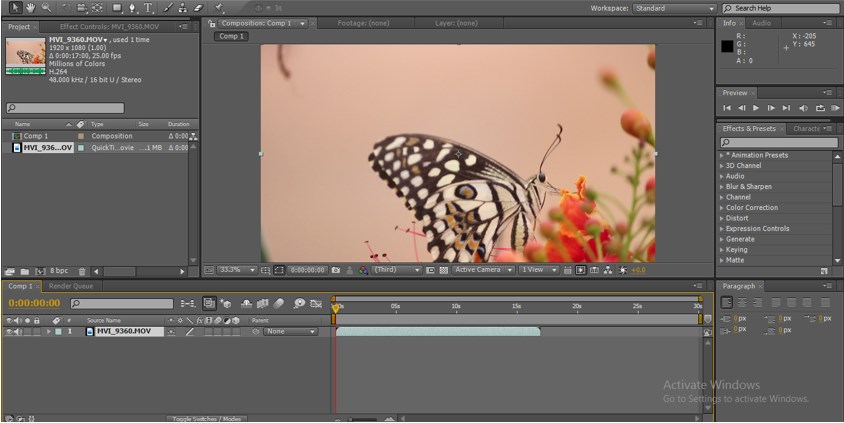
Step 2: I imported a video file.
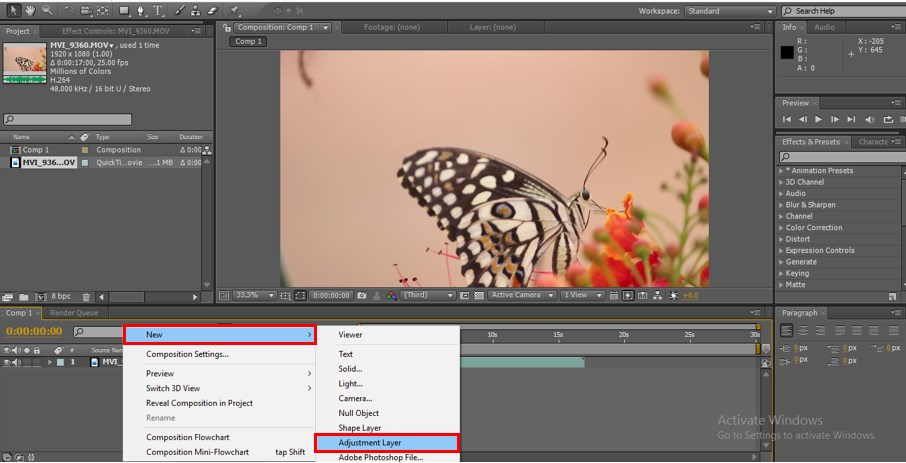
Step 3: Now we need to add an adjustment layer.
- Why do we need to use an adjustment layer?
- With the help of the adjustment layer, we can apply, edit and remove the effects without affecting the original layer, it’s one of the useful and powerful tools in motion graphics.
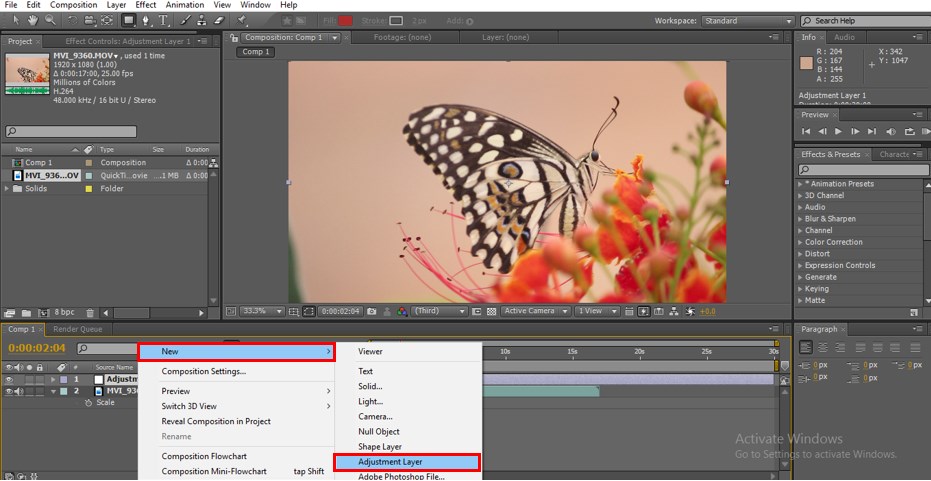
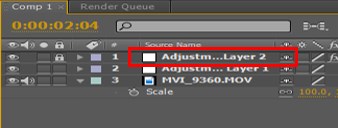
Step 4: Add another adjustment layer.
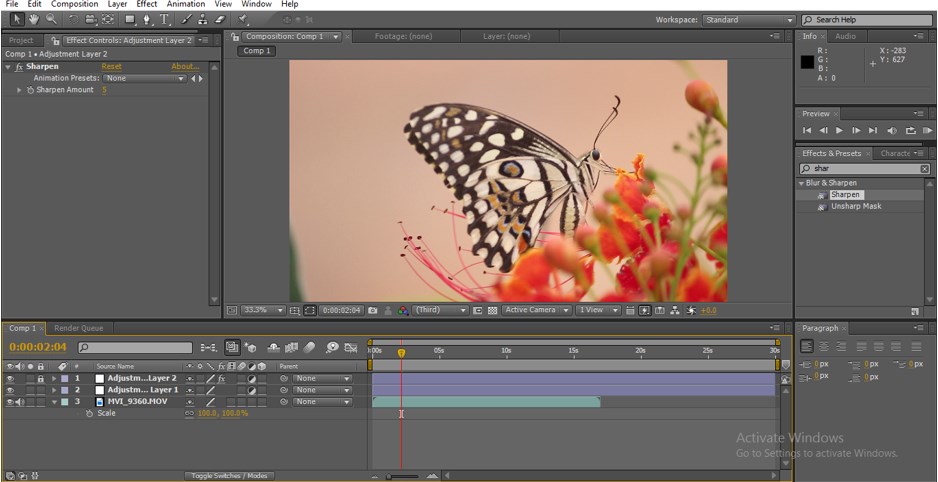
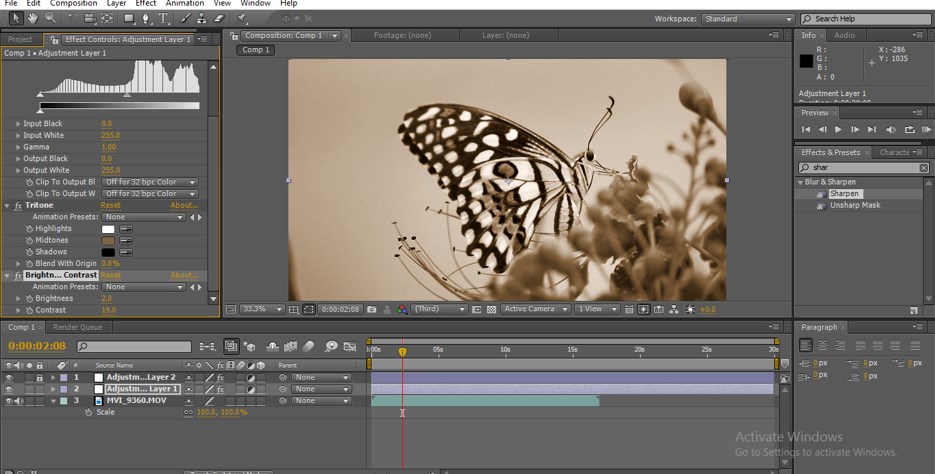
Step 5: Go to effects and presets and select sharpen effect then apply to adjustment layer 2.
Step 6: Change the sharpen amount to 5.
Step 7: And lock the adjustment Layer 2
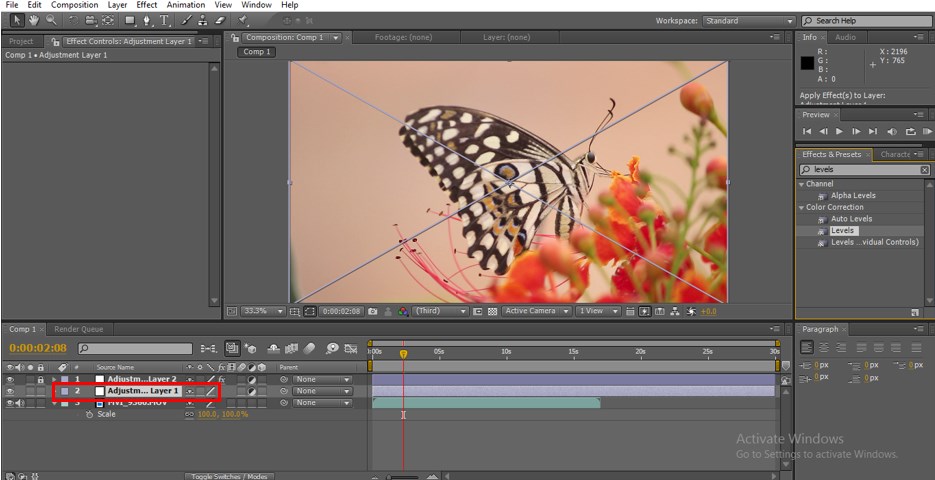
Step 8: Go to effects and present select levels then add to adjustment layer 1.
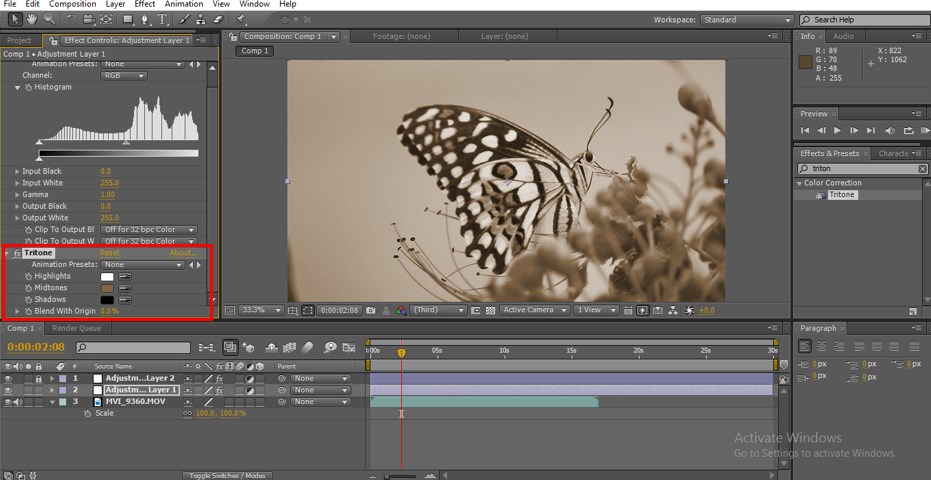
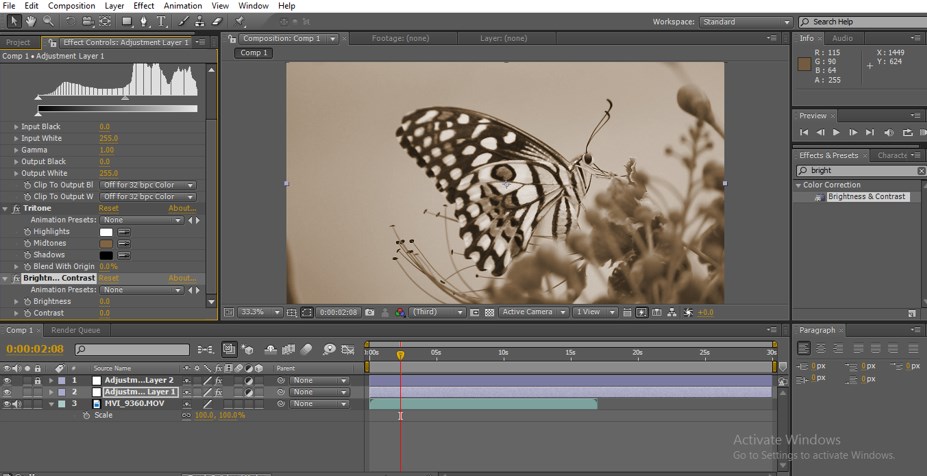
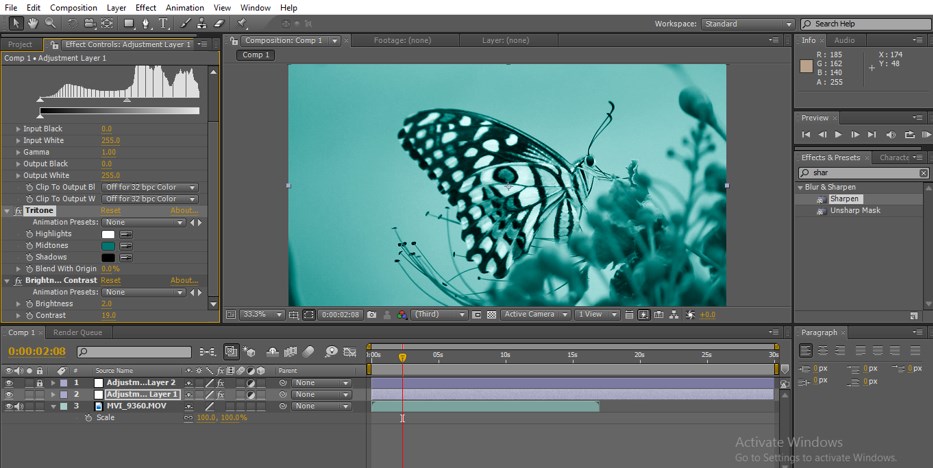
Step 9: Add the triton effect to the same layer.
- Once we apply this affect the tone of the particle changed as grayscale.
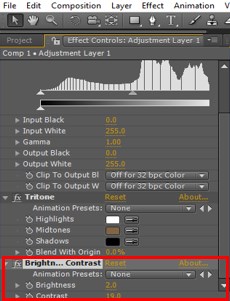
Step 10: Add brightness and contrast to the adjustment layer.
Step 11: Now let’s expand the values of brightness and contrast. Brightness 2, Contrast 19.
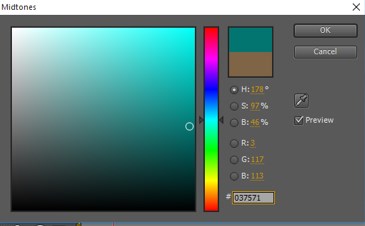
Step 12: Expand the values of Tritone and let us change the values of Midtones. Change the midtones fill color value to 037571.
- We can find the color change in the visual.
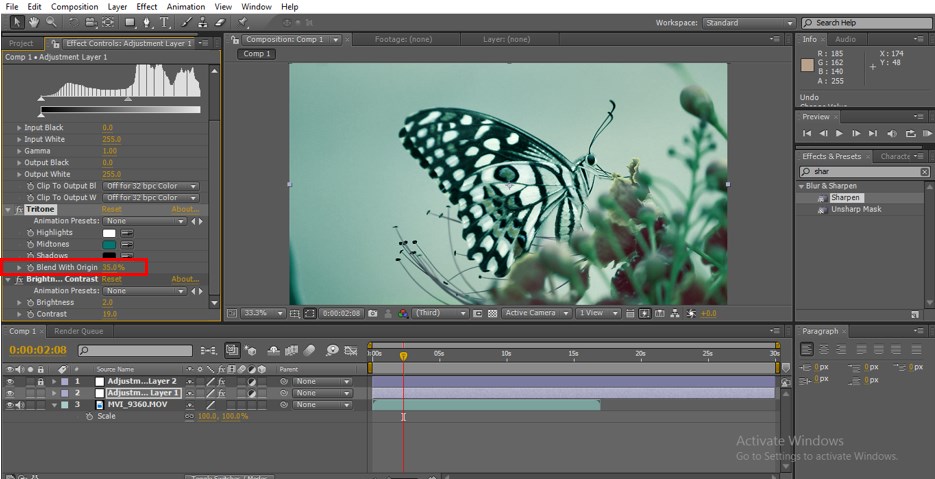
Step 13: Change the blend value to 35.
- Once we change the value of the blend we can find the colors changed.
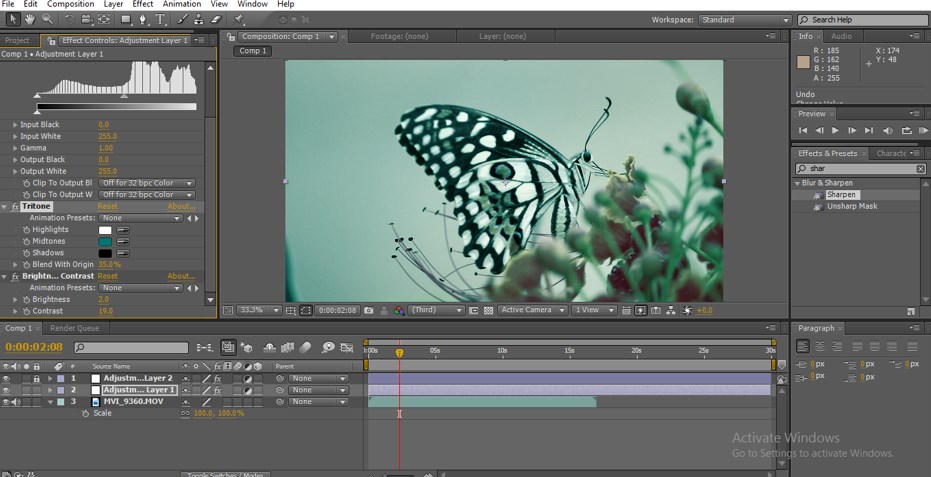
Step 14: Now expand the values of levels. Input black 24, Gamma 1.10.
Step 15: Here we go, now we can find the final color changed visually we can see a lot of difference from the original image.
- We can see the difference from the original image the sharpness, color, etc changed completely, after making color grading we can see the picture clarity very nice and clear. This is one type of color grading.
Types #2
Let’s see some other types of grading.
Step 1: Import an image or a video according to your requirements.
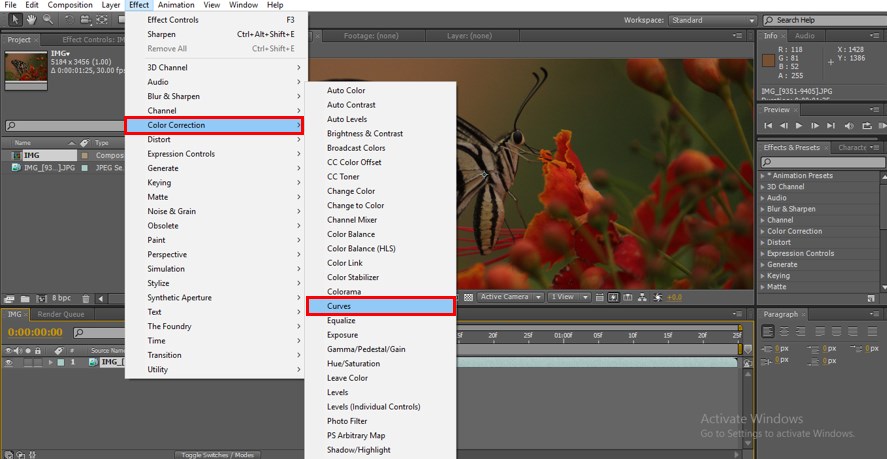
Step 2: We go with curves first. So click on Effects, Color Correction, Curves.
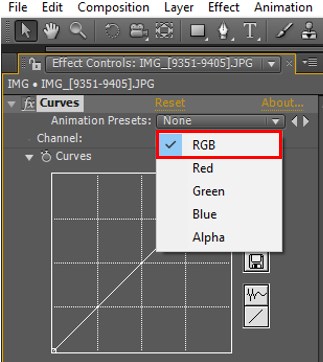
Step 3: Once we select the curves we can get color adjustment options. In that, we have 5 channels like RGB, Red, Green, Blue, and Alpha. We need to expand each channel to get good output.
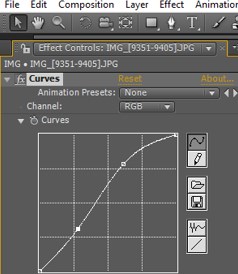
Step 4: Let’s start with RGB, we need to fix a point and need to move to curve and if needed we can add another point and make the curve adjustment.
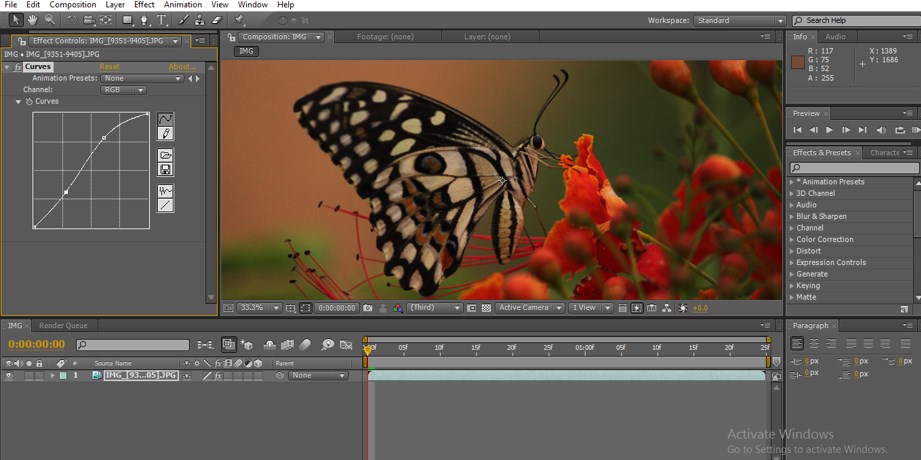
Step 5: Here we can find two points, after adjusting the curves we can find the difference in the visual.
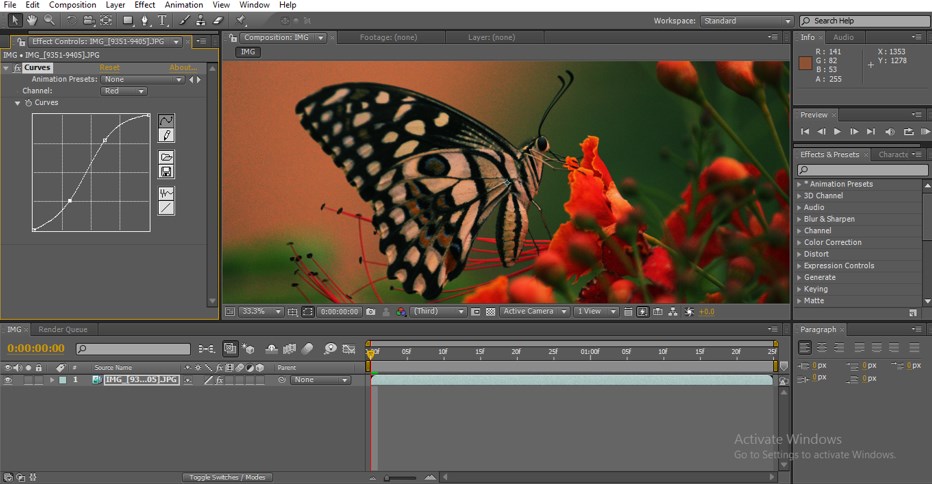
Step 6: I have adjusted Red color in the image.
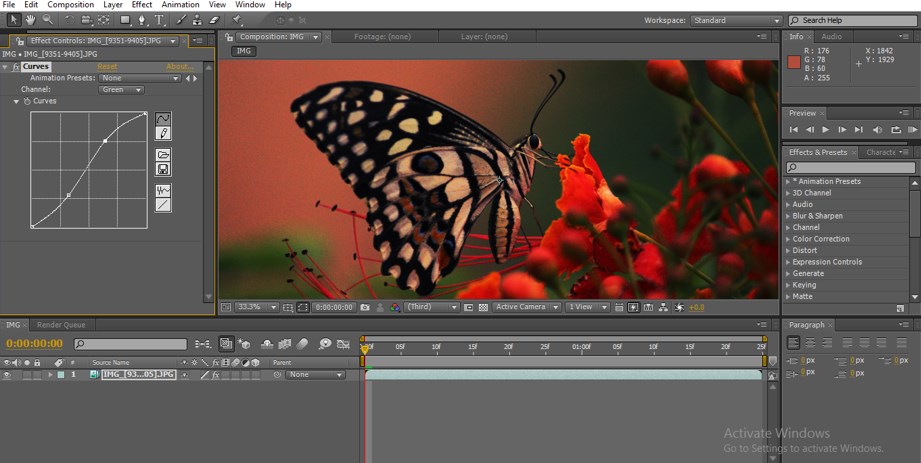
Step 7: Now we will adjust the green color here.
- We need to be very careful while adjusting if we drag little far the color will change too badly.
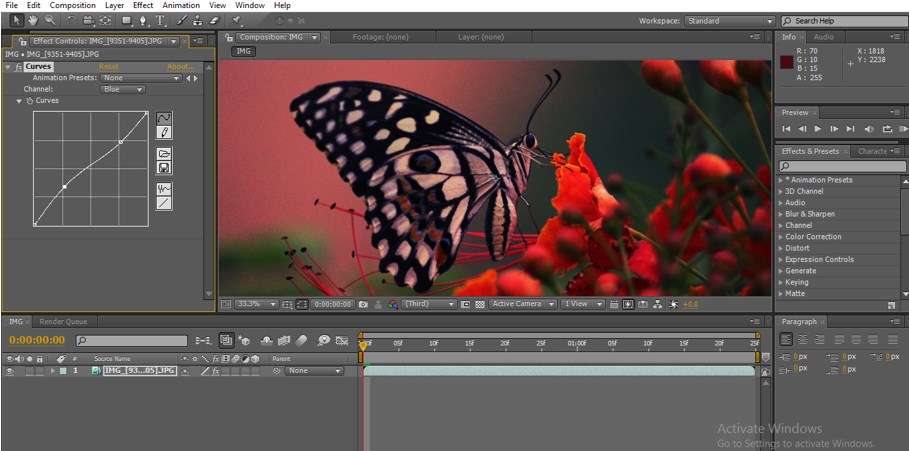
Step 8: Now let’s adjust the blue color.
- We now need to adjust the alpha in this process.
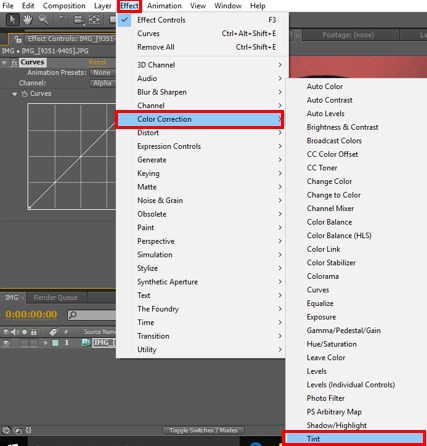
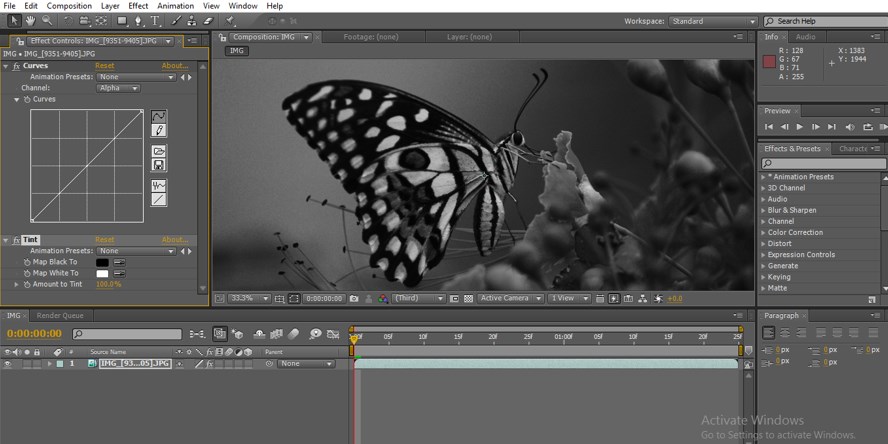
Step 9: Let’s work with Tint now. Go to Effects, Color Correction, select Tint.
Step 10: Once we apply tint the visual will become black and white because the amount of tint is 100.
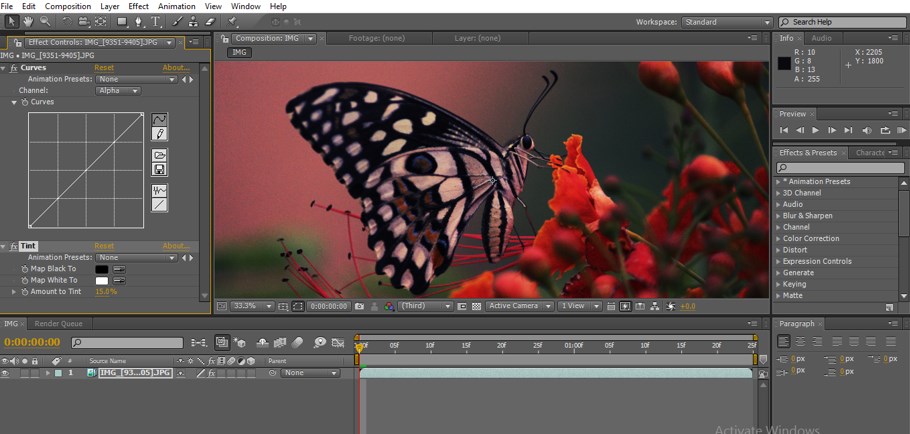
Step 11: Adjust the value of tint amount to 15, we can change according to our requirement.
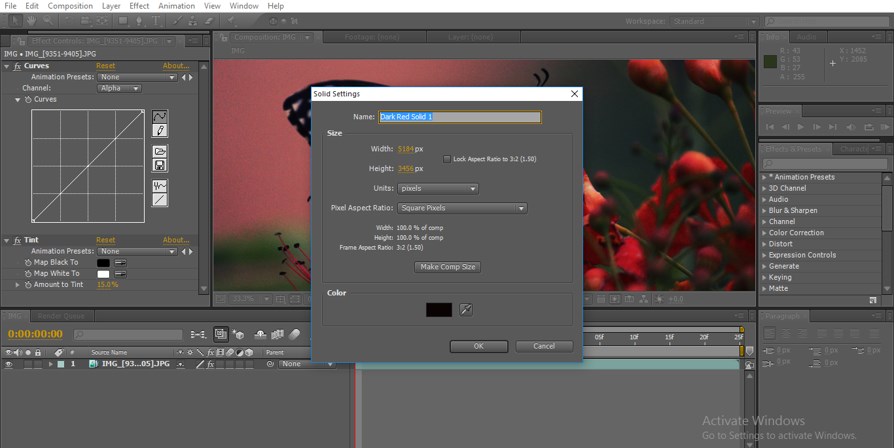
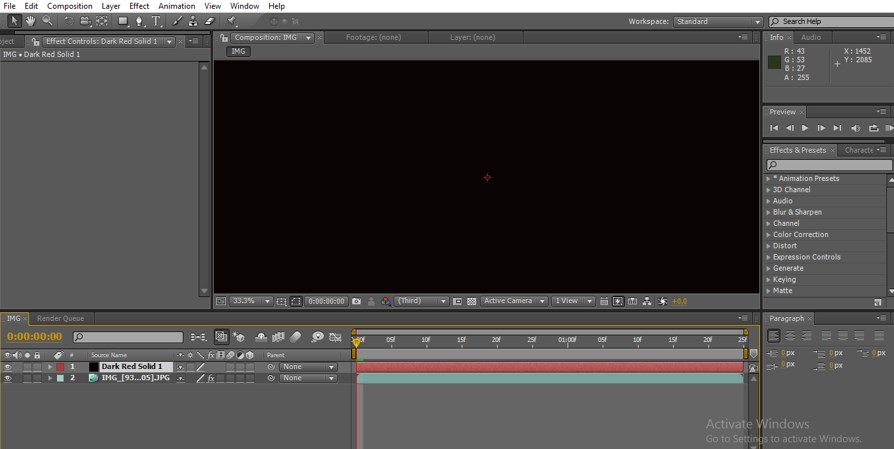
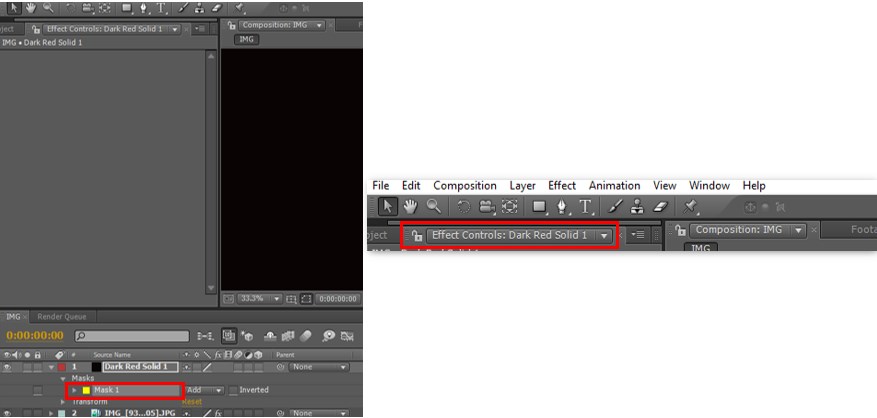
Step 12: Create a new black solid layer.
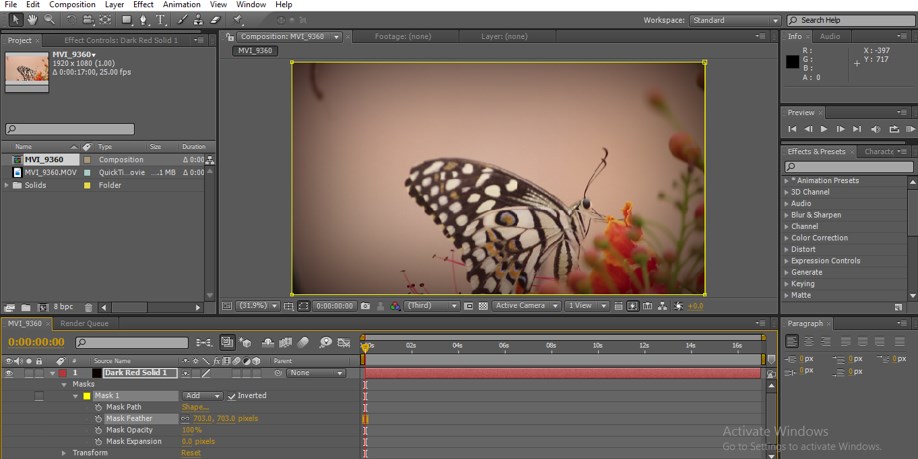
Step 13: Add a mask to the solid layer.
- Once we apply the mask just increase the mask feather level and decrease the opacity of the mask, active the inverted option by that we can see that mask will appear in the edges of the visual, it gives us a cinematic look for a normal video also. Not only black we can use different masks with different colors to create the atmosphere and mood for the visual.
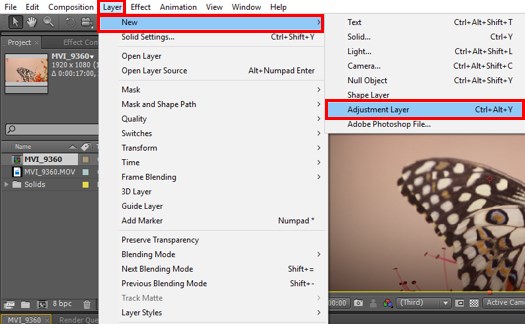
Step 14: Now, click on New and select the Adjustment Layer.
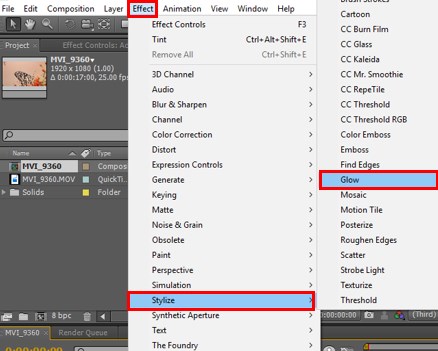
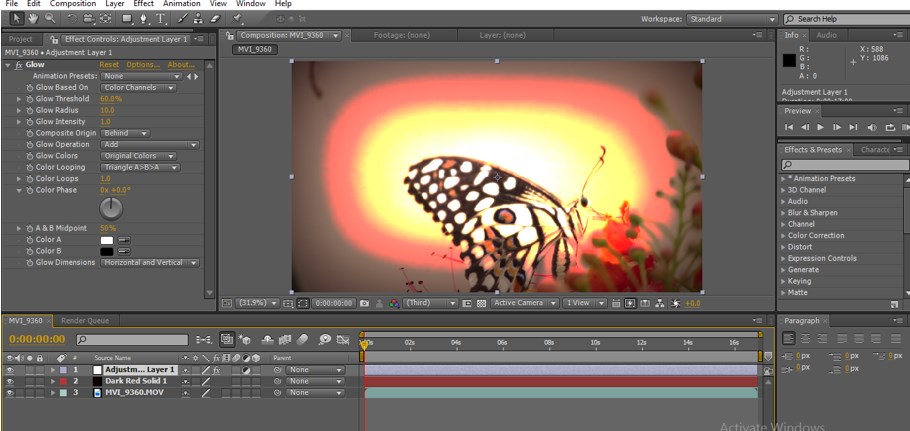
Step 15: Go to Effects, under Stylize select Glow.
Step 16: Once we apply the glow effect the visual will be like shown in the below image.
- We need to expand the configuration values to make the visual good.
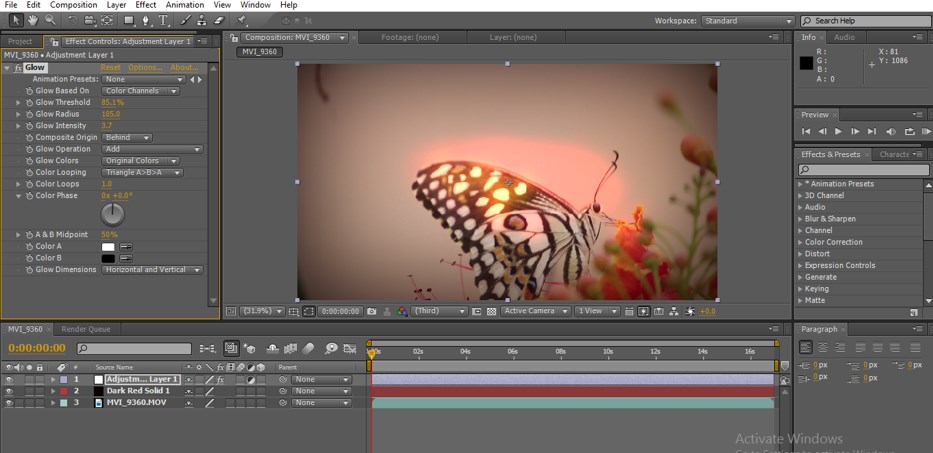
Step 17: Now expand the values of glow. Glow threshold 85.1, Glow radius 105, Glow intensity 3.7, Composite origin is behind. These values are used for my requirement while working for another project we can change according to the requirements.
Step 18: Here we go it’s the power of color gradient, if we observe in the visual we can find that something glow behind the butterfly, it looks just like sunshine behind the butterfly.
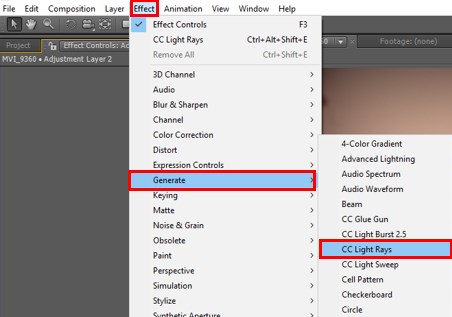
Step 19: Now add some light ray to make the visuals look more creative, light rays give more effect to the color correction, by applying the light rays we can change the original color to new different color.
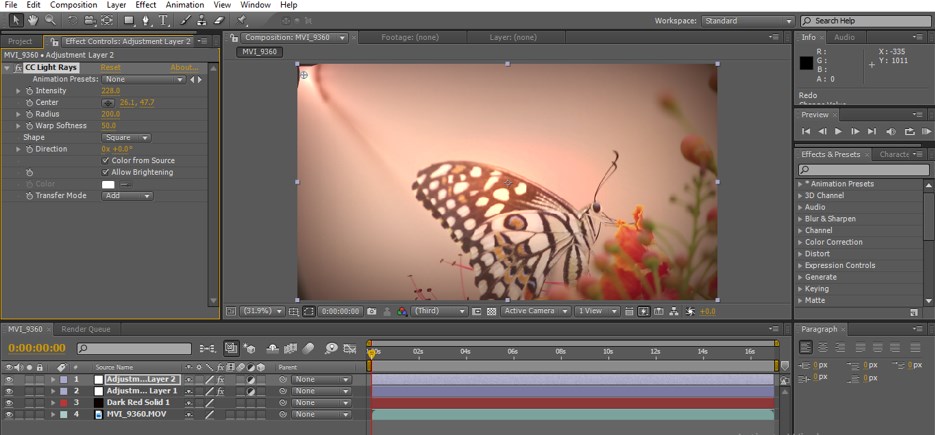
Step 20: After importing the CC Light Rays I fix it in the left side up corner by that, we can see how the background changed.
- Once we apply the light it will change the grade of the color around the light and give a good look to the background.
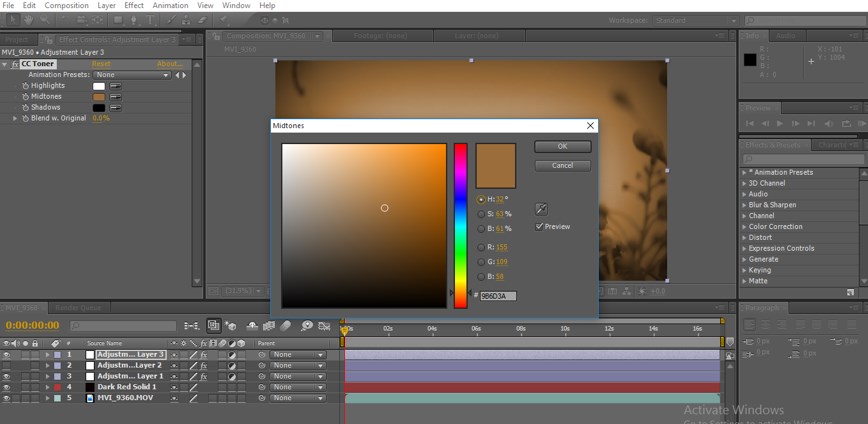
Step 21: Now let’s see the main important option in color grading that’s is CC Toner. Go to Effects, Color Correction, CC Toner.
Step 22: In CC Toner Configure Menu we have three main options. Highlights, Midtones, Shadows. Highlights and shadows are constant and change the color of Midtones.
Step 23: After applying we can see the visual like cinematic, let’s see the difference.
- We can see a lot of difference before and after, we need to spend a lot of time to get good output.
Conclusion – Color Grading in After Effects
Here we saw a couple of approaches towards color grading using After Effects and in this process, we also saw how to change the colors to the visuals, and how to correct the colors, we import a video and we did multi experiments to apply color gradings. I hope we had a creative discussion.
Recommended Articles
This is a guide to Color Grading in After Effects. Here we discuss how to make color corrections, how to use the adjustment layer, and Types of color corrections. You may also look at the following article to learn more –
