Updated July 3, 2023

Introduction to CorelDRAW Tools
CorelDRAW, developed by the Ottawa-based software company Corel, is a powerful vector-based graphics and drawing program. Unlike bitmapped programs like Adobe Photoshop, which produce images as a bitmap, CorelDRAW utilizes vector graphics containing mathematical curves.
When using CorelDRAW tools on the drawing page, you can sketch objects and structures and manage their appearance on the screen with the help of available mathematical formulas. CorelDRAW users can create graphic image files, including logos, motifs, signs, etc.
Tool Bar
Different Tools In CorelDRAW
The below tools are important in CorelDRAW to enhance the graphics design experience.
1. Pick Tool
The Pick Tool allows the user to select and transform objects. It also helps users to reposition, resize, rotate, and skew objects.
2. Shape Tool
The Shape Tool comes in handy to edit and manipulate the angles and outlines of selected objects. The two most popular brushes in the shape tool are as follows:
- Smudge Brush: The Smudge Brush creates artistic effects by dragging the brush along the image to smudge. It also distorts the picture and creates engaging and dynamic textures along shorelines.
- Roughen Brush: The Roughen Brush adds organic and hand-drawn elements to the drawing. It changes and distorts the outline shape of the sketch, giving it an overall roughened appearance. The brush strokes can create engaging textures, particularly along shorelines.
3. Free Transform Tools
The Free Transform Tools manipulate image objects by rotating them freely or up to a specific angle, resizing them according to a particular dimension, or even bending the structure as per requirement.
4. Crop Tool
The Crop Tool allows the user to clip out unwanted regions of an image precisely. This tool is useful for focusing on important details or composition of the drawing by selecting the necessary area and discarding the rest.
The Crop Tool further classifies itself into the following tools useful to modify any object.
- Virtual Segment Delete: The Virtual Segment Delete Tool comes in use to selectively remove unnecessary parts of intersecting objects in a drawing.
- Erase: The Erase Tool removes specific areas or objects from an image. By creating an outline around the unwanted portions, the user can easily eliminate unwanted elements and refine the designs with accuracy.
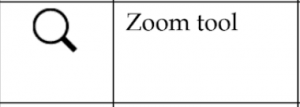
5. Zoom Tool
The Zoom Tool adjusts the level of magnification with the help of the hand tool in the illustration window to analyze objects more closely.
- Hand: The Hand Tool allows users to move around the canvas, especially with zoomed-in views. This tool provides smooth navigation to maintain a balanced composition without affecting the original design of the images.
6. Curve Tools
Curve Tools allow the user to create and manipulate the angles and dimensions of an image. The most common Curve Tools in CorelDRAW are explained as follows:
- Freehand Tool: The Freehand Tool creates sketch curves and lines using a mouse or a similar input device. This tool creates hand-drawn or organic shapes through freehand sketching.
- Bezier: The Bezier Tool allows the user to draw curves that consist of a single line segment per point. This tool creates smooth and accurate curves for intricate shapes and paths. This process is possible by placing the points and adjusting their control handles accordingly.
- Pen: The Pen Tool is useful for sketching complex curves by placing nodes and changing their positions accordingly.
- Three-Point Curve: The Three-Point Curve includes the start, end, and center points. This tool manipulates these three points to draw a curve with precise measurements.
- Poly-line: The Poly-line Tool sketches connected lines and curves in a preview mode to quickly create a series of interconnected segments. This tool allows adjusting and modifying the shape as and when necessary.
- Dimension: The Dimension Tool helps draw horizontal, vertical, oblique, and angular lines accurately. This tool can create technical graphics, architectural plans, or any layout that needs exact measurements and annotations.
- Interactive Connector: The Interactive Connector Tool connects two objects with a line to create flowcharts and diagrams with clear visual connections between elements.
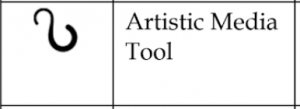
7. Artistic Media Tool
The Artistic Media Tool provides various creative tools like the sprayer, brush, calligraphic, preset, and pressure tools. These tools apply creative effects and add intense brush strokes to the designs for a unique look.
8. Rectangle Tool
The Rectangle Tool creates squares, rectangles, and precise geometric shapes for boxes, frames, or any design element needing straight sides and angles. To draw a more accurate rectangle, the following tool can be useful:
- Three-Point Rectangle: The Three-Point Rectangle Tool creates rectangles by setting three points, i.e., the starting point, width, and height. This tool arranges boxes and creates terms from one point to another.
9. Ellipse Tool
The Ellipse Tool creates perfect circles and ellipses. It drags the tool on the canvas and adjusts the width and height to create symmetrical and proportional shapes. The user must hold down SHIFT to maintain the aspect ratio.
10. Polygon Tool
The Polygon Tool sketches symmetric polygons, including triangles, squares, pentagons, hexagons, stars, and more. The user must specify the number of sides and adjust the radius to create precise and symmetrical polygons.
The Polygon Tool can create two types of stars, as explained below:
- Star: The Star Tool specifically draws various stars, including traditional five-pointed stars and customized stars with different points. Adjusting the inner and outer radius allows the user to control the size and proportions of the stars.
- Complex Star: The Complex Star Tool develops according to the powers of the Star Tool. This tool creates stars with intersecting angles and difficult shapes by adjusting the inner and outer radius, the number of points, and the depth of the indentations.
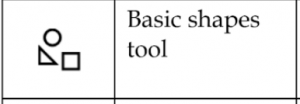
11. Basic Shapes Tool
The Basic Shapes Tool has various pre-defined shapes, including a right-angle triangle, smiley face, hexagram, and more to draw arrows, slanted rectangles, and flowcharts. The Basic Shapes Tool comprises the following options to draw different types of shapes:
- Arrow Shapes: With the Basic Shapes Tool, the user can easily draw arrows of various shapes and styles, including arrowheads, directional arrows, or specialized arrow designs. The tool can also draw slanted rectangles with flexibility for a diagonal orientation.
- Flowchart Shapes: The Basic Shapes Tool also includes a dedicated set of shapes for creating flowcharts. Flowchart shapes represent methods, decisions, start and end points, and connectors.
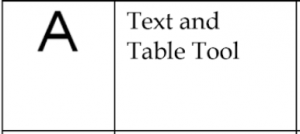
12. Text And Table Tool
The Text Tool creates paragraphs and adds text elements, while the Table Tool simplifies creating and editing tables. It designs tables with rows and columns, allowing users to add, delete, and format cells, adjust row and column sizes, and apply styling options.
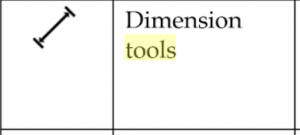
13. Dimension Tools
CorelDRAW offers a variety of dimension tools for accurately drawing lines and annotating the designs with specific measurements. These tools include segment, slanted, horizontal, vertical, and three-point dimensions. The most frequently used Dimension Tools are as follows:
- Horizontal or Vertical: The Horizontal or Vertical dimension tool draws lines that are in horizontal or vertical measurement as per the objects. This tool helps the user explain the objects’ length and height in the drawing.
- 3-Point Callout: The 3-Point Callout Tool adds a callout that focuses on necessary objects. This tool adds labels and annotations to important parts of a drawing for future reference.
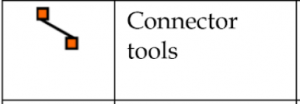
14. Connector Tools
Connector Tools in CorelDRAW create various types of lines and connectors between objects using straight lines, right-angle connectors, edit anchor connectors, and rounded right-angle connectors. These tools establish visual connections and flow between design elements, clearly communicating relationships and sequences. The following tools are most common for drawing in CorelDraw.
- Right-angle Connector: The Right-angle Connector Tool draws a line that intersects two objects at a right angle.
- Edit Anchor: The Edit Anchor Tool modifies the points that connect two or more lines. This tool changes an object’s shape and position per the design’s requirement.
15. Interactive Tools
CorelDraw has different Interactive Tools that can modify objects. They are as follows:
| Interactive Tool | Purpose |
| Interactive Blend |
|
| Interactive Distortion |
|
| Interactive Drop Shadow |
|
| Interactive Fill |
|
| Interactive Mesh |
|
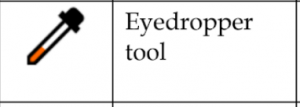
16. Eyedropper Tool
The Eyedropper Tool in CorelDRAW selects and copies object properties such as size, color, line thickness, and other formatting effects. This tool helps achieve consistent styling and formatting throughout the design.
17. Outline Tool
The Outline Tool adjusts the outline properties of objects. By selecting an object and using the Outline Tool, the user can open a fly-out menu that modifies attributes such as outline color, style, and thickness.
18. Fill Tool
The Fill Tool in CorelDRAW creates vibrant and visually engaging designs by applying various fill effects to your objects. The fly-out menu provides options to customize the fill color, gradient, pattern, or texture.
Conclusion
CorelDraw has been a universal design program since its initial release in 1989. It offers various tools for creating and editing images. These tools are valuable for designing newsletters, brochures, and printable documents and creating custom fonts and vector-based designs for various applications.
CorelDraw also supports the cloud-based connection. It allows users to generate page layouts, create QR codes, and apply special effects to their designs. CorelDraw works alongside other programs in the CorelDraw graphics suite, such as Corel photo-paint.
Professionals rely on CorelDraw for designing newsletters, brochures, and printable documents due to its efficient page layout features. The user-friendly interface of CorelDraw has a menu bar that accepts various commands and a taskbar that shows recently used tools.
Frequently Asked Questions (FAQs)
Q1. What is the full form of CMYK in CorelDRAW?
Answer: The acronym CMYK is a general term in printing, graphics, and CorelDRAW. The full-from stands for Cyan, Magenta, Yellow, and Key (Black). CMYK mixes these four ink colors to create a variety of colors similar to the RGB concept.
Q2. What are the two types of images in CorelDRAW?
Answer: Images in CorelDraw and the typical digital world are available in two main formats:
- Raster Images (Bitmap Images): Raster images contain a grid of pixels. Here, each pixel contains color information. Raster Images depend on the resolution, i.e., the size and details of the number of pixels. An image appears pixelated (low quality) if the user reduces/increases the size. JPEG, PNG, GIF, and BMP are common raster image file formats.
- Vector Images: Vector images use mathematical formulas to create geometric shapes, lines, and curves. Unlike raster images, vectors are resolution-independent. It means the change in their size will not affect the quality of the image. Vector images include objects that are easy to edit, such as points, lines, and shapes. Common vector image file formats include AI, EPS, SVG, and PDF.
Q3. What is CorelDRAW file format?
Answer: The file format of CorelDRAW is CDR (CorelDRAW Drawing). The CDR file format saves the vector data for any future editing. CDR supports other formats like PDF (Portable Document Format ), AI (Adobe Illustrator), EPS (Encapsulated PostScript), SVG (Scalable Vector Graphic), DVF (AutoCAD), etc.
Recommended Articles
This has been a guide to CorelDraw Tools; Here, we have discussed the tools available in CorelDRAW, with the help of which you can create logos, motifs, signs, etc. You may also look at the following article to learn more –


