Introduction to CorelDRAW vector
In this article, we are going to learn how to perform vector illustration in CorelDraw. Vector art consists of shape, lines, and points, and the main benefit of it versus the raster image is that it can scale without loss in quality. The quality factor is important if the art will be used for printing purposes. Mostly icons and logos are created for the web in vector format so they can scale up or down depending on the screen resolution. Common vector formats are cdr, svg, pdf, eps, ai. Vector illustration is used to create logos, drawings, banners, t-shirt designs, stationery, brochures, and much more.
Steps of CorelDRAW vector
Here are the following steps mention below
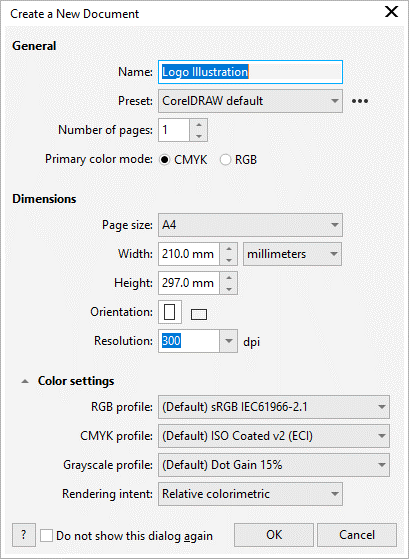
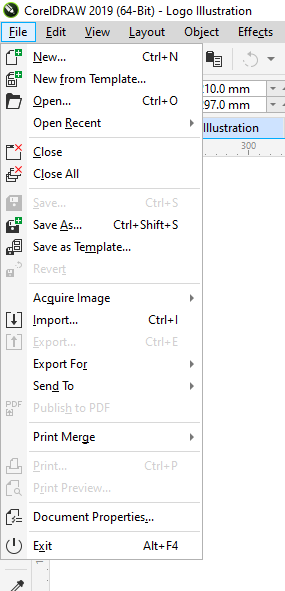
Step 1: Let’s start by creating a new document from the file menu or press Ctrl + N and give it a name and keep the rest of the settings to their default values.
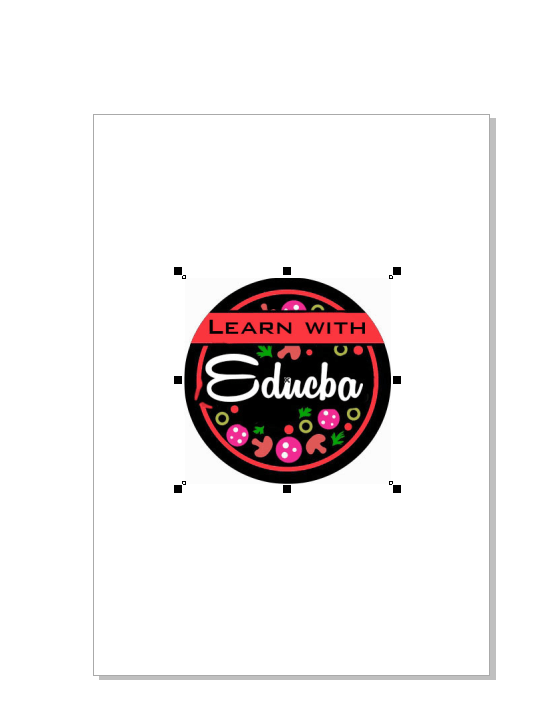
Step 2: Then import the logo image from the file menu or press Ctrl + I, or simply drag it from the explorer into CorelDRAW.
Step 3: As we can see, the logo image is a bitmap rgb with a resolution of 72 dpi, and this is not good if you want to create a large banner for printing.
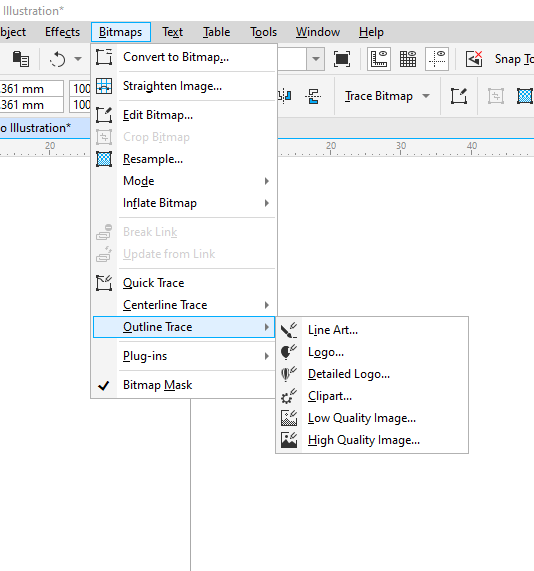
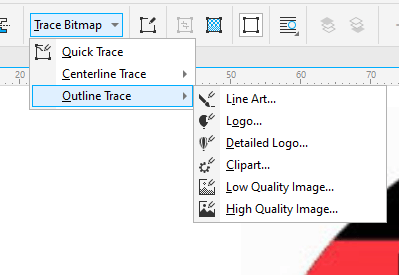
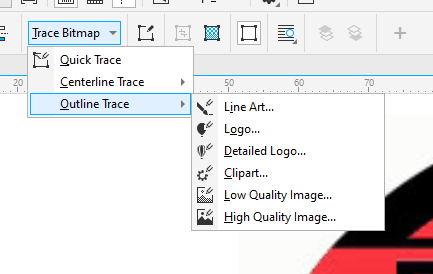
Step 4: We can approach this in multiple ways. The first way is to go in the Bitmaps menu and then in Outline Trace and then select the type of tracing you want to do.
Step 5: You can access the same options from the toolbar. There is also an option for quick trace, which will do the tracing based on the last settings or a preset. This is configured in the options.
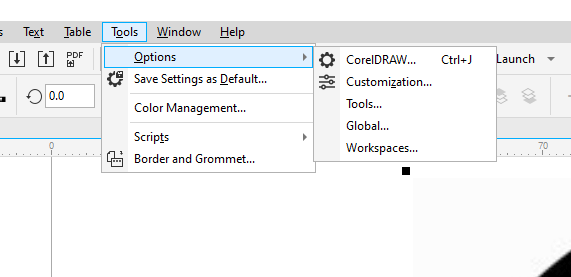
Step 6: In the options, menu go to CorelDRAW or press Ctrl + J
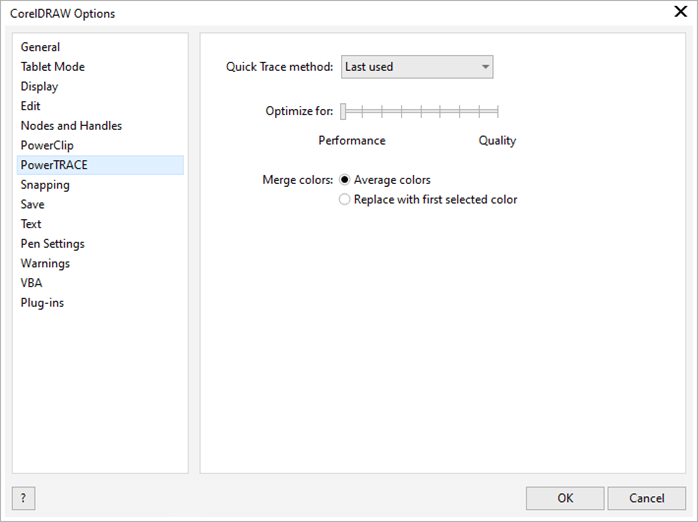
Step 7: In the PowerTRACE options, you can select the quick trace method, optimize for performance or quality, and also the option to merge colors.
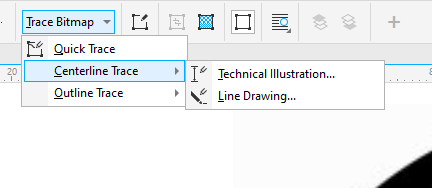
Step 8: Some other options to trace in Centerline Trace are Technical Illustrations which trace black and white illustrations with thin faint lines, or Line Drawings which also trace black and white sketches with black thick permanent lines.
Step 9: Let’s pick a logo to get started from the trace bitmap.
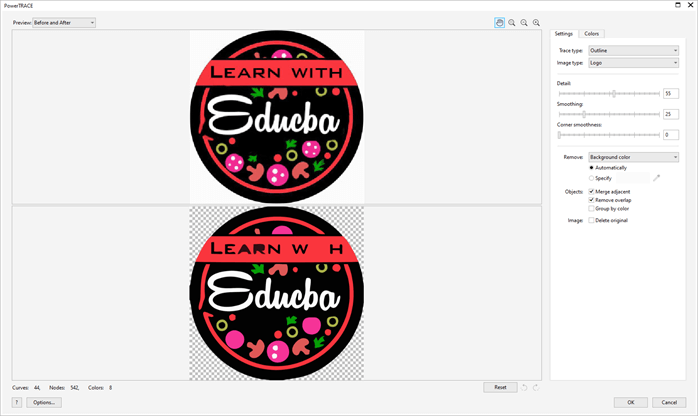
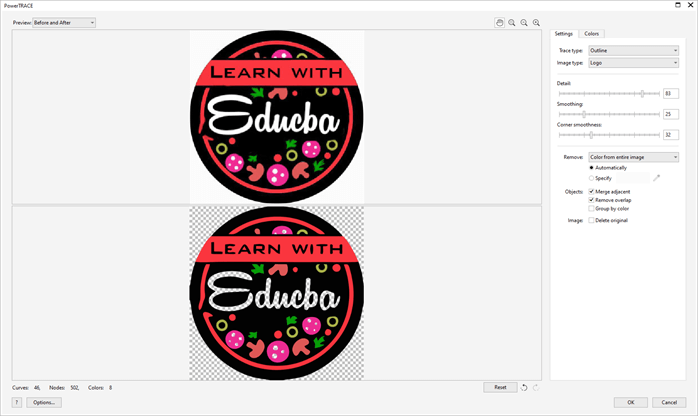
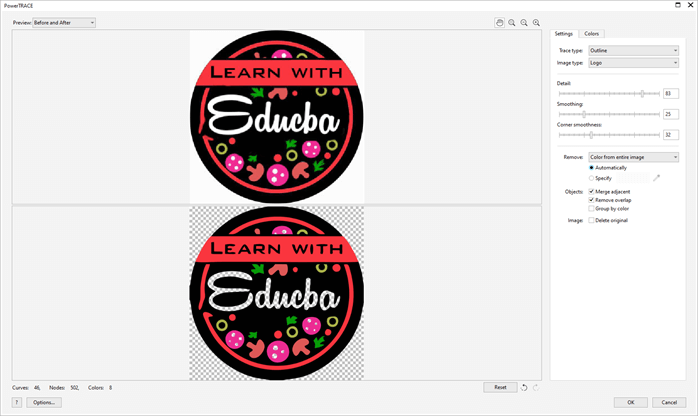
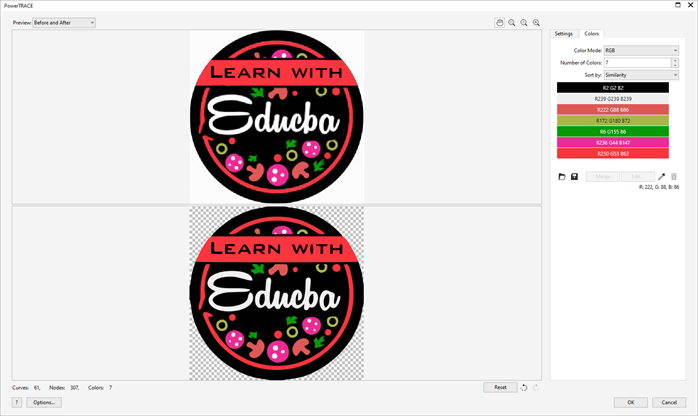
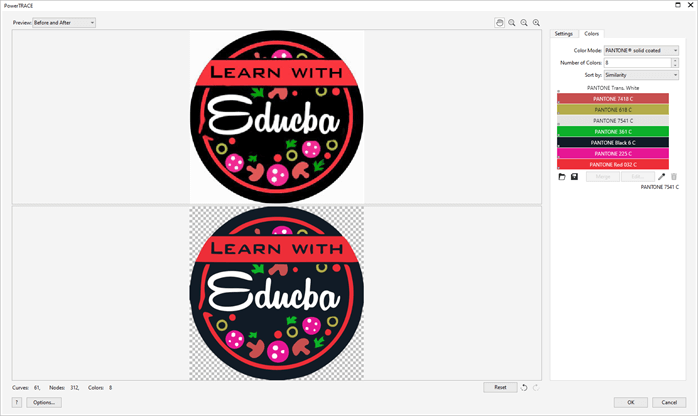
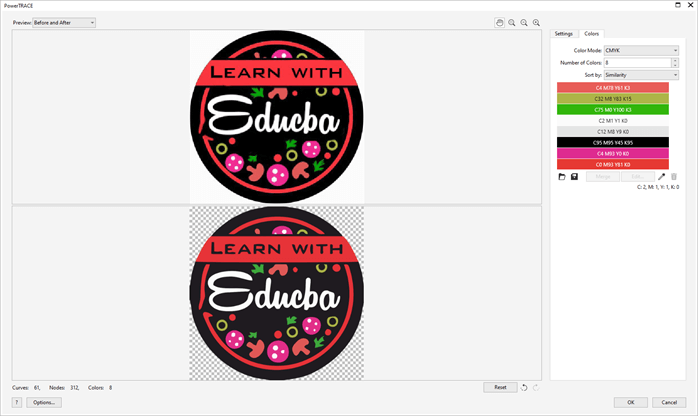
Step 10: As shown at the top is the bitmap image and at the bottom is our vector illustration. On the right side, there are some trace controls to make it look great.
Step 11: Let’s start with the details; as we increase the details, we can see all the pepperoni parts from the image in the illustration. Next is the smoothing option, which we do not need in this case as it will smooth out the jagged edges from the scan, and in this illustration, the edges are smooth.
Step 12: Next, we will increase the corner smoothness to make the text appear a bit smoother. Then there is an option to remove the background and set it to automatically, which guesses the background and removes it as indicated by the checkerboard pattern.
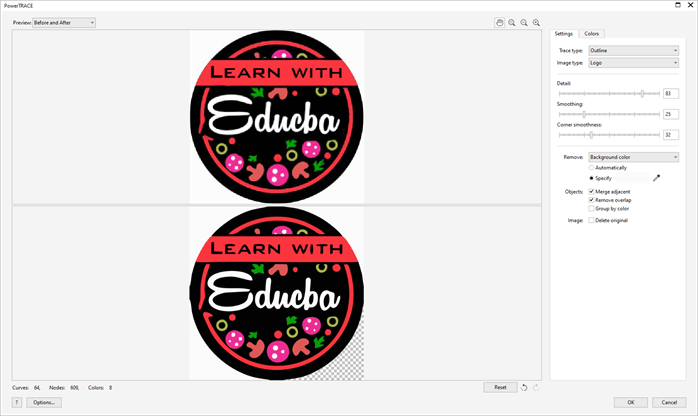
Step 13: If you want to specify manually, select the eyedropper tool and select the part you want to remove.
Step 14: Suppose you have messed up and want to undo kinds of stuff, then there is an option at the bottom right corner to undo. Click it multiple times until you are at the desired state.
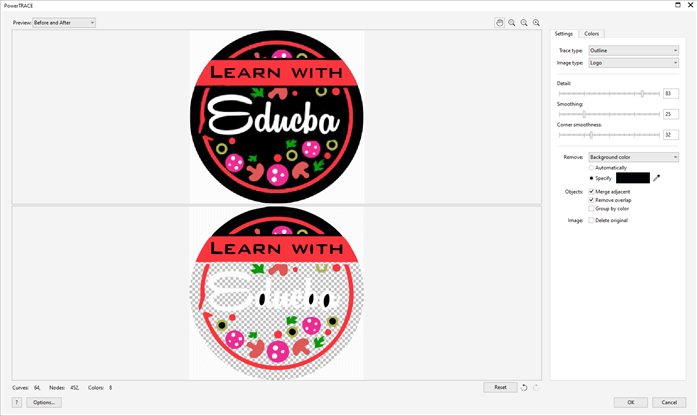
Step 15: Another option is to remove the color from the entire image, which will also delete the color from the text logo, which we do not want.
Step 16: Then there are options to merge adjacent, which will merge the adjusted similar color, e.g. If there are two green very near to each other, then it will be merged.
Step 17: Then there is the option to remove overlap, which we do not want in this case and if you remove overlapping parts, then there is an option to group the color. The last option is to delete the original image, which we do not want.
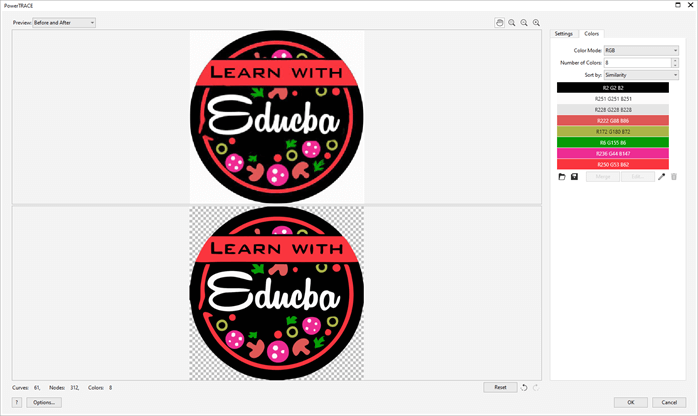
Step 18: Next, the colors tab gives us the entire color palette used in the illustration with the color mode. It also shows how any colors are used.
Step 19: When we select a color, it shows in the preview with the diagonal lines.
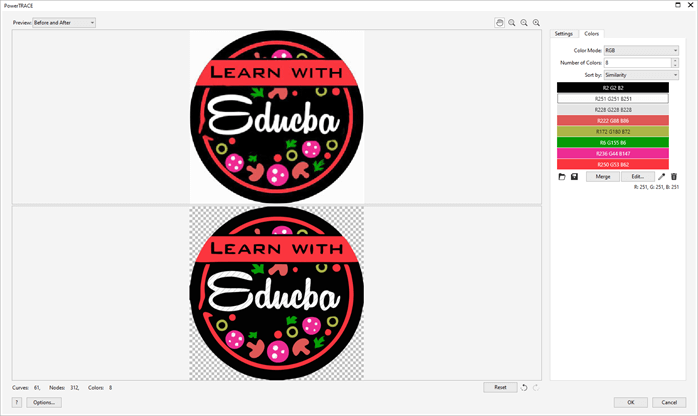
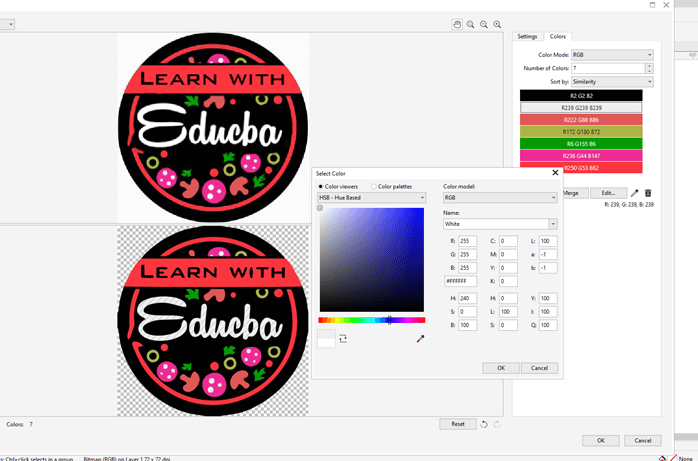
Step 20: A couple of very similar white colours we can select and click merge to reduce the color palette.
Step 21: Then there is the option to edit the color in which we select the white color and make it exact white
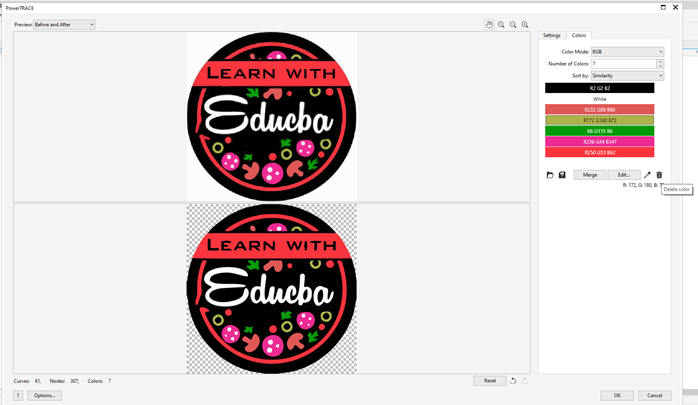
Step 22: Then there is the option to delete the color by clicking on the color you want to delete and then click the trashcan icon.
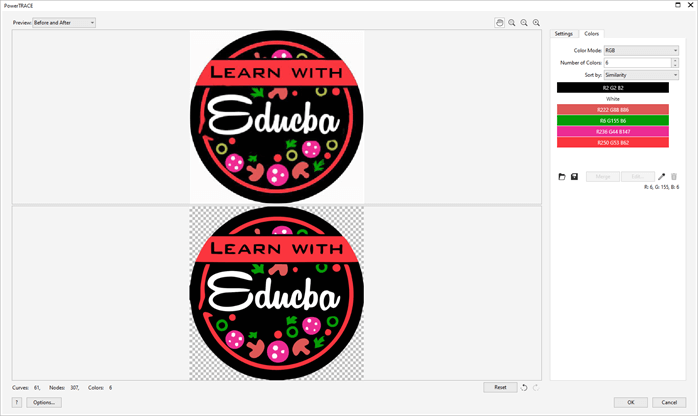
Step 23: As we deleted light green, so it is filled by the nearest green in the palette.
Step 24: Now, let’s change the color mode to Pantone solid coated. So all the colors will be replaced by the palatte in the Pantone color space. Here again, you can edit, merge, and delete colors as you wish.
Step 25: Since we want to print this logo, we will select CMYK colorspace and click OK.
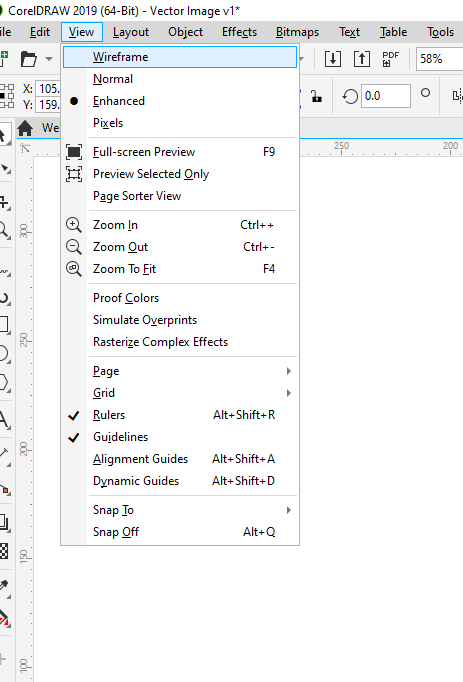
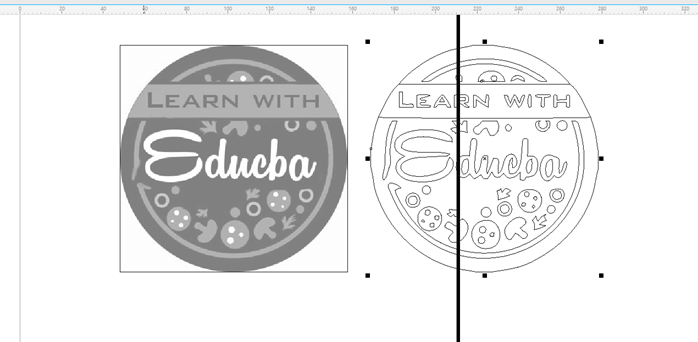
Step 26: Next, we will compare the image with our illustration, so put it on the side and go to view and wireframe.
Step 27: As we can see, it looks pretty good with some minor differences.
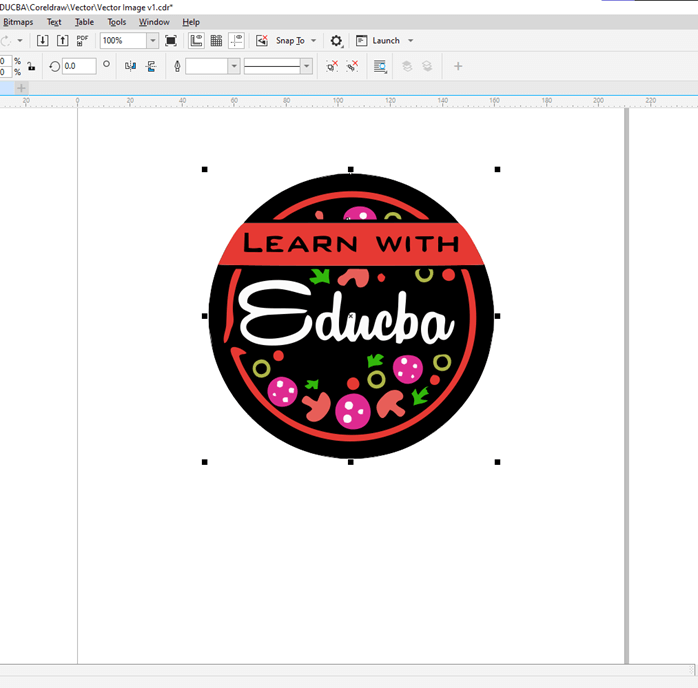
Step 28: Go back to the enhanced view, delete the original image, and center the logo by pressing the P key.
Step 29: First, select the logo and shift double click the rectangle tool. Then use the shape tool and drag the edges to make a circle. Then move it to the bottom of the stack. The last step is to ungroup the trace, delete the black object, and then fill it with black and group it with Ctrl + G.
Conclusion
In this article, we have seen how we can create vector illustrations in CorelDRAW. We have seen how we import a bitmap and use it to create a vector that can scale to any dimension while maintaining the crisp edges and uniform color to the precise detail for any type of applications and requirement.
Recommended Articles
This is a guide to the CorelDRAW vector. Here we discuss how we can create vector illustrations in CorelDRAW and how we import a bitmap. You may also have a look at the following articles to learn more –
