Updated July 5, 2023
What are Date Ranges in Excel?
Date ranges in Excel convert a value to text in a specified format. It also calculates the range within two specified dates. To set date ranges in Excel, we need to format the cell containing a start and end date as ‘date’ and use the operation ‘+’ or ‘-‘ to specify the end date or date range. To create a date range, we may use the following formula with the Text function available on the function toolbar.

Key Highlights
- Date ranges in Excel convert a value to text in a specified format.
- Adding a number to a date can formulate a date change.
- The date sequencing helps in filling the gaps between the two date ranges.
- For calculating the duration or number of days between two dates, we can subtract the two dates using the operation ‘+’ or ‘-’ to specify the end date or date range.
Explanation of Date Ranges
- The date range in Excel helps generalize the dates between two specific dates to get an idea of the modus operandi assigned.
- The text function assists in formulating the date range through cell selection, data sequencing, and operations like + or -. It also uses the ‘IF‘ function toolbar to analyze if the start or the end date is missing.
- Date ranges help notify stakeholders to understand the specific ranges to execute operationally and get an idea of the priorities assigned.
- It also helps check the irregularities between the two dates by speculating the range values.
How to Create Date Ranges in Excel?
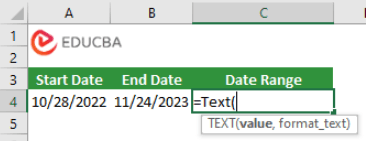
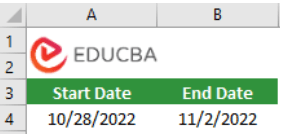
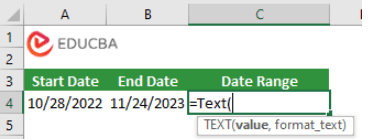
- Let’s take two random cells to include the start and the end date. Also, mention the date range in the corresponding cell. Mention any random date in the cells. For example, the start date is 10/28/2022, and the end is 11/24/2023.
- As mentioned earlier, the text function helps to tabulate the date range. It is available on the function toolbar (fx) with =Text(value, format text). Also, click on the cell below the data range to find the position of the result.
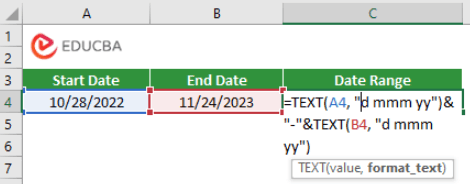
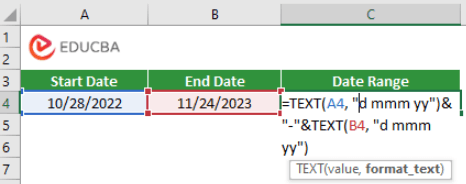
- To create a date range, we may use the following formula with the TEXT function: =TEXT(A4, “d mmm yy”)&”-“&TEXT(B4, “d mmm yy”). Cells A4 and B4 denote the start and the end date.
- Press Enter to see the results.
- It will be shown in the image below.
- The date range denotes the dates from October 2022 to November 2023.
Examples of Date Ranges in Excel
Example #1: Adding a number to the date range
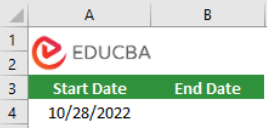
- Cell A2 contains a start date. We want to build a date range by adding a number to this start date.
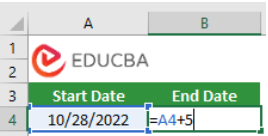
- If we add a number, say 5, to it, we can also build a date range.
- Press enter to see the results. 10/28/2022 changes to 11/2/2022 by doing an operation =A4+5 in cell B4.
- The basic data range changes concerning the cell mentioned by manipulating the cell reference and adding numbers. The operation will act according to the formula used.
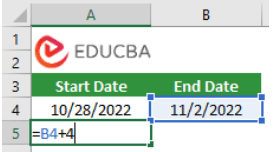
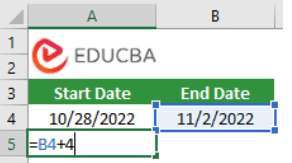
- Adding the number 4 to cell B4 will add the successive date accordingly.
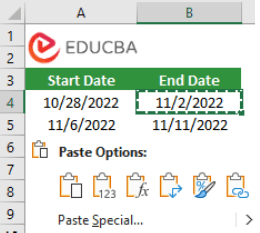
- Also, if you copy cell B4 and paste it on cell B5 will give the same result as the operation between A4 and B4.
Example #2: Building a date sequence
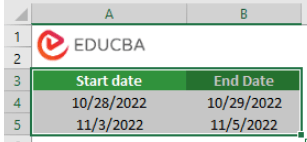
- To create a date sequence, we must fill the start and end dates in at least two rows.
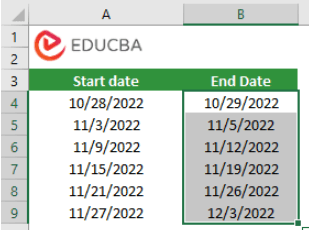
- Then, select these dates and drag down the cursor by clicking on the square mark in the extreme right corner. It will automatically add new dates.
- So we can see that Excel automatically creates date ranges for the subsequent rows by using the date ranges in the first two rows as a template.
Example #3: Date range in a single cell
- Let’s take two random cells to include the start and the end date. Also, mention the date range in the corresponding cell.
- To start with, mention any random date in the cells. For example, the start date is 10/28/2022, and the end is 11/24/2023.
- As mentioned earlier, the text function helps to tabulate the date range. It is available on the function toolbar (fx) with =Text(value, format text).
- To create a date range, we may use the following formula with the TEXT function: =TEXT(A4,”d mmm yy”)&” – “&TEXT(B4,”d mmm yy”). Cells A4 and B4 denote the start and the end date.
- Press Enter to see the results.
- It will be shown in the image below.
- The date range denotes the dates from October 2022 to November 2023.
Things to Remember
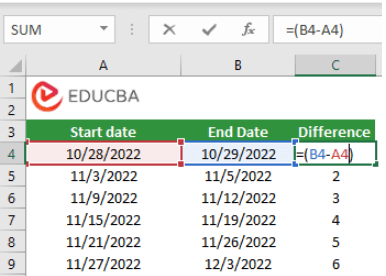
- If we want to know the difference between the dates, use the following operation command by selecting the cells.
- For example: =(B4-A4) in the formula (fx) toolbar.
- Also, you can use the square bar in the right corner to extend the rows. It will automate the difference.
FAQ
Q1. What do you mean by date range in Excel?
Answer: Date ranges in Excel convert a value to text in a specified format. It also calculates the range within two specified dates. To set date ranges in Excel, we need to format the cell containing a start and end date as ‘date’ and use the operation ‘+’ or ‘-‘ to specify the end date or date range.
Q2. What is the formula for calculating the date range?
Answer: You can calculate the date range using the formula =Text(value, format text). You can select the cell and use the formula as shown below:
=TEXT(A2,”d mmm yy”)&” – “&TEXT(B2,”d mmm yy”). The cells A2 and B2 denote the start and the end date
Q3. How to calculate the difference between the two dates?
Answer: You can calculate the difference between the dates by using operations like + or -.
For example: =(B2-A2).
Recommended Articles
This article explains everything about Date Ranges in Excel. To know more, read the following articles:

