Updated May 22, 2023
Introduction to Django REST API
We know that Django provides different types of features to the user; the rest API is one of the features that Django provides. It is usually a compelling framework to build the web-based API per our requirements. It also provides flexibility for implementation. Mainly it offers different types of authentication features to the developer, such as OAuth 1 and OAuth 2. Django also supports serialization so developers can work with ORM and non-ORM data. When we talk about support, it provides good community support to the user.
A REST API is a famous way for frameworks to uncover valuable capacities and information. REST, which represents illustrative state move, can consist of at least one asset that can be gotten to at a given URL and returned in different configurations, such as JSON, pictures, and HTML, and the sky’s the limit from there. In other words, we can say that REST (Representational State Transfer) is standard engineering for building and speaking with web administrations.
It commonly commands assets on the web that are addressed in a text design (like JSON, HTML, or XML) and can be gotten to or changed by a foreordained arrangement of tasks. Considering that we commonly construct REST APIs with HTTP rather than different conventions, these activities compare to HTTP techniques like GET, POST, or PUT. As the name proposes, an API (Application Programming Interface) is a connection point that characterizes the cooperation between various programming parts. Web APIs characterize what solicitations can be made to a part (for instance, an endpoint to get a rundown of shopping basket things), how to make them (for instance, a GET demand), and their normal reactions.
How to Create Django REST API?
Let’s see how we can create a REST API in Django as follows:
First, we need to follow some steps to create the REST API as follows:
In the first step, we need to add the framework.
Then, to initialize the framework into the specified project, we need to open setting.py and add rest_framework as below.
Code:
INSTALLED_APPS = [
  'django.contrib.admin',
  'django.contrib.auth',
  'django.contrib.contenttypes',
  'django.contrib.sessions',
  'django.contrib.messages',
  'django.contrib.staticfiles',
  'rest_framework',
]
Now, next, we need to create an application and model as per our requirement, so To create an application, we can use the following command.
Code:
python manage.py startapp sampleprojectExplanation:
- The above command shows that the sampleproject folder will be registered; after that, we need to add the INSTALLED_APPS and our specified URLs. After executing this command, we see the changes in the setting.py file.
Code:
INSTALLED_APPS = [
  'django.contrib.admin',
  'django.contrib.auth',
  'django.contrib.contenttypes',
  'django.contrib.sessions',
  'django.contrib.messages',
  'django.contrib.staticfiles',
  'rest_framework',
  ' sampleproject ',
]
Now we need to add whatever url we have inside the url file as follows.
Code:
from django.contrib import admin
from django.urls import path, include
  urls= [
   path('admin/', admin.site.urls),
   path('', include("sampleproject.urls"))
]
Explanation:
- In the above code, we can see; that first, we need to import all the required libraries; after that, we need to add the URL pattern with the specified url.
- In the third step, we need to create the model; here, we will create a student model inside the model file.
Code:
from django.db import models
class StudentModel(models.Model):
  studname = models.CharField(max_length = 50)
  description = models.TextField()
def __str__(self):
  return self.studname
Explanation:
- In the above, we created StudentModel as shown; inside the model, we have a studname variable with a specified maximum size.
Now our application is ready for execution, and the time to create a serializer is as follows.
Serializers permit complex information, such as query and model occurrences, to be changed entirely to local Python data types that can be effortlessly delivered into JSON, XML, or other substance types. Serializers likewise give deserialization, permitting parsed information to be changed over once more into complex kinds after approving the approaching information, so add the following code inside the serializer file.
Code:
from rest_framework import serializers
from .models import StudentModel
class studentSer(serializers.HyperlinkedModelSerializer):
   class Meta:
     model = StudentModel
     fields = ('studname', 'class')
Explanation:
- In the above code, first, we import the rest_framework and already created model as shown; after creating the serializer model and inside the model, we define fields as shown.
Now we need to create the view to render the data with the frontend, and it can handle user requests. So inside the view file, we need to add the following code.
Code:
from rest_framework import view
from .serializers import StudentSer
from .models import StudentModel
Class studenview(view.ModelView)
Query = StudentModel.object.all()
Ser_class = StudentSer
Explanation:
- In the above code, we import all the required libraries and create a view to render the data as shown.
The last step is to define the URL for our specified API.
Code:
from django.urls import include, path
from rest_framework import routers
from .views import *
r = routers.DefaultRouter()
r.regi(r'student', StudentView)
or rest_framework
urlpatterns = [
  path('', include(r.urls)),
  path('api-auth/', include('rest_framework.urls'))
Explanation:
- Now we need to run the server and check the API.
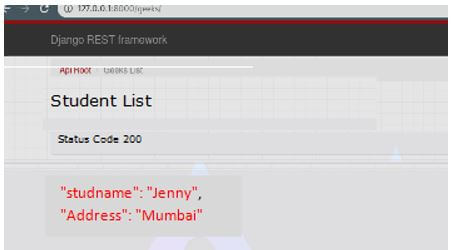
- Now run in the local server; after execution, we can see the result in the screenshot below.
Output:
Django REST Framework
- In the above point, we have already discussed how we can create an API with the Django framework. The Django REST Framework (DRF) is a bundle based on top of Django to make web APIs. One of the most momentous highlights of Django is its Object Relational Mapper (ORM), which works with connection with the data set in a Pythonic way.
- You can make exemplary web applications using Django and open their usefulness to the world through REST APIs. This is quite simple to do! However, the Django REST Framework is more specific for this undertaking, is based on top of plain Django, and simplifies the cycle.
APIView Class
APIView classes are not the same as ordinary View classes in the accompanying ways:
- Demands passed to the controller strategies will be REST structure’s Request occurrences, not Django’s HttpRequest occasions.
- Overseer strategies might return the REST system’s Response rather than Django’s HttpResponse. The view will oversee content discussion and setting the right renderer on the reaction.
- Any APIException special cases will be gotten and intervened into suitable reactions.
- Approaching solicitations will be confirmed, and suitable consent and choke checks will be run before dispatching the solicitation to the controller technique.
Conclusion
With the help of the above article, we saw the Django rest API. From this article, we saw basic things about the Django rest API and the features and examples of the Django rest API, and how we use it in the Django rest API.
Recommended Articles
We hope that this EDUCBA information on “Django REST API” was beneficial to you. You can view EDUCBA’s recommended articles for more information.


