Updated April 14, 2023

Introduction to Docker Repositories
Docker Repositories are used to store or host the same images with multiple tags or versions. It allows us to share container images with different teams, customers, or the Docker community at large. A docker repository is a collection of different Docker images with the same name but has different tags. Tags are like a version of that Docker image, for example, v1, v2, v2.1, etc. If we do not provide any tag to the image while pushing to the repository, it creates an image with the ‘latest’ tag by default. We can keep it private or public. Docker repositories are hosted on the Docker hub.
How do Repositories Work in Docker?
We need to sign into Docker Hub to work with the Docker repository. We can do it with the help of the command-line using the ‘docker login’ command or we can login to Docker Hub directly. We create a Docker repository before pushing the Docker image to it from web console however if we push any new Docker image to the Docker Hub, it automatically creates a new Docker repository for us.
We login to the Docker Hub from the command line using the command shown below: –
$docker login
We need to provide a username and password when prompted. We can also give username and password with the login command however it takes passwords in plain text that is not secure so it is not recommended. We can do this instead:
We use the command ‘docker logout’ to remove the credentials from the host as shown below:
$docker logout
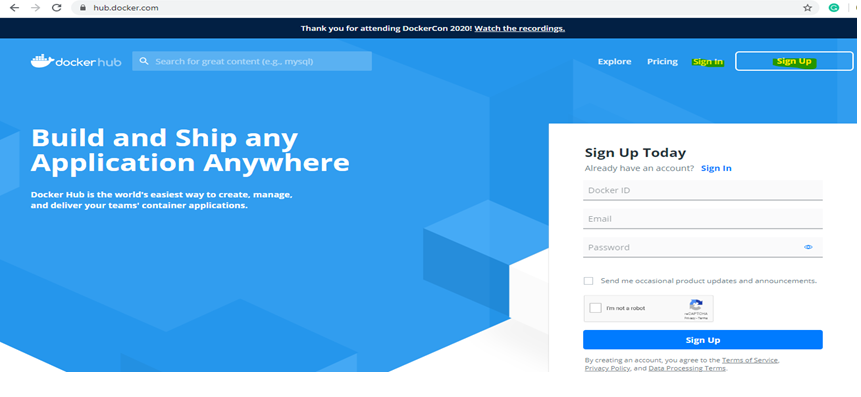
Let’s login to https://hub.docker.com
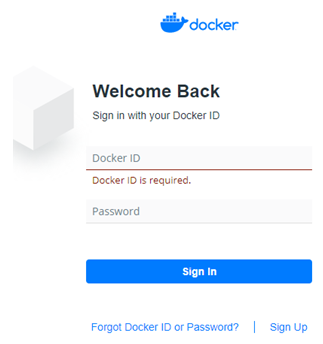
We click on the ‘Sign In’ button if already have Docker ID or else click on the ‘Sign Up’ button or fill the ‘Sign Up Today’ form shown on the same page. Let’s click on the ‘Sign In’ button as already signed up. We get the below page to enter the credentials:
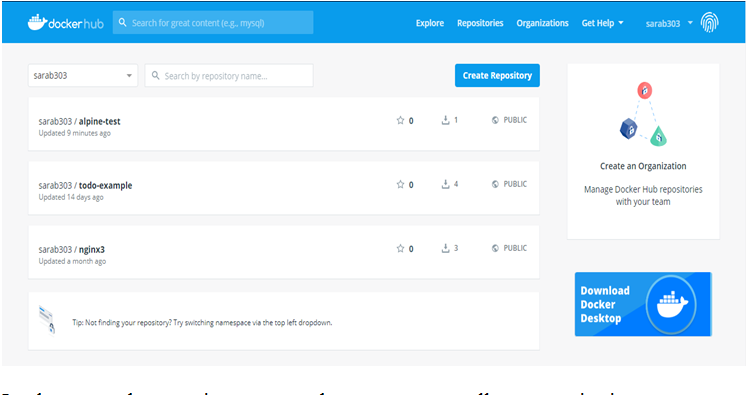
Click on the ‘Sign In’ button to login to the Docker Hub and get below web page: –
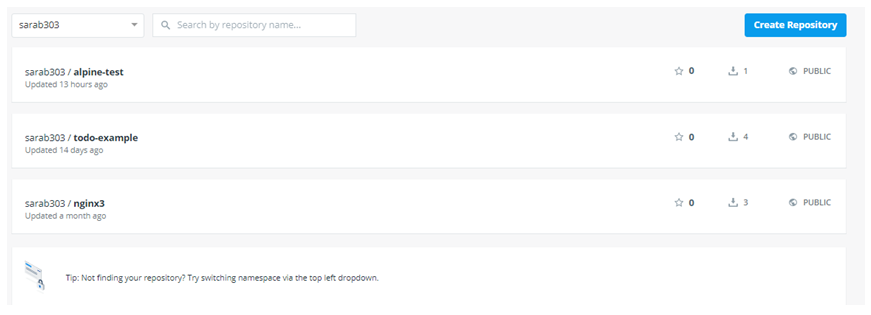
It takes us to the repository page, where we can see all our repositories.
How to Create Repositories in Docker?
We can create a blank repository without any tag in it using web console however if we push a new Docker image and there is no repository that exists with that name it will automatically create the repository for that Docker image.
1. We can create repositories from the web console by clicking on the ‘Create Repository’ button.
We get below window after clicking on the ‘Create Repository’ button:
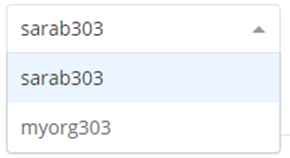
2. We have to choose the namespace in which this repository is going to reside. It creates a namespace with our Docker ID by default however we can create a new organization by clicking on the ‘Organizations’ button from the top-right corner if we don’t have one.
In the above snapshot, there are two namespacesthat exist, the top one is Docker ID namespace and the bottom one is the organization namespace.
3. Now give the name of the repository and the description as shown below:
4. Then we have to choose the visibility option. It has two options, the first one is ‘Public’ which means it will be displayed in the Docker Hub search and anyone can download it and use it and the second option is ‘Private’ which means only the owner can view this repository.
In the above snapshot, see the highlighted line that says ‘Using 0 of 1 private repositories’ which means we can only create 1 private repository in a free repository plan. We need to upgrade to pro for unlimited private repos. If we click on the ‘Get more’ link, it takes us to the billing page where we can change the plan.
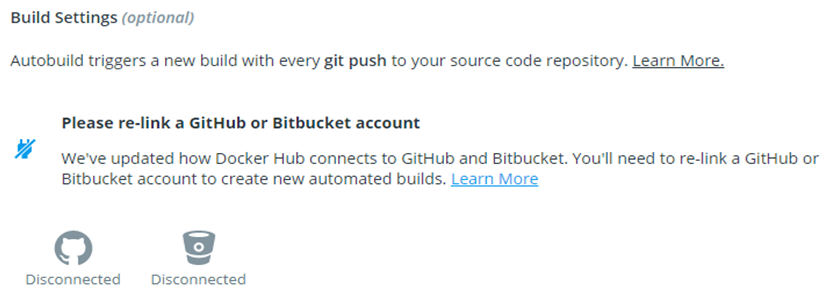
5. We have the ‘Build Settings’ option at the end that is optional. Here, we can link the Github or Bitbucketsource code repository to trigger the auto-build.
6. Now the final step, click on the ‘Create’ button to create the new repository named ‘my-nginx-app’. Here, the ‘Create & Build’ button is greyed out as Build Settings are not configured.
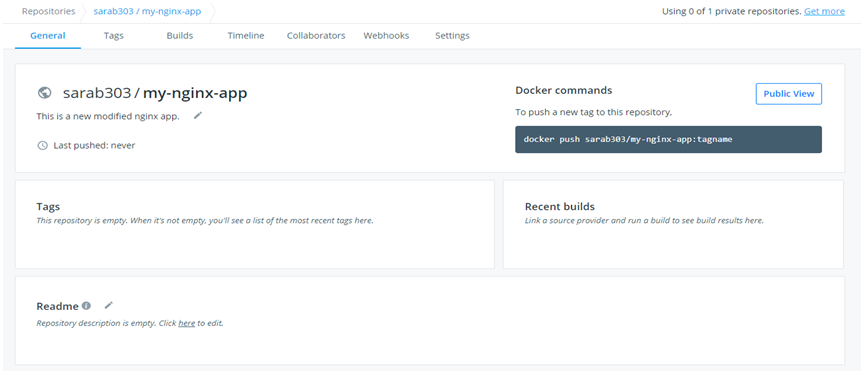
7. Once a new repository is created, we get the below repository page where we can manage this repository like modifying the description and Readme section:
In the above snapshot, the repository is empty, there are no tags however there is a docker command at the top-right corner which is used to push the tags to this repository.
Operations of Docker Repositories with Examples
Operations that we can perform on Docker Repositories are as below:
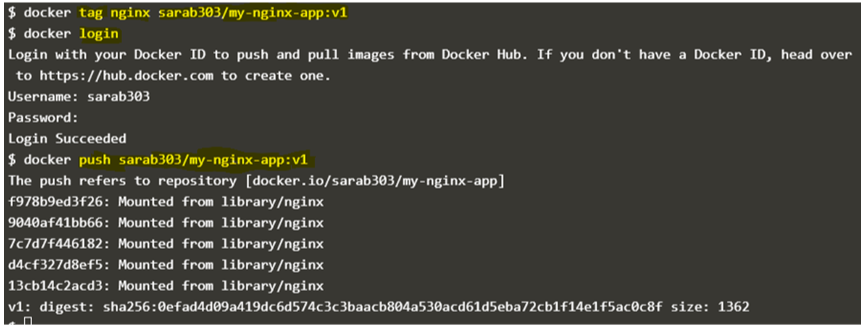
Let’s push the Docker image to the newly created repository. For testing purposes, we just retag the existing nginx image with our repository name and login to the Docker Hub if not logged in already, and then push the image as shown below:
Syntax:
$docker tag <existing_image_name><docker_id>/<repository_name>[:<tag>]
or
$docker tag <existing_image_name><organization_namespace>/<repository_name>[:<tag>]
Example
$docker tag nginx sarab303/my-nginx-app:v1

$docker login

$docker push sarab303/my-nginx-app:v1
Note: We can give the repository name while building a new Docker image as well.
In the above snapshot, we have pushed the ‘sarab303/my-nginx-app:v1’ Docker image to the repository where ‘sarab303’ is Docker ID, ‘my-nginx-app’ is the repository name that we have just created and ‘v1’ is the tag of the image.
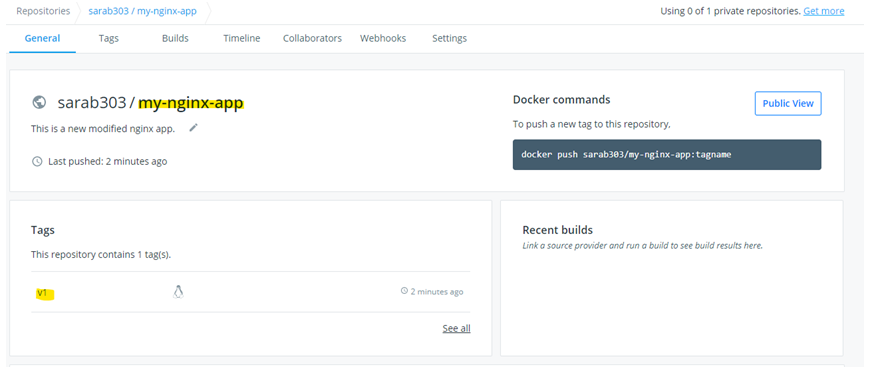
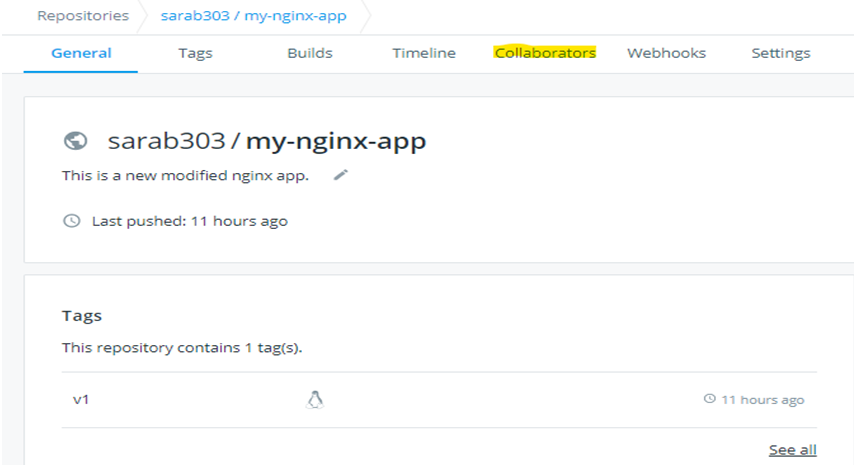
Let’s login to the Docker Hub and check. In the below snapshot, we can see that the ‘my-nginx-app’ repository has a tag ‘v1’ now.
Let’s search for this new repository. Again, we can do it by command line or directly on Docker Hub. We use the ‘docker search’ command to search for any repository from the command line as shown below: –
Syntax:
$docker search <repository_name>
Example
$docker search my-nginx-app
In the above snapshot, we see that if we search with Docker Id and then repository name, it does not work so we have to only give the repository name and then we can pipe it to grep to filter our repository. We can search for any Docker image using a search command if it is available publicly.
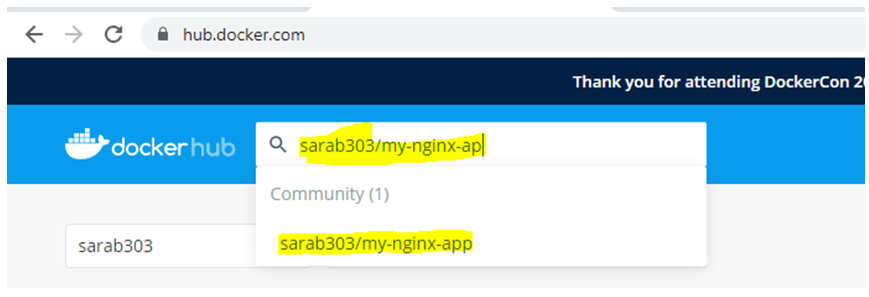
We can also search repository on Docker Hub, just write the name of the repository in the search box as shown below:
Here we can give the Docker ID to filter out. It redirects to that repository once we clicked on it.
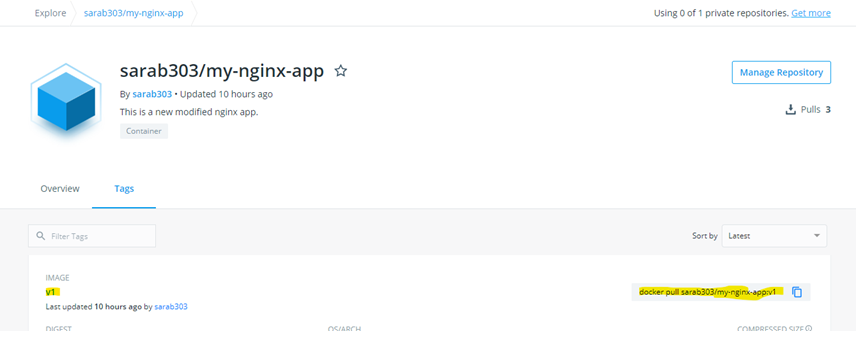
Now if we click on tags, we can see the ‘v1’ is present over here, and there is also a command that is mentioned to pull this image locally.
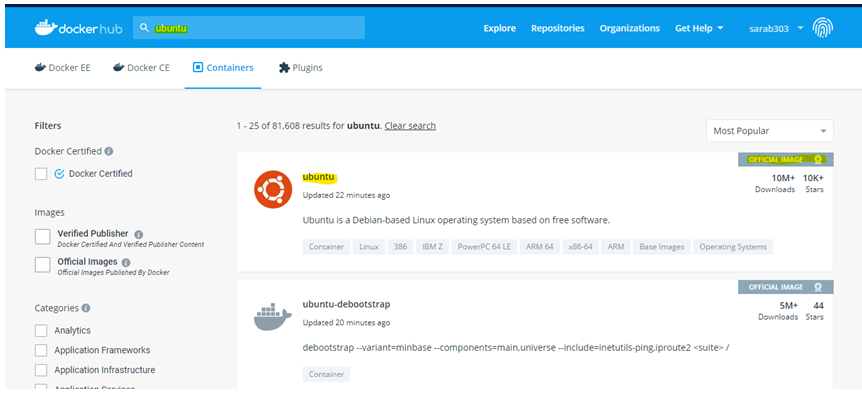
Let’s search for any other image, for example, Ubuntu. Once we hit enter, we get the below page with search results, and on the right-hand side, it is mentioned ‘OFFICIAL IMAGE’ which means this image is managed by Canonical. It also shows Downloads and Stars count.
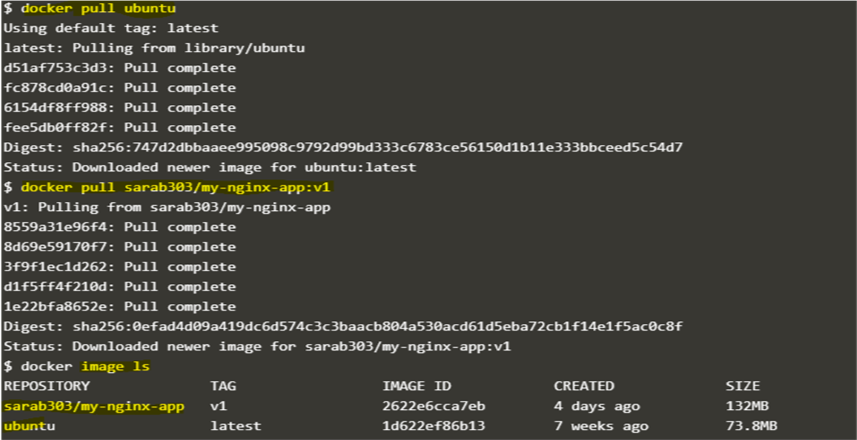
Let’s pull the Docker image, we use the ‘docker pull’ command to pull the Docker image with a specific tag however that is optional and by default, it takes the ‘latest’ tag. If there is no Docker image with the latest tag in that repository, we get an error.
Syntax:
$docker pull <image_name>
or
$docker pull <Docker_ID>/<repository_name>[:<tag>]
Example
$docker pull ubuntu

$docker pull sarab303/my-nginx-app:v1
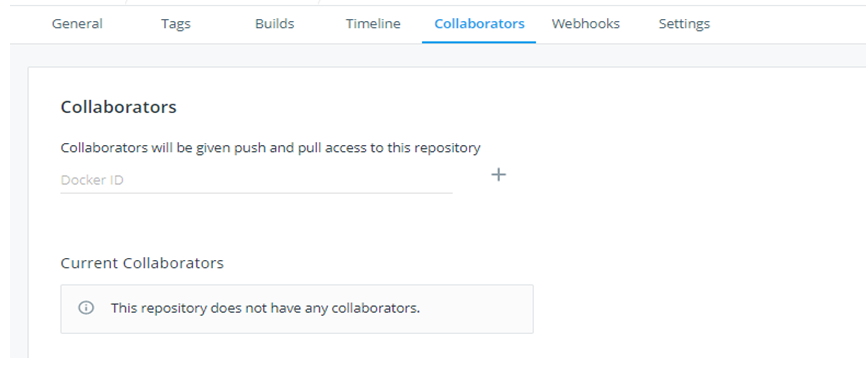
We can give access to someone who wants to pull or push to our private repositories by clicking on the ‘Collaborators’ tab however collaborators cannot perform any administrative tasks such as deleting the repository or changing the visibility from private to public or vice-versa.
We get the below page when we click on the ‘Collaborators’ tab, here we have to type the Docker ID of the collaborator and click on the ‘+’ button. There is no collaborators is added to the ‘sarab303/my-nginx-app’ repository.
If we want to modify the visibility settings or delete the repository, click on the ‘Settings’ tab and we get below page:
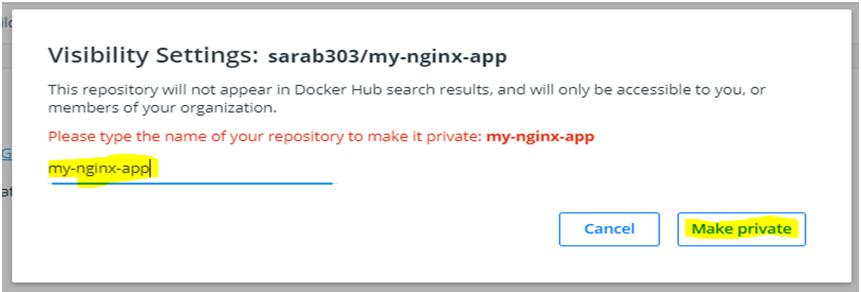
To make the repository private, click on the ‘Make private’ button, and provide the name of the repository as shown in the below snapshot:
The visibility of the repository has been changed to private now.
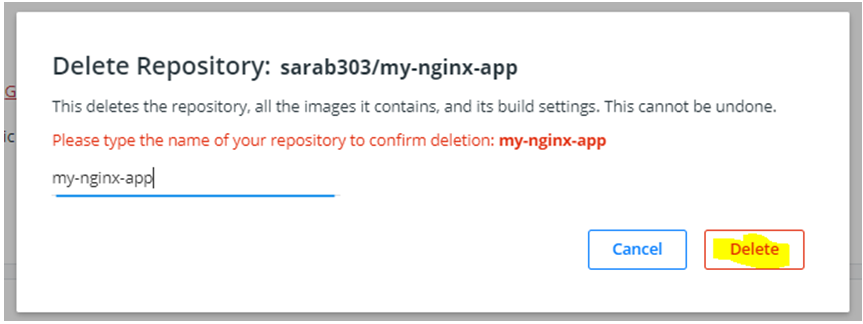
To delete the repository, click on the ‘Delete repository’ button and give the name of the repository and click on the ‘Delete’ button as shown in the below snapshots:
Here we go, there are no repos called ‘my-nginx-app’ under sarab303 namespace.
Conclusion
Docker repositories are very useful and provide more options in the paid version. We can also host our know Docker private registry as a container and create repositories however it does not provide a web console and have less control. Docker enterprise edition provides DTR i.e. Docker Trusted Registry provides web console and role-based access control.
Recommended Articles
This is a guide to Docker Repositories. Here we also discuss the introduction and how do repositories work in docker? along with different examples and its code implementation. You may also have a look at the following articles to learn more –


