Updated April 13, 2023

Introduction to Dockerfile
Dockerfile is used to build Docker Images. It is a simple text file that consists of a set of instructions or commands that is executed by an automated build process in steps from top to bottom. It is used to create our own Docker image and mostly we use aparent Docker image to build our own Docker image however, we can create a base image as well. The name of the Dockerfile must be ‘Dockerfile’ else Docker daemon will throw an error and it is case sensitive. We use the ‘docker build’ command to create a Docker image from a Dockerfile.
How Dockerfile works in Docker?
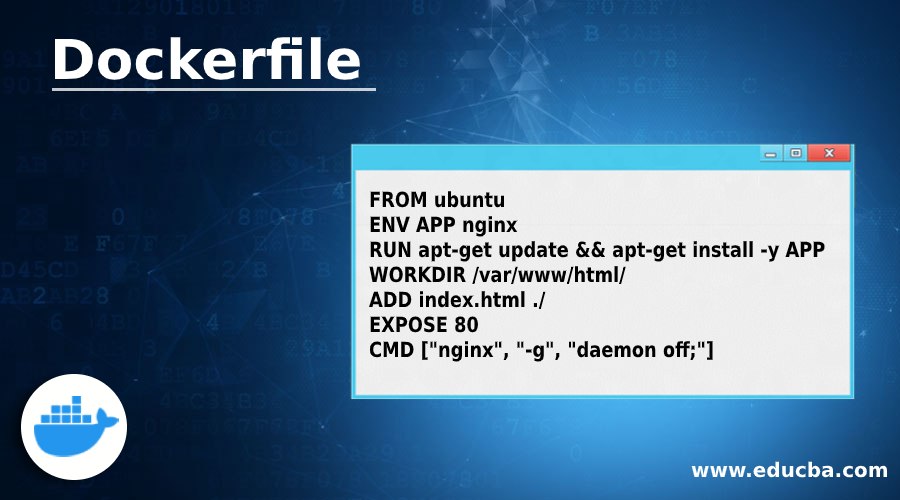
Given below shows how Dockerfile works in Docker with an example.
Code:
FROM ubuntu

ENV APP nginx

RUN apt-get update && apt-get install -y APP

WORKDIR /var/www/html/

ADD index.html ./

EXPOSE 80

CMD ["nginx", "-g", "daemon off;"]
Let’s see each instruction of Dockerfile mentioned in the above sample Dockerfile:
1. FROM
Most of the time we use an official image on which we are going to build our Docker image so that it is the base of our Docker image. If we want to create a base image, we use ‘FROM scratch’ in the Dockerfile. In the above Dockerfile, ‘ubuntu’ is used as a base image, which is called parent image. Other instruction mentioned in the Dockerfile is going to modify this Docker image.
2. ENV
It is used to set the environment variable while creating a Docker image. It has key-value pairs and we can set multiple variables using “<key>=<value>”. If we do not use equal (=) sign then it allows a single variable as shown in the above Dockerfile.
Code:
ENV key1=”value1” key2=”value2” \

key3=”value3”
ENV key1 value1

ENV key2 value2

ENV key3 value3
3. RUN
RUN instruction is used to execute shell command in the new layer and commit the result in a new Docker image. We can run separate long or complex RUN instruction in multiple lines using a backslash as below:
Code:
RUN apt-get update && apt-get install –y \

package1 \

package2 \

package3
4. WORKDIR
It changes the current working directory in the Docker image and that can be utilized by further instruction. In the above example, working directory has been changed to “/var/www/html” and then in the next instruction we use ‘.’ to specify that add the file ‘index.html’ to the working directory that is “/var/www/html”.
5. ADD
It is used to add files from local host to the Docker image. COPY instruction has similar functionality however, ADD has some other features as well like tar extraction and remote URL support. In the above Dockerfile, index.html file from localhost has been added to the current working directory of Docker image.
6. EXPOSE
EXPOSE instruction tells about the port on which a container listens for connections. It does not expose the port while building the image. It provides a general information about the port if we run a container using this image. In the above example, the container will listen on port 80 if it is created using the image that is built by above Dockerfile and that must be exposed while creating a container to access it externally.
7. CMD
It defines what would get executed when a container gets created using the Docker image or simply it provides default for an executing container. We should define only one CMD in a Dockerfile, however if we define multiple CMD instructions in a Dockerfile, then only last CMD will get executed. Also if we specify any command while running the container, the specified command will take precedence and CMD instruction will not get executed.
We can use ENTRYPOINT instruction that allows creating an executable container. It has two forms, one is ‘exec’ and another one is ‘shell’ form. If we pass command line argument while running the container using ‘docker run <image>’ command, specified command gets appended after all elements in an exec form ENTRYPOINT. We use the flag ‘–entrypoint’ to override the ENTRYPOINT instruction while running the container using ‘docker run <image>’ command.
Let’s build the Docker image using above sample Dockerfile using below command:
Syntax:
$docker build -t <image_name>:<image_tag><path_of_Dockerfile>
Example:
Code:
$docker build -t my_nginx .
Explanation:
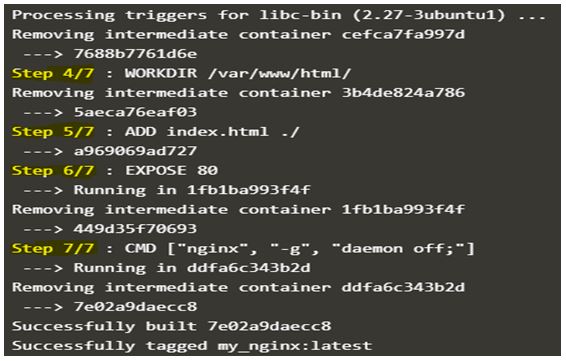
- In the above snapshot, it is cleared that build has total 7 steps and it is equal to the number of instructions specified in Dockerfile which means each instruction is getting executed one by one.
Step 1: Docker daemon searches for the image mentioned in the FROM instruction i.e. ubuntu, if the image is not available locally it downloads from the hub, in above case ubuntu already exists locally.
Step 2: Set environment variable APP to nginx.
Step 3: Updates the OS and install nginx.
Step 4: Changes the working directory to ‘/var/www/html’.
Step 5: Copy local ‘index.html’ file to Docker image to ‘/var/www/html’.
Step 6: It shows PORT 80 needs to be exposed to access it externally.
Step 7: This is the last step that sets the default command that runs the nginx daemon as a background job when any container gets created using this Docker image.
Advantages of Dockerfile
Given below are the advantages :
- It saves our time by automating all the steps with sets of instructions that gets executed during the build so we do not have to manually make the changes to the container and commit it.
- We can keep Dockerfiles on any source control management tools like git, svn, etc. and take advantage offered by those tools like version control, branching, etc.
- We can share Dockerfile easily with other teammates or groups even if we do not have a central registry for images.
- Each instruction in Dockerfile creates a layer in the Docker image that is useful to understand what image is doing behind the scene by checking the history of the image. It also helps in faster image building by using cache.
Conclusion
We can use ‘docker commit’ after making required changes to the container to create a Docker image as well but it is not recommended as we miss to take the advantages mentioned above about Dockerfile. There are many more directives available to use in Dockerfile.
Recommended Articles
This is a guide to Dockerfile. Here we discuss the introduction to dockerfile along with step by step working, advantages and respective examples. You may also have a look at the following articles to learn more –


