Introduction to Duik After Effects
As we know, After Effects is video editing software as well as it is also animation making software. Here in this software, we can make a number of effective animation with the help of some plugins. Duik is one of the plugins that help in the rigging parts of any character design to make the best animation with that character and provide you with the parts’ predesigned motion parts. Here we will make an animation by using Duik plugin in this software and analyze the parameters of the Duik plugin for our better understanding of this topic.
How to Use Duik in After Effects?
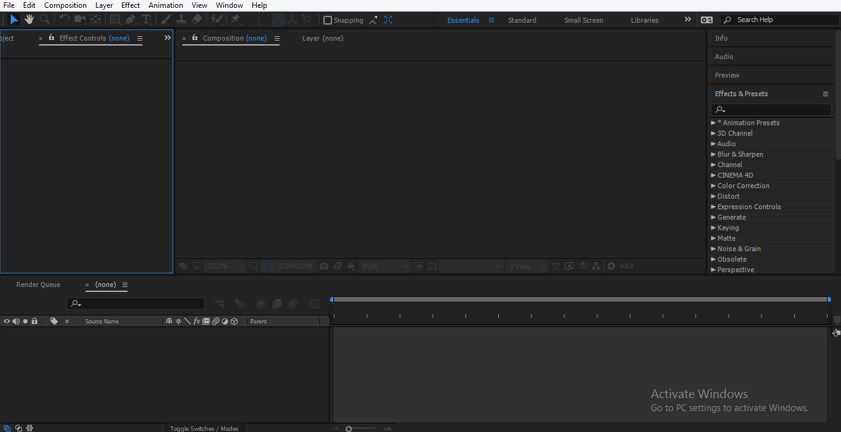
Duik is nothing but plugin software that makes the working of After Effects software easy. We will learn about the Duik plugin in the step by step manner. Before starting our learning, let us have a look at the working screen of this software so that there will no problem occurs during our learning throughout this article.
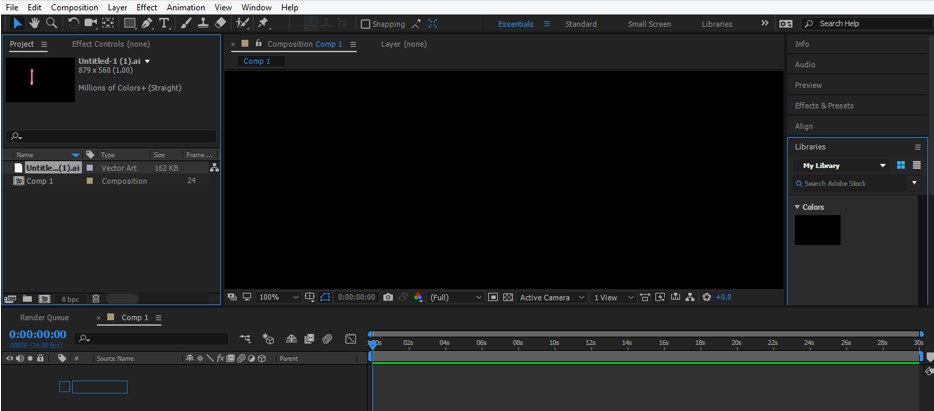
Step 1: At the top of the working screen, there are two main ribbons that are Menu bar and Toolbar with property bar of the active tool, below these ribbons, there are three main sections that are Project panel at the left side along with Effects control panel, at the center, there are Composition window and the right side there are some important Parameters panels, below these three sections there are two another important sections that are Layer section at the left side of the bottom end of the working screen and at the right side of this bottom end, we have Timeline panel.
Step 2: Now, after getting introduced to this software’s working screen, let us start our learning. First of all, take a new composition. For new composition, you can use any of the three options that are going to the top of the working screen and click on the Composition Menu of the Menu bar, then choose the New composition option from the drop-down list or press the Ctrl+ N button from the keyboard as a short cut key for a new composition.
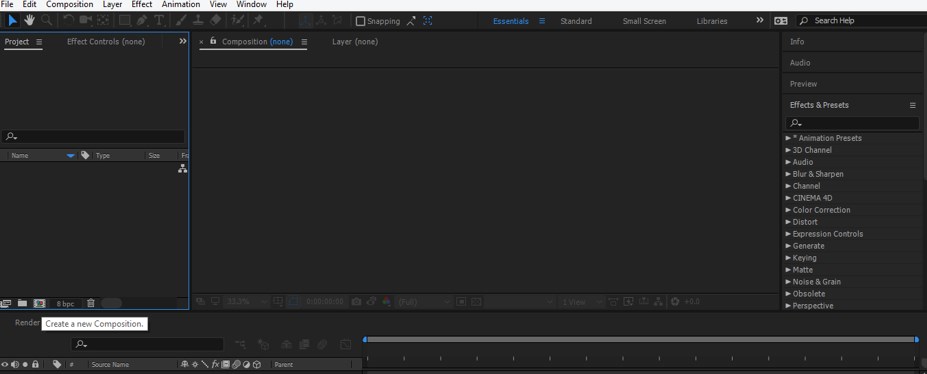
Step 3: The second option is to go to the Project panel of this software and click on this tab, the name ‘Create a new Composition’ for a new composition.
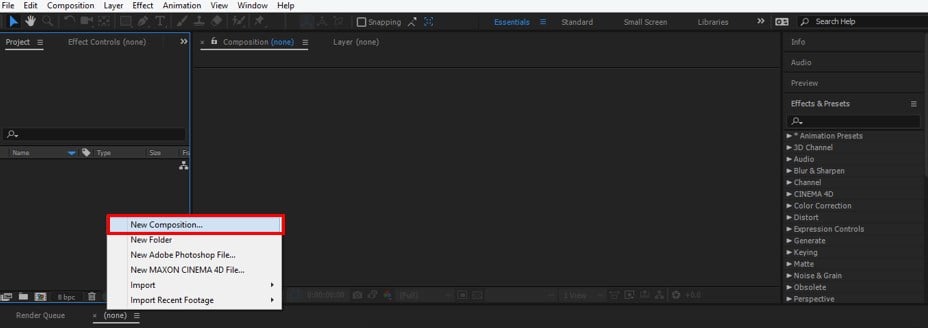
Step 4: Or the third option is making right-click from the mouse button anywhere in the Project panel section of this software and click on the New Composition option of the drop-down list for a new composition.
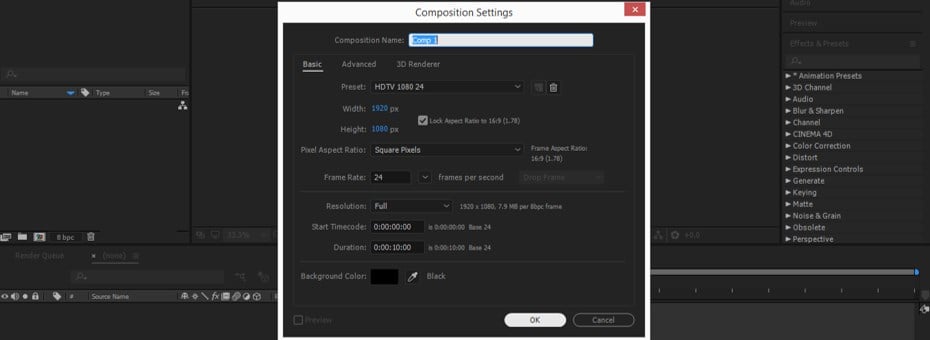
Step 5: A composition setting box will be open for settings of the new composition. Here you can make your desired settings for your new composition. After making settings click on the ‘Ok’ button of this dialog box for applying the settings.
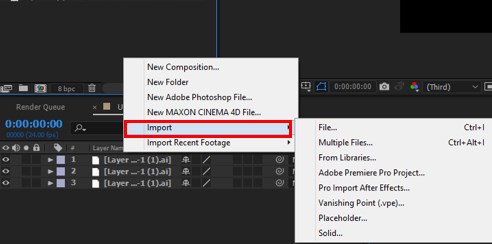
Step 6: Now, let us have a vector file of a hand of character from adobe Illustrator. Now import the vector file of a hand of character in this software. For importing files, just make right-click in the project panel section of this software and go to the Import option in the drop-down list, then click on the File option of the new drop-down list.
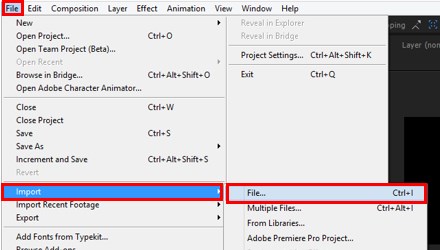
Step 7: Or you can go to the File menu of the Menu bar of this software which is at the top and then go to Import option in the drop-down list. Now click on the File option of the new drop-down list.
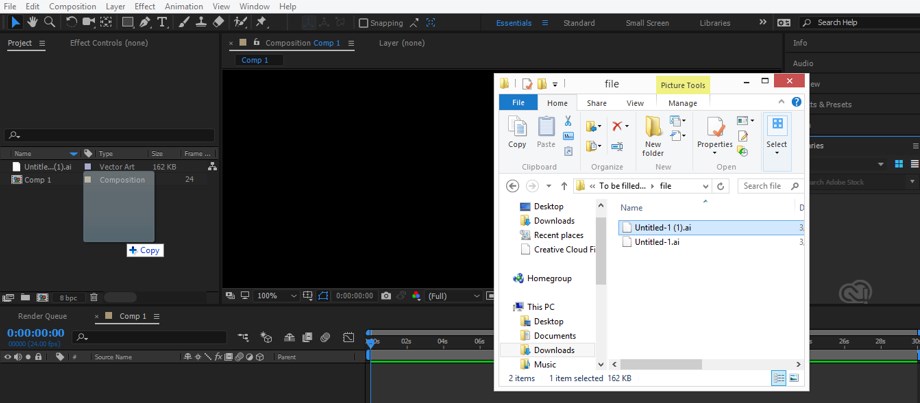
Step 8: Or you can simply pick a file from the folder where you have saved it in your personal computer and drop it into the Project Panel section of this software.
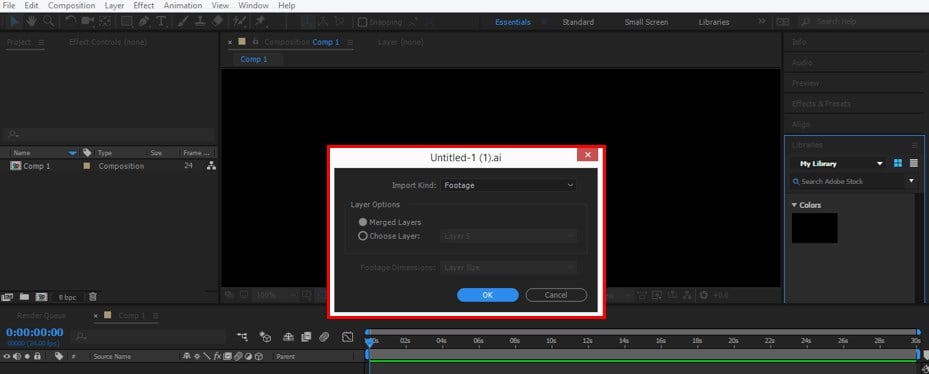
Step 9: If your vector working is in different layers,will ask whether you want to merge your all layers or place them separately, one by one. I will choose the Merged layer option and press the Ok button of this dialog box.
Step 10: Now drag this vector layer from the Project panel to the Layer section of this software which is at the bottom end of the working screen.
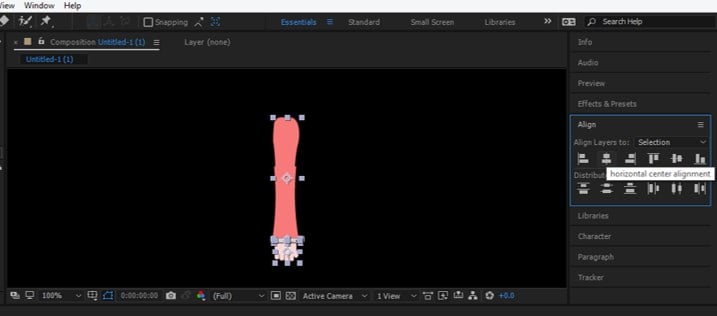
Step 11: Now adjust the hand of Character and align them at the center by using the Align tab of this software which is at the Parameters sections at the right side of the composition window.
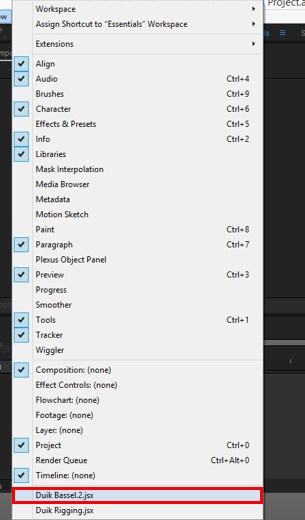
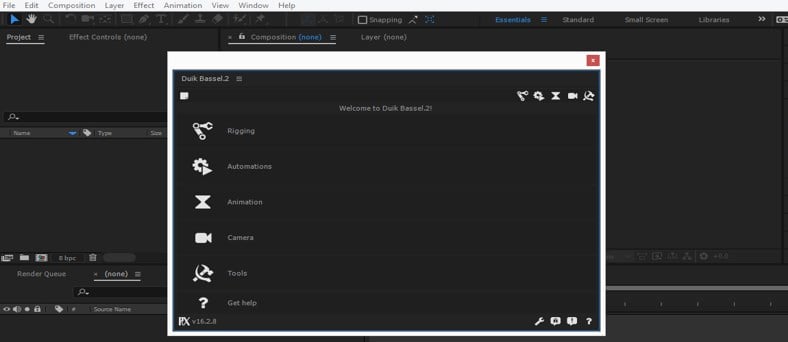
Step 12: Now, let us open the Duik plugin panel. For the Duik plugin panel go to Window menu of the Menu bar of this software and click on Duik Bassel option in the drop-down list. If you have not the Duik plugin on your personal computer, then download it from the internet. As it is an open-source program so it is free for all.
Step 13: A Duik setting box will be open. Click on the ‘Open Preference’ tab of this box.
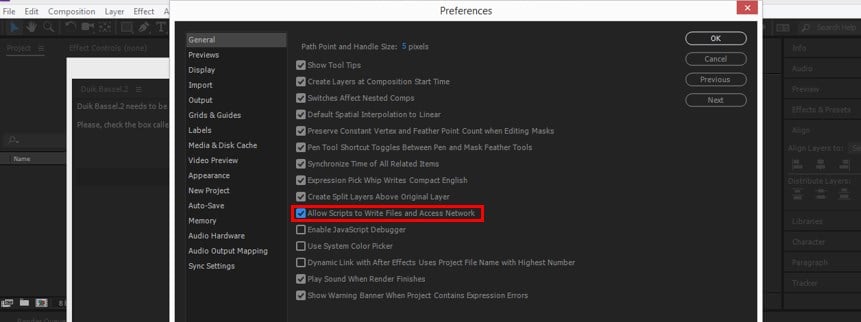
Step 14: Preferences setting box will be open. Enable the ‘Allow Scripts to White….’ option from the list and press the Ok button of this dialog box.
Step 15: Now select the language in which you want to continue duik plugin and press the Ok button of the Duik Bassel 2 dialog box.
Step 16: Now duik panel window is ready for your use.
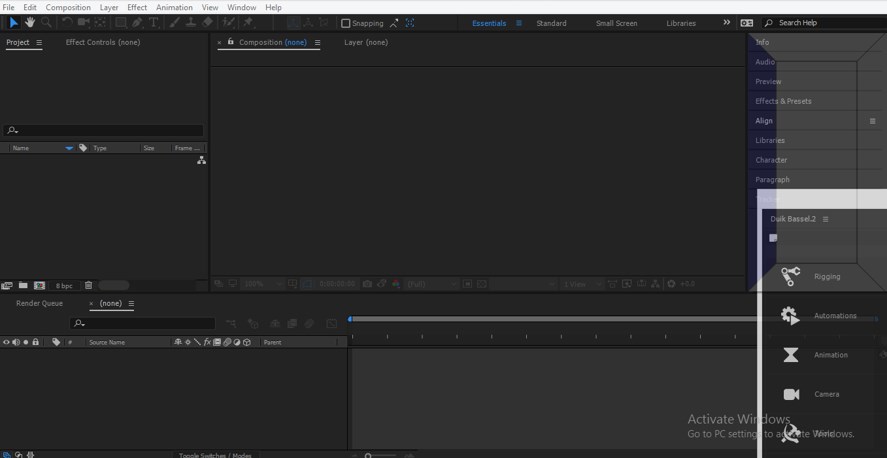
Step 17: Place this window at a certain place on the working screen of this software according to your suitability. I will place it in the Parameter section area.
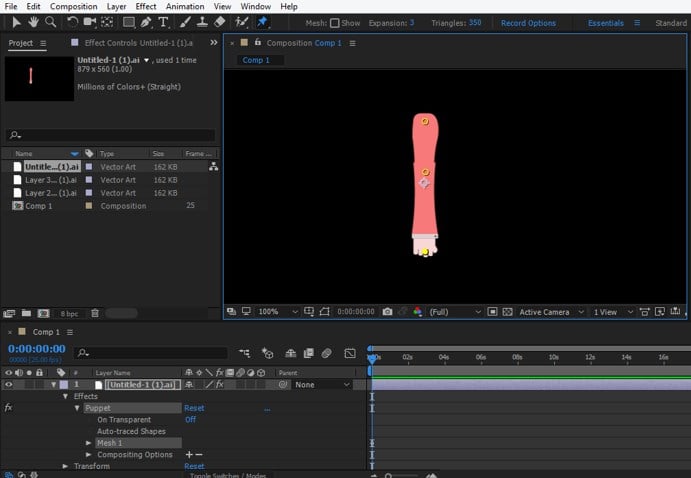
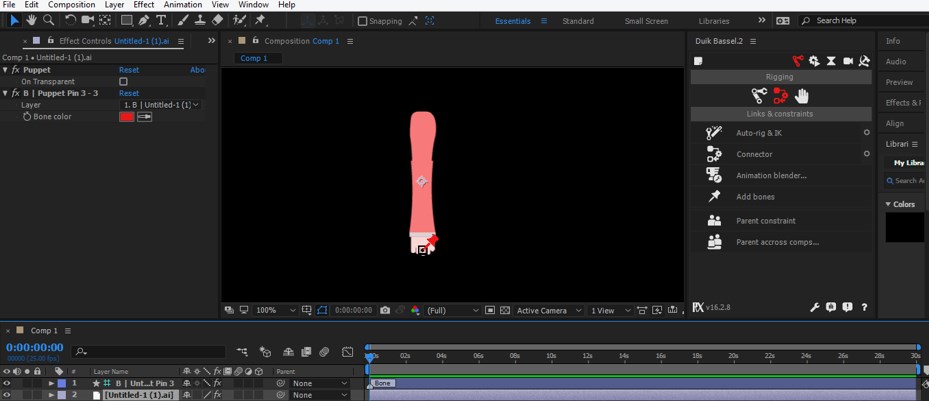
Step 18: Now, take the Puppet Pin tool from the tool panel of this software.
Step 19: Make a pinpoint on the hand, just like joints of bones.
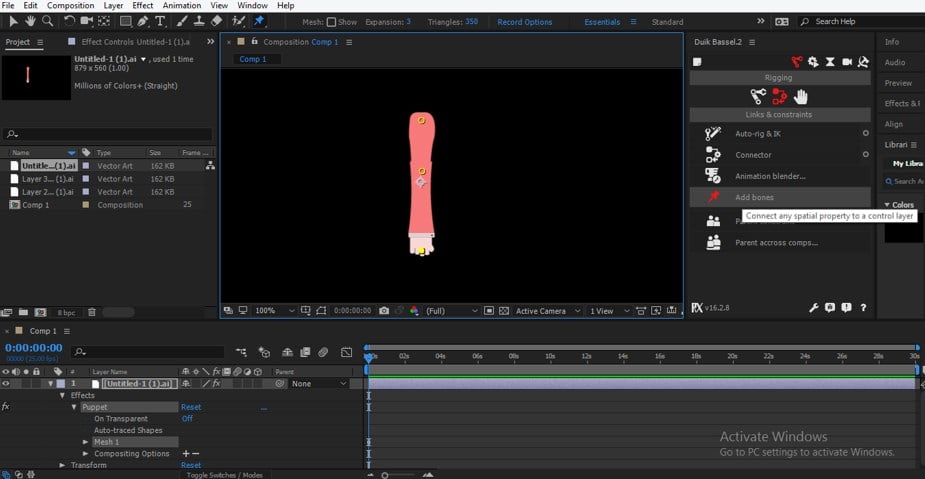
Step 20: Now click on Add bones option of Links & Constraints option of Rigging in the Duik panel.
Step 21: Once you click on Add Bones option, a pin will become at the end of the hand.
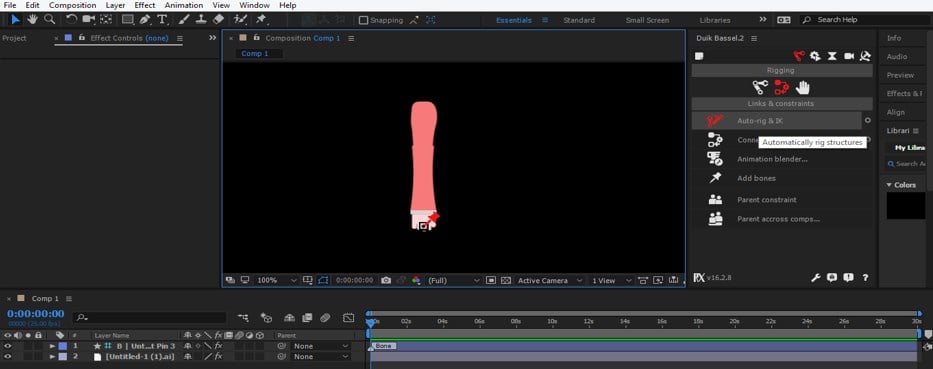
Step 22: Now come to the layer section and select the hand layer, then click on the Auto-rig & IK option of the duik panel.
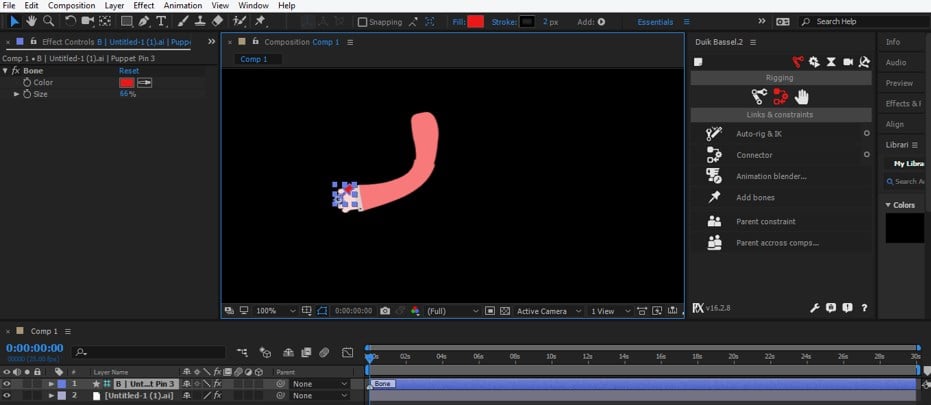
Step 23: Now hold the pin and move it in your desired direction for rigging motion of this hand.
- Now you can give motion to this hand and animate it with the help of the Duik plugin. In this way, you can use the Duik plugin in this software and make an effective motion character with its help.
Conclusion
Now, after this article, you know everything about Duik software and can easily handle the parameters of this plugin. You can make different types of rigging with your character designing by analyzing different features of the Duik plugin. Once you get command on features of this plugin you will add a plus point in your graphics designing skill.
Recommended Articles
This is a guide to Duik After Effects. Here we discuss an Introduction, how to create Duik After Effects in the step by step manner. You can also go through our other related articles to learn more –
