Updated May 3, 2023
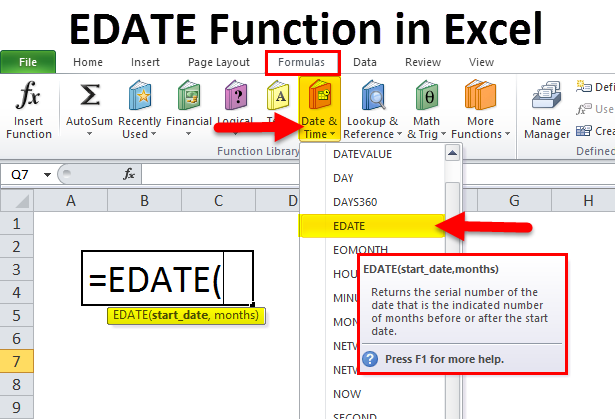
EDATE in Excel
EDATE Function in Excel is one of the kinds of Date functions which returns the past or future date from the month we feed in, and the obtained date will be the same, but it would be of next month or last month. In simple, using the Edate function, we select any date and find the next month’s or the previous month’s date. For next month use positive values in the syntax in place of Month, and for past months, use the negative sign in place of month.
EDATE Formula in Excel:
The Formula for the EDATE Function in Excel is as follows:
Where both the arguments are compulsory & it is required
start_date: It is an initial date, or It is the date from which you want to start
months: It is the number of months to add to or subtract from the mentioned start_date
For a month argument, we have to use a positive value or integer to add months and a negative value or integer to subtract months
How to Use EDATE Function in Excel?
EDATE Function in Excel is very simple and easy to use. Let us understand the working of EDATE in Excel with Some Examples.
Example #1
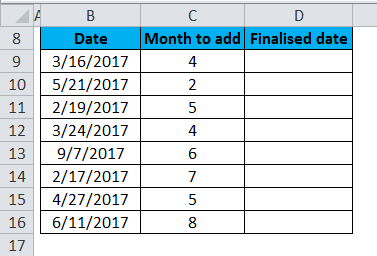
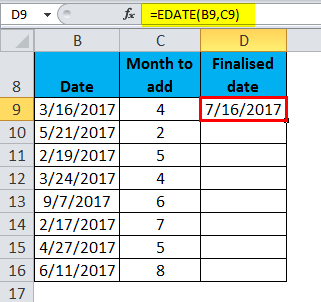
In the below-mentioned table. I have the various dates in the date column to which I need to add the number of months mentioned in the Months to add a column; Here, With the help of the EDATE function, I need to find out the finalized dates in column D.
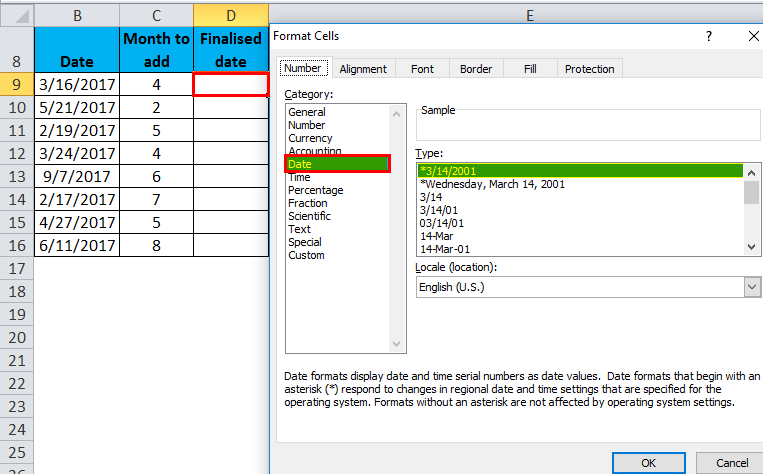
Prior to applying the EDATE Function, if column D cells are in a general format, we have to convert to date format, i.e. mm-dd-yy format. The date is represented incorrect date format. Otherwise, it will appear in a general format, and an output of the edate function will appear as numbers.
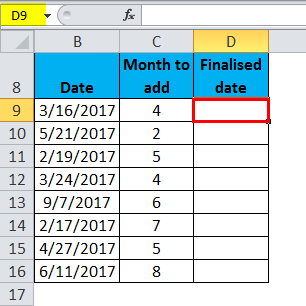
Let’s apply the EDATE function in cell “D9”.
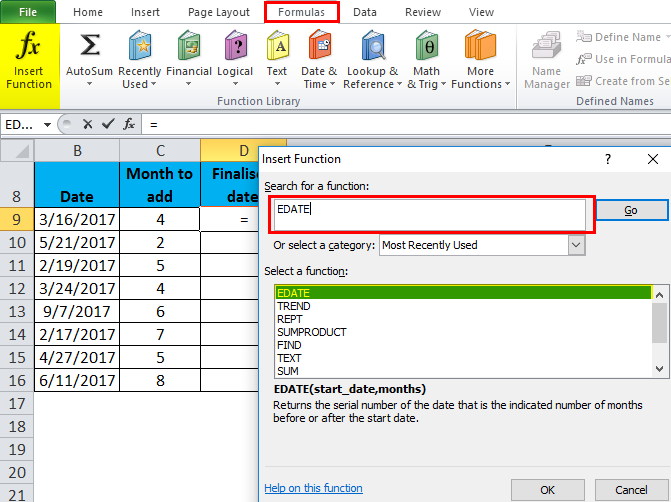
Select the cell “D9” where an EDATE function needs to be applied, Click the insert function button (fx) under the formula toolbar, and a dialog box will appear, type the keyword “EDATE” in the search for a function box, EDATE function will appear in select a function box.
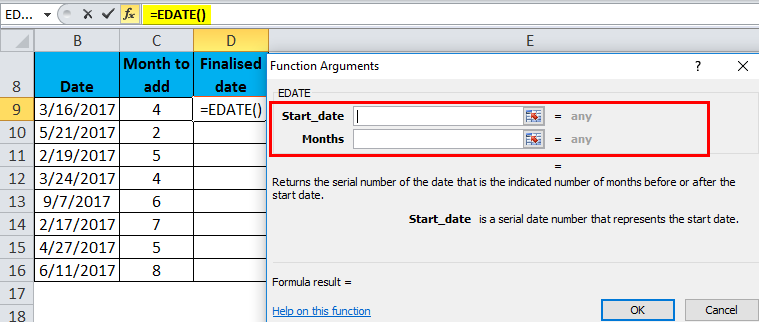
Double click on an EDATE function, and A dialog box appears where arguments for the EDATE function need to be filled or entered, i.e. =EDATE(start_date, months)
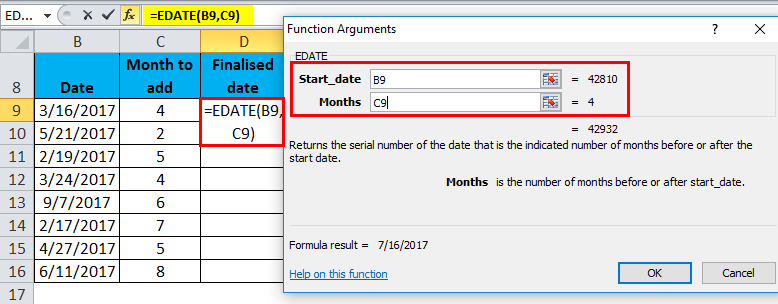
start_date is the date or reference cell or date in number format; either of them is entered to get the desired output. Here I mentioned the reference cell, i.e. “B9.”
months: I entered here as a reference cell, i.e. “C9,” or I can add 4, which is the number of months to add
=EDATE(B9,C9)
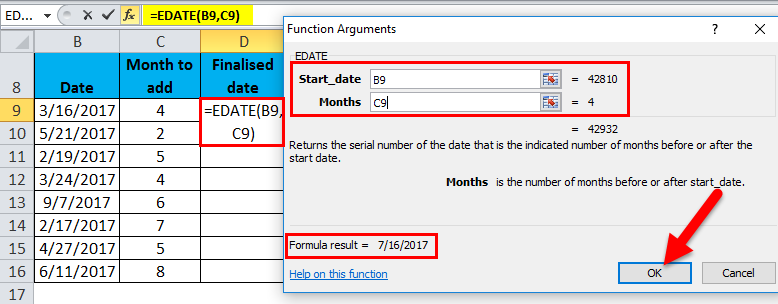
Click ok after entering both arguments.
=EDATE(B9, C9), i.e. returns the finalized date value as of 7/16/2017 in cell D9.
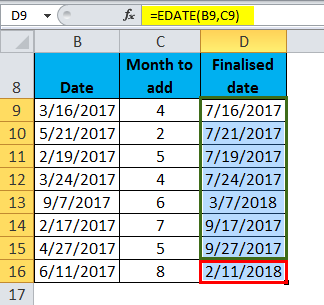
To get the finalized date for the complete dataset, click inside cell D9 to see the cell selected, then Select the cells till D16. Once selected, the column range will get selected; Click on Ctrl + D to apply the EDATE Formula to the whole range.
Example #2
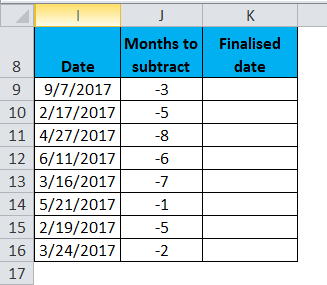
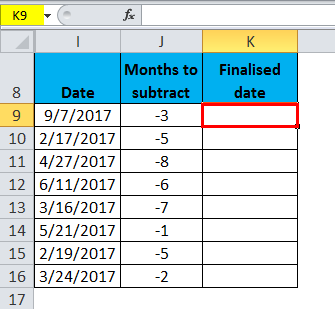
In the below-mentioned table. I have the various dates in the date column to which I need to subtract the number of months mentioned in the Months to subtract column.
With the help of the EDATE function, I need to find out the finalized dates in column K.
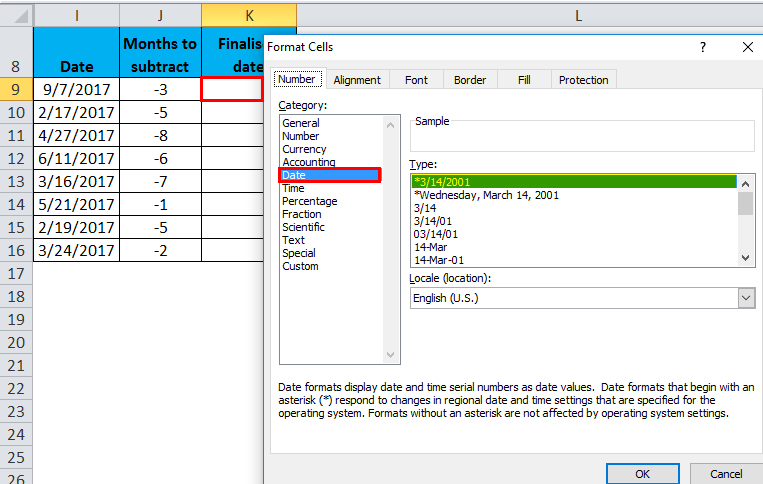
Prior to applying the EDATE function, if column K cells are in a general format, then we have to convert to date format, i.e. mm-dd-yy format so that the date is represented incorrect date format. Otherwise, it will appear in a general format, and an output of the edate function will appear as numbers.
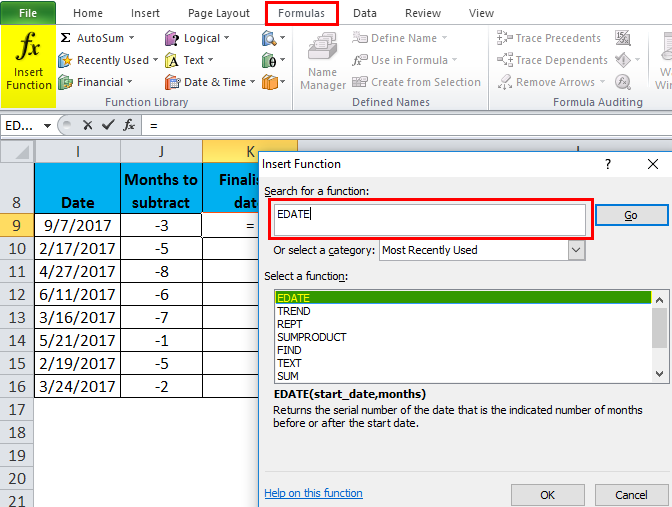
Let’s apply the EDATE function in cell “K9”.
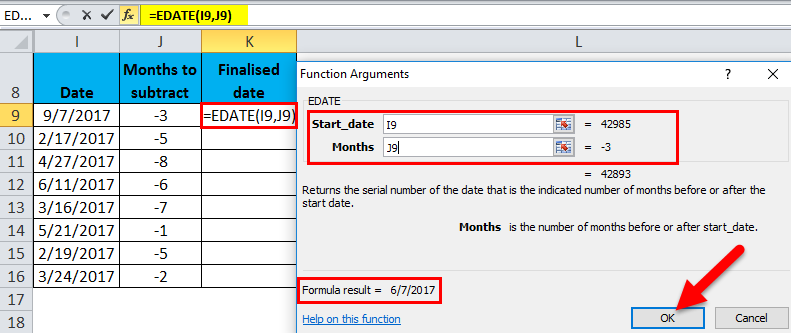
Select the cell “K9” where an EDATE function needs to be applied, Click the insert function button (fx) under the formula toolbar, and a dialog box will appear, type the keyword “EDATE” in the search for a function box EDATE function will appear in select a function box.
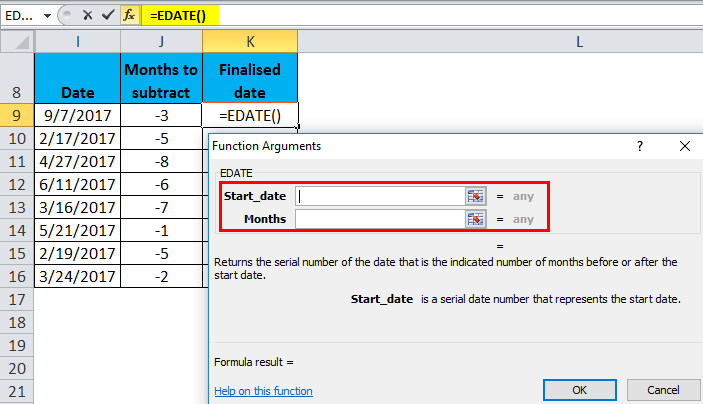
Double click on an EDATE function, and A dialog box appears where arguments for the EDATE function need to be filled or entered, i.e. =EDATE(start_date, months)
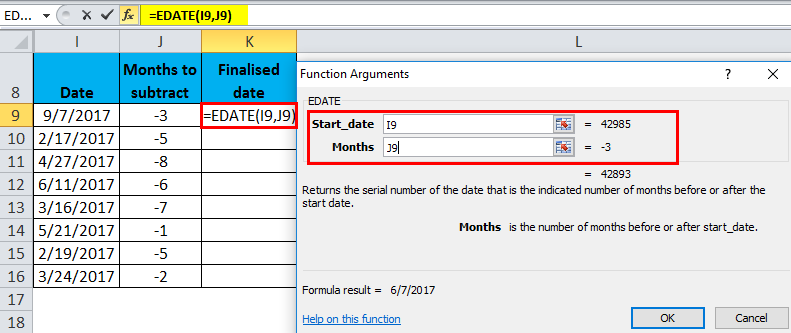
start_date is the date or reference cell or date in number format; either of them is entered to get the desired output. Here I mentioned the reference cell, i.e. “I9.”
months: I entered here as a reference cell, i.e. “J9,” or I can add -3, which is the number of months to subtract
=EDATE(I9,J9)
Click ok after entering both arguments.
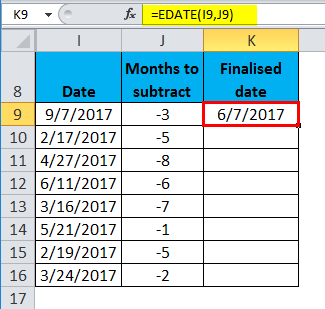
=EDATE(I9, J9), i.e. returns the finalized date value as of 6/7/17 in cell K9.
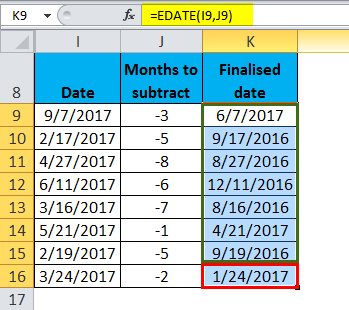
To get the finalized date for the complete dataset, click inside cell K9 to see the cell selected, then Select the cells till K16. After selecting the column range will get selected; click on Ctrl + D so that the EDATE Formula in Excel is applied to the whole range.
Things to Remember
- In the month argument, we have to use a positive number in months to get a future date and a negative number to obtain or get a past date.
- EDATE Function in Excel will give you the same date in the future and past. It will not consider that there are 31 days, 30 days, or 28 days in a month. e. g. In November month, there are 30 days. (No 31days in November), so while calculating 1 month before in the edate function. It will return the output as 30th November.
- EDATE Function in Excel returns the #VALUE! error value, If the start_date argument is invalid or any of the supplied arguments are non-numeric values.
Recommended Articles
This has been a guide to EDATE in Excel. Here we discuss the EDATE Formula in Excel and how to use EDATE Function in Excel, along with Excel examples and downloadable Excel templates. You may also look at these useful functions in Excel –
