Updated April 11, 2023
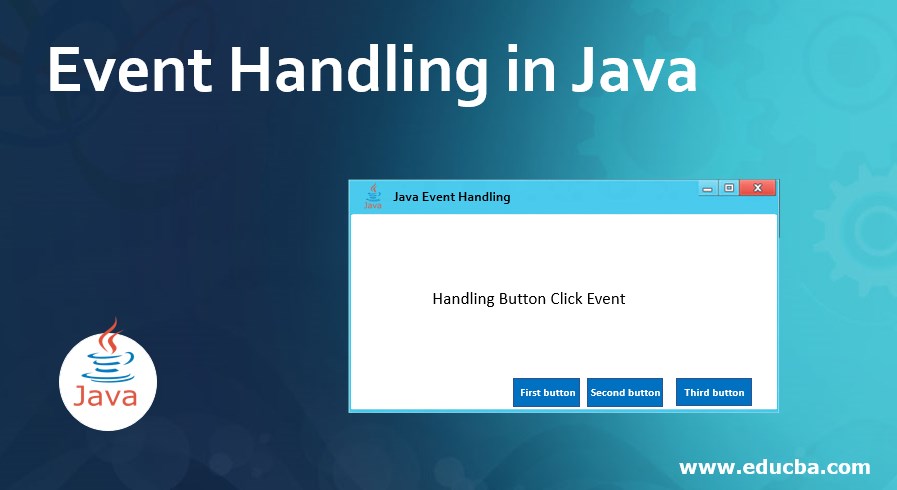
Introduction to Event Handling in Java
Any change in the state of an existing object is called as an event, event handlers are designed in order to listen to specific events and perform some logical actions accordingly, AWT components can be registered with required listeners listening to user events and then handle events accordingly. In this topic, we are going to learn about Event Handling in Java.
Syntax
Here is a syntax of how AWT event handlers are used:
// importing awt package
import java.awt.*;
// create a class extending Frame component
class <className> extends Frame implements <ListenerInterface>{
// override methods of implemented interface
@Override
public void <methodName>(){
// do required actions on event happened
}
<className>(){
component.addActionListerner(listenerClassobject);  // register component with listener
}}
The above syntax shows how to use a listener in java awt.
In the above syntax <ClassName> denotes name of java class. <ListenerInterface> can be the name of listener to be used. In order to register our component to the event, we need to register the component with the listener using the method as shown above.
Event Handling in Java
The following are different types of listeners available in java awt:
| Event | ListenerInterface | Description |
| ActionEvent | ActionListener | Produced on click of a button, selection of an item from menu or other. |
| MouseEvent | MouseListener | Produced when mouse event takes place like moved, pressed, click, double-click or enter/exit of mouse pointer into a specified area. |
| KeyEvent | KeyListener | Produced on the press of the key. |
| ItemEvent | ItemListener | Produced when the checkbox is checked or unchecked or item present in a list is clicked. |
| WindowEvent | WindowListener | Produced on different operations performed on a window. |
| ComponentEvent | ComponnetEventListener | Produced when a component is made visible, hidden, moved or changes are made in component size. |
| ContainerEvent | ContainerListener | Produced when a component is inserted or deleted from a container. |
| FocusEvent | FocusListener | Produced when a component attains or loses keyboard focus. |
| AdjustmentEvent | AdjustmentListener | Produced when changes are made to using the scrollbar. |
| MouseWheelEvent | MouseWheelListener | Produced when the mouse wheel is rotated. |
| TextEvent | TextListener | Produced whenever there is a change in the value of textarea or textfield. |
The following are major steps involved in the handling of an event in java awt:
- Implement the required interface and override its methods.
- Register the component with the listener.
Example of Event Handling in Java
The following example shows how to use event handlers in java awt:
Code:
package com.edubca.awtdemo;
// importing important packages
import java.awt.*;
import java.awt.event.*;
public class EventHandlerDemo {
private Frame parentFrame;
private Label headerTitle;
private Label status;
private Panel panel;
public EventHandlerDemo(){
prepareInterface();
}
public static void main(String[] args){
EventHandlerDemo  awtdemo = new EventHandlerDemo();
awtdemo.showEventHandlingDemo();
}
private void prepareInterface(){
parentFrame = new Frame("Java Event Handling Example");
parentFrame.setSize(400,400);
parentFrame.setLayout(new GridLayout(3, 1));
parentFrame.addWindowListener(new WindowAdapter() {
public void windowClosing(WindowEvent windowEvent){
System.exit(0);
}
});
headerTitle = new Label();
headerTitle.setAlignment(Label.CENTER);
status = new Label();
status.setAlignment(Label.CENTER);
status.setSize(350,100);
panel = new Panel();
panel.setLayout(new FlowLayout());
parentFrame.add(headerTitle);
parentFrame.add(panel);
parentFrame.add(status);
parentFrame.setVisible(true);
}
private void showEventHandlingDemo(){
headerTitle.setText("Handling Button Click Event");
Button firstButton = new Button("First Button");
Button secondButton = new Button("Second Button");
Button thirdButton = new Button("Third Button");
firstButton.setActionCommand("First Button Clicked");
secondButton.setActionCommand("Second Button Clicked");
thirdButton.setActionCommand("Third Button Clicked");
//registering button with listener
firstButton.addActionListener(new ButtonClickEventListener());
//registering button with listener
secondButton.addActionListener(new ButtonClickEventListener());
//registering button with listener
thirdButton.addActionListener(new ButtonClickEventListener());
panel.add(firstButton);
panel.add(secondButton);
panel.add(thirdButton);
parentFrame.setVisible(true);
}
// inner class implementing Action Listener
private class ButtonClickEventListener implements ActionListener{
// overriding method
public void actionPerformed(ActionEvent e) {
String command = e.getActionCommand();
// do different actions according to different commands
if( command.equals( "First Button Clicked" ))  {
status.setText ("First Button Clicked.");
}
else if( command.equals( "Second Button Clicked" ) )  {
status.setText ("Second Button Clicked.");
}
else  {
status.setText ("Third Button Clicked.");
}
}
}
}
The above program shows how to use awt event handlers in java. It involves implementing the required listener interface and implementing its methods followed by registering the component with the specified listener.
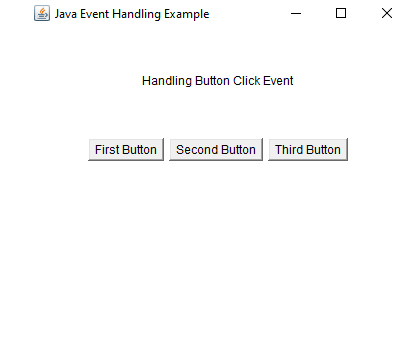
In the above example we have three buttons and one click of buttons the label in footer changes. After the above program is executed the following window prompts up:
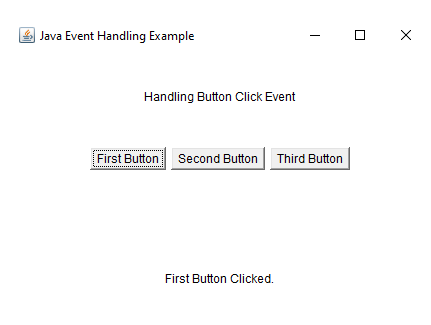
On click of the First button, the following text will be produced below:
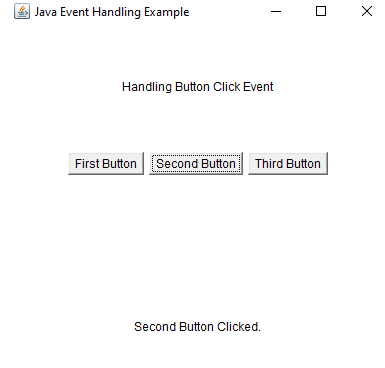
On Click of the second button, the following output will be produced:
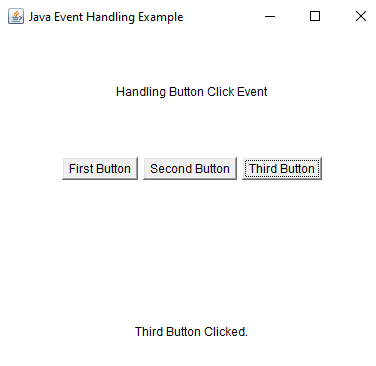
On click of the third button, the following output will be produced:
Therefore we can see that click events of different buttons is detected by the listener and different functions are then performed accordingly.
Conclusion
The above article provides a clear understanding of event handlers in java awt.
Recommended Articles
This is a guide to Event Handling in Java. Here we discuss the introduction to Event Handling in Java along with the syntax and examples. You may also have a look at the following articles to learn more –
