Updated June 13, 2023
Calendar Template in Excel (Table of Contents)
Introduction to Excel Calendar Template
There are often times when a calendar is needed while working with large worksheets in Excel. Entering dates, date formats, and knowing a particular day’s date could all be problems without an Excel calendar.
We can create our own calendar in Excel using the following ways:
- Using a pre-made calendar template.
- Making a custom calendar.
- Making a Dynamic Excel calendar template with formulas.
Creating a Calendar Template in Excel
Let’s use examples to create a calendar template in Excel.
Example #1 – Using a Pre-made Calendar Template
We wish to create an Excel calendar using a pre-made template.
Now the following steps can be used to do so:
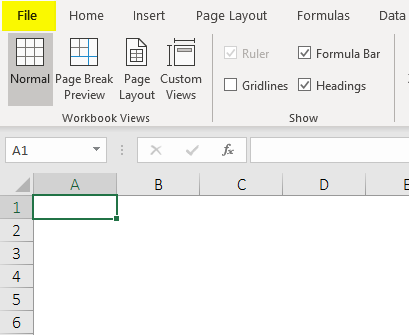
Step 1: Open Microsoft Excel.
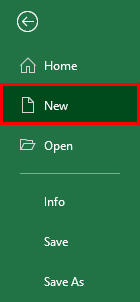
Step 2: Click the ‘File’ tab and select ‘New’.
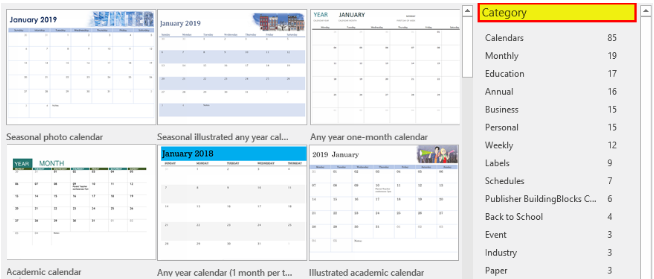
Step 3: On doing this, we will see a search field. Type ‘Calendar’ in the search field, and then on search, we will see some templates for the calendar as below.
So we can see in the above screenshot that there are some inbuilt calendar templates. Do not open each tamale before selecting it; just click on a template to see the preview. This preview gives us a glimpse of the template’s formatting, appearance, and layout. Also, we can completely customize these templates, i.e., we can change them per our requirements.
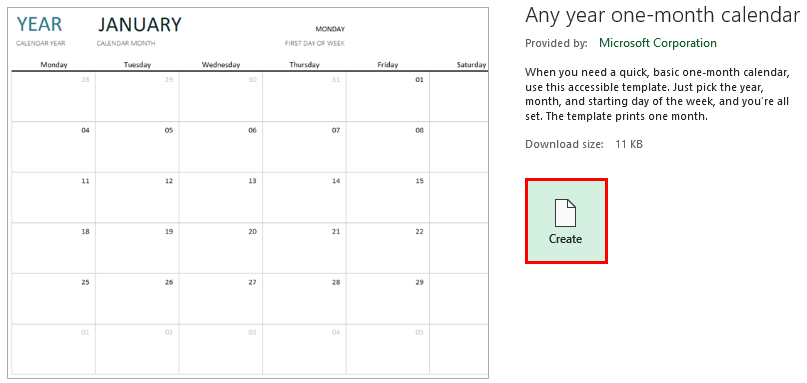
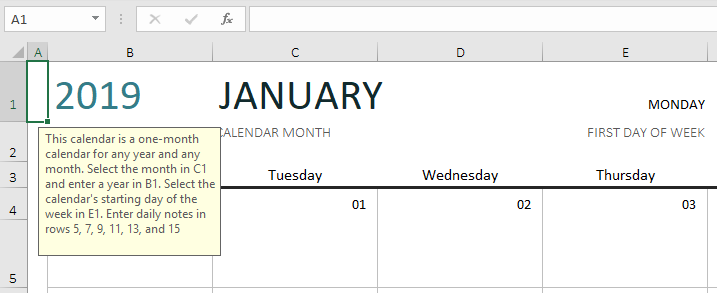
Step 4: After selecting the template to be used, click on that template and then click on the ‘Create’ button to the right of the preview. This will open the desired template in Excel. We can select the ‘Any year one-month calendar’ template.
Step 5: Now, the template can be edited per our needs. As we can see in the above screenshot, most templates have their own unique features. This ‘Any year one-month calendar’ lets us type in a new year or a week’s starting day to customize the calendar automatically.
Example #2 – Creating a Custom Calendar
Let’s say we create our own Excel calendar with a monthly template.
The following steps can be used to do so:
Step 1: Open a new sheet in Microsoft Excel and type the days of the week in the first row of the sheet. This first row will serve as the calendar’s foundation.
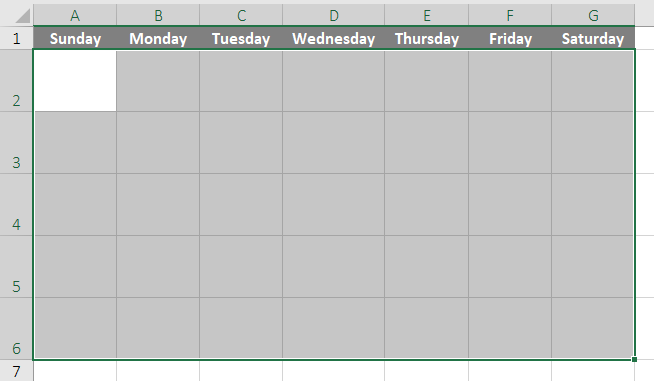
Step 2: There are seven months in a year with 31 days, 4 with 30 days, and 1 with 28 or 29 days. So let us first create a grid of seven and five rows by selecting all seven columns.
Step 3: Now select five rows under each weekday, and adjust the height of the first column. With all five rows selected, all rows will adjust to the same height.
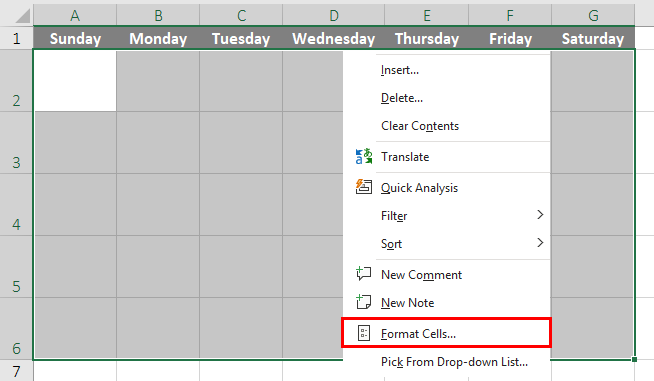
Step 4: Now, day numbers can be aligned to the upper right of each cell (or box) of this 7*5 grid. Select all the cells, right-click on any one cell, and click ‘Format Cells’.
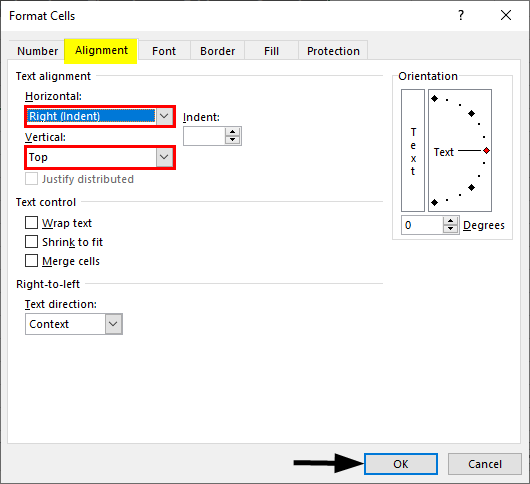
Step 5: Now, under the ‘Text Alignment’ section, set ‘Horizontal’ to ‘Right (Indent)’ and set ‘Vertical’ to ‘Top’:
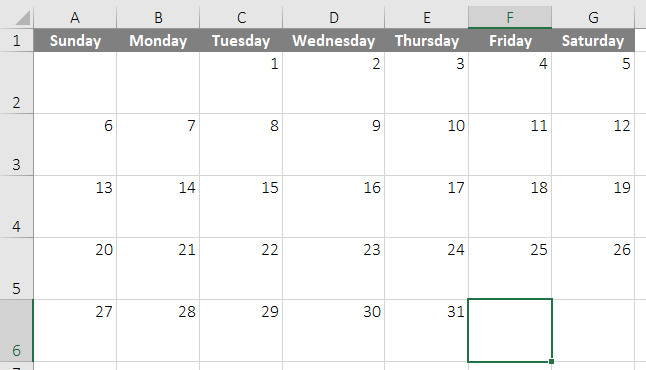
Step 6: Next step is to number the days. We can know which day is the first day of the month and then align numbers accordingly. For instance, for 2019, October started on Tuesday, so we start numbering from Tuesday as follows:
So this sheet can be copied in the following way:
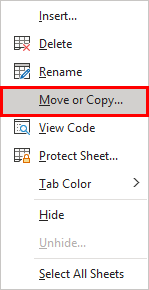
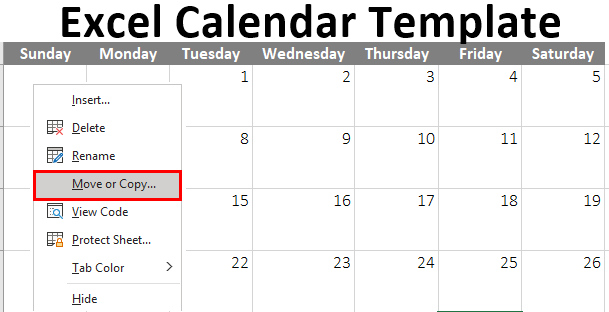
Step 7: First, we can rename this sheet as ‘October’ or whichever month we have created. Then right-click on the sheet name or tab and select ‘Move or Copy.
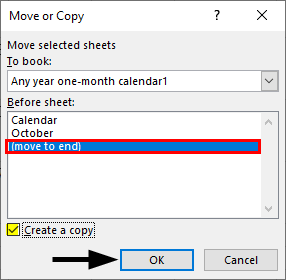
Step 8: A pop-up window will appear. Select ‘Move to End’ under ‘Before Sheet’, checkmark ‘Create a copy, ‘ then click ‘OK’.
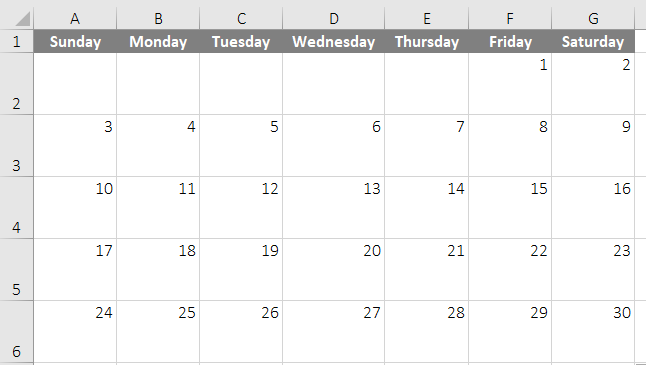
This will create a new sheet. Now we can rename this and number all the days as per the next month. We can repeat this for all the months, depending on the number of days each month. We can add a row label or head in each tab and then name the months.
So after finishing numbering all the months, we will have a calendar in Excel for the entire year, i.e., will have a calendar template as follows:
Now, this was a custom monthly calendar. This way, a custom weekly and yearly calendar template can also be created.
Example #3 – Dynamic Excel Calendar Template with Formulas
Now let’s say we create a dynamic calendar for a monthly template.
The following steps can be used to do so:
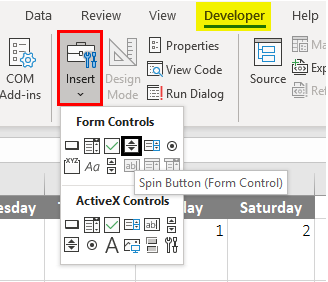
Step 1: Click on the ‘Insert’ and ‘Spin’ buttons under the ‘Developer’ tab and insert this to the right of the template. (If the ‘Developer’ tab is not activated, we can do that by clicking on ‘Customize Ribbon’ and ‘Developer’ under File options).
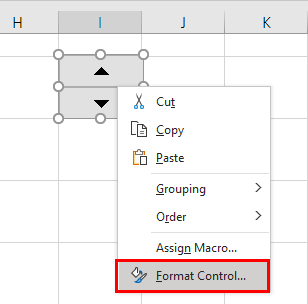
Step 2: Select ‘Format Control’ after right-clicking the ‘Spin’ button.
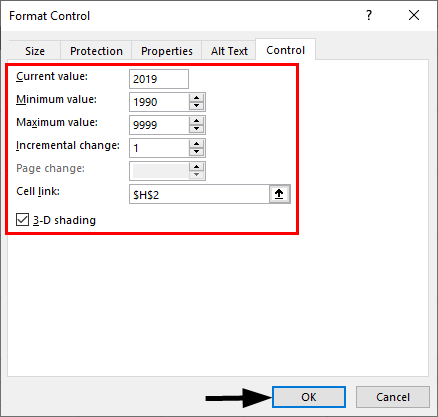
Step 3: A pop-up window will appear. Select the following in the window and click on ‘OK’.
Step 4: Since a specific month calendar is being created, we create 12 different sheets for 12 months. So we create 12 different Name Managers for this and name the cell H2 as ‘Year’ by right-clicking on the cell and selecting ‘Define Name:
The heading can be changed by applying the formula.
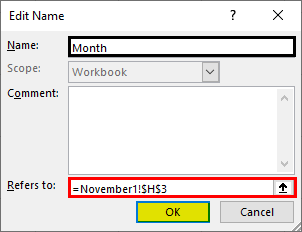
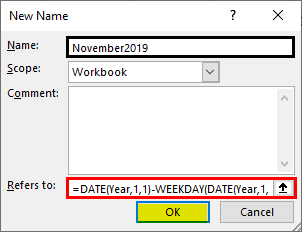
Step 5: Now, we create one more Name manager for this month as follows.
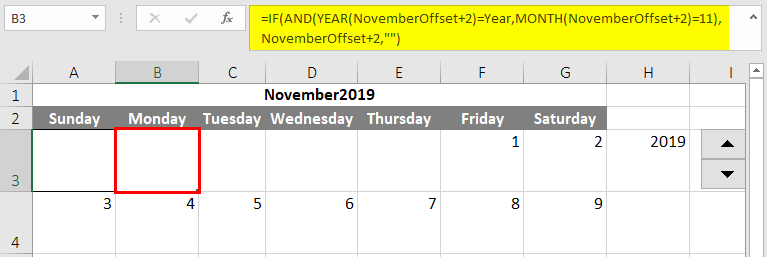
Step 6: Now, in the first-day column, apply the following formula:
=IF( AND( YEAR( NovemberOffset + 1)=Year, MONTH(NovemberOffset + 1) =11), NovemberOffset + 1, “”)
Step 7: Copy and paste the formula to the remaining cells, but change 1 to 2, 3, etc. Similarly, everything is to be increased by 1.
The same logic can apply to all the sheets of different months by changing the month from 11 to 12 (November to December). After completing all the sheets, the first sheet can only control the template. We can change the year using the spin button, and then in all the months’ sheets, the selected year dates will show up.
Things to Remember About Excel Calendar Template
The calendar type one wishes to create depends on how one plan and organizes their day.
Some of the Excel calendar templates that can be downloaded for free in some Excel versions are:
- Academic Calendar
- Any year one-month Calendar
- Birthday Calendar
- Social Media Content Calendar
Recommended Articles
This is a guide to Excel Calendar Template. Here we discuss how to create a calendar template in Excel, practical examples, and a downloadable Excel template. You can also go through our other suggested articles to learn more –
