Updated July 5, 2023
Introduction to Exponents in Excel
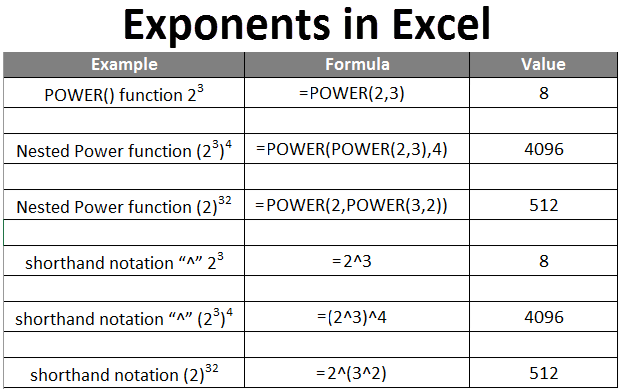
Exponents in Excel are one of the oldest concepts in Mathematics and are a very powerful one as you have to deal with powers. They are a shorthand notation for repetition or to depict how many times a number is multiplied by itself. E.g., 23 means we need to multiply 2 three times, i.e., 2 x 2 x 2, yielding the output 8.
The 2 in the above example is referred to as a base, while 3 is referred to as an exponent or power or index, and it is often read as 2 raised to power 3.
In the examples below, we will learn about the different techniques to use exponents in Excel and some more associated benefits.
How to use Exponents in Excel?
We can use Exponents in Excel in different ways. Let’s understand How to use Exponents in Excel with some examples.
Exponents in Excel – Example #1
Using POWER() function
One of the basic methods to use Exponents in Excel is the POWER function. The function has two arguments, as shown below:
POWER (number, POWER)
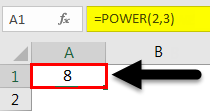
So, if we want to write 23, we will write it as POWER(2,3).
Let’s see how it looks in Excel.
Step 1: Click on the cell where you wish to write the formula.
Step 2: Enter the formula below in the destination cell.
And as you press Enter, you will get the desired output or result.
Exponents in Excel – Example #2
Use of Nested POWER functions
The above example was quite easy to understand the functionality of the POWER function. In this new example, we will learn the use of a power function inside another power function.
To understand the concept in depth, let’s solve a mathematical equation, and then we will learn how to do the same thing in Excel.
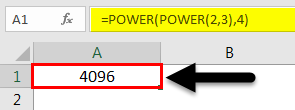
(23)4 = (2 x 2 x 2)4 = (8)4 = 8 x 8 x 8 x 8 = 4096
We should note that the order of brackets is very important, and they can alter our results. We will see this in the below example using the above mathematical equation.
Step 1: Click on the cell where you want to insert the formula.
Step 2: Enter the formula below in the selected cell.
And then, press Enter, and you will get the desired output or result.
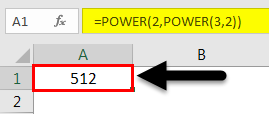
In case we have something like (2)32, then we need to use the below formula, and it will give us different results:
Step 1: Click on the cell where you want to insert the formula.
Step 2: Enter the formula below in the selected cell.
Once you press Enter, you will get the desired output or result.
The above two examples clearly show the difference between (23)4 and (2)32
Also, you can use multiple POWER functions as per the need.
Exponents in Excel – Example #3
Using shorthand notation “^.”
The other easy and most useful way to calculate exponents in Excel is by using the shorthand notation “^” as shown below:
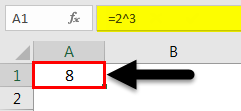
Let’s assume we have the same example, 23, and we will write it as 2^3. Let’s see how we can write this up in Excel:
Step 1: Click on the cell where you wish to calculate.
Step 2: Enter the formula below in the selected cell.
And as you press Enter, you will get the desired output or result.
This formula is simple from the POWER function, and it is very easy to use it.
Using ^ for multiple exponents
As we learned the use of multiple POWER functions above, similarly, we will learn the use of “^” for multiple exponents. As we have seen that the brackets play a crucial role in the calculations, we need to be careful while calculating such formulas. Now let’s take a glimpse at a few examples:
Exponents in Excel – Example #4
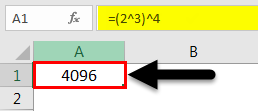
Mathematical equation: (23)4
Below are the steps that will lead our way:
Step 1: Click on the cell where you wish to calculate.
Step 2: Enter the formula below in the selected cell.
As you press Enter, you will get the desired output or result.
Exponents in Excel – Example #5
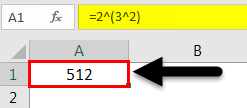
For the numbers like (2)32, we need to use the formula as shown below:
Step 1: Click on the cell where you wish to calculate.
Step 2: Enter the formula below in the selected cell.
When pressed Enter, you will get the desired output or result.
Exponents in Excel – Example #6
Using Exponents as superscript
In the above examples, we learn how to do calculations using Excel’s exponents. But sometimes, we have to use the exponents in textual cells, and we refer to them as superscripts, a character smaller in size than the other characters and slightly above the line we are typing.
Most of the time, the superscript text is used as a marker to differentiate the text or if we need to highlight any point.
In the below steps, we are going to learn how to write superscripts in Excel:
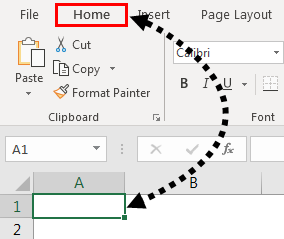
Step 1: Click on the cell where you wish to write.
Step 2: Click on the Home tab as highlighted below image:
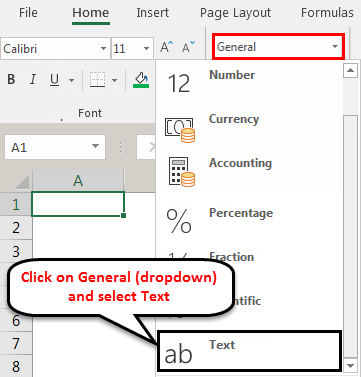
Step 3: Under the Home tab, click on the dropdown next to General to select Text.
This will change the format of the cell to Text format.
Step 4: Now, type the text or number along with the exponent with space as shown below and Highlight the number we want to use as a superscript as shown below:
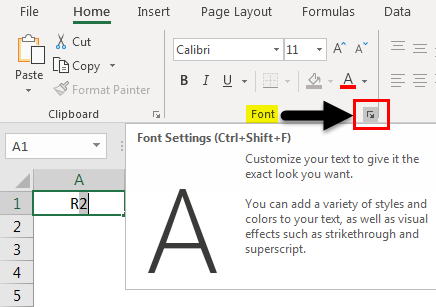
Step 5: Again, click on the Home tab and then click on the bottom-most arrow in the Font section to expand it as shown below:
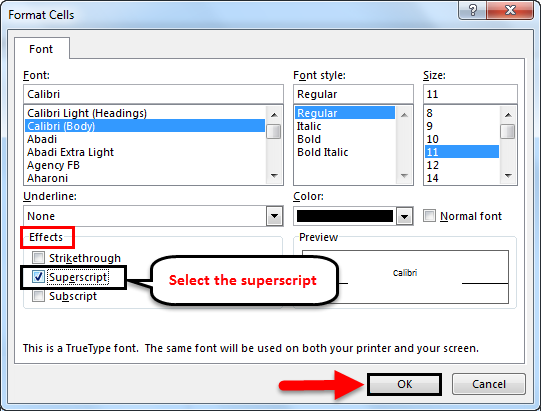
Step 6: The pop-up window will appear. Then Select the Superscript, which is present under Effects, and press OK.
And after pressing Enter, you will get the desired output as shown below:
This is how we use exponents for different calculations and superscripts.
Things to remember about Exponents in Excel
- Using ^ notation for exponents is preferred compared to the POWER() function. But while using “^”, we need to be very careful with brackets as little here, and they can yield different results and might skew the other calculation dependent on the exponent.
- While using multiple POWER() functions, we need to take care if we need the insert as a “number” or POWER argument. This is again a similar case as above in which the results will be different.
Recommended Articles
This has been a guide to Exponents in Excel. Here we discussed Exponents in Excel and how to use Exponents in Excel, along with practical examples and a downloadable Excel template. You can also go through our other suggested articles –


