Excel VBA FileCopy
There are many ways to copy or move a file from one folder to another. We can do it manually from Copying and cutting the file icon and pasting it into the destination folder. But when it comes to automating this process of copying the file, we can do that in VBA as well. To copy the file, we have a function available in VBA named as same “File Copy”.
Syntax of FileCopy in Excel VBA
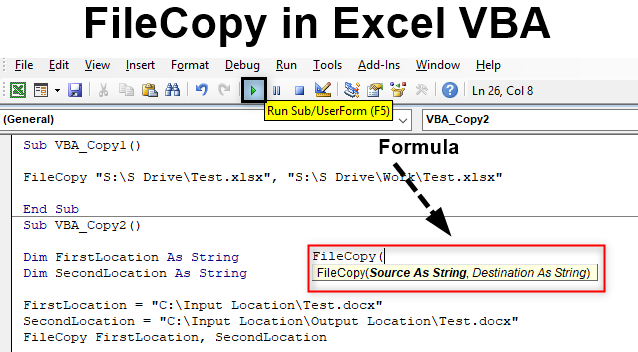
It is very easy to apply File Copy in VBA. The syntax of File Copy is as shown below.
File Copy has only two components to feed. Which are:
- Source – Here we will put the source location from where we need to copy the file.
- Destination – And this will be the destination folder where we will be pasting the copied file.
The complete syntax will be in String datatype. Because we will be using the path of the file which will be as text.
How to Copy a File in Excel VBA?
Now let us try with some examples on VBA File Copy in Excel.
Example #1 – FileCopy In VBA
In the first example, we will see how to copy a file from a source location and paste it in a destination location in a very simple way.
For this, we need a file of any kind or extension. Here we are considering an Excel file with extension xlsx. As we can see, we have placed that excel file into a location which is easy to access named as Test.
Now we will copy this file with the help of FileCopy to the below destination folder.
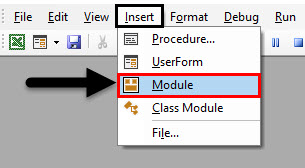
Step 1: For this, go to VBA and open a Module from Insert menu drop-down option as shown below.
Step 2: Now in the opened module, write the subcategory of VBA FileCopy or in any other name as per your choice.
Code:
Sub VBA_Copy1()

End Sub
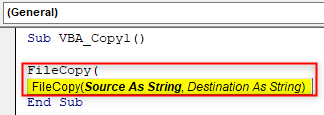
Step 3: Now directly open the FileCopy function as shown below.
Code:
Sub VBA_Copy1()

FileCopy(

End Sub
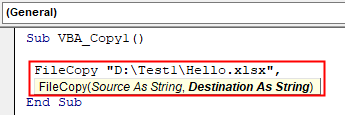
Step 4: Now in quotes write the source location address followed by file name and extension as shown below.
Code:
Sub VBA_Copy1()

FileCopy "D:\Test1\Hello.xlsx",

End Sub
Step 5: For the Destination location, again put the path in inverted commas followed by file and extension.
Code:
Sub VBA_Copy1()

FileCopy "D:\Test1\Hello.xlsx", "D:\VPB File\April Files\Hello.xlsx"

End Sub
Step 6: Now compile the code and run it by clicking on the Play button which is located below the menu bar. We will see, the excel file with name Test is now copied from the source location to destination location as shown below. As there was nothing in the file so the size of the file is coming as 0 KB.
Example #2 – FileCopy In VBA
In another example, we will see how to copy the file from Source location to Destination by defining the variable. This process is little lengthy but more reliable as we will be fixing the parameters and variable.
Step 1: Now first open a new module and write the subcategory of VBA File Copy as shown below.
Code:
Sub VBA_Copy2()

End Sub
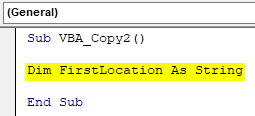
Step 2: First, define a variable where we will be putting the source location of the file same excel file which we have used in example-1 as String.
Code:
Sub VBA_Copy2()

Dim FirstLocation As String

End Sub
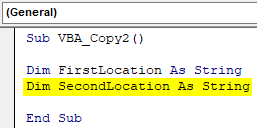
Step 3: In a similar way, we will be needing another variable for the Destination location.
Code:
Sub VBA_Copy2()

Dim FirstLocation As String
Dim SecondLocation As String

End Sub
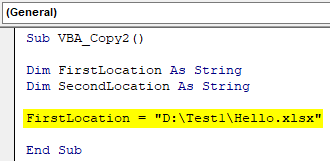
Step 4: Now put the location in the first defined variable which is “FirstLocation” along with file name and its extension.
Code:
Sub VBA_Copy2()

Dim FirstLocation As String
Dim SecondLocation As String

FirstLocation = "D:\Test1\Hello.xlsx"

End Sub
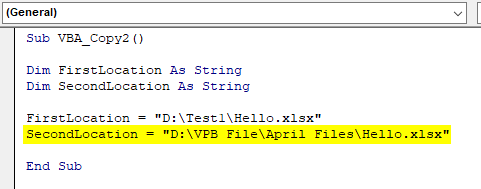
Step 5: In a similar way, do that same thing for Destination location using variable “SecondLocation” which we have defined above.
Code:
Sub VBA_Copy2()

Dim FirstLocation As String
Dim SecondLocation As String

FirstLocation = "D:\Test1\Hello.xlsx"
SecondLocation = "D:\VPB File\April Files\Hello.xlsx"

End Sub
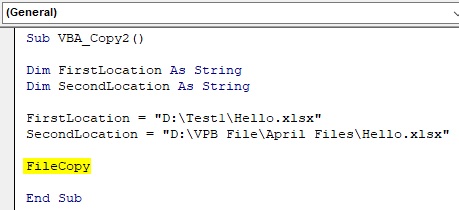
Step 6: Now it is the time to use FileCopy function.
Code:
Sub VBA_Copy2()

Dim FirstLocation As String
Dim SecondLocation As String

FirstLocation = "D:\Test1\Hello.xlsx"
SecondLocation = "D:\VPB File\April Files\Hello.xlsx"

FileCopy

End Sub
As per syntax of the FileCopy first, we have to put source location, where we have kept the file. But as we have already defined the source and destination location folders in above for both variables.
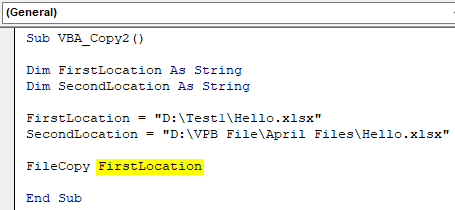
Step 7: So here we can directly select those variables. First select source location variable which is FirstLocation.
Code:
Sub VBA_Copy2()

Dim FirstLocation As String
Dim SecondLocation As String

FirstLocation = "D:\Test1\Hello.xlsx"
SecondLocation = "D:\VPB File\April Files\Hello.xlsx"

FileCopy FirstLocation

End Sub
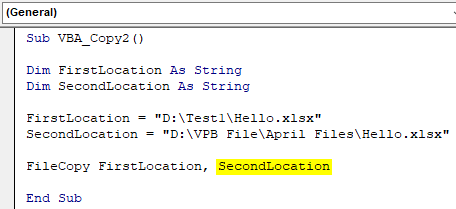
Step 8: Again in a similar way, select the destination location variable which is SecondLocation as shown below.
Code:
Sub VBA_Copy2()

Dim FirstLocation As String
Dim SecondLocation As String

FirstLocation = "D:\Test1\Hello.xlsx"
SecondLocation = "D:\VPB File\April Files\Hello.xlsx"

FileCopy FirstLocation, SecondLocation

End Sub
Step 9: Once done, we will compile the code by pressing F8 functional key. And if there is no error found, then run the code. We will see, the file from source location is copied and pasted in the destination folder as shown below.
We can try different location path as well. For test let’s consider another source location where we will be having a word file.
As we can see, the file doesn’t have any data so the size is again showing as 0 KB.
And the destination folder will be Output Location folder which is under Input Location folder. If we see inside the file, there is no data available.
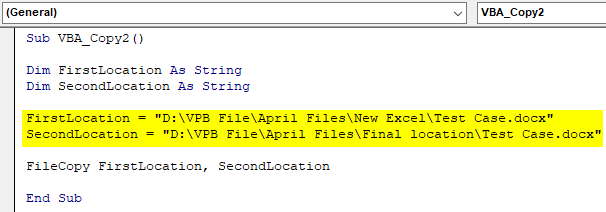
Now we will replace the source and destination in variables FirstLocation and Second Location respectively followed by the file name and its extension.
Code:
Sub VBA_Copy2()

Dim FirstLocation As String
Dim SecondLocation As String

FirstLocation = "D:\VPB File\April Files\New Excel\Test Case.docx"
SecondLocation = "D:\VPB File\April Files\Final location\Test Case.docx"

FileCopy FirstLocation, SecondLocation

End Sub
Now run the code.
We will see, the Test word file is now copied from the Input Location folder to Output location folder with the same size which is 0 KB.
Pros of FileCopy In VBA
- It can be used for copying more than 1 file in one shot.
- It takes a similar amount of time for 10 files as it takes for copying one file.
- We can use any extension file type which we want to copy.
Things to Remember
- Always put the file name and its extension at the end of the location name.
- Quote the destination and source location links into inverted commas.
- Once done, save the code in Macro enable excel to use and retain the code for future purpose.
- Always grant the permission to code so that it could copy the file from the source location and paste it in a destination location.
Recommended Articles
This is a guide to FileCopy in VBA. Here we discuss how to Copy an Excel file using VBA Code along with practical examples and downloadable excel template. You can also go through our other suggested articles –


