Introduction
Installing FileZilla on your system can be a game-changer if you’re a Ubuntu user looking to streamline your file transfer processes. Whether you’re uploading website files, managing server configurations, or simply exchanging files between your local machine and a remote server, FileZilla offers the tools you need to do so efficiently. FileZilla is a widely used open-source FTP (File Transfer Protocol) client that simplifies file management tasks for casual users and professionals.
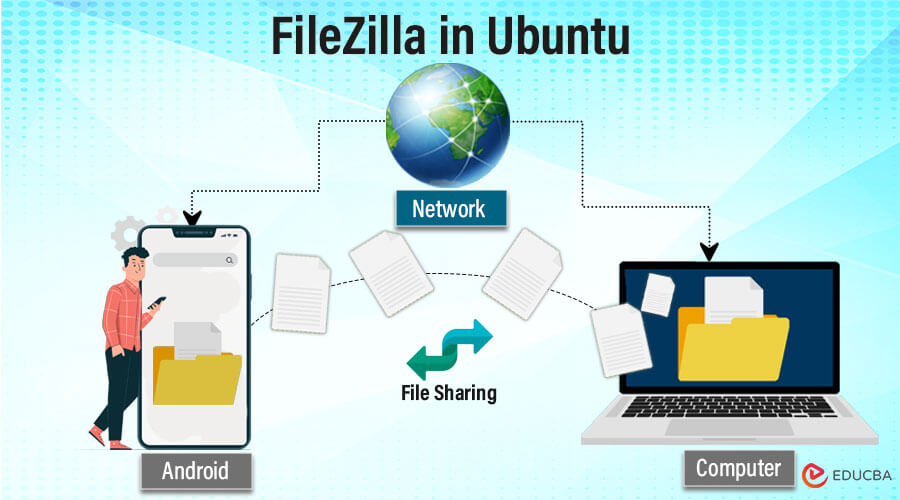
Table of Contents
Prerequisites
- Administrative Privileges: You’ll need administrative privileges to install software on Ubuntu. Log in as the root user. Ensure you have sudo privileges to execute commands with superuser permissions.
- Terminal Access: Familiarize yourself with accessing and using the Ubuntu terminal. While there are graphical methods to install FileZilla, knowing how to use the Terminal can be helpful for troubleshooting and advanced configurations.
Installation Methods
You can install FileZilla using the Terminal and the Software Center (GUI Method).
Step-by-step instructions on searching and installing via the Software Center
This method is the easiest method for beginners who want to install FileZilla.
- You can find the Software Center icon in the Applications menu. (typically represented by a grid of squares in the bottom left corner).
- You can also search for “Software Center” in the Activities overview (press the Super key, usually the Windows key).
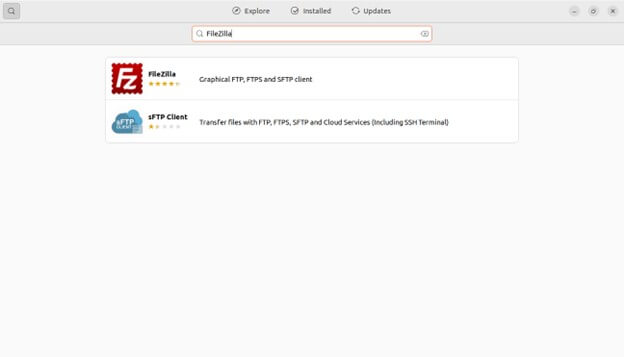
- In the Software Center search bar, type “FileZilla.”
- Locate “FileZilla” in the search results and click on it.
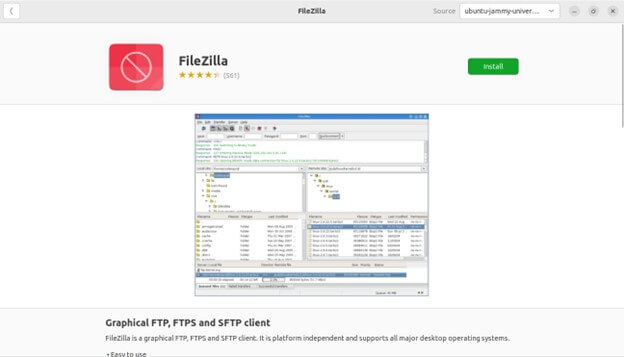
- You’ll see the application details page. Click the “Install” button
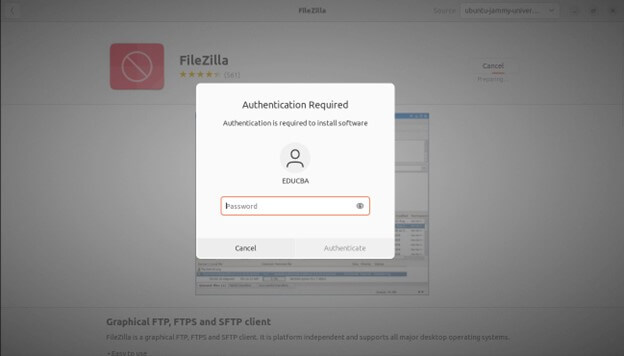
- The system will prompt you to enter your user password to install. This is for security reasons, as installing software often requires administrative privileges.
- Type your password and click “Authenticate.”
- The Software Center will download and install FileZilla on your system. Depending on your internet speed, this might take a few minutes.
Steps for installing via Terminal (Command Line):
This method offers more control and is often faster than the Software Center.
- You can open the Terminal via the Applications menu by searching for it or by pressing the keyboard shortcut (Ctrl + Alt + T.)
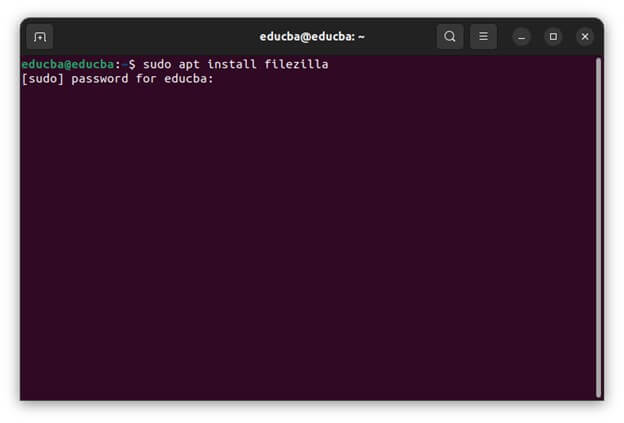
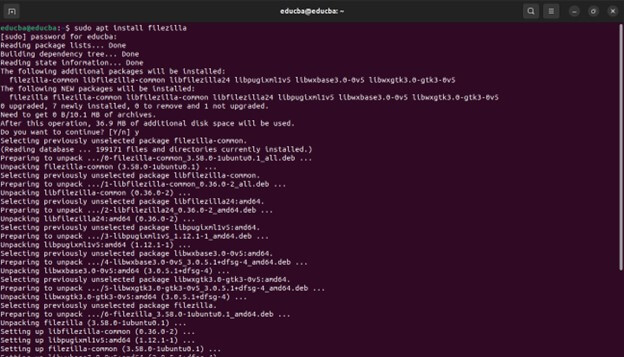
- Enter the following command into the Terminal after it has opened:
sudo apt install filezilla
- After you enter the command, the system will prompt you to enter your password. This security measure verifies that you have the necessary permissions to execute the command with superuser privileges. When you type the password, you won’t see any characters on the screen. Rest assured that we are registering your keystrokes.
- Once you’ve entered your password correctly, the Terminal will begin the installation process. The required files and FileZilla will be downloaded and on your system.
Verifying the installation
Use the command to check if FileZilla is installed correctly.
FileZilla –version
Launching FileZilla
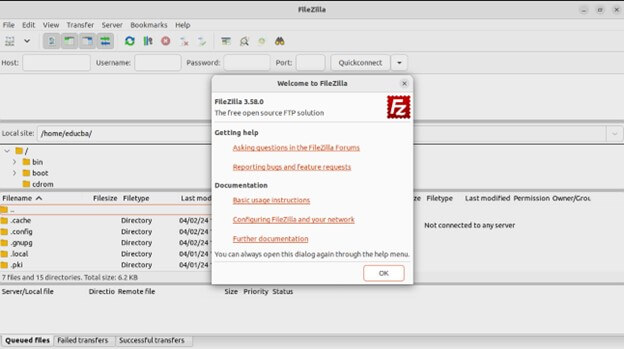
Once you’ve installed FileZilla using either the Terminal or Software Center, here’s how to launch it using the Graphical User Interface (GUI)
1. Graphical User Interface (GUI)
- Open the Activities or Applications menu, depending on your Ubuntu version. Then, type “FileZilla” into the search bar. When the FileZilla icon shows up in the search results, click it to open the program.
- FileZilla Interface after opening the application
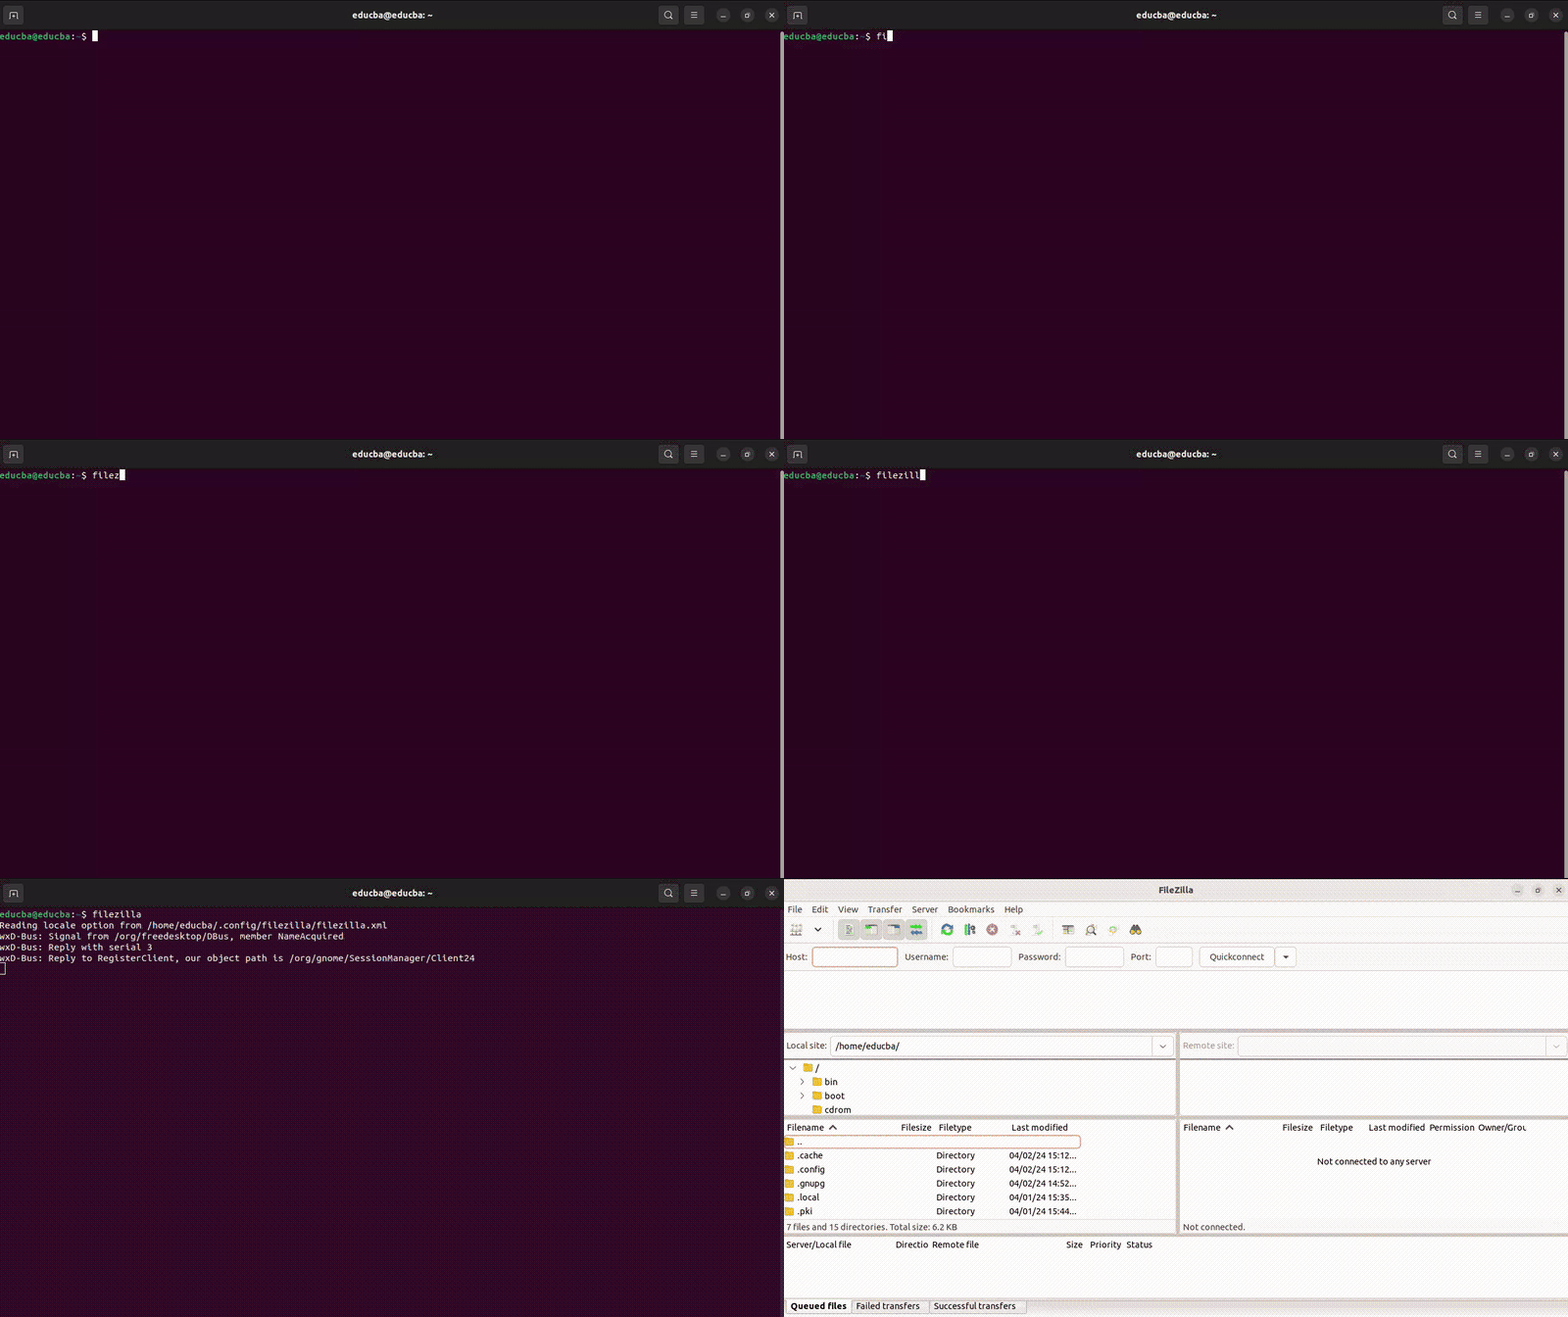
2. Command Line:
- To directly launch FileZilla from the Terminal in Ubuntu, you can use the following command:
FileZilla
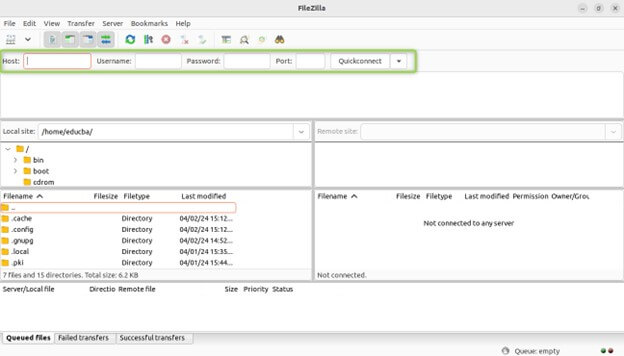
FileZilla Interface Overview
Key Sections:
1. Quick connect bar
Located at the top of the window, this bar lets you quickly connect to a remote server. It typically includes fields for:
- Host: To establish a connection, enter the server’s IP address or hostname.
- Username: Enter your username to access the server.
- Password: Enter your server password. (For security purposes, this field is masked with asterisks.)
- Port: Specify the port number used for the connection protocol (usually 21 for FTP, 22 for SFTP).
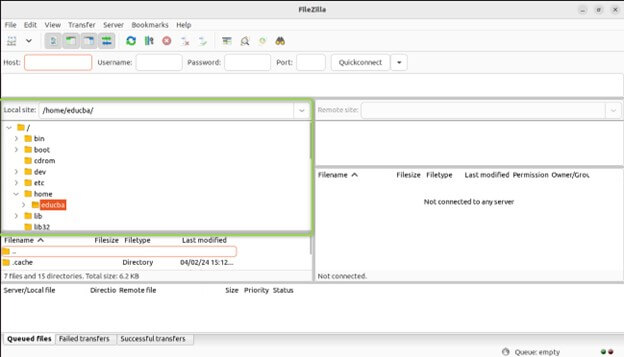
2. Local site pane
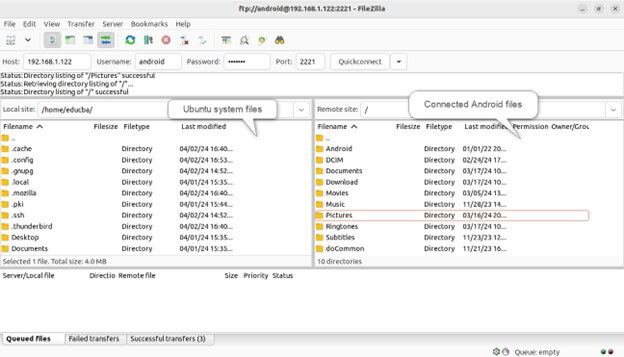
This pane, typically on the left side of the window, displays the contents of your local computer’s file system. It functions like a standard file explorer, allowing you to navigate through folders and files on your local machine and select files and folders to upload to the remote server.
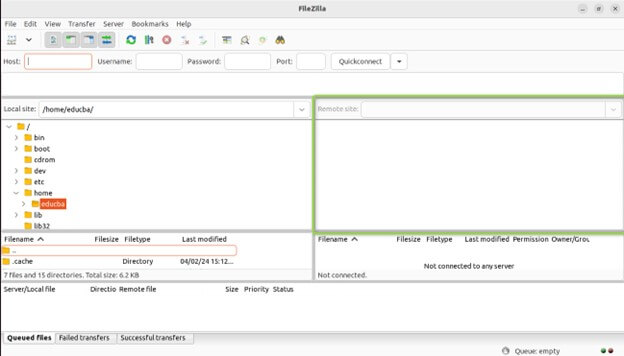
3. Remote site pane
The window usually displays the contents of the remote server you are connected to on the right side, in the remote site pane. Similar to the local site pane, it allows you to navigate directories and view files on the server. You can choose any folders and files you want to download to your local machine from the server.
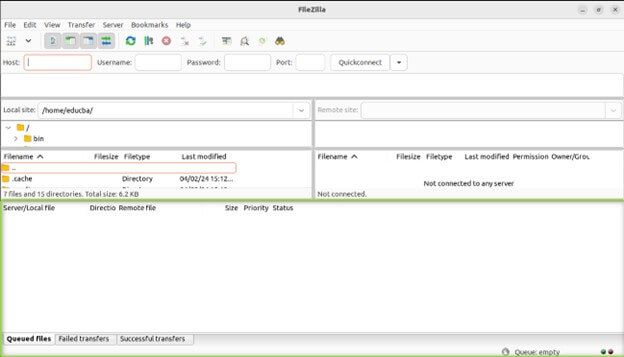
4. File transfer queue
A list of files currently being uploaded or downloaded is shown in the file transfer queue at the window’s bottom. It shows the progress of each transfer, including file name, size, status (e.g., queued, transferring, completed), and any errors encountered. You can manage the queue by pausing, resuming, or canceling individual transfers.
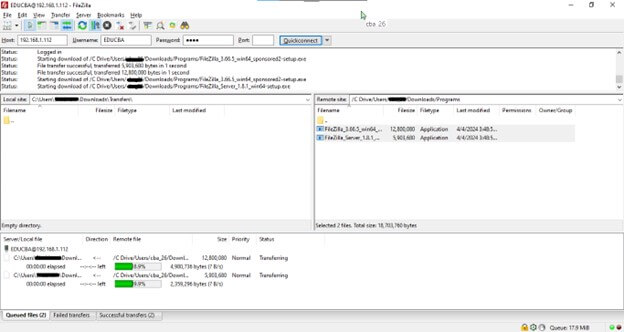
Connecting to an FTP Server
- This is how the Server looks like when you connect to the FileZilla FTP Server
File Transfers with FileZilla
File Transfer between Ubuntu and Android using FileZilla
Troubleshooting
1. Connection Failed:
- Verify Server Details: Double-check the hostname, username, password, and port number you’re entering in the Quick Connect bar. Ensure they match the credentials provided by your hosting service or server administrator.
- Check Firewall: Ensure your firewall isn’t blocking the ports used by FileZilla (typically port 21 for FTP or 22 for SFTP). It would help if you temporarily disabled or configured the firewall to allow connections on these ports.
- Server Status: The remote server you’re trying to connect to might be down or experiencing technical difficulties. Try connecting later or check with your hosting provider for any server outages.
2. Permission Errors:
- Insufficient Permissions: You might need the necessary permissions to upload or download files or folders on the remote server. Ensure your user account has the appropriate read/write access for the target directories. If you need clarification on permissions, contact your server administrator.
- Incorrect File Ownership: The files/folders you’re trying to access might belong to a different user on the server. To modify them, you’ll need the appropriate permissions from the owner.
3. Transfer Errors:
- File Corruption: Files can sometimes become corrupted during transfer due to network issues or interruptions. Try re-uploading/downloading the files.
- Insufficient Disk Space: Ensure sufficient disk space is available on the target location (local machine or remote server) to accommodate the transferred files.
4. Slow Transfer Speeds:
- Network Bandwidth: Slow internet connection speeds can significantly impact transfer times. Consider optimizing your network connection or transferring files during off-peak hours.
- Server Load: Transfer speeds can be affected if the remote server is overloaded with other tasks. If the issue persists, try connecting again later or contacting your hosting provider.
Uninstall or Remove
To uninstall or remove FileZilla from your Ubuntu system, you can use the following steps:
- A terminal window can be opened by looking for “Terminal” in the Applications menu or using the keyboard shortcut Ctrl + Alt + T.
- To uninstall FileZilla, type the following command:
sudo apt remove filezilla
- If you want to remove all configuration files linked with FileZilla, you can use the following command:
sudo apt purge filezilla
- Once you execute the removal command, messages will inform you about which files are being removed. After the process is complete, your system will uninstall FileZilla.
Conclusion
FileZilla is an indispensable tool for Ubuntu users seeking seamless file management and transfer capabilities. With its robust features and user-friendly interface, FileZilla simplifies connecting to remote servers and efficiently transferring files. Whether you opt for the convenience of the graphical user interface or the efficiency of the command line, FileZilla stands as a reliable solution for users of all levels of expertise.
Frequently Asked Questions (FAQs)
Q1. What installation method do you recommend?
Answer: We recommend using the terminal method for most users. It’s generally faster and offers more control over the installation process. However, For those who would rather use a graphical user interface, the Software Center method is a suitable substitute.
Q2. Will uninstalling FileZilla remove my saved server connections?
Answer: By default, no. Uninstalling with the core commands (sudo apt remove FileZilla or from the Software Center) only removes the application files. Configuration files, including saved connections, are typically stored separately. The guide includes instructions for using sudo apt purge to remove both the application and configuration files.
Q3. Does FileZilla support encrypted connections?
Answer: Yes, FileZilla supports encrypted connections for enhanced security during file transfers. It supports Secure FTP (SFTP) and FTP over SSL/TLS (FTPS), allowing users to establish encrypted connections to remote servers for secure data transfer.
Q4. Is there a mobile version of FileZilla available for Ubuntu smartphones or tablets?
Answer: FileZilla’s official mobile version is currently unavailable for smartphones or tablets. However, alternative FTP client apps are available for mobile devices that offer similar functionality for managing file transfers on the go.
Recommended Articles
We hope that this EDUCBA information on “FileZilla in Ubuntu” was beneficial to you. You can view EDUCBA’s recommended articles for more information,
