Introduction to Filters in Illustrator
Adobe Illustrator utilizes filters and effects to produce and segregate alterations in a layer of design. In comparison to photography filters, these are similar where you can stylize a picture to make it look classical or like an illustration. While Illustrator effects and filters are alike and frequently utilize the same phraseology, filters are an enduring and lasting alteration to the design that automatically modifies the design form. Filters involve appending poster extremities, fresco, film grain and many more. Illustrator has shifted the Filter menu to the effects menu, where all the functions are now assembled with effects coming on the appearance panel. Filters register lasting alterations to craft; they are destructive alterations since when you save and shut the file, you can’t revoke the outcomes.
How to Apply Filters in Illustrator?
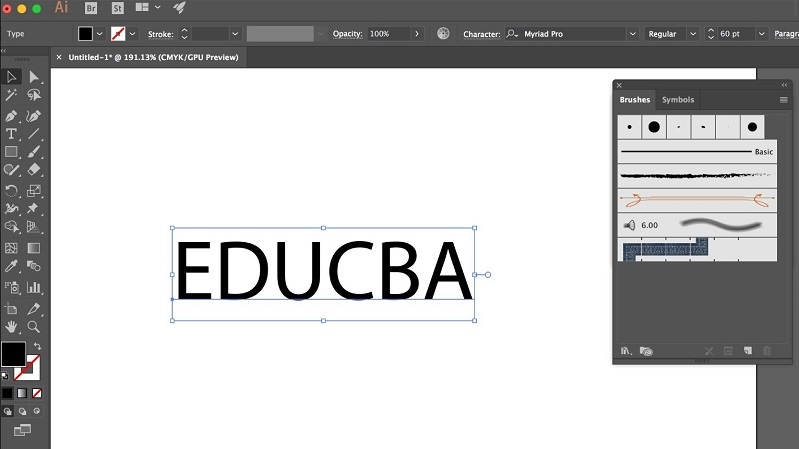
Step 1: Start Adobe Illustrator on your system. Draw or write something on the dashboard. Here we will take an example of a text.
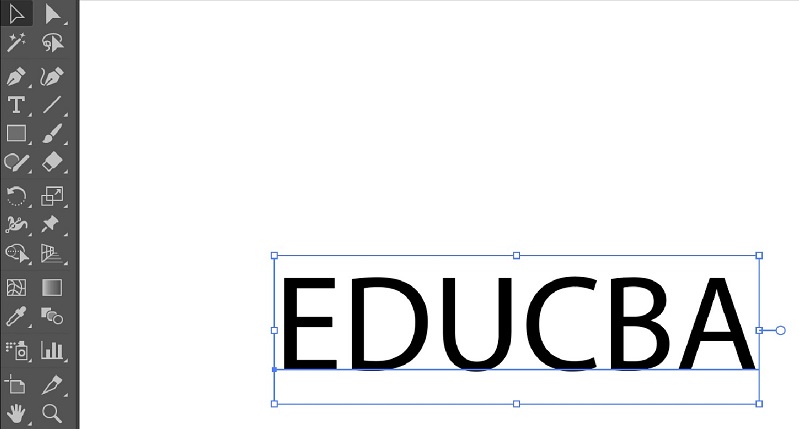
Step 2: Utilize your Select tool to hit the object or collection of objects to which you wish to append a filter. The select tool is present at the left-hand side tools panel.
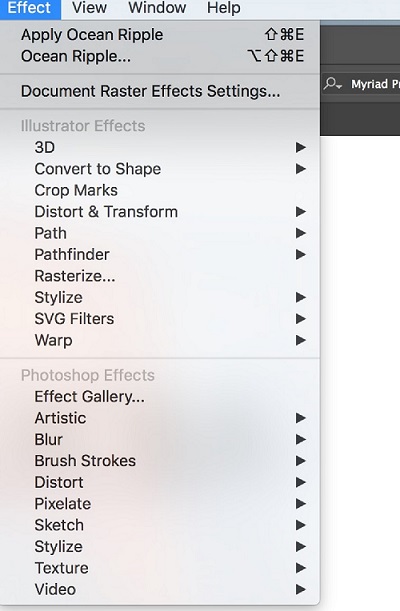
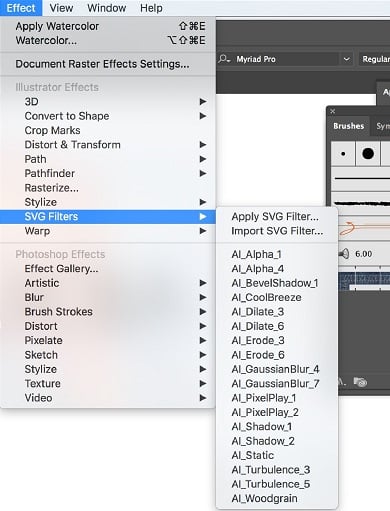
Step 3: The latest version of Illustrator has all the filters under effects now. Click on effects and then select your filter.
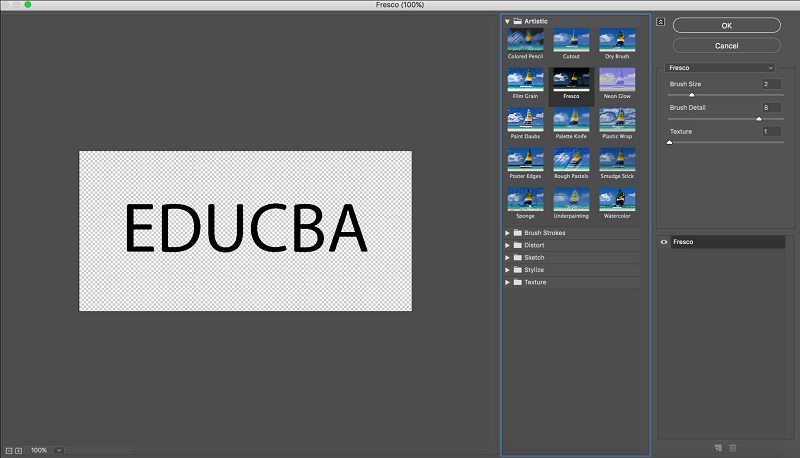
Filters that are frequently incorporated in Adobe Illustrator application versions comprise of colored pencils, fresco, film grain, stylize, blur, glowing edges, and watercolor.
Step 4: Place the alternatives for your filter. This may incorporate selecting the number of filters you wish to utilize out of a percentage of 100. For instance, if you have selected to utilize the sharpen filter, you will select what percentage you wish Illustrator to enhance the contrast of the various components of the picture, illustration or text.
Check your object with the new filter applied using the preview option if that alternative is available in the version of Adobe Illustrator that you are using. Hit OK to make the alterations to your object. Although you may wish to test with the gradient, as compared to effects, once filters are reserved, the image is modified and can’t be revoked.
What is SVG Filter?
Scalable Vector Graphics (SVG) can be defined as a vector-based file format that can be utilized for exhibiting illustrations on the network and on portable gadgets. You can register specific effects on illustrations that are reserved in the SVG format. They are actually XML-based commands that are registered when the SVG illustration is displayed in a viewer or web browser.
Illustrator provides eighteen SVG filter effects, although if you have knowledge of coding, then you can create your own SVG filters. You can hit the new SVG filter button to produce a new SVG filter effect from the beginning. Also, you can eliminate the chosen filters by utilizing the delete icon in the apply SVF filter dialog box.
In Adobe Illustrator, the filters are currently available as effects divided into Illustrator effects and Photoshop effects. These photoshop filters can be registered only to raster images. There is something called as smart filters that are registered to a smart object. The importance of smart filters is that you can modify the settings, conceal and even eliminate them in a non-destructive manner.
Creating SVG Filters
You can also create SVG filters that are available for you in Adobe Illustrator. The steps are given below:
Step 1: Open Adobe Illustrator and open the same example we have used above.
Step 2: Utilize your Select tool to hit the object or collection of objects to which you wish to append a filter. The select tool is present at the left-hand side tools panel.
Step 3: Click on the effect present in the menu bar and select SVG filters.
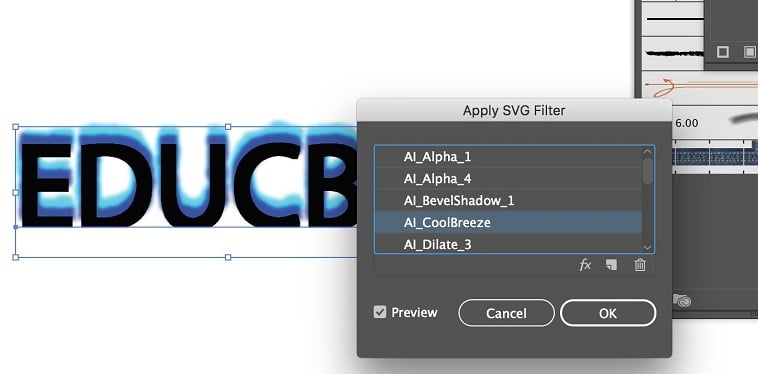
Step 4: Next, you can click on apply SVG filter and then you will get a pop-up.
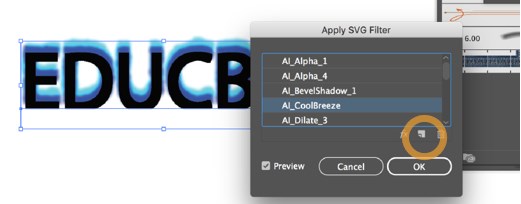
You can select any filter you want, and with the preview checkbox available, you can decide which filter suits the text best. You can also create your own SVG filter. Click on the new SVG filter option as shown below.
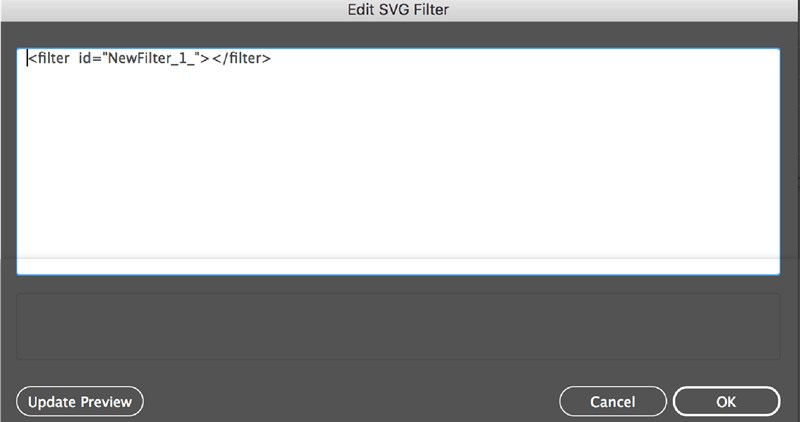
Once you click on a new SVG filter, you will get a window where you can post your filter code and create a new SVG filter.
Adobe Illustrator also has the option of importing SVG filters. You just need to select Effect > SVG Filters > Import SVG Filter. Then a dialog box will appear. In the dialog box, open an SVG file having a filter effect, and once you do, Illustrator will import that filter into your present file.
Conclusion
Filters can be used to correct your images, register exceptional art filters that provide your picture with the aspect of a drawing or allusive portrayal, or produce distinctive modifications utilizing lighting effects and distortions. Third-party developers provide some filters that are accessible as plugins. Applying filters to huge pictures can be time absorbing, but you can check the effect by selecting the preview checkbox in the filter dialog box. The filter gallery provides a sampler of various exceptional effects filters. You can register more than one filter, switch on or off the effect of a filter, reset alternatives for a filter, and modify the order in which filters are registered. When you are content with the preview, you can then register it to your picture. Adobe Illustrator also comes with special-effects filters that you can register to immersed bitmap pictures for a scale of effects.
Recommended Articles
This is a guide to Filters in Illustrator. Here we discuss the Introduction and How to Apply Filters in Illustrator along with steps to create SVG Filters. You may also look at the following articles to learn more –
