What is Flash Fill in Excel?
Flash Fill in Excel is a feature you can use to automatically format a dataset by simply providing an example of how you want the data to appear.
For example, let’s say you have a column of dates in the format “dd/mm/yyyy”. If you start typing the year in a new column, Flash Fill will recognize this pattern and automatically fill in the rest of the years for you in the same format.
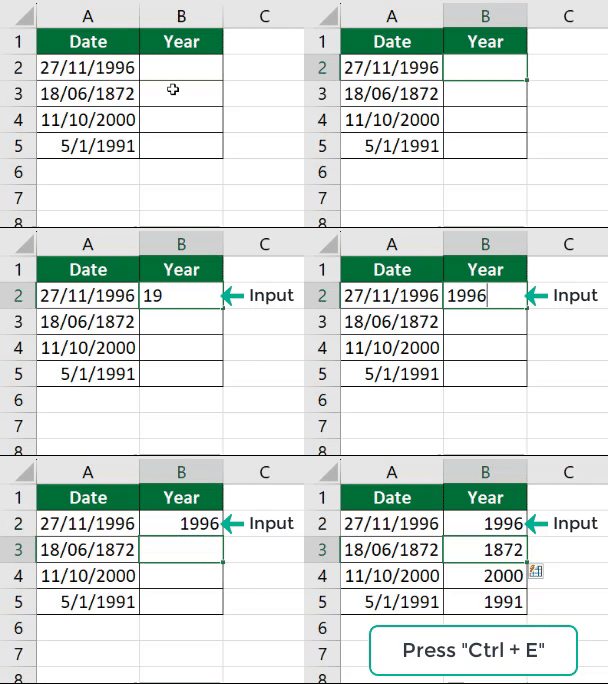
It is a very useful feature that simplifies data manipulation tasks and makes it easier to work with large datasets. We can use flash fill instead of using complex formulas or multiple functions.
Excel Flash Fill Shortcut
Shortcut for Mac: “Cmd + E”
Table of Contents
How to Enable/Disable Flash Fill in Excel?
Steps to “Turn ON” Flash Fill
1. Open your Microsoft Excel file
2. Go to the “File” menu (located at the top left corner) and click on it.
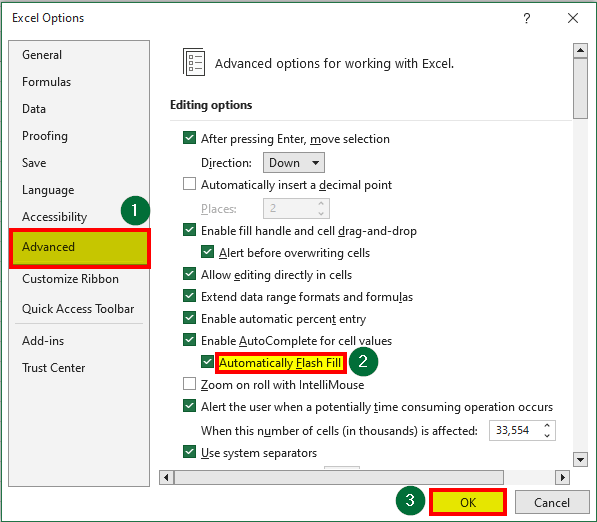
3. In the menu that appears, click on “Options.” It will open the Excel Options dialog box.
4. In the Excel Options dialog box, click on the “Advanced” tab on the left side.
5. Check the “Automatically Flash Fill” option
6. Click “OK”
Steps to “Turn OFF” Flash Fill
To disable Flash Fill, follow steps 1 to 4 from the previous instructions, and in step 5, uncheck the “Automatically Flash Fill” checkbox.
How to Use Flash Fill in Excel?
Let’s understand with an example how to use Flash Fill in Excel. Follow these steps.
1. Enter the data in the first column.
2. In the second column (e.g., cell B2), provide an example of how you want the data to appear. For instance, we want “Daisy_Clooney” to appear as “Daisy Clooney“, so we have added it in cell B2.
3. To initiate Flash Fill, press “Ctrl + E” (Windows) or “Cmd + E” (Mac). Excel will automatically fill the cells based on the pattern you provided.
Excel Flash Fill Examples
Example 1:
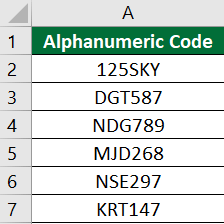
Suppose you have an alphanumeric list of codes and want to extract numbers from them to create a new column containing only the numbers. Here’s how to do it:
Step 1: Enter the data in column 1.
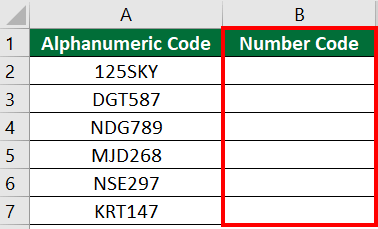
Step 2: Insert a new column where you want the extracted numbers to appear.
Step 3: Type the desired data in cells B2 and B3 to show the pattern you want.
Step 4: Use Flash Fill
- Press “Enter” after inputting the values in cells B2 and B3.
- Go to the “Data” tab on the Excel ribbon.
- In the “Data Tools” group, click “Flash Fill” or use the shortcut “Ctrl + E“.
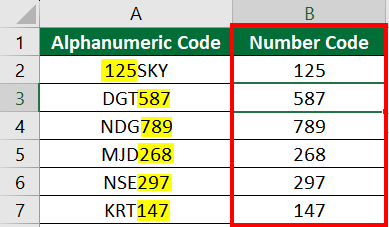
Excel will automatically fill the remaining cells in Column B based on the pattern you set.
Example 2: Extract City Name from Address
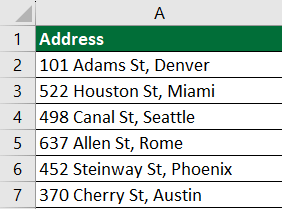
We have a list of addresses with city names mixed in, and we want to separate just the city names to make a new list. Here’s how you can do it using Flash Fill.
Given:
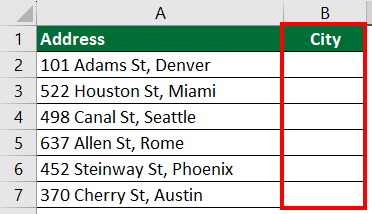
Solution:
1. Add a new column where you want to extract the city names.
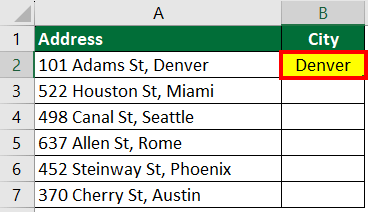
2. Manually type “Denver” in cell B2.
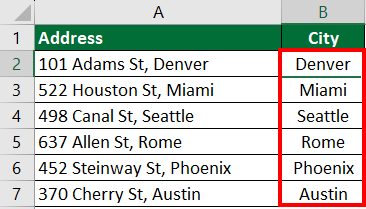
Result: Use the flash fill shortcut “Ctrl + E” to apply the same for the rest of the cells in Column B.
Example 3: Extracting Acronyms from Full Forms
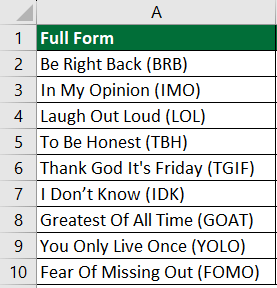
We have a list of words with their acronyms (short forms), like “Be Right Back (BRB)” and “Laugh Out Loud (LOL).” If you want to get only the acronyms (BRB and LOL) into a new column, here’s how you can do it.
Given:
Solution:
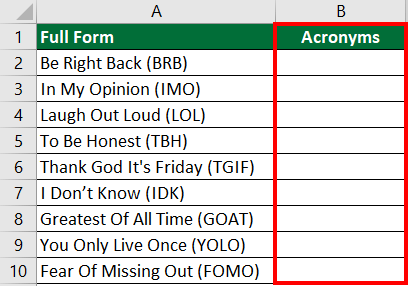
1. Add a new column where you want to extract the acronyms
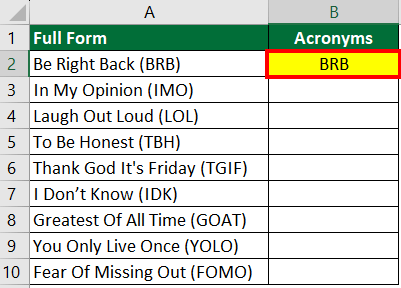
2. Manually type “BRB” in cell B2.
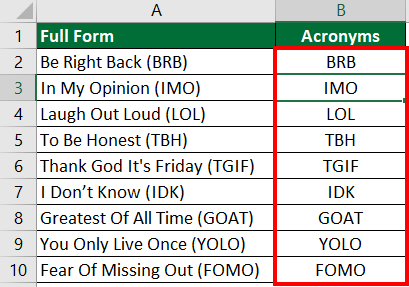
Result: Use the flash fill shortcut to apply the same for the rest of the cells in Column B.
Example 4: Use Flash Fill for Multiple Columns
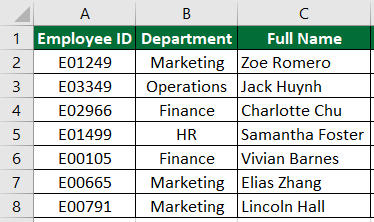
You have a dataset containing employee information such as Employee ID, Department, and Full Name. Your task is to create an Email ID for each employee in the dataset using the information provided in the Department and Full Name columns.
Given:
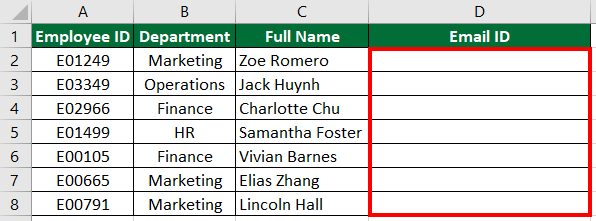
Solution:
1. Add the desired column.
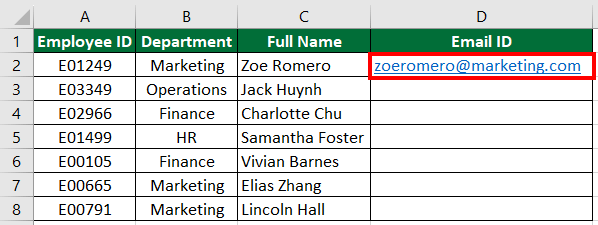
2. Add desired data to the first row of the Email ID column, i.e., fullname@department.com. So the input will be zoeromero@marketing.com
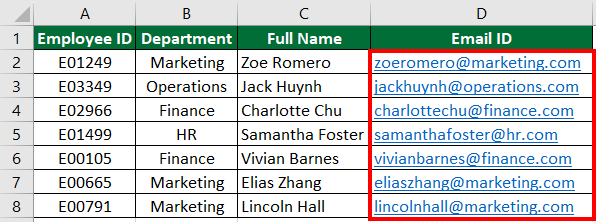
3. Click Ctrl+E to apply the same for the rest of the cells in Column D.
Result:
What to do if Excel Flash Fill is Not Working?
When Excel’s Flash Fill feature isn’t functioning as expected, it may display an error message, as seen below.
To resolve the issue, follow these steps:
- Check Flash Fill Settings: First, ensure that Flash Fill is enabled in Excel settings. Go to the “File” menu, select “Options,” then click on “Advanced.” Ensure the “Automatically Flash Fill” option is enabled.
- Use a Recognizable Pattern: The data you want to format must follow a recognizable pattern. Remember that Flash Fill works best when the pattern is consistent and distinguishable.
- Check Excel Version: Confirm that you are using a supported Excel version (2013 and later) since Flash Fill may not be available in older versions.
What is Flash Fill vs. Autofill in Excel?
| Feature | Flash Fill | Autofill |
| Purpose | Extract and format data based on patterns. | Extend a series or copy values/formulas. |
| Activation | Automatic based on detected patterns. | Manual drag-and-fill or use of a fill handle. |
| How to use it? | In the Excel ribbon, go to Data>Data tools>Flash Fill, or you can use Ctrl+E. | Drag the fill handle in the bottom right corner of a selected cell to fill adjacent cells. |
| Functionality | Automatically detects patterns and applies transformations without formulas. | Repeats patterns, fill series, and copies data or formulas. |
| Usage | Commonly used for data formatting tasks. | Commonly used for filling series and duplicating data. |
| Customization | Limited control over the transformation. | Can be customized using different fill options, like fill series, copy cells, etc. |
| Data dependencies | Doesn’t rely on formulas or existing data. | Fills data based on existing values or formulas. |
What are Flash Fill Limitations?
- Complex or inconsistent data may lead to inaccurate results.
- Non-English or non-standard characters might cause issues.
- Complex patterns can produce unexpected outcomes.
- It may overwrite existing data if not used carefully.
- It only works within a single column (Column A) and cannot fill data in multiple columns at once.
- Not available in versions older than Excel 2013.
- Skips cells with spaces or non-printable characters.
Recommended Articles
This EDUCBA article guides you on flash fill-in Excel. We explain how you can use this feature to transform data easily. We have added 4 examples along with a downloadable template. For more such articles, please check the recommendations below:

