Updated June 8, 2023
Excel Formatting Text (Table of Contents)
Introduction to Formatting Text in Excel
Excel has a wide range of text formatting, which can make your results, dashboards, spreadsheets, and analysis that you do on a daily basis look fancier and more attractive at the same time. Text formatting in Excel works the same way as in other Microsoft tools, such as Word and PowerPoint. This includes changing Font, Font Size, Font Color, Font Attribute (Such as making text, Bold Italic, Underlined, etc.), text alignment, background color change, etc. This article will cover these text formatting tools in Excel and provide examples for better understanding. All text formatting can divide into two major groups: Font and Alignment. Each group has a variety of options using which we can format the text values and has its own relevance. e.g., within Font, you can have all the options associated with text fonts.
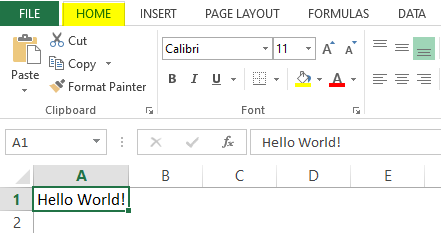
Please find attached the screenshot for your reference:
Text Formatting Tools
The home tab contains all the text formatting tools. I am not considering the Clipboard because most of its part contains the cut, copy, paste, and Format Painter. Let’s start with Font and its options.
1. Text Font
The first thing that comes into the picture when we talk about text formatting is Text Font. The default text font in Excel is set as Calibri (Body). However, it can change to any variety in the fonts section.
Let’s add some text under cell A1 of the Excel sheet.
As seen through the screenshot above, we have added the text “Hello World!” under cell A1 of the Excel sheet.
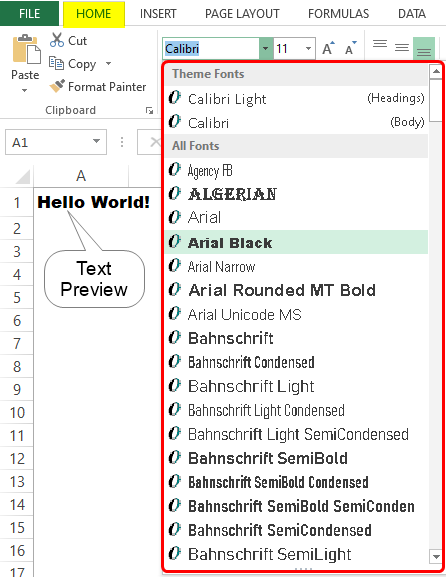
Navigate toward the Font section, where the default value is Calibri. Click on the dropdown menu, and you can see multiple fonts which you can use for the text in cell A1. Choose any one of your choices; I will use Arial Black.
Now, we will try to change the font size.
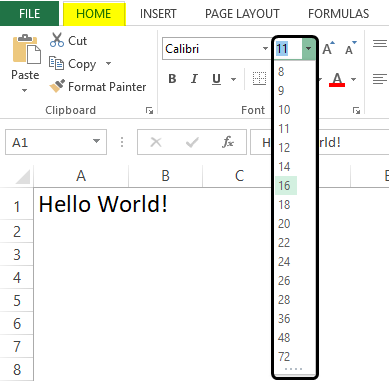
Select the cell containing text (A1 in our example) and navigate toward the Font Size dropdown beside the option. Click on the dropdown to see different font sizes starting from as low as 8. I will change the font size to 16. Please see the screenshot below for your reference.
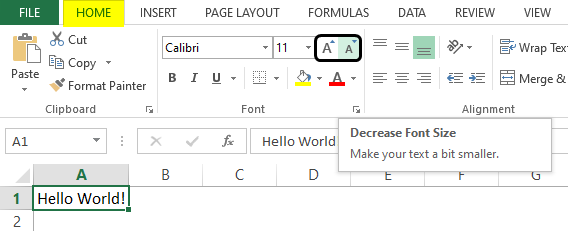
You can also increase or decrease the font size using the Increase Font Size and Decrease Font Size buttons beside the Font Size dropdown. See the screenshot below:
The next part comes when we have to change the text’s appearance. This covers the Bold, Italic, and underlined text, coloring the text and cell containing the same.
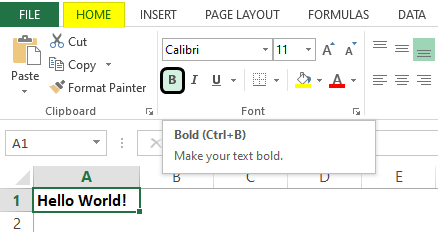
Select the cell containing text and click on the bold button. It will make the text appear in bold. You can also achieve this by hitting Ctrl + B keys.
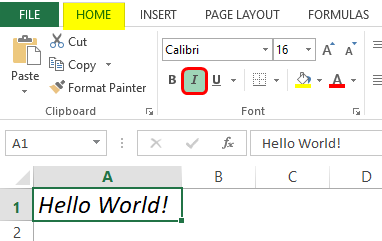
Select the cell and click the Italic button that converts the text into Italic font. This can achieve through a keyboard shortcut Ctrl + I.
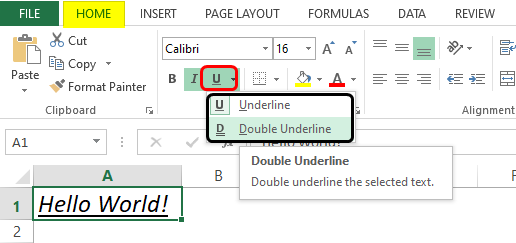
You can underline the text by using the Underline button beside the Italic button; the keyboard shortcut to achieve this result is Ctrl + U. There is one more option for the underlined section: Double Underline. It adds a double underline to the current cell containing text. See the screenshot below for better visualization of these two options.
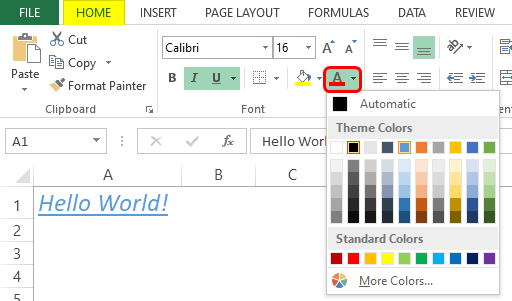
We also have the option to change the text color for a given text. This option is placed under the Font section in your Excel ribbon. You can simply click the change color dropdown and see different colors to add to the current text value. See the screenshot below for your reference:
This is how we can format the text using the Font Group. Now we will move toward the second group, called Alignment.
2. Text Alignment
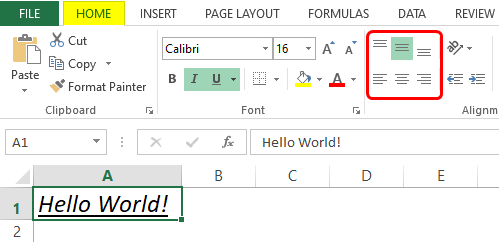
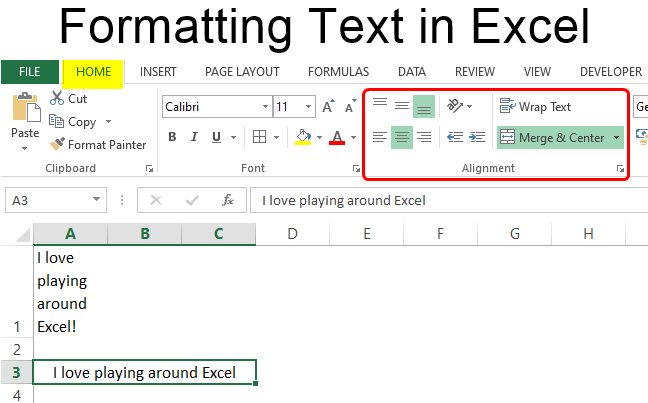
This part also plays an important role in text formatting. We have several alignment options available under this Group. We will see that one by one. Text alignment is of 6 types in total. The first three are Top Align, Middle Align, and Bottom Align. These are placed at the topmost tier under the Alignment group.
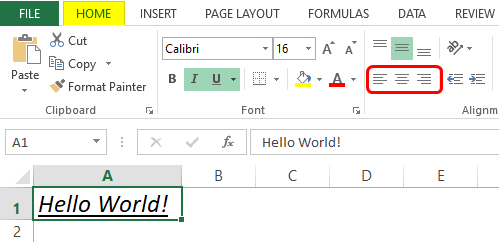
Exactly below these three, there are three more alignment options. Align Left, Center, and Align Right. They are placed in the second tier of the options under the Alignment group.
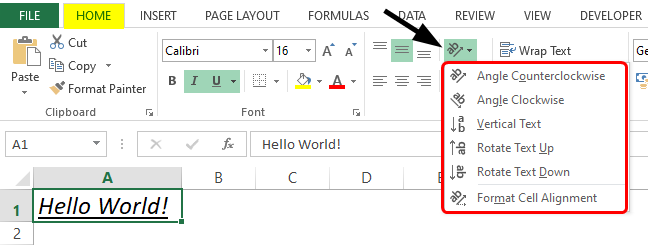
The Text Rotation option is the third part covered under the Alignment group. This option has different text rotation options, allowing you to rotate the text with angles (clockwise)and vertically (up and Down). Sometimes, using this feature can be helpful when you want to do something different with the headings of your reports, although it is rarely used.
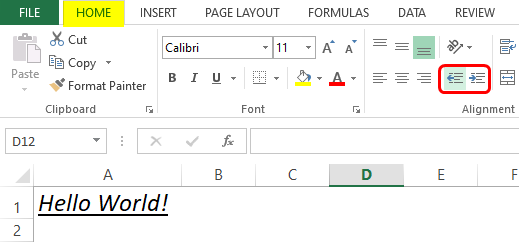
Forth thing that gets covered under the Alignment section is the indentation. Most of us fail to recognize when to add or decrease an indentation. However, you don’t need to keep it in your mind. Excel has Increase Indent and Decrease Indent option that helps you either increase or decrease the indent in your current text.
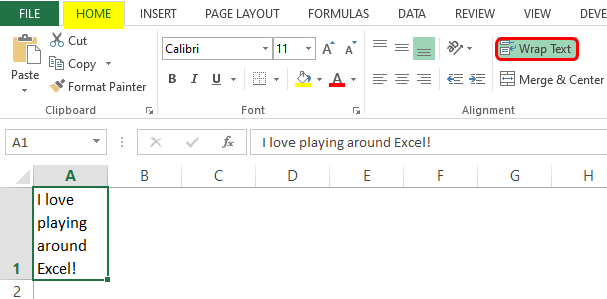
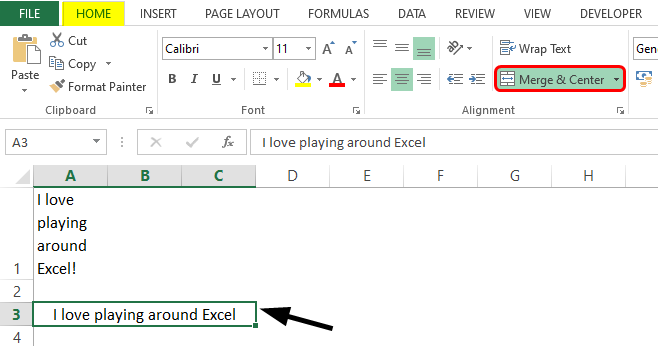
The fifth and last thing under alignment is Wrap Text and Merge& Center options. Well, these two are the most commonly used alignment operations in Excel. Wrap Text shows text in one single cell even if that text goes beyond the cell boundaries. On the other hand, Merge & Center merges the data across multiple cells and then makes a centered alignment for the merged text. If you click on Merge & Center button again, it removes the effect; however, the text gets filled in the leftmost cell or a cell under which it has been entered.
The above screenshot emphasizes the use of Wrap Text. The actual text under A1 is beyond the cell boundary. However, with it having wrapped, it is under the cell boundary.
This screenshot emphasizes the use of Merge and Center. Instead of wrapping the text under the same cell, we tried to merge it across three cells, A3:C3, and it looks nicer. This is how Merge & Center works.
This is how we can format the text under Excel. Now let’s wrap things up with some points to be remembered about Text Formatting in Excel.
Things to Remember
- Font and Alignment cover most of the Text Formatting options under Excel
- Some users also consider Conditional Formatting as a part of Text Formatting. It can sometimes use to format the text. However, it is not dedicated to text formatting (We can also use conditional formatting on numbers).
- You can use the Format Painter option under Clipboard to copy the text format and apply it to other text in another cell or sheet.
Recommended Articles
This has been a guide to Formatting Text in Excel. Here we discuss How to use Formatting Text in Excel, practical examples, and a downloadable Excel template. You can also go through our other suggested articles –

