Updated April 13, 2023

Introduction to GitLab API
GitLab API has two types, the first is REST API and the second is GraphQL API, as compared to REST and GraphQL API REST API is very easy to use in programs. Also, rest API is very easy to understand and use it in our program, it will define the endpoints as per action which we are performing. We can use the GitLab API to get the information which was publically accessible, we can also authenticate our API requests from public access. There are multiple ways available to authenticate our request.
What is GitLab API?
GitLab is a very powerful API which was used to manage our application, we can manage our whole GitLab instances by using this API. We can create our project by using GitLab API. to test the endpoints of API we are using postman or google chrome. We need to use three resources name as a group, projects and standalone.
There are two types available.
- Rest API
- GraphQL API
GraphQL is nothing but the query language which was used which allows clients, to request the data which was they needed. We are possible to get the all required data with less number of requests. GitLab API does have not any fixed data model and endpoints, new abilities of gitlab are added without creating any changed in a breakpoint. Git is the most useful SCM which was used in GitLab. It is the most popular product which was used to manage the repository of gitlab in a centralized way. GitLab repository will come with many features. GitLab will allow managing the repositories in subgroups also it will allow us to use the template.
We can also apply the security to each group and also we can create the group structure. It provides the ease to enable our automation tasks. We can also use different types to create the request. Using it we can make the request only for which was we have need. Using GitLab API we can delete the controller specific endpoints. Using it is possible to maintain the different API for a single project. We can manage only a single API for one project. It will include the API and the version of the API. The API version is defined in api.rb file. We can use the authentication on GitLab API, suppose we have not used any authentication then it will return the public data.
How to Use API/Access to GitLab API?
To use the API we need to create a project. We have created the project name gitlab-api. We have used the GitLab API method in our project.
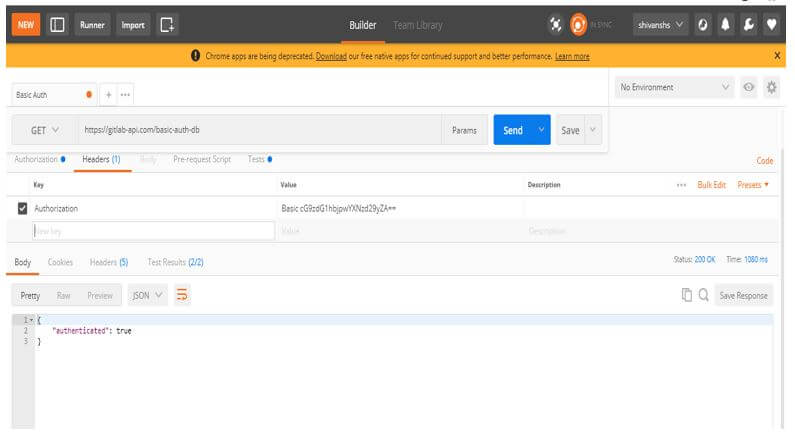
1. We are using the below URL as follows.
In the below example, we are checking the authentication with the database server. We are checking with a response as true.
https://gitlab-api.com/basic-auth-db
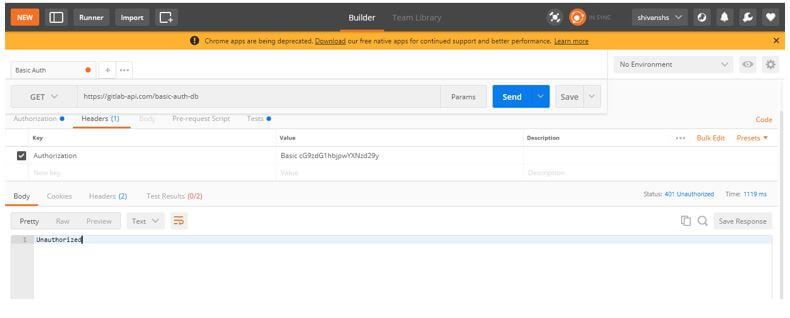
2. After changing the password of the secret it will show the status code as unauthorized. It will be showing the status code as unauthorized because we have used the wrong secret.
https://gitlab-api.com/basic-auth-db
Installation of GitLab API
1. First we are installing the GitLab and its dependency packages. We need to install the dependency package with git. We need to install the below dependency at the time of installing.
- libcurl4-openssl-dev
- libexpat1-dev
- gettext
- libz-dev
- libssl-dev
- libpcre2-dev
- build-essential
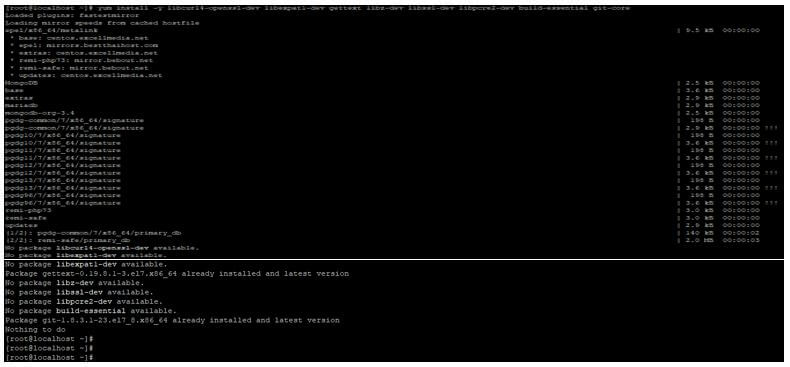
After installing above all the packaged we are installing the GitLab API in our server. In the below example, we have installed all the packages in a single command.
In the below example, we have already installed the package so it will be showing it will already have been installed.
In the below example we can see that dependency packaged will automatically be installed at the time installing the package using the yum command in Linux.
Code:
# yum install -y libssl-dev libpcre2-dev build-essential libcurl4-openssl-dev libexpat1-dev gettext libz-dev git-coreOutput:
2. After installing the GitLab package create a directory for cloning of git. We are creating the directory name as gitaly in the tmp directory.
Code:
# mkdir /tmp/gitalyOutput:
3. After creating the folder clone the repository the git. We have compiled the git by using the GitLab API.
Code:
# git clone https://gitlab.com/gitlab-org/gitaly.git -b 14-2-stable /tmp/gitaly/Output:
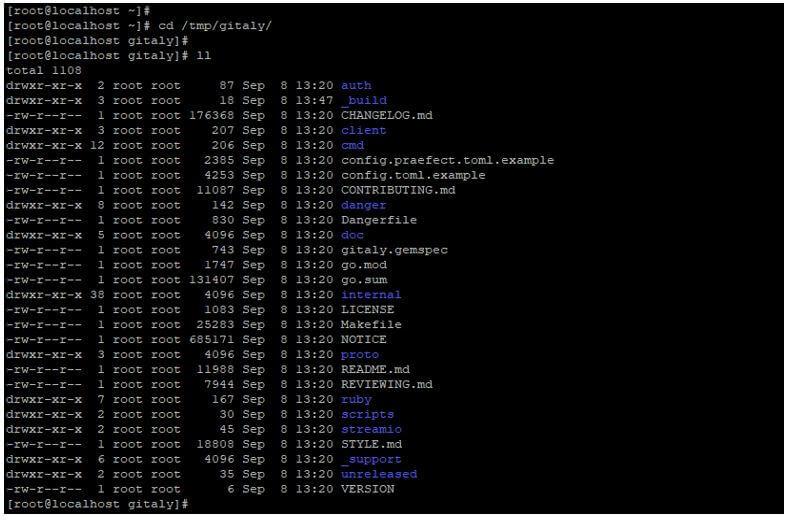
4. After cloning we can check all files are created in /tmp/gitaly directory.
Code:
# cd /tmp/gitaly/
# ll
Output:
Status Codes
At the time of working, we need to understand the status codes. Status code is nothing but the value which was returning while sending a request. It is used a status code which was equivalent to the HTTP status code.
Below are the status code which are returning while sending the API request.
- 200 – OK
- 201 – Created
- 400 – Bad request
- 401 – Unauthorized
Below is the description of each status code as follows:
1. 200 – Ok
- This status code shows the delete, get and put request is successful. While requesting the resource it will be returned in the format of JSON.
2. 201 – Created
- This status code shows that our post request is successful. This status code returns when we are trying to create a new resource.
3. 400 – Bad request
- This status code shows that we have missed the required parameter from the request.
4. 401 – Unauthorized
- This status code shows that we are not authenticated to perform this request.
- If we have not sent any secret token or sent an invalid token same time this status is returned.
Conclusion
GitLab API has two types first is REST API and the second is GraphQL API, as compared to REST and GraphQL API REST API is very easy to use in programs. It uses a status code which was equivalent to the HTTP status code.
Recommended Articles
We hope that this EDUCBA information on “GitLab API” was beneficial to you. You can view EDUCBA’s recommended articles for more information.


