Updated February 22, 2023
Introduction to GitLab Branch Protection
The GitLab branch protection is one of the parts of the strong set of configuration settings. It will be used for users to allow it to the repository of the codes using administrators’ privileges and to make sure to enforce the security regulations. At the same time, we prevent unintentional branch deletions and require successful automated checks while we perform before the pull requests and merge with some other files.
GitLab branch protection overviews
The Setting branch protection rules, which describe whether the collaborators can delete or force push operation to the branch and other set constraints for any pushes to the branch, such as passing status checks or having a linear commit history, can help secure key branches. Implementing the branch protection rule, which can be used to enforce the particular workflows or any other requirements before a collaborator can make the changes to a branch in the repository, also includes merging a pull request into the branch. Then each branch protection will apply as the rule blocks to force or pushes the changes to the matched branches and prevent them with default. These limits can be disabled, and other branch protection measures enabled at the discretion settings. It needs admin permissions to the repository to be exempt from the constraints of a branch protection rule by default, including the admins if required.
Create GitLab branch protection
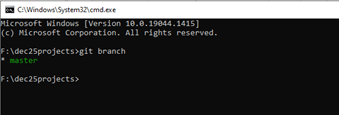
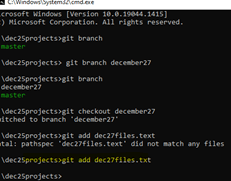
Permissions in GitLab are primarily defined in terms of both reads and write access to the repository and branches’ datas. With Certain branches that can be safeguarded to apply certain constraints. By default, the repository’s branch is protected as the default one. First, we can check how many branches are used in the projects with the help of commands like git branch,
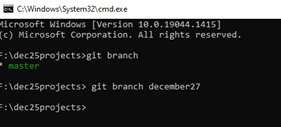
The above screenshot used the git branch command to list the total branches from the current project. Then we need to create the new branch using the command called git branch branchName
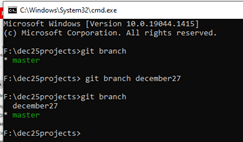
We can check the branch lists using the git branch,
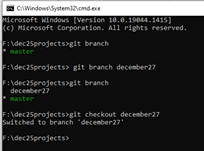
If we want to enter a new branch by using commands like git checkout on December 27,
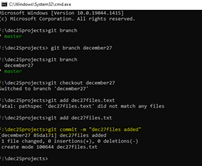
I created one text file name like dec27files.txt and added it to the branch,
After that, I commit the file to the branch using the command like git commit -m “dec27files added.”
Now again, I checked the previous branch called master commits using a command called git checkout master,
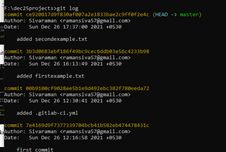
It has four commits; by using git log, we can
The above screenshot shows a list of commits performed by the users in the branch repository; on December 27, the branch had one comment only,
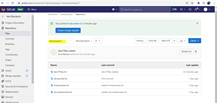
After I use git remote add December 27 “URL,” the branch is remotely added to the repository, and then using git push December 27 command is used to push the branch with files in the GitLab repository,
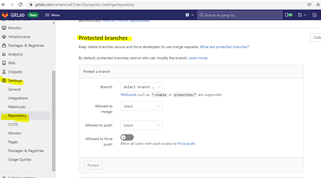
Settings ->Repository -> Protected branches option enable we can perform to protect the branch,
Like that, we can create n number of branch protections for the single branches.
Multiple GitLab branch protection
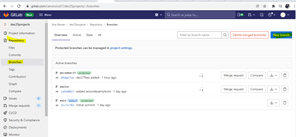
Whenever we use a single branch, we can also parallelly perform the multiple branches with the above scenarios, including the restrictions and protections. We can create the branch using the Web IDE command button called “New branch,”
The Permissions in GitLab are based on whether it does not have the part to read or write access in the repository and coding branches. When we developed the code and protected the branches for o prevent users from tampering with the history of pushing codes without review.
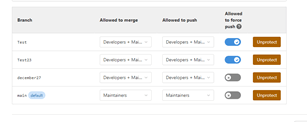
I can protect the multiple branches using the above settings. When we enable the Allowed to force push option, the changes done by the users are allowed to post the changes in the branch. If we disable that option, the programmer is not allowed to deploy or push the changes to the branch folder.
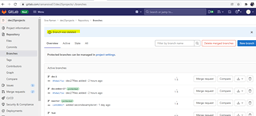
The above screenshot shows the branches are protected using the above options. We can also use the wildcard option to protect the multiple branches simultaneously.
When we want to create a branch name that starts dec, it is automatically protected.
GitLab branch protection Configure
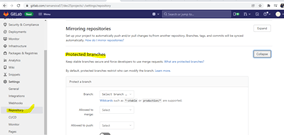
Generally, we can configure using the GitLab settings -> repository -> protected branches,
The above screenshot helps to configure the branches in the GitLab repository. Then we can use the options like Expand Protected branches to choose the branch which is listed and created already by the user,
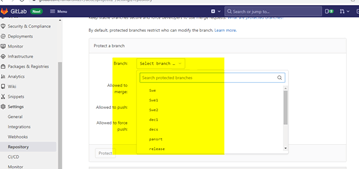
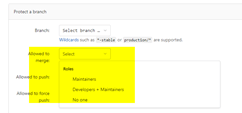
From the above dropdown, the branches are listed, and we select the branch which we want to protect; then, we can choose the option called Allowed to merge list for selecting the role or group which we want to merge into the branch also in GitLab premium we can add n number of users at the same time.
Next, we are Allowed to push list the selected role, group, or other users that can be pushed to this branch the same way we can add the n number of users simultaneously. Finally, we protect the choice using the protect button. Generally, we prerequisites the options like Allowed to push option is set to No one and Allowed to merge is set for the developers. For to create the protected branch by using the UI or API format. And also, only existing protected branches and commits are to be protected.
Deleting protected branch
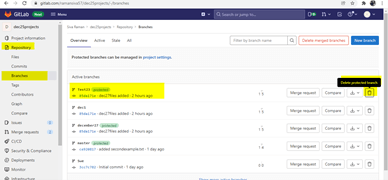
We can delete the protected branch using the delete protected branch option in the Web IDE itself,
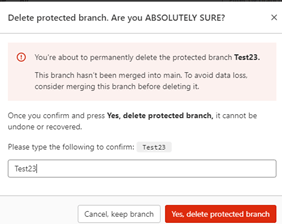
If we want to delete the protected branch with the files, click the delete option; it shows the following warning message popup,
Once we enter the branch name in the text box, the Yes delete protected branch button is enabled to proceed with the delete operations.
Finally, the branch was deleted successfully.
Conclusion
The GitLab has many features among that branches: the basic workflow tree for performing the developer and other team tasks in the repository. In that administrator or maintainer, give the permissions like read or write to changes in the code repository branches with safeguard for applying the constraints.
Recommended Articles
This is a guide to GitLab Branch Protection. Here we discuss the basic workflow tree for performing the developer and other team tasks in the repository. You may also look at the following articles to learn more –
