Updated April 15, 2023

Introduction to Gitlab GIST
GIST in GITHUB is a new feature shared by GITHUB. The intention of GIST in GITHUB is great. GISTS are more like code snippets. The major use of GIST is to write a short piece of code or a small functionality and allowing to share that functionality among other users. So GIST is more like a memo of code. A snap of code or a snap of functionality that can be shared among other users for reference. So the process of sharing code snippets and Pastes is largely resolved using GIST. So when a coworker or some among the friends are expected to be shared with a sample piece of code then GISTS come into play widely. Let’s discuss these GITHUB GISTS widely further. In this topic, we are going to learn about Gitlab GIST.
How to Use Github Gist?
Every GIST is a GIT repository. So all operations of a normal git repository can be performed here too. Operations like Forking, cloning, etc. can be very well performed here. The Account which is currently signed in will have the allocation for the particular number of GISTS involved. The option to allow it to be set as private or public is available in GISTS. This means we can prefer to set a GIST in such a way that if needed we can keep it open for the public or it can also be restricted within yourself or a particular set of users. The discover option lists all the public GISTS created. From the point of secret GISTS, these secret GISTS can be searched and do not appear in the Discover option.
The process of what type of GIST is been created is probably one time. This means when a GIST is created as public then it cannot be converted as a Private or a secret GIST, same as when a GIST is created as a secret then that specific GIST cannot be converted again to the public option. When a lot of security or if the intention is to create a code away from other developers who may acquire your code then PRIVATE or SECRET is the possible option to prefer.
Notifications are another key item in a GIST, a notification will be received on below possible conditions such as below,
- When a user is declared to be the author of a created GIST
- When someone or some random person mentions or puts our reference on a GIST.
- When a subscription is intentionally triggered by us.
All changes made across the GIST can also be noticed in the GIST creations. The changes made will be tightly kept in a listing and this can be explored in the revision section. So the revision sections mention all the GIST changes associated. The process of pinning is also available. Moreover, the commit level history can also be fully viewed and analyzed, and then it can be complete with the differences.
How to create a gist?
- The first thing to be considered is to sign in to GITHUB.
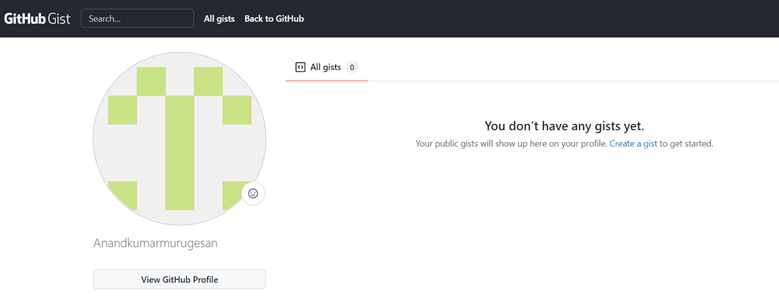
- The below is one of the pages where we can check for the GIST.
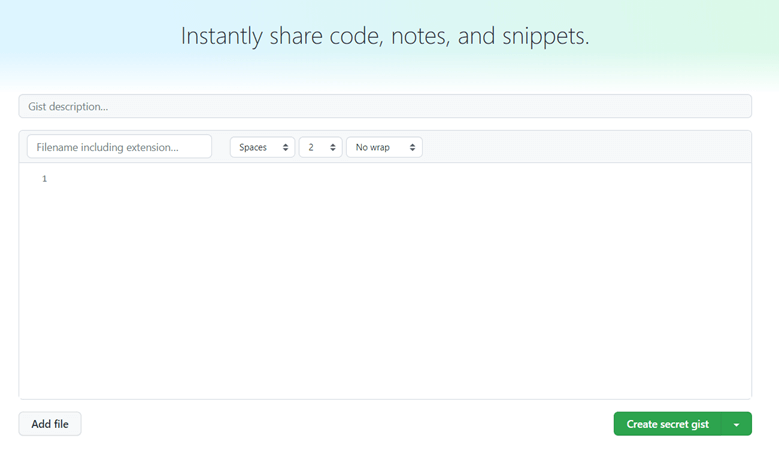
- Next, the below code snap appears where we can create our gists instantly. We can notice the header of the code stamp mentions that we can share code, snippets, and notes in the same.
- We can notice more specifically the addition of the files is also supported, so the new file can be added or deleted through the add file button at the bottom.
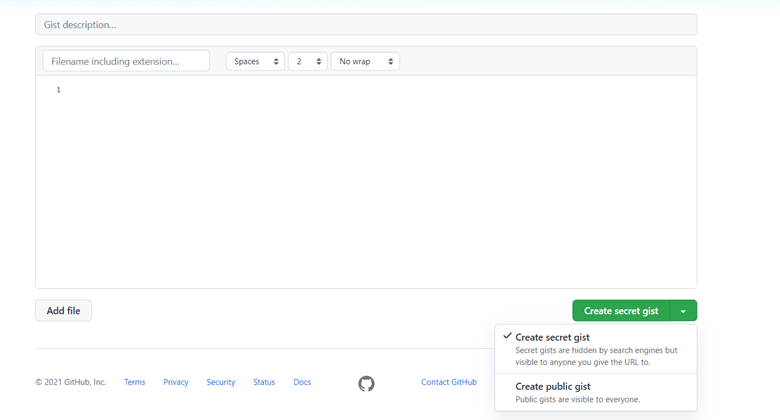
- We can notice the most important option at the bottom. The option mentions whether the created GIST has to be public or secret. This option is on the drop-down menu of the button named the create secret GIST at the bottom. The option to allow it to be set as private or public is available in GISTS. This means we can prefer to set a GIST in such a way that if needed we can keep it as open for the public or it can also be restricted within yourself or a particular set of users. The discover option lists all the public GISTS created. From the point of secret GISTS, these secret GISTS can be searched and do not appear in the Discover option.
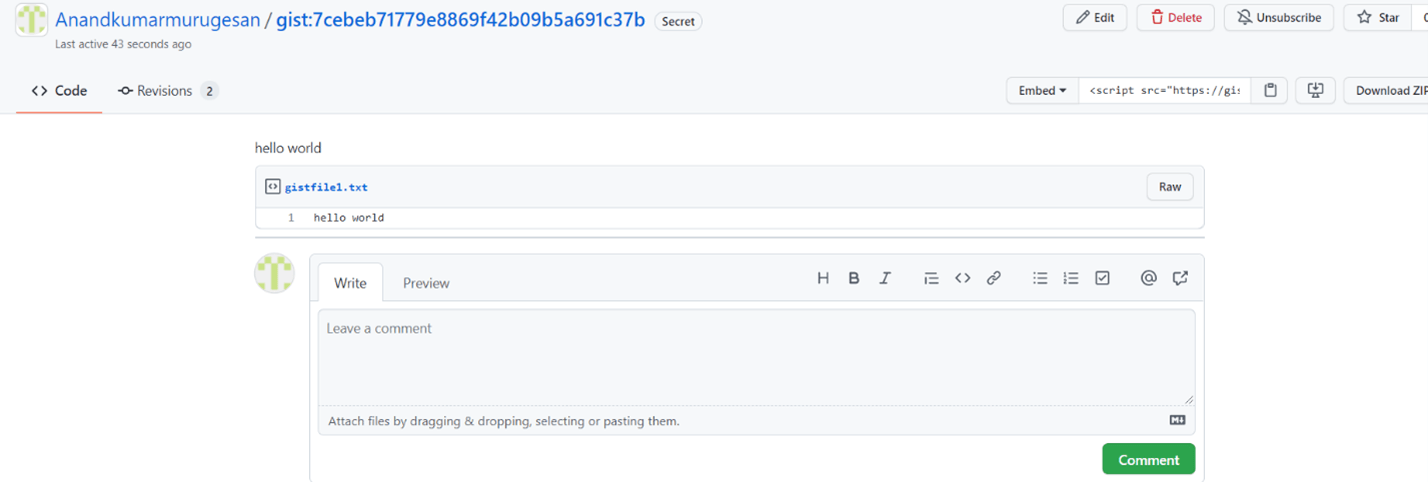
- We can notice the GIST created successfully and the entry of the GIST is available and it can be flexibly updated at any point of time with the comments section open. The gist created below is more of a secret GIST. Additionally, the option of deletion of the GIST can also be performed using the delete button on the right top corner. The process of subscribing and unsubscribing a gist is also been mention and the star value for the GIST is also listed. Any new files are expected to be added they can be flexibly added into the GIST which is been created at any specific point in time.
- All changes made across the GIST can also be noticed in the GIST creations. The changes made will be tightly kept in a listing and this can be explored in the revision section. So the revision sections mention all the GIST changes associated. Snap of this specific section is also listed below,
Gist Example
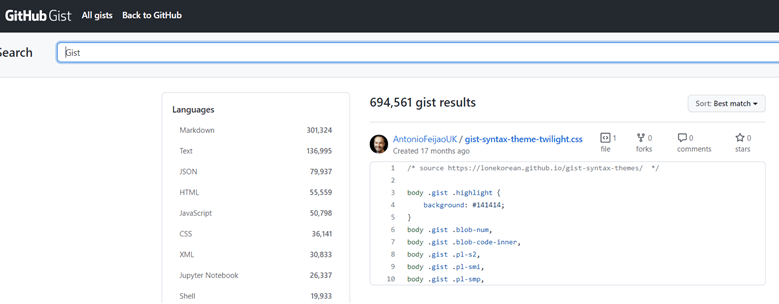
Let’s discuss one among the examples of the GISTS below. The given snap below in the example lists a common search of all the gists available in github and it also lists a sample example of one among random gists which was created for reference. GISTS brings a lot of flexibility for the users to comfortably share a small set of code among the other users involved. This is among the key advantages of using GISTS across the platforms.
Conclusion – Gitlab GIST
The Article mentions what are GISTS, how GISTS are created across the GITHUB setup, mentions some of the important steps involved in creating GISTS, and a suitable example to explain the same.
Recommended Articles
This is a guide to Gitlab GIST. Here we discuss what are GISTS, how GISTS are created across the GITHUB setup, mentions some of the important steps. You may also have a look at the following articles to learn more –
