Updated May 22, 2023

Introduction to Golang Channel
Channels play a very important role in handling dependent work in go language. It creates a channel that allows us to communicate between two goroutines, for example, if we have one goroutine. We want to perform some operation in another goroutine. We want to establish some connection between two goroutines; then we can use the channel; channel default property is bidirectional, which means one goroutine can send and another can receive the request at one time, so it very simply we can say that channel performs two things one is sending and another is receiving the data.
Syntax
Below is the simple way to create any channel; in the below syntax, two things are happening one is giving a name to the channel and the type of the channel,
- First, we need to mention the channel’s name; anyone who wants to use these channels can make a call with the channel’s name.
- We must also mention the channel type with the keyword chan. The data type of channel can be anything string and integer etc.
- We have used the make function with keyword chan and channel type. We can also take a type as a string or integer.
var name_of_channel chan type //Simple way to initialise any channel in go language
name_of_channel:= make(chan type) //Using make function to create channel
How does Channel work in the Go language?
To explain the working of the channel in the go language, we have taken a diagram; please see the below diagram; we can explain the below diagram in the following steps.
- There are two goroutines, and each one is sending and receiving the data.
- We can see that they are bidirectional, which means one can send and another can receive the data.
- Any channel looks like any normal variable, but it will get called.
- In any channel, two operations will be performed one operation is sending the data another is receiving the data. To send, we use the operator channel_name <-, and to receive the data from any goroutine, we can use the operator attribute:=channel_name<-. We will see more uses in the example sections.
- One important thing about the channel is that once we send some data from one goroutine to another goroutine, until the sender does not receive the data from another goroutine, the channel will be blocked for that time.
Please see the below diagram for a better understanding.
Examples to Implement Golang Channel
Below, we have given some of important examples that explain various operations on any channel. To execute the below examples, we can create a file with the name channel.go, and we can run the command go run channel.go, and we get the respective outputs.
Example #1
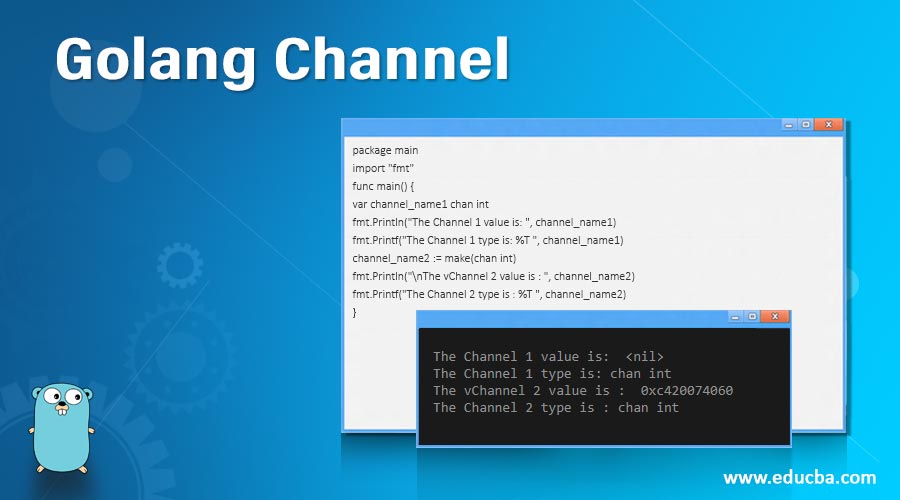
Below is a simple example of any channel where we create a channel and print the channel value and type(int or string) of the channel.
Code:
package main
import "fmt"
func main() {
var channel_name1 chan int
fmt.Println("The Channel 1 value is: ", channel_name1)
fmt.Printf("The Channel 1 type is: %T ", channel_name1)
channel_name2 := make(chan int)
fmt.Println("\nThe vChannel 2 value is : ", channel_name2)
fmt.Printf("The Channel 2 type is : %T ", channel_name2)
}
Output:
Example #2
In the below example, we have created a channel with type as the integer and sending and receiving from that. In all, we are performing the sum of the integer pass from the channel. During sending and receiving the data, the channel will be blocked.
Code:
package main
import "fmt"
func testFunc(channel chan int) {
fmt.Println("The result of the sum is :",123 + <-channel)
}
func main() {
fmt.Println("This is the start of the main method")
channel := make(chan int)
go testFunc(channel)
channel <- 23
fmt.Println("This the end the method main function")
}
Output:
Example #3
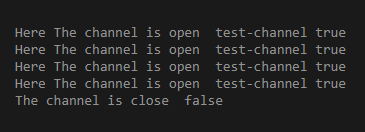
Below is also a very simple example of channels we are sending and receiving; there is a channel created during sending and receiving. But we are at concerts. If the channel is open all time, it will consume memory, so we are performing the close of the channel.
Code:
package main
import "fmt"
func test(channel chan string) {
for i := 0; i < 4; i++ {
channel <- "test-channel"
}
close(channel)
}
func main() {
channel := make(chan string)
go test(channel)
for {
response, check := <-channel
if check == false {
fmt.Println("The channel is close ", check)
break
}
fmt.Println("Here The channel is open ", response, check)
}
}
Output:
Example #4
Code:
package main
import "fmt"
func main() {
channel := make(chan string)
go func() {
channel <- "Go"
channel <- "Java"
channel <- "PHP"
channel <- "Javascript"
close(channel)
}()
for response := range channel {
fmt.Println("Channel of the language",response)
}
}
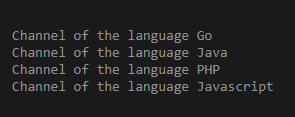
Output:
Example #5
In the below example, we are calculating the length of the channel. len function of the go language allows us to get the length of the channel. The length means the number of attributes inside the channel.
Code:
package main
import "fmt"
func main() {
channel := make(chan string, 4)
channel <- "Go"
channel <- "Java"
channel <- "PHP"
channel <- "Javascript"
fmt.Println("The total length of the channel is: ", len(channel))
}
Output:
Example #6
Here we are calculating the capacity of the channel; capacity means the number of attributes that can be accommodated in it.
Code:
package main
import "fmt"
func main() {
channel := make(chan string, 6)
channel <- "Go"
channel <- "Java"
channel <- "PHP"
channel <- "Javascript"
fmt.Println("The total capacity of the channel is: ", cap(channel))
}
Output:
Conclusion
From this tutorial, we learned the basic concept of the channel in the go language; we learned the working of the channel with the help of a simple diagram that revealed the flowchart of the channel. We focus on some of the important examples of the channel in the go language.
Recommended Articles
We hope that this EDUCBA information on “Golang Channel” was beneficial to you. You can view EDUCBA’s recommended articles for more information.


