Introduction
Ever felt that nagging sense of your Ubuntu drive filling up faster than a birthday balloon? Fear not, intrepid computer user! There’s a hidden hero in your software arsenal: GParted Ubuntu. This nifty tool isn’t some flashy superhero with a cape but a powerful partition editor that lets you wrangle your hard drive space like a digital cowboy. With GParted Ubuntu, you can resize partitions, create new ones, and generally become the master of your storage destiny. But hold on to your virtual horses—if you’ve never messed with partitions before, it can feel a bit daunting. Don’t worry; this guide will be your friendly neighborhood GParted guru, walking you through the basics and making you a partition-resizing pro in no time.
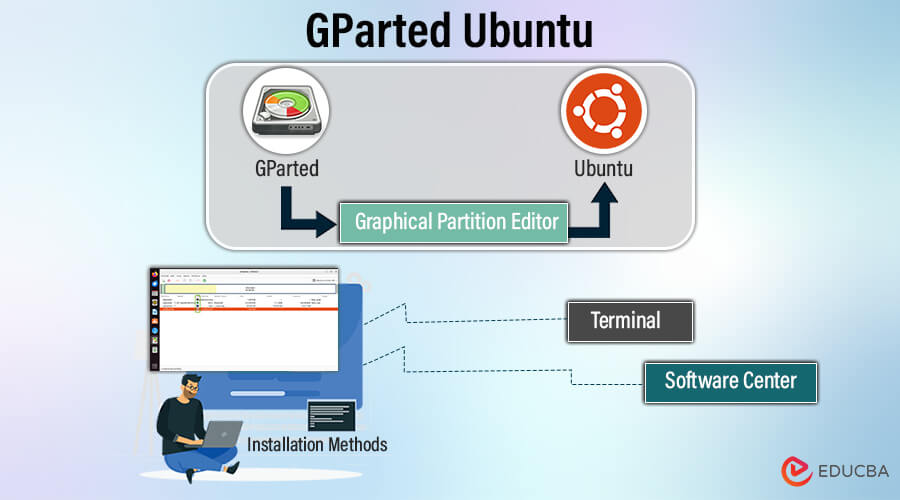
Table of Contents
What is GParted Ubuntu?
GParted Ubuntu isn’t a single program but rather a combination of tools working together. The key player is GParted, also known as the GNOME Partition Editor. It is a free and open-source application renowned for its user-friendly graphical interface (GUI) that lets you manage your hard drive’s partitions on Ubuntu and other Linux distributions. Think of your hard drive as a giant container; partitions act like separate rooms inside it. Each room holds specific data, like your Ubuntu operating system or your personal files. The “Ubuntu” part simply refers to the operating system you’re likely using. While GParted works on various systems, “GParted Ubuntu” is a common way to describe using it specifically for managing partitions on your Ubuntu machine. So, When you mention GParted Ubuntu, it refers to using this powerful tool to control how you divide up your storage space within your Ubuntu system.
Installation to GParted Ubuntu
GParted can be easily installed on Ubuntu using various methods, including the Software Center or the Terminal.
Via Software Center:
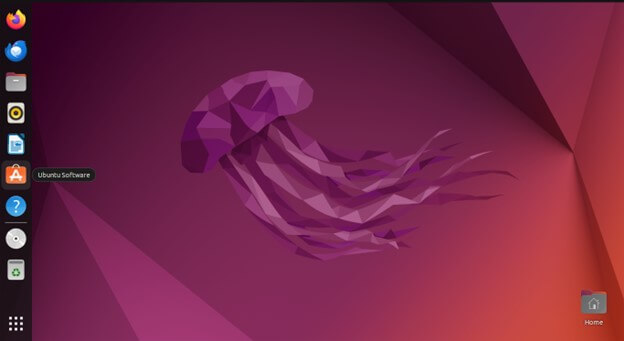
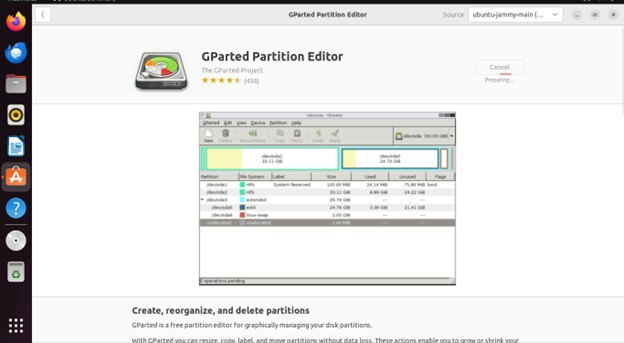
Open the Ubuntu Software Center from the Applications menu.
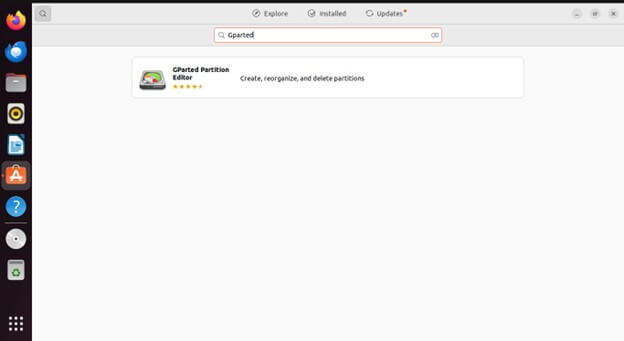
In the search bar, type “GParted.”
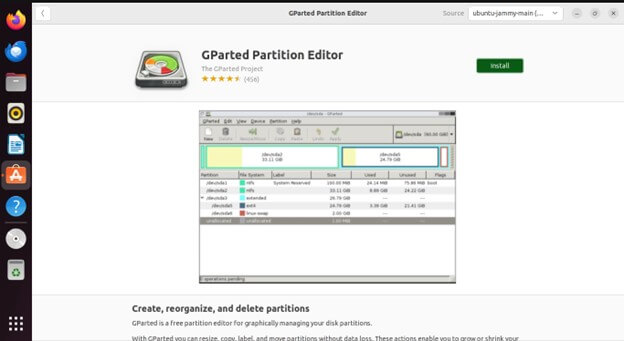
Click on the GParted icon, then click the “Install” button.
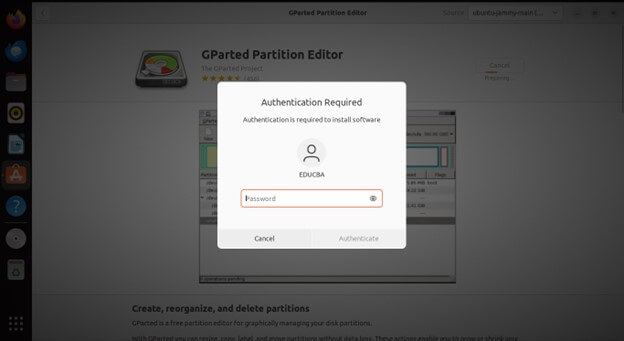
Enter your administrative password when prompted.
Wait for the installation process to complete.
Installing Via Terminal:
You can open the Terminal by searching for it in the Applications menu or press Ctrl + Alt + T to access it.
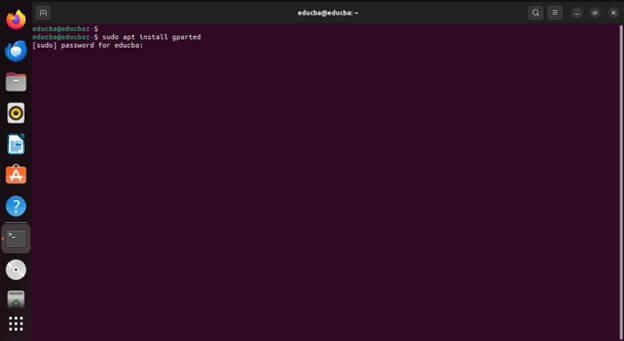
Type the following command and press Enter to install GParted:
“` sudo apt install gparted“`
Enter your administrative password when prompted.
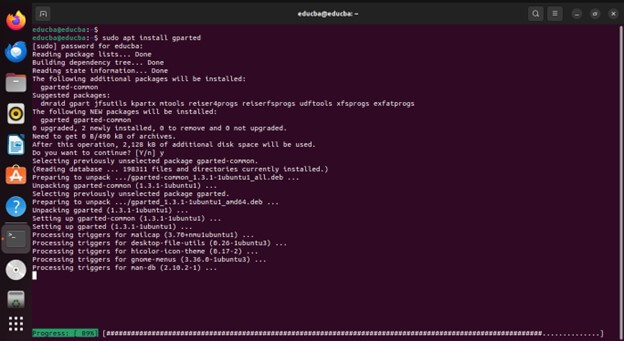
Wait for the installation process to finish.
Understanding the GParted Interface
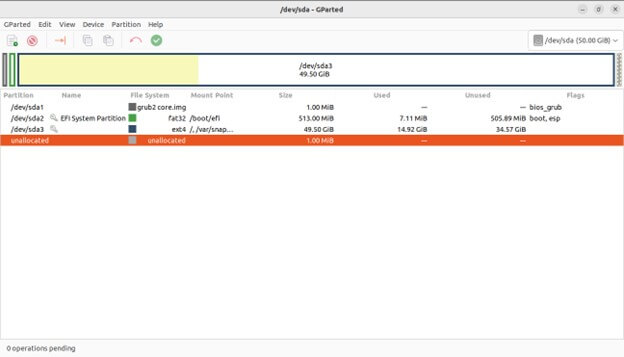
GParted features a user-friendly graphical interface that allows users to manage disk partitions effectively.
Disk List Pane:
This pane on the left side lists all detected storage devices in your system. Each device identifies by its name.
Partition Table Pane:
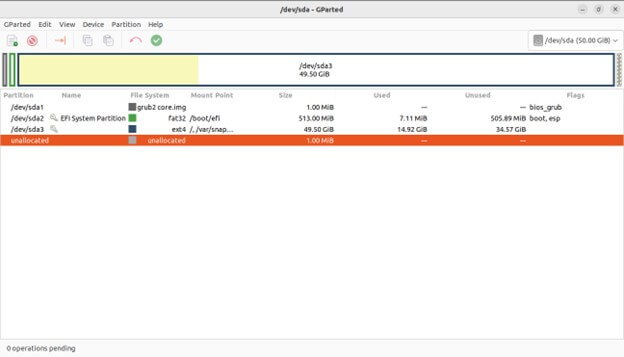
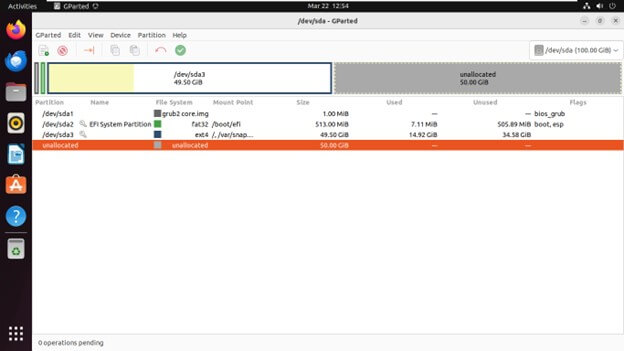
Here is the main area where you’ll see a graphical representation of your disks and their partitions
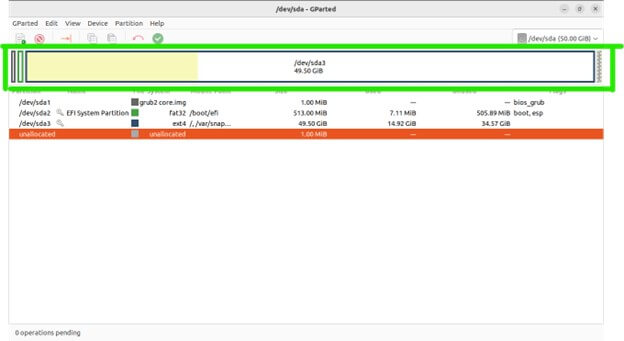
Bar Graph: Represents the entire storage capacity of the selected disk.
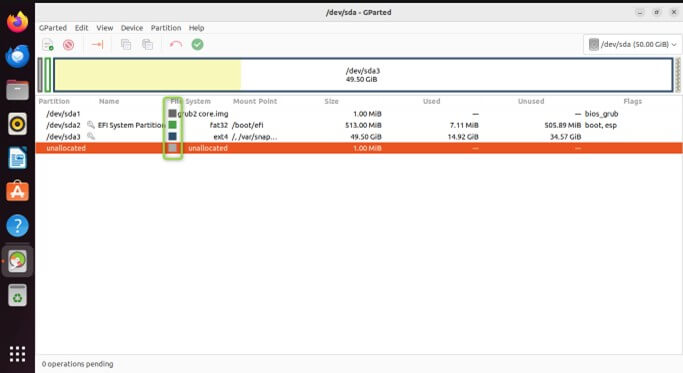
Colored Rectangles: Represent individual partitions within the disk. Each rectangle’s size corresponds to the partition’s allocated space.
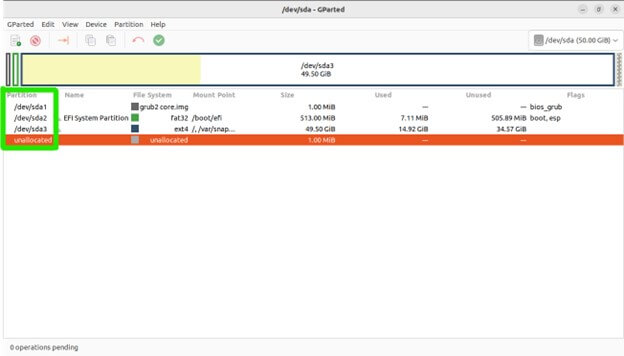
Labels: Display information about each partition, including:
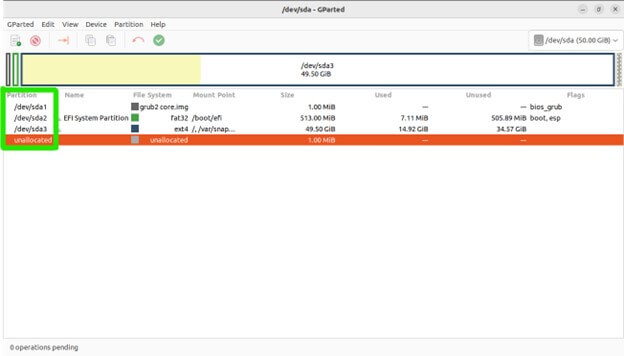
Device: Partition name (e.g., /dev/sda1).
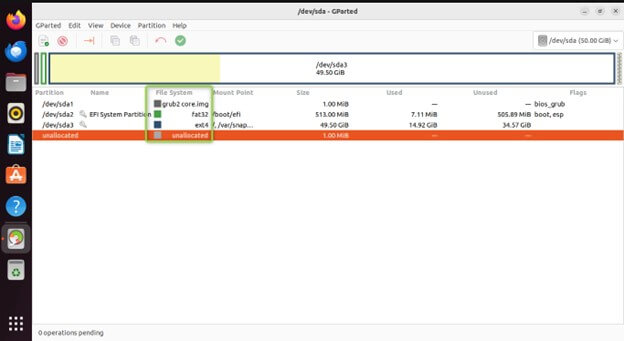
File System: Type of file system the partition uses (e.g., ext4, NTFS).
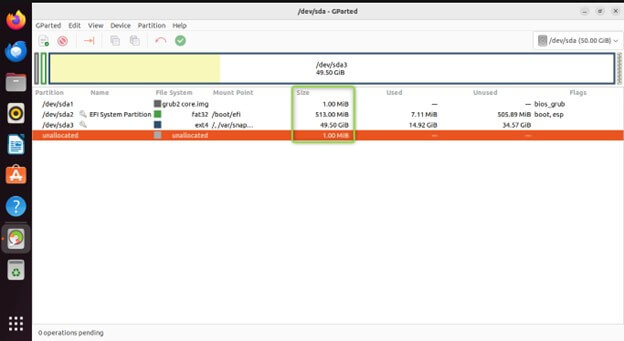
Size: Total storage space allocated to the partition.
Free Space: The bar graph displays any unallocated space on the disk as a blank area.
Common Partitioning Tasks with GParted
Gparted allows you to resize existing partitions, offering a comprehensive group of tools for managing disk partitions on Ubuntu.
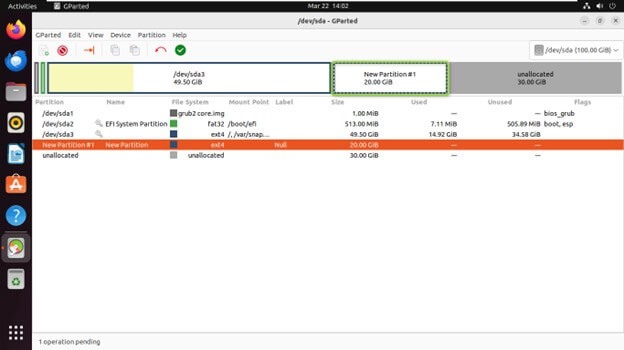
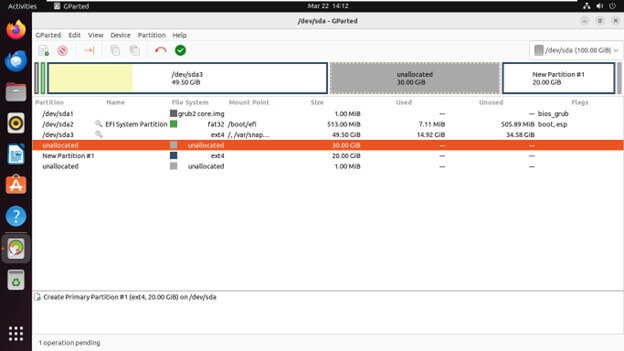
Creating a New Partition
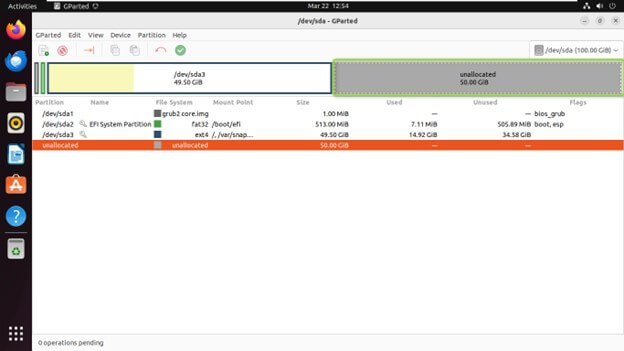
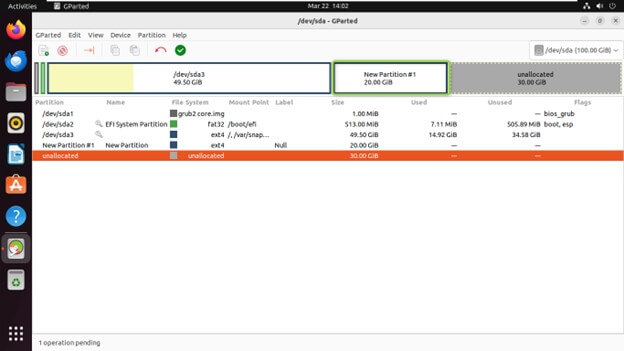
Select the unallocated space on the disk where you want to create the new partition.
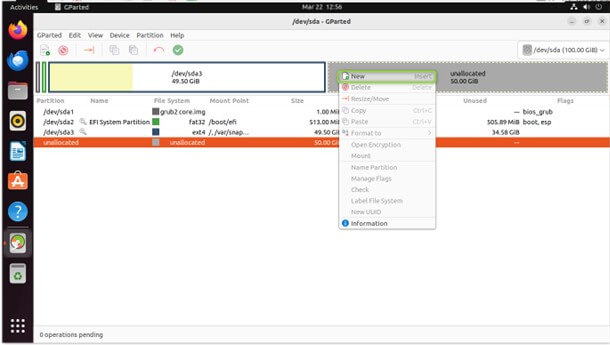
Right-click on the unallocated space and choose “New
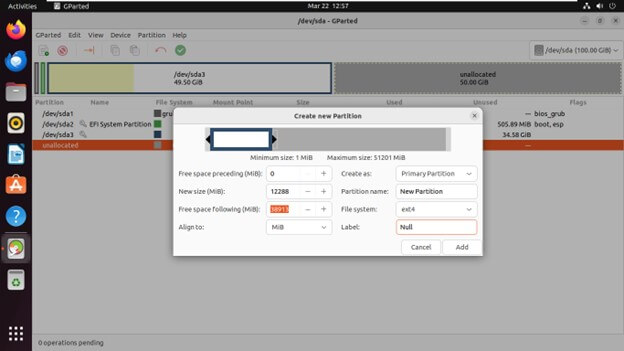
Specify the new partition’s size, file system type, and label.
Click “Add” to create the partition.
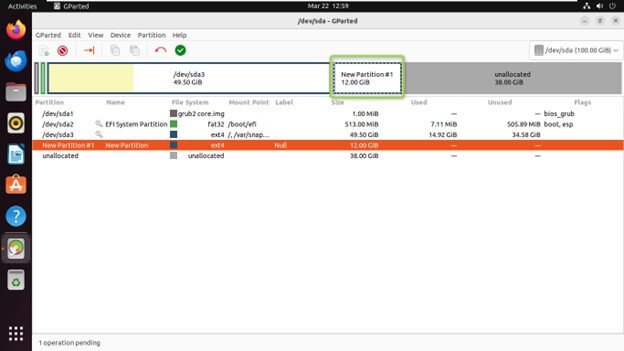
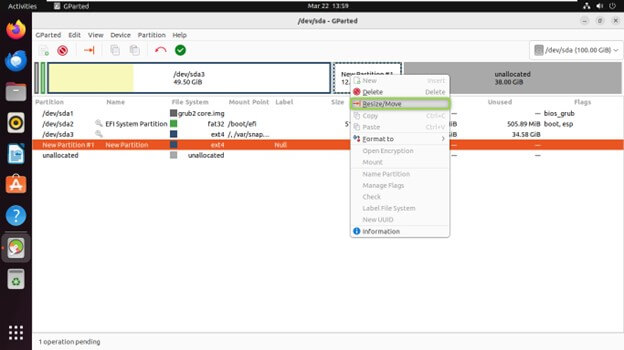
Resizing an Existing Partition
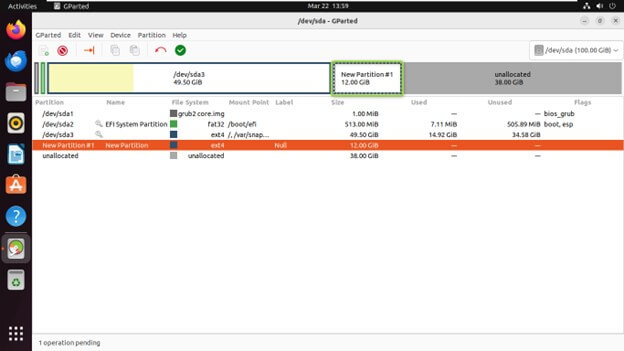
Select the partition you want to resize from the partition list.
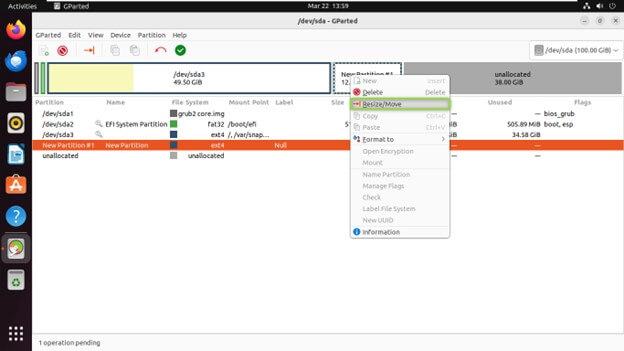
Right-click on the partition and click on “Resize/Move”.
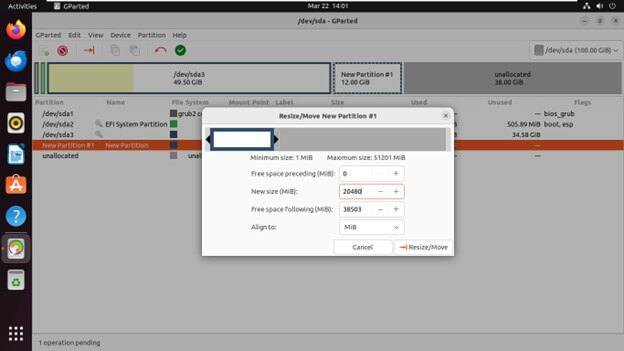
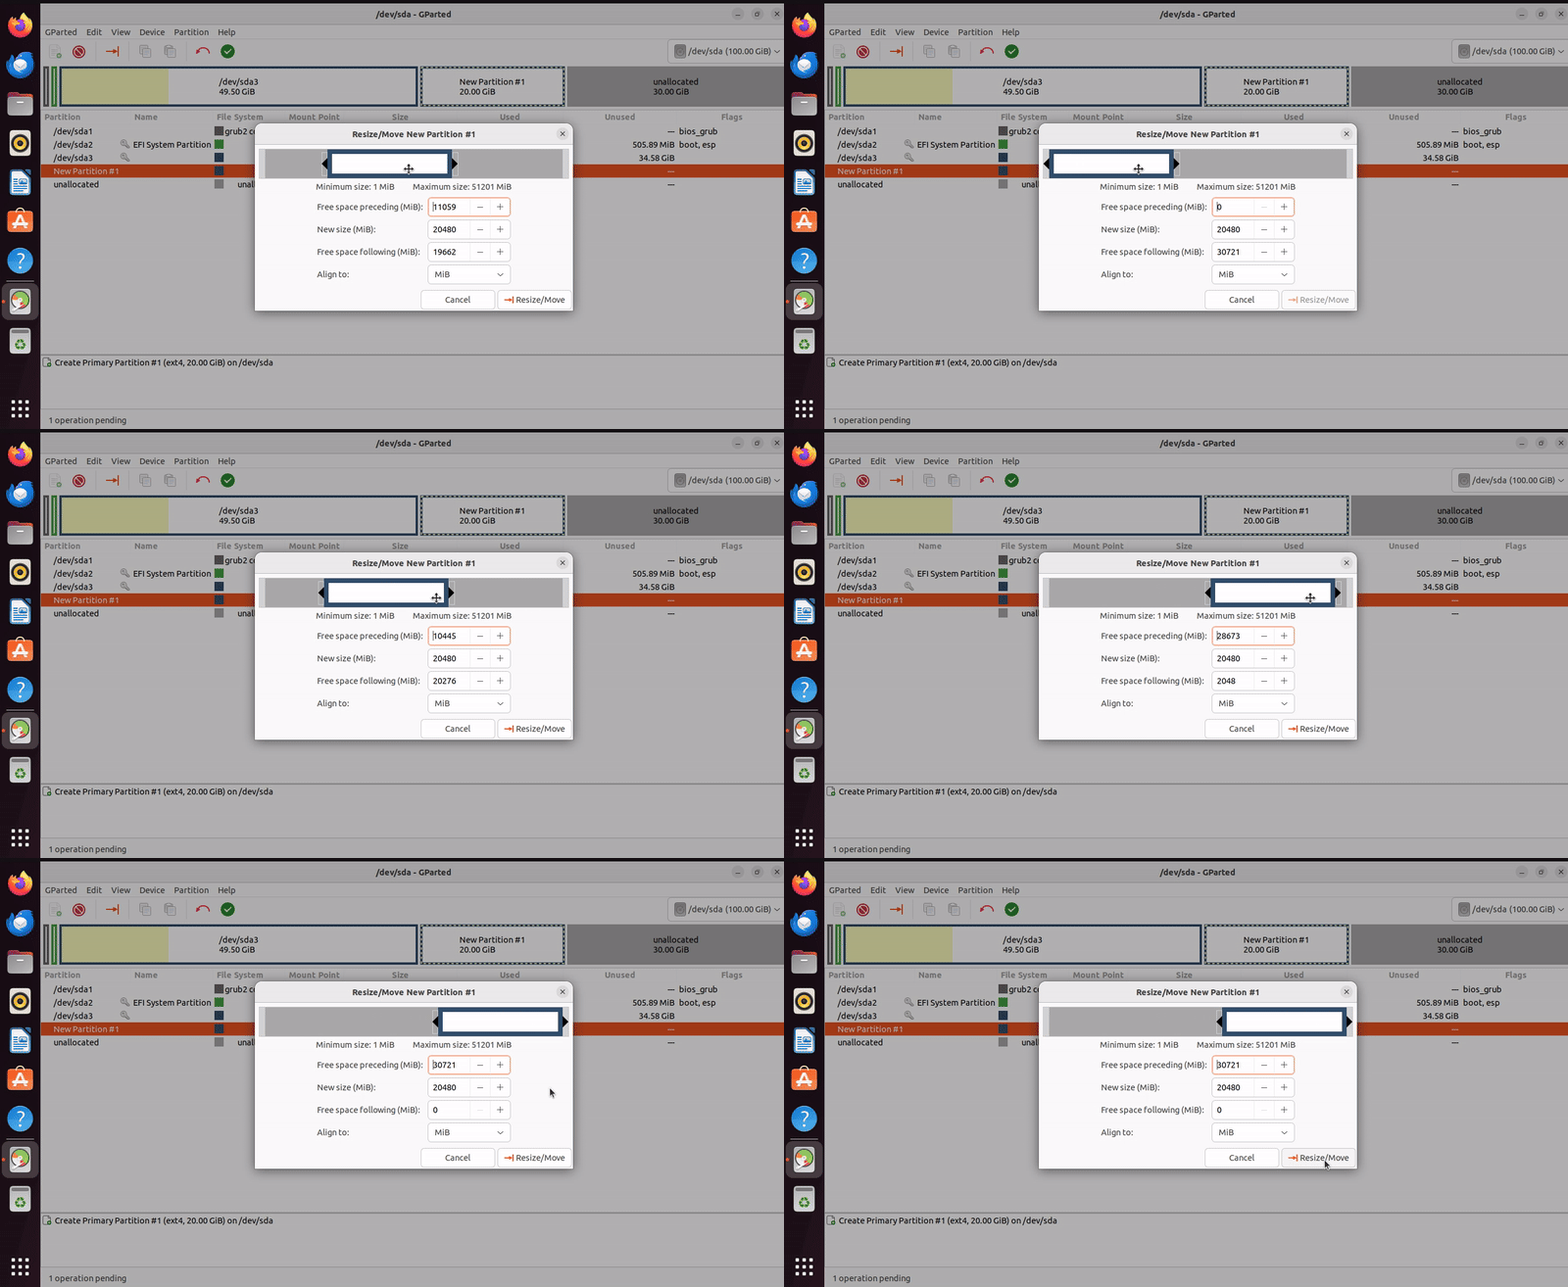
Adjust the partition’s size by dragging its boundary or entering specific values in the dialog.
Click “Resize/Move” to apply the changes.
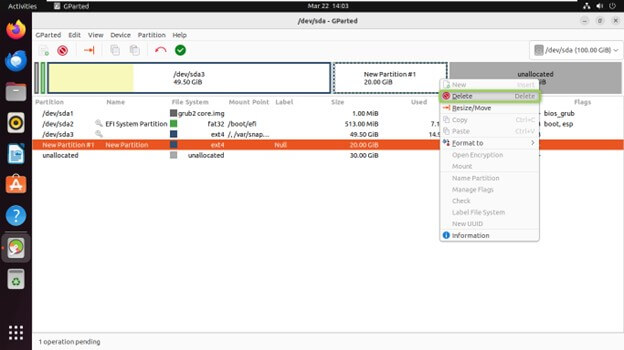
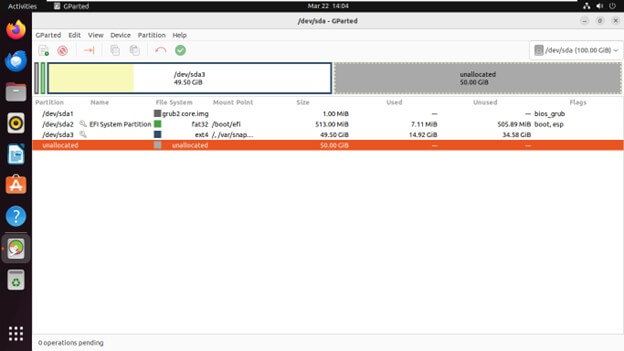
Deleting a Partition
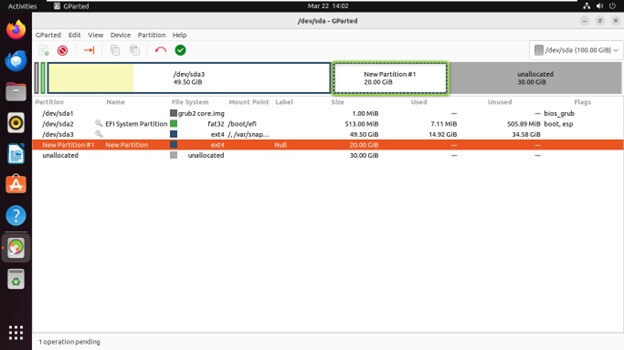
Select the partition you want to delete from the partition list.
Right-click on the partition and choose “Delete.”
Confirm the deletion when prompted.
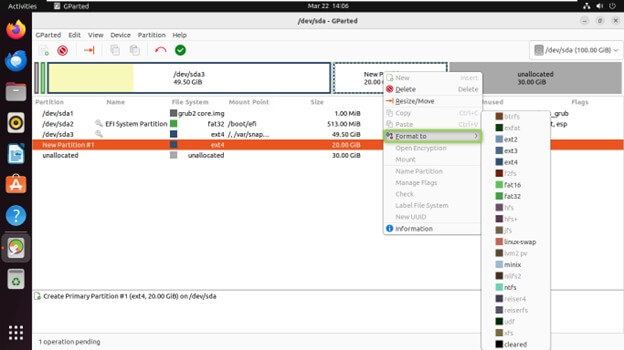
Formatting a Partition
From the partition list, select the partition you want to format. Right-click on the partition and click on “Format to”.
Choose the desired file system type (e.g., ext4, NTFS, FAT32) and Click “Apply” to format the partition.
Moving a Partition
Select the partition you want to move from the partition list.
Right-click on the partition and click on “Resize/Move”.
Drag the partition to the desired location within the unallocated space.
Click “Resize/Move” to apply the changes.
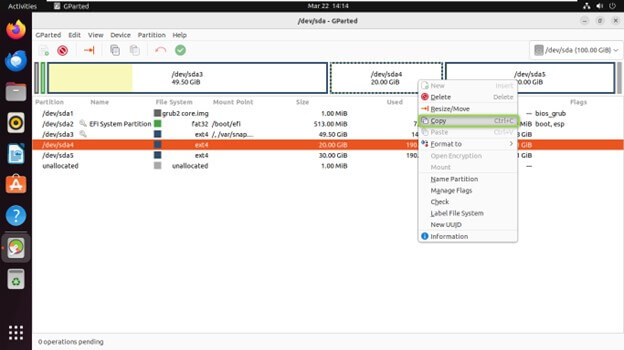
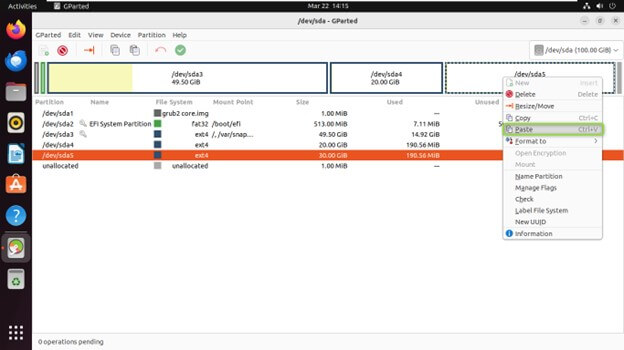
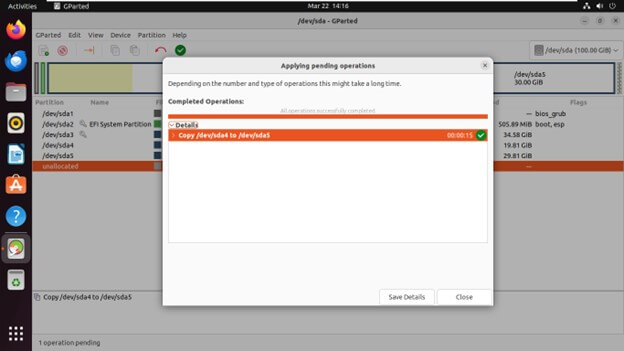
Copying and Pasting Partitions
Copying: Right-click on the partition you want to copy and choose “Copy.”
Pasting: Right-click on the unallocated space where you want to paste the partition and choose “Paste.”
Click “Apply” to finalize the changes.
Important Considerations and Safety Tips
While using GParted to manage disk partitions on Ubuntu, it’s essential to keep the following considerations and safety tips in mind to avoid data loss or system instability:
- Backup Your Data:
- Before performing any partitioning operations, ensure you have a backup of your important data.
- Partitioning operations such as resizing, moving, or deleting partitions carry a risk of data loss, so having a backup is crucial to avoid potential data disasters.
- Understand Partitioning Basics:
- Familiarize yourself with basic partitioning concepts such as primary, extended, and logical partitions.
- Understand the differences between file systems (e.g., ext4, NTFS, FAT32) and their compatibility with different operating systems.
- Check for Disk Errors:
- Before making any changes to disk partitions, check for disk errors using tools like fsck.
- Address any disk errors before proceeding with partitioning operations to ensure data integrity.
- Be Cautious with System Partitions:
- Exercise caution when modifying partitions containing the operating system or boot loader.
- Accidental modifications to these partitions can render the system unbootable.
- Always double-check your actions and ensure you’re working on the correct partitions.
- Avoid Interrupting Operations:
- Do not interrupt partitioning operations while they are in progress.
- Abruptly stopping an operation can lead to data corruption or partition table damage.
- Wait for operations to complete, and only proceed when GParted confirms that the changes have applied successfully.
- Verify Changes Before Applying:
- Review and verify your partitioning changes before applying them.
- Double-check partition sizes, file system types, and other settings to ensure they align with your intentions.
- Use the preview feature in GParted to visualize the proposed changes before committing to them.
Advanced Features
GParted offers several advanced features for users who require more specialized partition management tasks
Checking Partition Integrity
- Over time, partitions can develop inconsistencies that affect data access. GParted allows you to verify the health of your partitions using file system checkers specific to the file system type (e.g., fsck.ext4 for ext4 partitions).
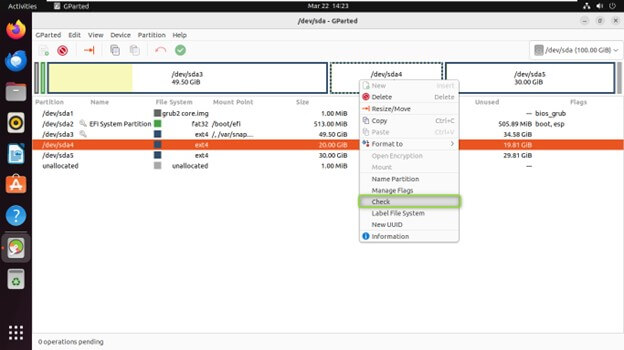
- Right-click on the partition you want to check in the partition list and Select “Check” from the context menu to run a file system check.
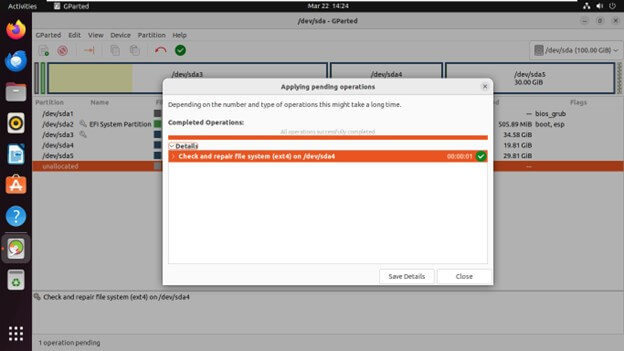
- GParted will scan the partition for errors and attempt to repair them if found any.
Setting Partition Flags
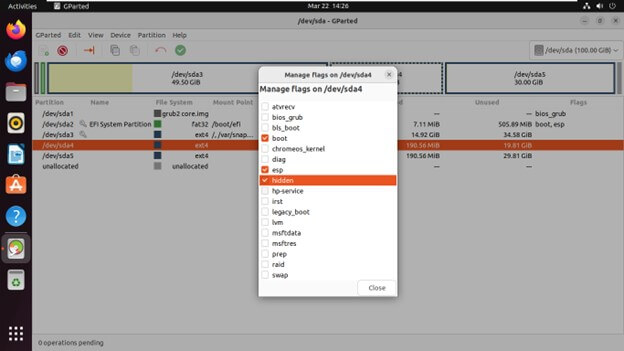
- Partitions can have flags associated with them that define specific attributes. They determine various attributes or behaviors related to a partition.
- boot: Marks a partition bootable, which is crucial for the operating system to load.
- esp: Denotes an EFI System Partition used by UEFI firmware for booting.
- hidden: Hides the partition from most operating system tools.
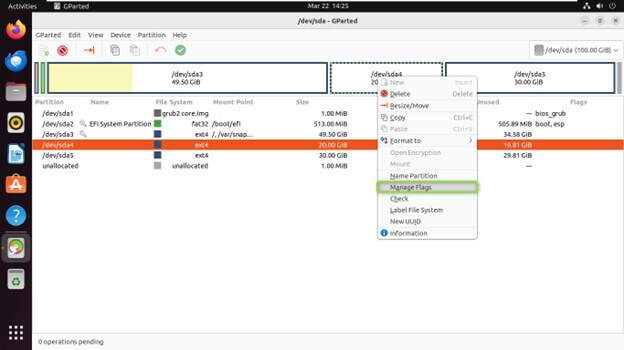
- Right-click on the partition for which you want to set flags in the partition list and Choose “Manage Flags” from the context menu.
- Check or uncheck the desired flags, such as “boot” or “hidden.”
- Click “Close” to apply the changes.
Changing UUIDs
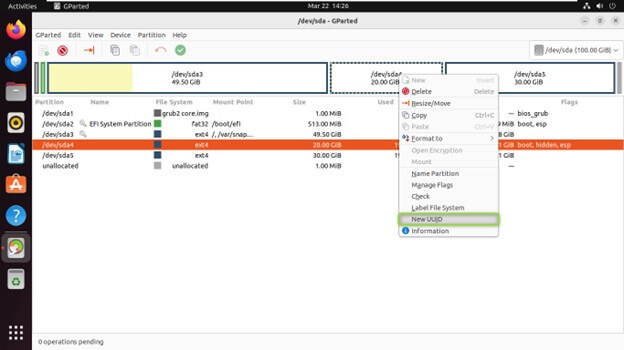
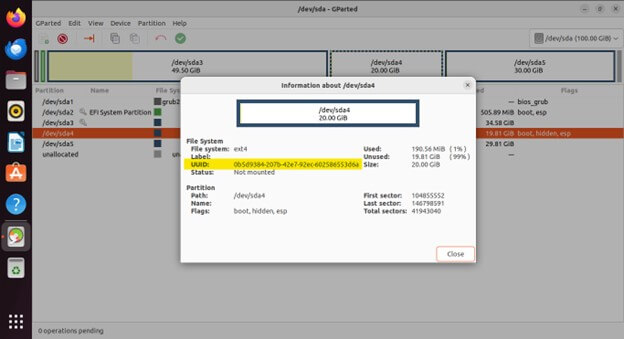
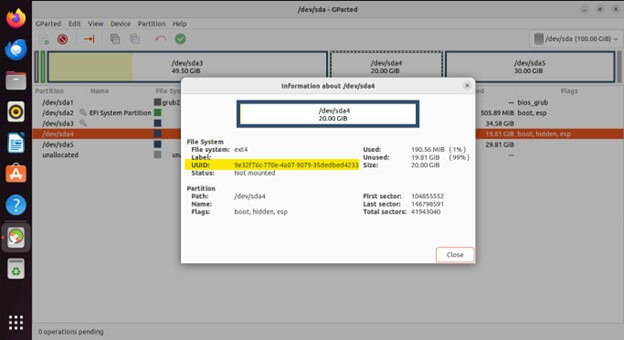
- Every partition has a Universally Unique Identifier (UUID) assigned to it. GParted allows you to modify a partition’s UUID, which can be helpful in specific scenarios like troubleshooting boot issues.
- GParted allows users to change the UUID of a partition.
- Right-click on the partition for which you want to change the UUID in the partition list and Select “UUID” from the context menu.
- Enter the new UUID or click “Generate New” to create a random UUID.
- Click “Apply” to assign the new UUID to the partition.
- Enter the new UUID or click “Generate New” to create a random UUID.
- Click “Apply” to assign the new UUID to the partition.
Old UUID
New UUID
Note: Changing UUIDs can impact how your system recognizes the partition
Tips and Tricks
GParted is a powerful tool for managing disk partitions on Ubuntu, and mastering it can significantly enhance your system administration skills. Here are some tips and tricks to help you make the most out of GParted:
- Take Advantage of Undo/Redo Functionality:
- GParted includes undo and redo functionality, allowing you to revert or reapply changes as needed.
- Before applying any changes, please take a moment to review your actions and ensure they align with your intentions.
- If something goes wrong or you get unexpected results, you can easily undo the changes and try again.
- Backup Critical Data Before Making Changes:
- Before modifying partitions, always create backups of critical data to avoid potential data loss.
- While GParted is a reliable tool, unexpected errors or hardware failures can occur, so it’s better to be safe than sorry.
- Practice on Virtual Machines or Test Systems:
- If you’re new to partitioning or want to experiment with different configurations, consider using virtual machines or test systems.
- Virtualization platforms like VirtualBox or VMware allow you to create virtual environments for safe testing and learning.
- Stay Updated and Use Stable Versions:
- Keep GParted and your Ubuntu system updated with the latest stable releases to benefit from bug fixes and performance improvements.
- Avoid using alpha or beta versions of GParted for critical partitioning tasks, as they may contain unresolved issues or experimental features.
Conclusion
GParted in Ubuntu is a free and user-friendly tool that allows you to create, resize, delete, and format partitions on your disks. As Ubuntu continues to evolve and users encounter diverse storage challenges, GParted remains a reliable companion, offering powerful tools and capabilities to address various partitioning needs. It empowers Ubuntu users to take control of their disk space, optimize system performance, and streamline data management processes.
Frequently Asked Questions (FAQs)
Q1. Is GParted safe to use?
Answer: GParted is generally safe to use. However, to avoid potential data loss or system instability, it’s essential to follow best practices, such as backing up your data before making any changes.
Q2. Will using GParted delete my data?
Answer: GParted operations such as resizing, moving, or deleting partitions can potentially result in data loss if not performed correctly. It’s essential to double-check your actions and back up your data before making any changes.
Q3. Can GParted be used to manage partitions on external drives or USB devices?
Answer: Yes, GParted can manage partitions on external drives, USB devices, and other storage media connected to your Ubuntu system. It provides the same functionality for external drives as for internal drives.
Q4. I resized a partition with GParted, but now my system won’t boot. What should I do?
Answer: If resizing a partition with GParted has caused your system to become unbootable, you may need to use a live Ubuntu USB or DVD to boot into a live environment and attempt to repair the boot loader or revert the changes using GParted.
Recommended Articles
We hope this EDUCBA information on “GParted Ubuntu” benefited you. You can view EDUCBA’s recommended articles for more information,
