Introduction to HBase Shell Commands
In this article, we will learn about HBase Shell Commands. HBase Shell is a very powerful tool to communicate with HBase. The shell will support the Data Definition and Data Manipulation Language of HBase in it. With the help of the ruby language, The shell is created. After the successful installation of the HBase over the Hadoop Eco System. We can able to communicate with HBase environment via HBase Shell and Java API.
How to Login HBase Shell?
- Open any remote access client software like putty, MobaXterm, etc.
- Enter the IP address of the HBase Server with User ID and Password.
- Once you will log in with the respective user.
- Enter the “HBase shell” and hit enter. Now you will able to login in the HBase Shell
Code:
hbase shell
Output:
Different Categories in HBase Shell Commands
Below we will learn the three different categories in HBase Shell Commands:
- Informative Commands
- Data Definition Language
- Data Manipulation Language
1. Informative Commands
Below are the commands for Informative:
a. “whoami “ command
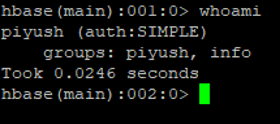
It is giving the information, from which user you have login in and from which group a user belongs to.
Code:
whoami
Output:
Explanation:
- User Name: Piyush
- Group: info
b. “version” command
The command is useful to get information about HBase Version is available.
Code:
version
Output:
c. “status” command
It is helpful to get detail information of how many HBase Master, HBase Region Server, HBase Server we have. In case, if any region server may dead + average load on the server. It will also update in the same command
Code:
status
Output:
2. Data Definition Language
Below are the points that define the data language with codes and outputs:
a. Create Table
The create command is useful to create the table. We need to provide the table name and column family name in it.
Syntax:
create <table_name>, <column_family_name>
Code:
create 'eduCBA','sr_no','student_name','roll_name','std','sct','address'
Output:
b. List Table
The list command is useful to get all the list of tables in HBase.
Code:
list
Output:
c. Describe Table
The describe command will help to get the detail information of the table. It will give the information of the column family and table is enable or not.
Syntax:
describe <table_name>
Code:
describe 'eduCBA'
Output:
d. Disable Table
If you want to delete/drop the table form HBase Environment. It is mandatory to disable the table first. Unless and utile if the table will not disable the table will not able to drop or delete from HBase.
Syntax:
disable <table_name>
Code:
disable 'eduCBA'
Output:
e. Disable_all Table
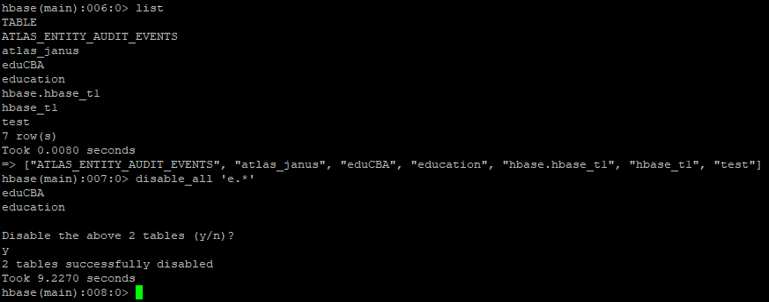
With the help of disable_all command, we can able to disable all the tables with matching regex value from HBase Environment. If we will run the disable_all command the table will not work or not able to serve any client request in disable_all mode/condition. Once the table will disable, the user can able to delete the table in ‘disable_all’ mode as well.
Syntax:
disable_all <matching_regex_value>
Code:
list
Output:
Explanation: In the above example, we have a list of tables having ‘education’,’eduCBA’ tables. In ‘disable_all’ command, we have added ‘matching_regex_value=e.*’. After entering the command, it is asking whether we need to disable the table or not. If you will provide ‘y’ (yes). Then the tables start from ‘e’ all the tables will disable.
f. Enable Table
If we have disabled the table. Then the table will not work. If you want to access the table as previously it works. We need to run the ‘enable’ command.
Syntax:
enable <table_name>
Code:
enable 'eduCBA'
Output:
g. Show_filters
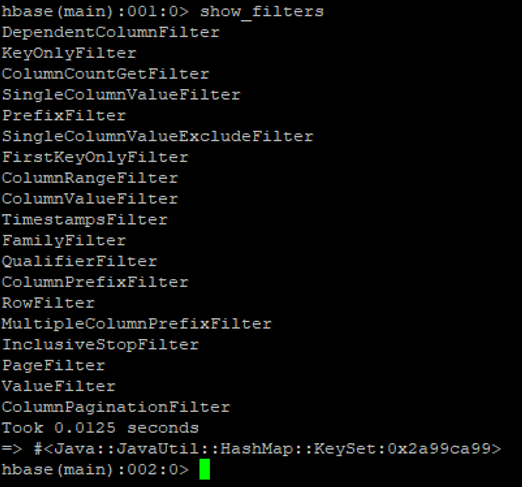
It is useful to display all the filters that are present in the HBase environment.
Syntax:
show_filters
Code:
show_filters
Output:
h. Drop-Table
As the name suggested, we can drop the tables from HBase. But before dropping any table from HBase we need to first disable it. Then after we can able to drop the table.
Syntax:
drop <table_name>
Code:
drop 'education'
Output:
i. Drop_all Table
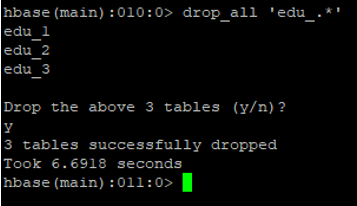
The drop_all tables are similar to the drop table. In the same command, we need to specify the ‘regex_value’.
Syntax:
drop_all <matching_regex_value>
Code:
drop_all 'edu_.*'
Output:
j. Is_enabled
The command is useful to test whether the table enables or not. The values come true then the table is enabled.
Syntax:
is_enabled <table_name>
Code:
is_enabled 'eduCBA'
Output:
k. Alter Table
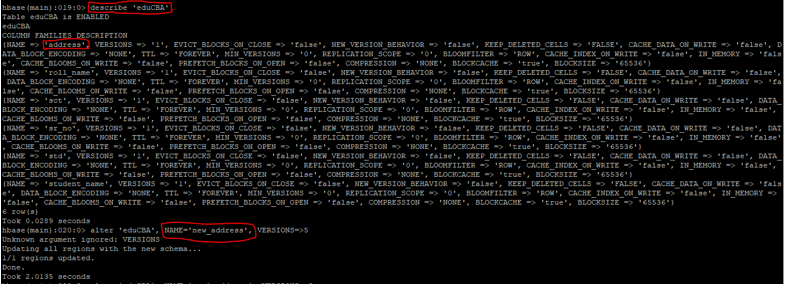
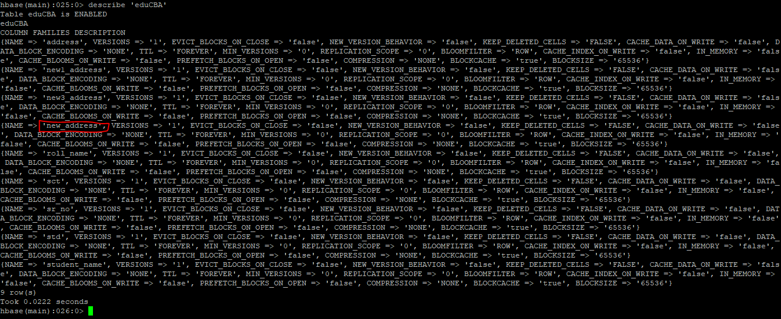
As the name suggested we can alter the HBase table. We can add single or multiple column families in the HBase table.
Syntax:
alter <table_name>, NAME=><column_family_name>, VERSIONS=>5
Code:
describe 'eduCBA'
Output:
3. Data Manipulation Language
Below are the points explain the data manipulation languages:
a. Count
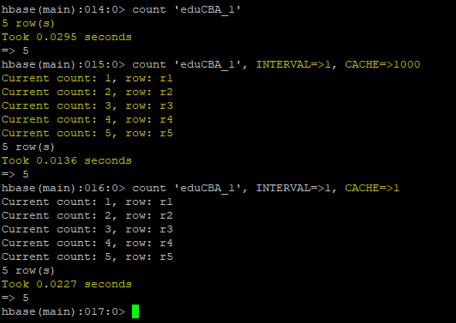
When we want to know the number of rows present in the HBase table. Then we are using the ‘count’ command. It will display the total number of rows present in it.
Two more major things in it
- Interval: Default Interval Size in HBase is 10000. If you want to add it. You can add as per the requirement. Ex: let consider if you have 1000000 rows in your table. If you will run the default count then the interval will 10000. If you will mention the interval value of 100000. Then the ‘count’ command will execute in the next 10 intervals only.
- Cache: Default Size is 10 rows if you will increase it. Then the count command will execute in less time. It details with memory parameters.
Syntax:
count <table_name>, INTERVAL=><VALUE>, CACHE=><VALUE>
Code:
count 'eduCBA_1'
Output:
b. Scan
The ‘scan’ command is useful to check whether the input / inserted value is correctly present in the table or not.
Syntax:
scan <table_name>
Code:
scan 'eduCBA_1'
Output:
c. Put
It will help to add/put/ insert the data at a specific table. It will also optionally coordinate with a timestamp as well.
Syntax:
put <table_name>, <row>, <col>, <data>
Code:
put 'eduCBA_1' , 'r1', 'c1', 'abc1'
Output:
d. Get
With the help of ‘get’ command, we can able to get or see the contents of the specific table. As per the requirement, we can also able to add time_stamp, time_range, version, filters.
Syntax:
get <table_name>, <row>, <col>
Code:
get 'eduCBA_1' , 'r1', 'c1'
Output:
e. Delete
We can delete the actual data from the HBase table. In delete command, we need to specify the specific row as well as column.
Syntax:
delete <table_name> <row> <col>
Code:
delete 'eduCBA_1' , 'r1', 'c1'
Output:
f. Delete all
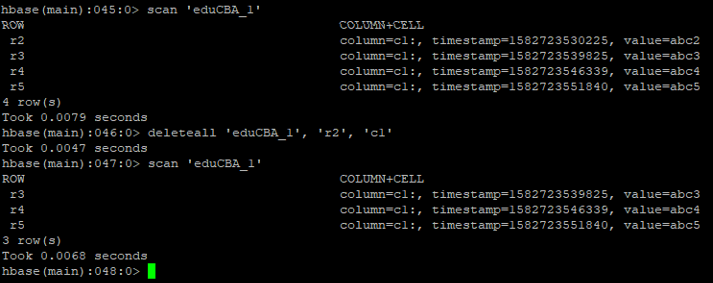
We can delete all the cells from the HBase Table. We can optionally present the column name in it.
Syntax:
deleteall <table_name> <row> <col>
Code
deleteall 'eduCBA_1' , 'r2', 'c1'
Output:
g. Truncate
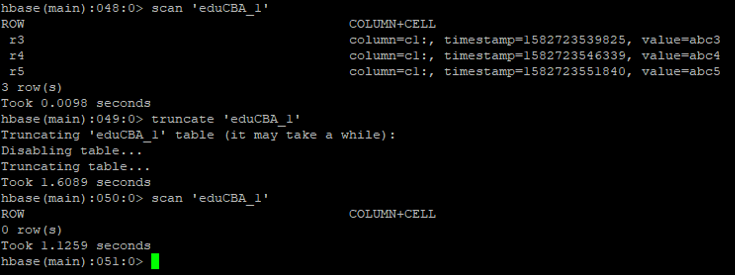
The truncate command will keep the schema of the table. But the records are not present.
Syntax:
truncate <table_name>
Code:
truncate 'eduCBA_1'
Output:
Recommended Articles
This is a guide to HBase Shell Commands. Here we discuss an introduction and top three categories in detail with their codes and outputs. You can also go through our other related articles to learn more –


