Updated August 25, 2023

Introduction to Blend in Adobe Photoshop
Blend in Adobe Photoshop changes the way that a layer reacts with the layer underneath. Blend modes such as layer mask, auto blend, layer opacity options offer the users with the means and flexibility to create artwork that best uses photography with digital software; it also includes a detailed description of using and creating design using the various blend modes available in Photoshop in a step by step manner to help you better project your work both professionally as well as aesthetically.
Methods to Blend Images in Photoshop
This tutorial will learn how to blend images together in photoshop and create realistic images using various methods.
Method #1 – Layer Mask Method
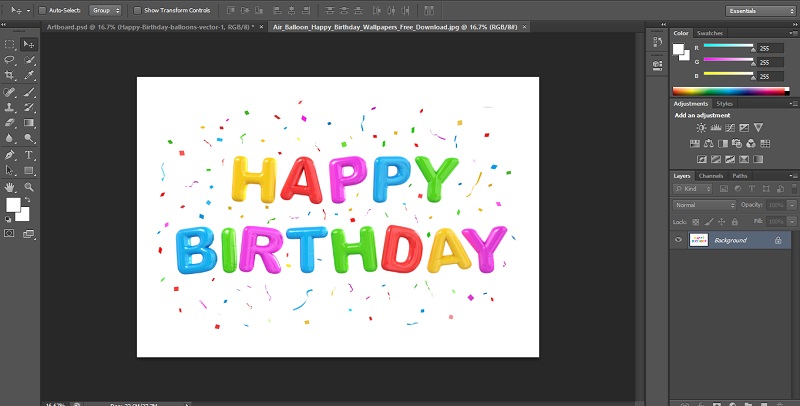
Step 1: The first step will be to select two images that you will apply the blend effect. Choose the image resolution appropriately, according to whether you are working for the web or print format.
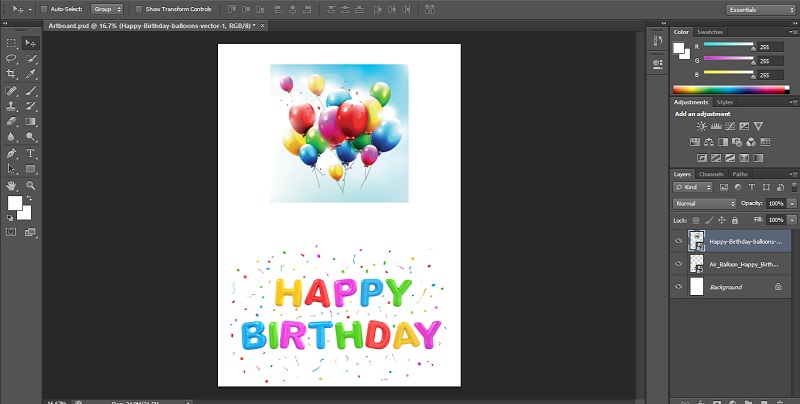
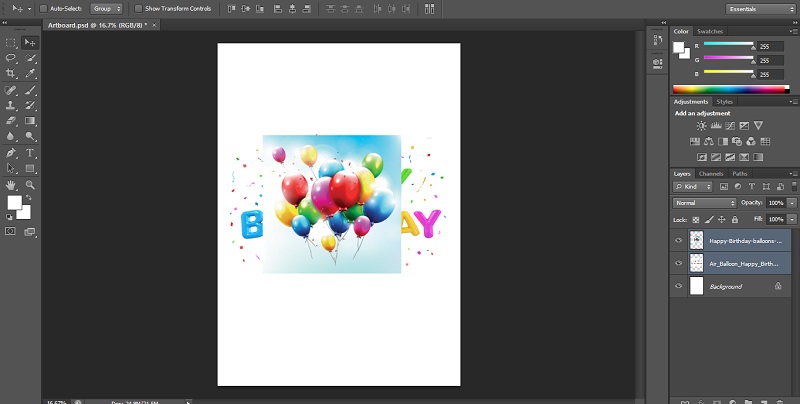
Step 2: Merge the Images together. Now, we will bring the two images together into a single document. For that, select the move tool from the tool panel on the left or press V on the keyboard for its shortcut. Next, select the second image window using the mouse cursor and drag it onto the first image window. Now you can release the mouse in the middle of the document to get the images together for blending.
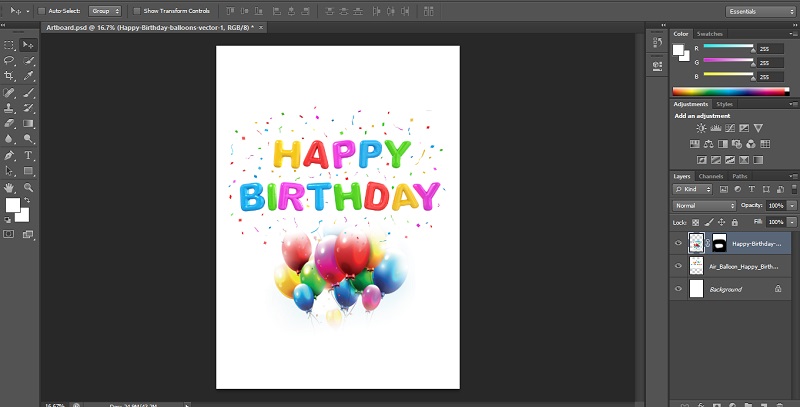
Step 3: Now, there will be two layers in the document. The next step is to add the layer mask. We need to click on the add layer mask button for doing that, as shown in the image below. It is located on the layers panel option on the bottom right section. Now you will get a new layer mask. The property of the layer mask is that it is a transparent layer, which allows the image underneath to be visible while using the black paint. On the other hand, the image becomes invisible while using white paint.
Step 4: In the fourth step, select the gradient tool by pressing the key. The foreground and background colors should be set to black and white. Now, we will select the gradient as linear and drag the gradient over the image.
Step 5: The resulting effect is two images that blend together very well. You can also notice that the mask containing a gradient in the layer thumbnail, as shown below. The areas that are white will display the top image, while the black areas display the background image. You can try with numerous gradient effects until you obtain the desired result, as the mask can be overrun endlessly.
Method #2 – The Auto-Blend Layers Command
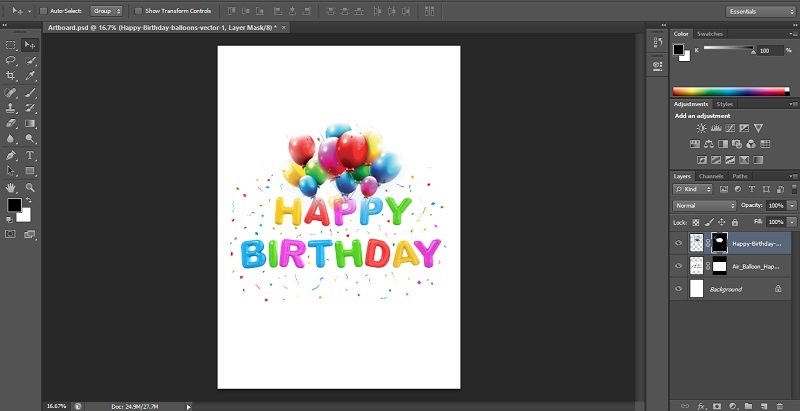
The auto blend layer command can be used in Adobe Photoshop to merge or stitch images with a smooth transition in the final output. It works by applying layer masks as required over each layer to extract underexposed parts efficiently. However, you need to remember that the auto blend layers option is applicable only on RGB and grayscale images. That means it does not have any effect on smart objects, BG layers, 3D layers, and video layers.
Depth of Field Blending
The first step is to bring together the two images you want to blend in the same document.
Step 1: Once the images are in the separate layers, select the layers you need to blend.
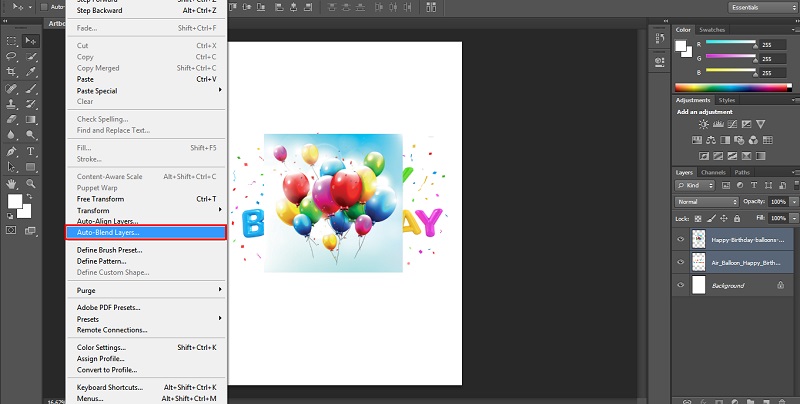
Step 2: The next step is to apply the auto blend layers. For that, select the layers and select edit.
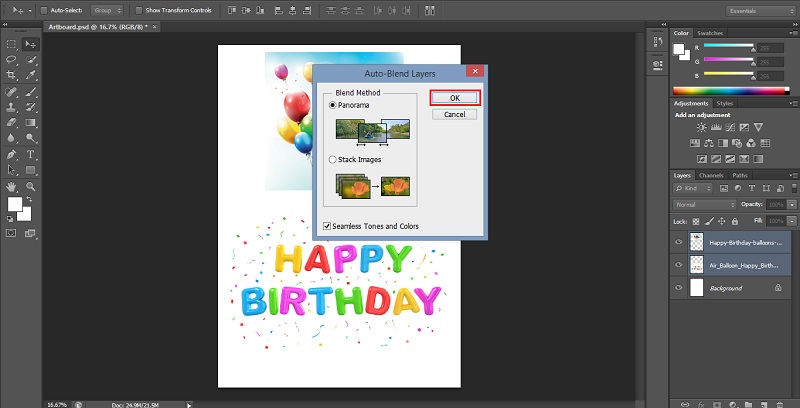
Step 3: Next, select the Auto-Blend Layers and click on the auto blend objective, either panorama or stack.
Panorama
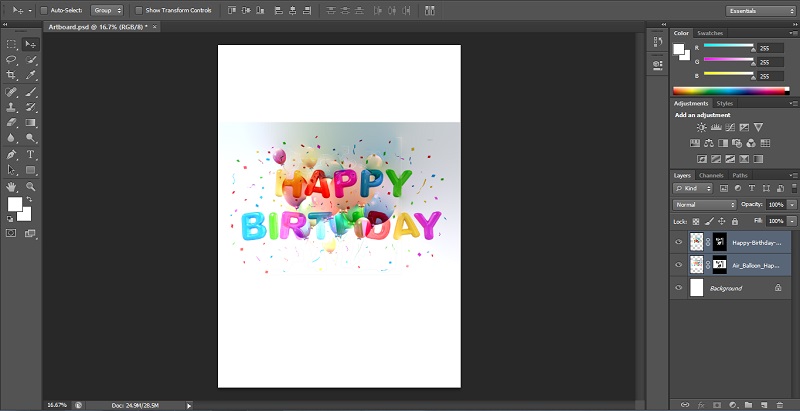
If you choose panorama, the resulting blend will be overlapped layers in panorama view.
Stack Images
The stack option blends details from the merging areas effectively.
Note: Stack works by highlighting areas based on illumination. You can auto-align the image before applying the stack option for obtaining the best results. Besides, you can check the seamless Tones and Colors option. It will enhance the overall color and tonality of the blending effect.
Method #3 – Layer Opacity Option
In this third method, we will blend two images using the layer opacity option in Photoshop. You can follow a similar method discussed above by placing them together in separate layers using the layer panel option.
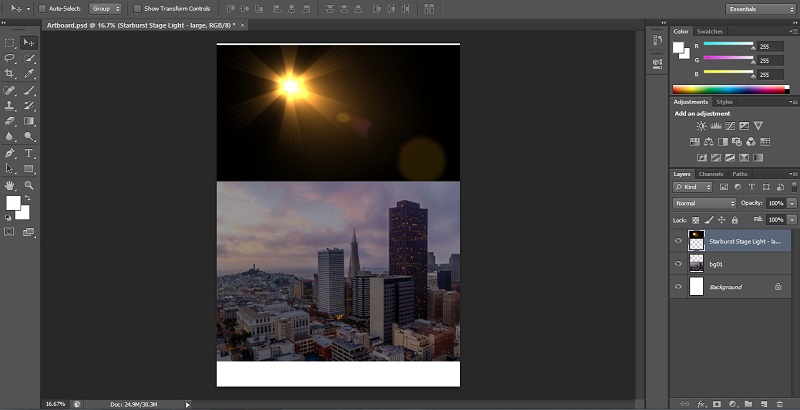
Step 1: Below, I have used the image of a city landscape and a glowing star to blend.
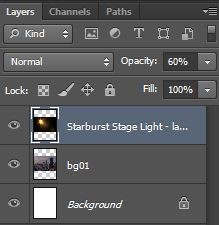
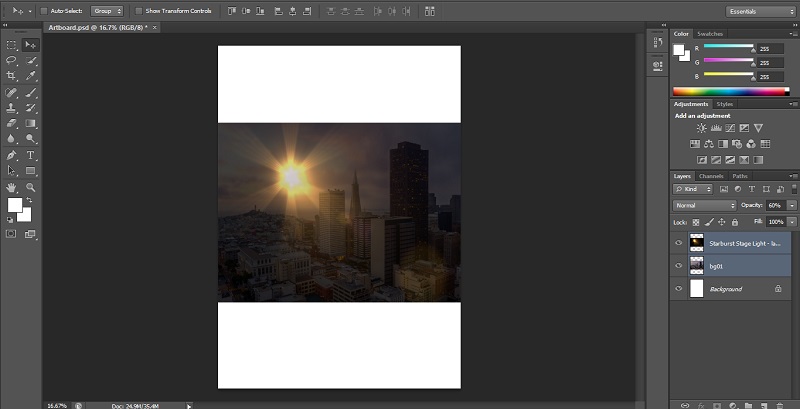
Step 2: On the upper right of the Layers panel, you can find the opacity option. The opacity value of the picture will be set to 100 % by default. Therefore, the image on the top will be blocking the background image. The opacity value determines the transparency level of an image. Hence, we will be lowering the opacity value for the top image. It will slowly bring the background image to visibility. In this example, I have lower the opacity from 100 % to 60%.
Step 3: Now, you will notice that the image below is slowly starting to blend with the city landscape.
Conclusion
It was quick info on how we can blend images in Adobe Photoshop using the various blend methods such as the layer mask method, the auto blend layers command, and the layer opacity option. Create amazing visuals using the blend options after mastering their usage. Similarly, you can loan more about other tutorials on various Photoshop effects, applications, and modes. Try them out and upskill your graphic designing skills for your career.
Recommended Articles
This is a guide on How to Blend Images in Photoshop?. Here we discuss three different methods to blend images using various effects. You can also go through our other related articles to learn more –

