Updated March 21, 2023
Introduction to Node.js
As we know, Node.js is an open-source runtime environment that uses JavaScript on the server-side. It is used for building data-intensive and real-time-based web applications. It is based on Google Chrome’s V8 engine and runs on various platforms such as Windows, Linux, and Mac, etc.
How to Install Node.js?
First, we will have to install node.js for it to use. You can download node.js according to the platform (Windows, Linux, Mac, etc) that you are using from https://nodejs.org/en/ and install it. Once the installation of the node is done, install npm.
To install npm globally, you can use:
npm install –g npm@latestNPM stands for Node Package Manager. It is a package manager for the Node JavaScript runtime environment and is a recommended feature for Node.JS installer. It can manage packages that are local dependencies of a particular project and is the world’s largest online repository. You can download any of these code editor: Visual Studio Code, Atom, Sublime Text, etc.
How to Use Node.js?
To use Node.js, let us first create a folder for our project:
Step 1: Let us create a folder for the project
Command:
mkdir project_nameExample:
mkdir MyNodeProjectStep 2: After the folder is created, to change to the project directory, use
Command:
cd directory_nameExample:
cd MyNodeProjectStep 3: To initialize the project, use the command
Command:
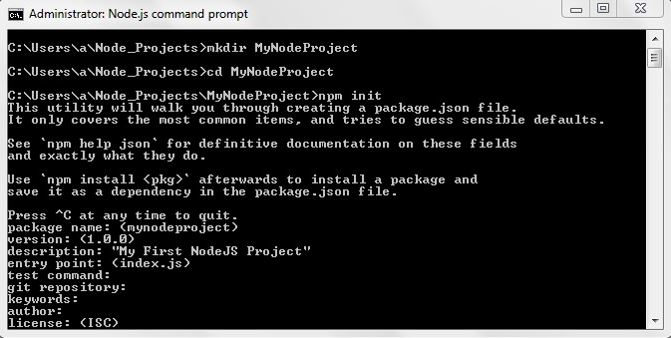
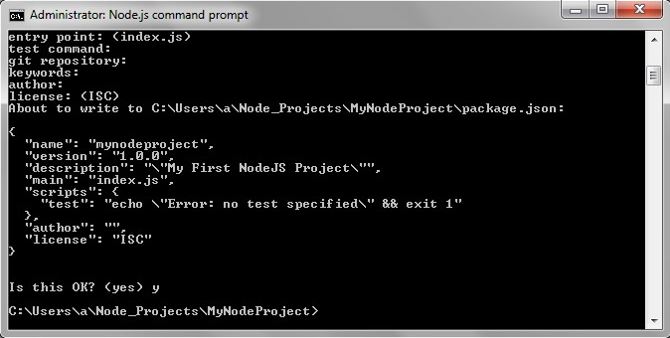
npm initThe above three steps can be seen in the below screenshots:
Once the project is initialized upon using the command “npm init”, a “package.json” the file is created. “package.json” is a plain JSON. The full form for JSON is JavaScript Object Notation. A “package.json” file lists all the packages that your project depends on. The two required fields in a “package.json” file are “name” and “version”.
“name”
- consists of your package’s name
- written in lowercase
- may consist of underscores or hyphens
“version”
- follows semantic versioning
- must be in the form of y.y.y
The “package.json” is an essential file that is present in the root directory of the project. It represents all the information regarding the project and the packages with its version.
Step 4: Let us now learn how to create a web server
A web server is a software application that handles the HTTP requests sent by HTTP clients (e.g. browsers) and sends back a response (e.g. webpages) to the client.
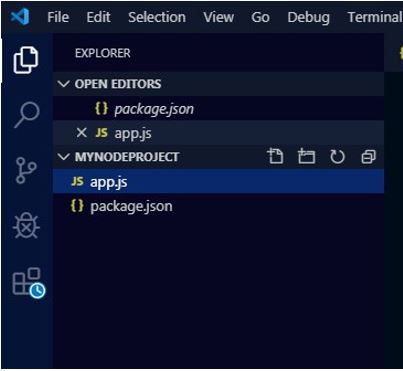
Create an app.js file in your root directory.
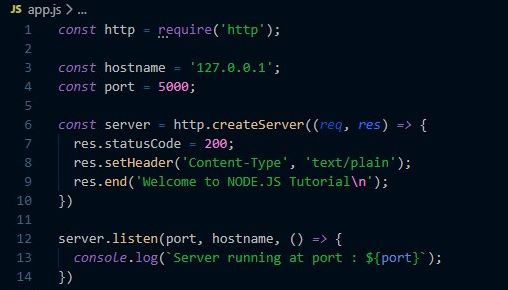
Copy and paste the following code snippet.
Let us understand what the code is all about:
- What is HTTP – HTTP module stands for HyperText Transfer Protocol which allows Node.js to transfer the information.
- Why HTTP – HTTP module gives the privilege to create a web server that listens to server ports and sends a response back to the client.
- What does the require() do – Require() is used to include the HTTP module.
- What is the use of createserver() – createserver() is a method of HTTP module that creates a server.
- What does listen() does – It listens to the server port mentioned in the code, in the above example, it listens to the port 5000.
- The arguments passed for the function createserver() are req and res representing request and response.
- When the response contains the statuscode “200”, it depicts that the request is processed properly and received an appropriate response.
- The type of response headers is depicted through the “res.setHeader(‘Content-type’, ’text-plain’)”.
- “res.end()” ends the response.
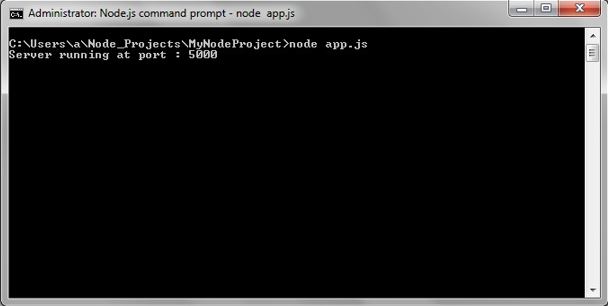
Step 5: To execute the code snippet, use the following command as shown in the picture below:
Command:
node app.jsstep 6: After running the app.js file, you can check the output by switching into Google chrome browser and type: http://localhost:5000, you will find the following output:
Thus, the above image depicts the creation of our first web server that listens to port 5000.
How Node.js Works?
As we are aware, Node.js works asynchronously (non-blocking); let us understand the working process:
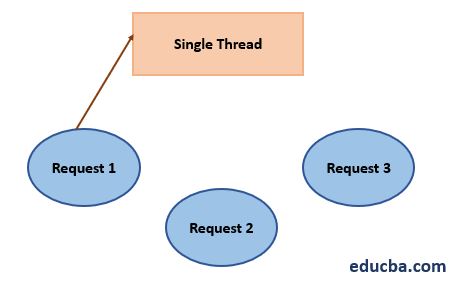
1. In Node.js, a single thread handles the incoming requests.
2. The client sends a request to the server.
3. The thread then checks if the request requires querying the database or any complex operations, the thread does not wait for the database to return the value, instead, the thread is ready to serve another request.
4. Meanwhile, for the first request which involves interaction with the database, the thread places that particular request in the Event Queue.
5. Event Queue operates on a single thread only.
6. When a request is placed in the Event Queue, it starts processing that particular client request.
7. It then checks the thread availability in Internal Thread Pool. Internal Thread Pool consists of multiple threads.
8. A thread is then assigned to look after the request, which takes the request forward, processes it, prepares the response, and sends it back to the Event Loop.
9. The event loop, in turn, sends the response back to the client.
10. When the next request arrives, it again checks if that current request requires to query the database, if not then the thread takes the request ahead, processes it, and sends back the response to the client.
Node.js is asynchronous by default. It operates in a non-blocking way and is event-driven. Node.js is used to build highly scalable, data-intensive applications. It uses fewer threads so that it can use fewer resources. The above scenario explains how Node.js handles concurrent client requests and operates on a single thread and does not need the creation of multiple threads.
Conclusion
Thus, we learned how to create a Node.js project through command prompt, also the importance of package.json file required fields in package.json file and created our very first web server using HyperText Transfer Protocol module. We also walked through the working of Node.js, i.e the communication between client and server, how Node.js handles a request asynchronously (in a non-blocking way), and acknowledged the role played by Event Loop and Internal Thread Pool in the execution of requests and sending back responses to the client.
Recommended Articles
This is a guide to How to Use Node.js. Here we discuss the introduction and how to install node.js along with its working including the commands and examples. You may also look at the following articles to learn more-
