Updated May 30, 2023
What are HTML Server-Sent Events
HTML server-sent events are one of the scenarios included in HTML API for getting updates automatically from the server using a web page. This concept includes one kind of event that works between a web server and a web browser, known as a Server-sent event.
We first want to add some code to check whether our browser will support a server-sent event or not; after that, we will process other code to get the exact output. Unlike WebSockets, developing web applications that use server-sent events is always easier.
How Server-Sent Events Work in HTML?
- As a user, when we try to do some event and pass it to the server, like on the log-in button click, log-in details will be sent to the server. So while executing this type of event, which is passing from a web browser to the web server, this event is known as a client-side event.
- But we are doing the opposite of the above process, which means sending data or events from the server to the web browser is known as server-sent events. Therefore those kinds of events occur in the system when the browser gets automatically updated from the server.
- Server-sent events are always treated as single-directional because it only does the process in one direction, from server to client. Therefore, one of the main attributes of this process is the EventSource attribute with its object.
- So this object is attached with the terms like url, request, reconnection time, and last event ID string. So let’s see that one by one.
- Url: This is going to be set during the process of Construction.
- Request: we must have to initialize it to null for the beginning.
- Reconnection time: this is the timestamp measured in milliseconds.
- Last event ID string: We must also have to initialize the string value as an empty string.
Receive Server-Sent Events Notification
Earlier, we discussed the EventSource attribute; it’s also used with its object in receiving server event notifications.
Example
The actual use of the EventSource attribute is in the following example:
Code:
<!DOCTYPE html>
<html>
<body>
<h1>Receive Sever-sent Event</h1>
<div id="demo"></div>
<script>
if(typeof(EventSource) !== "undefined") {
var source = new EventSource("ssedemo.html");
source.onmessage = function(event) {
document.getElementById("demo").innerHTML += event.data + "<br>";
};
} else {
document.getElementById("demo").innerHTML = "Oops, your browser is not going to support Secure-sent event";
}
</script>
</body>
</html>- In the above example, we are defining the object of the EventSource attribute, including url of the page through which we are sending updates; all updates are received on an event called on message, which helps of defined id called demo.
Syntax:
- The first step is to check whether our browser will support a server-sent event or not. So we will put a small code in our program to check whether its browser is supported or not.
if(typeof(EventSource) !== "undefined") {
// Server-sent event supported code
// Program code
}
else {
//Oops! Server-sent event is not supported code
}- Now we will see the syntax for receiving events from the server-sent event is as follows:
Syntax:
if(typeof(EventSource) !== "undefined") {
var object = new EventSource("File_URL");
source.onmessage = function(event) {
document.getElementById("output").innerHTML += event.data + "<br>";
}- As shown in the above syntax, first, we have to create a new object of the EventSource attribute along with we are defining url of the file. This will help us to send updates to the web browser.
- So whenever any update comes from the server, the event will occur on on message, and it will print a required message on the web document.
Examples of HTML Server-Sent Events
Examples of html server-sent events are given below:
Example #1
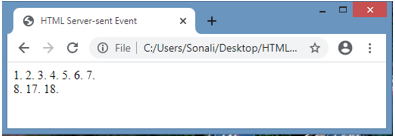
In this first example, we are going to check whether our browser is going to support the Server-send event or not. If everything is ok, it will display time in the output window, and if it’s not supporting the browser, it prints an error message on the browser window. Code:
<!DOCTYPE html>
<html>
<head>
<title>HTML Server-sent Event</title>
</head>
<body>
<div id="sse_demo">
</div>
<script type="text/javascript">
if(typeof(EventSource)!=="undefined")
{
alert("Yes Your browser is going to support Server-Sent Event");
}
else
{
alert("Sorry! Yes Your browser is not going to support Server-
Sent Event");
}
</script>
</body>
</html>
Output:
We see times in numbers on the output screen, which means our browser will support HTML Server-Send Event.
Example #2
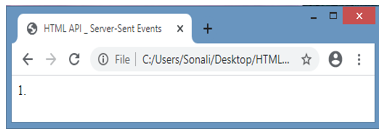
This example is for Server-send events, where we count the required time to load the server-sent event on the browser. This timestamp is in seconds.
Code:
<!DOCTYPE html>
<html lang="en">
<head>
<title>HTML API _ Server-Sent Events</title>
<script>
window.onload = function()
{
var path = new EventSource("server_time.html");
path.onmessage = function(event)
{
document.getElementById("sse_output").innerHTML += "Required
timestamp   received from web server: " + event.data + "<br>";
};
};
</script>
</head>
<body>
<div id="sse_output">
<!--This will display required time of server to load contents-->
</div>
</body>
</html>
Output:
As seen in the below output screen, it shows 1 sec as loading time.
Example #3
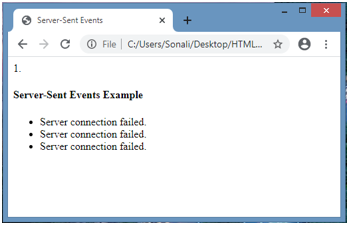
This is the example where we try to show the connection’s establishment. Let’s run the code and will what will be the output:
Code:
<!DOCTYPE html>
<html>
<head>
<meta charset="utf-8" />
<meta name="viewport" content="width=device-width, height=device-height" />
<title> Server-Sent Events </title>
<style type="text/css">
font-family: ‘Times new Roman’;
</style>
</head>
<body>
<h4> Server-Sent Events Example </h4>
<ul></ul>
<script>
(function()
{ "use strict";
var ev_check = document.querySelector('ul');
var ssl = new EventSource('/events');
function li(text) {
var li = document.createElement('li');
li.innerText = text;
ev_check.appendChild(li);
}
ssl.addEventListener('open', function()
{
li('Server connection done succussfully.');
});
ssl.addEventListener('my-custom-event', function(event)
{
li(event.data);
});
ssl.addEventListener('error', function()
{
li('Server connection failed.');
});
})();
</script>
</body>
</html>
Output:
As soon above code runs on the browser window, it will generate output where the server connection fails.
Conclusion
From all the above information, the HTML Server-send Event is a new API used as a mono-directional event process where users can create an event from a web server to a web browser. It uses the attribute EventSource. One can be able to see event load time using it. This is used on Facebook, news feeds, stock price update, etc.
Recommended Articles
This is a guide to HTML Server-Sent Events. Here we discuss the introduction and how server-sent events work in html. Along with different examples and their code implementation. You may also have a look at the following articles to learn more –


