Updated March 24, 2023

What are IAM Roles?
The following article provides an outline for IAM Roles in AWS. In AWS an IAM role is an IAM identity that has specific permissions specified during its creation. IAM roles can be associated with a single or multiple Amazon’s services/Users. It also defines a set of permissions for making AWS service requests.
To get clarity on IAM Roles Let’s take an example of a media service provider. Usually, a media service provider has different types of accesses for their users based on various categories like Sports, Music, Movies, Premium access, basic access, etc. Each category has specific permissions that allow users to leverage their benefit. For example, if a user has subscribed to premium access, he/she might have early access to the latest and popular movies or if a user just wants to watch sports entertainment then he may only subscribe to the Sport package. Similarly, in AWS specific permission is attached to specific IAM roles which are further assumed by AWS services or users based on their requirement and level of access.
How to Create IAM Roles in AWS?
Below are the differet steps to create IAM roles in AWS:
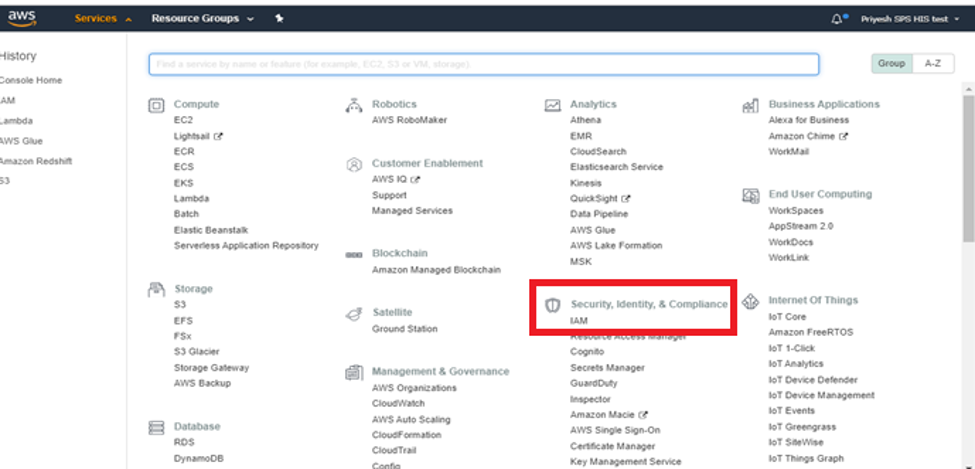
Step 1: To create an IAM role via AWS console first you need to login to your AWS account and select IAM which comes under Security, Identity, and Compliance as shown in the below screenshot.
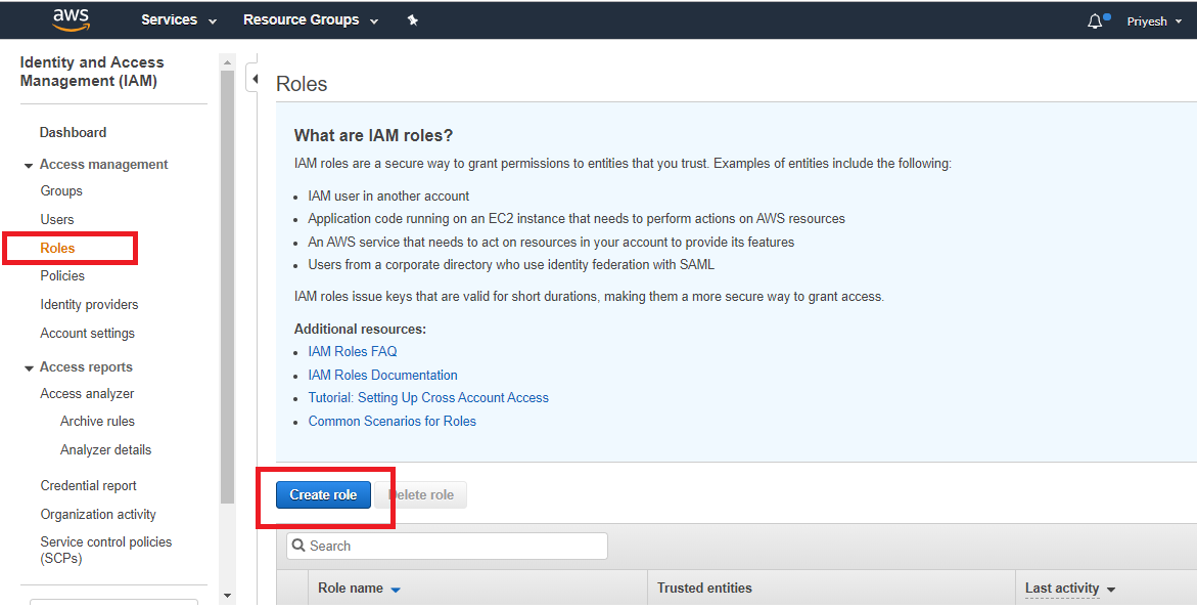
Step 2: In the IAM section you have to click on “Roles” and then click on “Create role”.
Step 3: Then select the AWS Service for which you want to create the Role. For example, you can create a role for EC2 through which EC2 will be able to access S3 buckets. After selecting the AWS service click on “Next: Permissions”.

Step 4: In this step, you can select the type of access you want to grant to your selected service in our case its EC2. You can grant different types of access like Full Access, only read access, read and write access, etc. in the below picture we are granting AmazonS3fullaccess to EC2.
Then click on “Next: Tags”. Tags help us to manage roles easily by specifying a value for each tag. This step is completely optional.
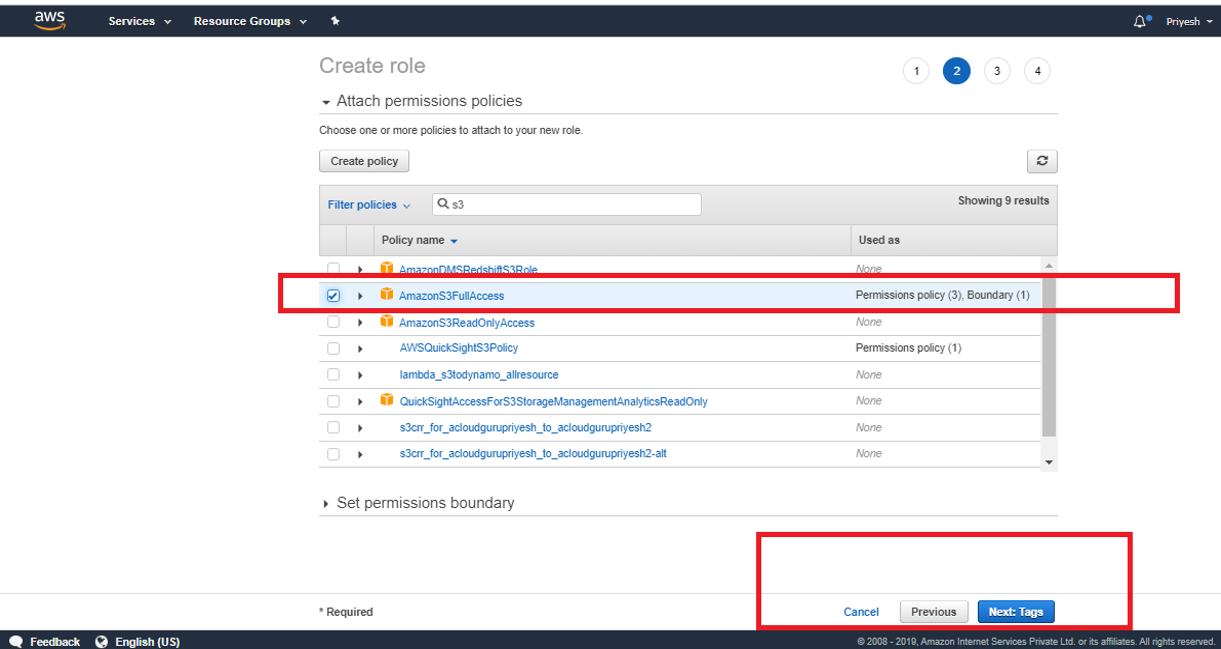
In this above step, you also have the option of “Create Policy” through which you can create policies according to your requirements instead of selecting existing policies.
You can create your own policy with the help of the Visual editor as shown in the below picture.

In Visual editor, you can select the access level of the policy and also the request conditions.

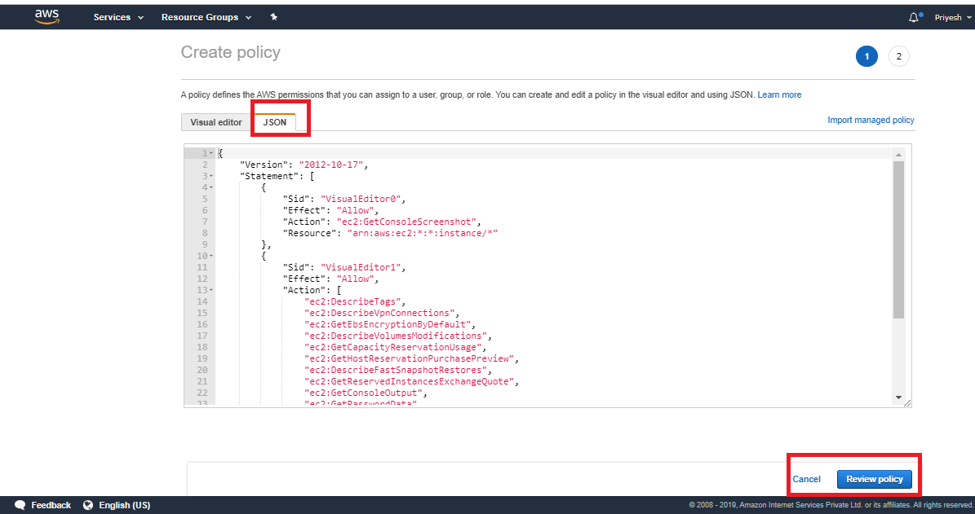
You can also write a JSON script for creating the policy for your Roles as shown below. After writing JSON script you can click on “Review policy” and attach the policy to your Role.
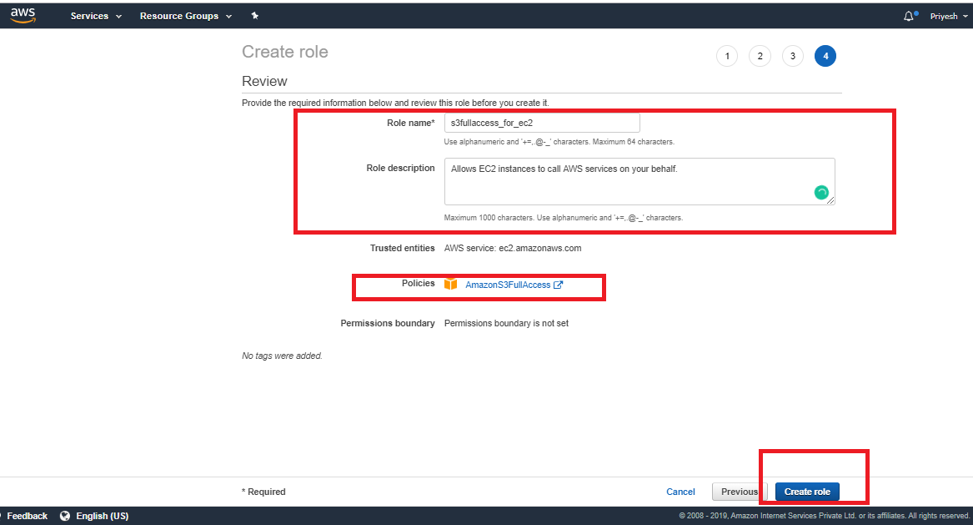
Step 5: In this step, you will be in the review section of the role where you need to provide Role Name and its description. You can also review which policies you have attached and also the tags if you have created. After reviewing your role, you can click on “Create Role” as shown in the image below.
Then you will be able to view your role in the IAM dashboard under the Roles tab as shown below.

How to Use IAM Roles in AWS?
IAM roles can be used by AWS services such as EC2, application and by IAM Users for AWS access. You can use IAM roles to delegate access to IAM users managed within your account or to IAM users under a different AWS account. IAM roles allow you to defined permissions to trusted entities and delegate access without having to share long-term access keys.
To use an IAM role with AWS service you just need to follow the step which was mentioned for Creating a Role. How to use the existing IAM role for an AWS service is explained in the next topic.
IAM Role Use Cases:
There are many cases where we can use IAM roles like we can grant S3 access to Lambda function to process the files automatically, Use IAM roles for granting temporary access to AWS through STS tokens, etc. For the explanation, we will use the IAM role with EC2 to grant EC2 access to view the S3 buckets in our AWS account.
Step 1: Create an IAM role for the EC2 instance. To create a role just follow the steps which we discussed in the previous section.
Step 2: Create an EC2 Instance by going to the EC2 Dashboard and clicking on Launch Instance.

Then select the Amazon Linux free tier AMI.

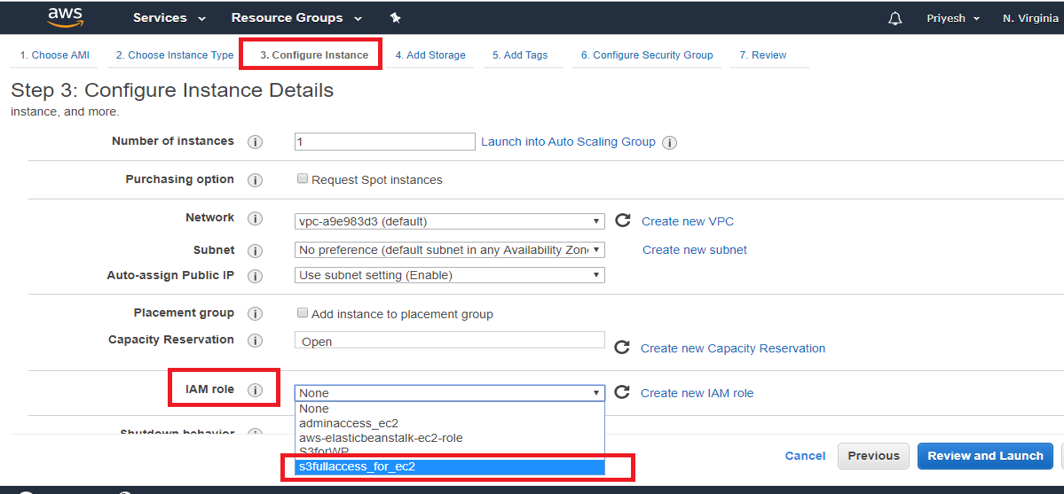
In the “Configure Instance” section select the Role as shown in the below picture. Keep everything as default.

Step 3: Select a key pair or create one, save this key pair in the local system which would be in .pem format and Launch the Instance. In this example, we are going to use Putty to login to our Linux EC2 instance. Before we log in, we need to convert .pem to .ppk which can be done with the help of Puttygen.

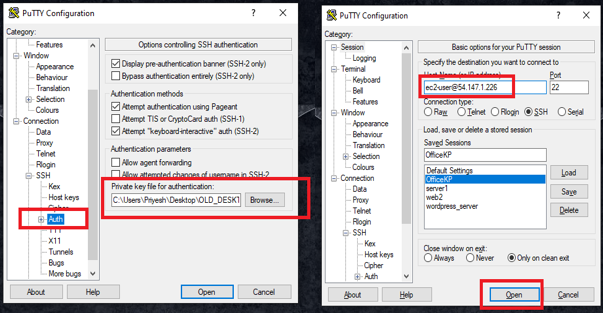
Step 4: After you launch the instance copy the public IPv4 and open PuTTY specify the path of PPK file in the Auth section as shown in the image below then paste the IPv4 and click on open.
Step 5: After you log in, you will be able to see Private DNS address highlighted in blue as shown in the picture below then type CLI command “aws s3 ls” to list the names of all S3 buckets in our account. The buckets are highlighted in green in the below image.
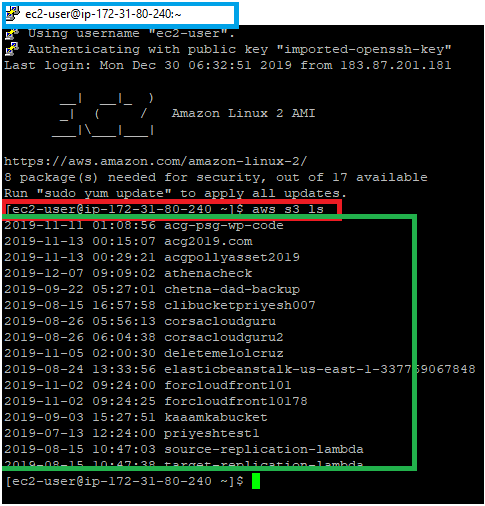
This CLI command won’t work if you had not attached the IAM role to the EC2 instance.
Conclusion
IAM Roles play a vital role in AWS in terms of security. It allows us to secure our application easily and seamlessly, it also helps us to avoid dependencies by allowing us to create different Roles for different requirements.
Recommended Articles
This is a guide to the IAM Roles in AWS. Here we discuss the introduction and how to create and use IAM roles in AWS?. You may also look at the following articles to learn more –


