Updated March 16, 2023

Introduction to Image Link in HTML
Image Link In HTML is found in almost all pages as they help us navigate from one page to another on a website. A popular combination is to use the HTML anchor tag <a> with HTML’s img tag <img>. With this combination, we can allow the movement of users from one page to another by clicking on an image. Before we dive further into this topic, let’s first understand the working and rendering of anchor and image elements individually and then combine them to achieve a linked image.
HTML Anchor Tag
The HTML Anchor tag is used to create HTML hyperlinks to other web pages or multimedia content hosted on the web. Let’s refer to the syntax below to understand how anchor tags work and their basic attributes
<a href=”https://www.google.co.in/“>Click here!!</a>
In the above example, the “href” attribute specifies the URL of the webpage to which we would like to redirect the user while click on the text “Click here!!”.
Let us see the complete code below :

Output
<!–![]() –>
–>
With the above example, you will be able to make the following observations
- An unvisited link will appear underlined and in blue color. For, e.g. This is an unvisited Link
- A visited link will appear underlined and in purple color. For, e.g. This is an already visited Link
- An active link appears underlined and in red color. For, e.g. This is an active Link
HTML Image Tag
While browsing the internet, I am sure you must have come across several web pages which have various forms of multimedia included in them. Especially images are a popular form of multimedia that can be found in almost all interactive web pages and websites today. Let us understand the image tag and its implementation in HTML with the example below:
Syntax
<img src="smiley.gif" alt="Smiley face" width="42" height="42">Let us now understand how each of the attributes in the img tag work:
- src: The src attribute defines the image file path we are trying to load with this tag. It can be linked to an image hosted on the web with a format like example.com/images/dummy.png or an image file locally hosted on the same server as the web page.
- alt: The alt attribute defines the text and description of the image that we would like to display in case if the images fail to load due to network connectivity or any other issue.
- Width and height: The width and height of both attributes define the width and height of the image we’d like to display on the web page. Else the image would work with by default 100% height and width.
Now let’s see the complete HTML code required to load an image on a webpage. Save the following image by the name “sunset.png” in a folder called “image_test” in your local drive.
Now in the same folder, let’s create an HTML file named sunset.html with the following HTML code :
Now go to a browser on your machine and type in the path of the .html file. My files are stored in a D drive, so the path for me would be
D:/image_test/sunset.html
And now we can see that the rendered HTML page has loaded the sunset image on our browser. With the help of CSS and <p> tag, we can also display text as per our requirement around the image. Both the anchor and img tags are compatible with all browsers like Google Chrome, Safari, Microsoft Edge, Firefox and Internet Explorer.
Linked Images in HTML
Now that we have understood with examples how anchor tag and image tag work individually, let us now understand how we can combine the two functionalities to achieve a scenario where we would like the users to be redirected to a new webpage with the click of an image. To make an image clickable and redirect the user to another webpage, we simply need to nest the image in an anchor tag. In the below example, we will try to enlist the top 3 web search engines used across the globe. In our list, we will show the logos of the 3 search engines, and by clicking on any of the logos, the user will be redirected to the respective search engine page. Let us create a folder named “redirection test”, and in the same folder, let’s save the below images
1. Google
2. Yahoo
3. Bing
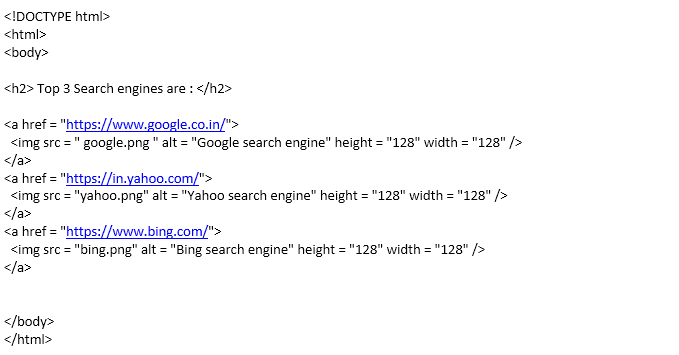
Now we will create a .html by the name imageredirection.html in the same file. The imageredirection.html will contain the following code.
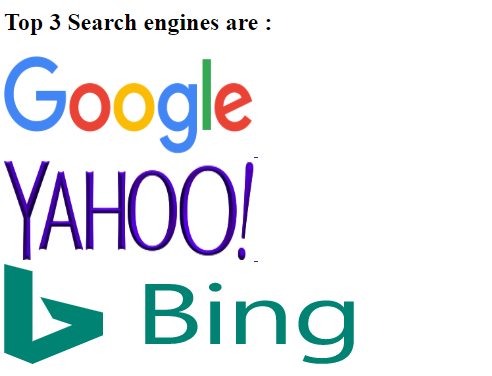
Now we need to access the HTML page from the browser, for which I will type my local path “D:/redirectiontest/ imageredirection.html”. the browser will then render the HTML file to generate the following result:
<!–
The users will be able to navigate to the respective search engine by clicking their logo. From the above example, we can observe that HTML is a simple and flexible language that allows us to combine multiple tags together and achieve a complex functionality like this. The combination of using img and anchor tag is a popular combination.With additional HTML coding we can also add different HTML elements like displaying linked images in an ordered or unordered list using <ol> or <ul>. The extreme flexibility and simplicity that HTML provides with each version released help UI and UX designers design interactive and intuitive web pages that we see while browsing the internet for day to day activities.


