Updated March 24, 2023

Introduction to ImageButton in ASP.NET
ImageButton control in ASP.Net is used in button formation by which we can use the images. It is like a button with an image on it. Generally, we have seen the images on the website and after clicking on it, certain activities performed. So, in this case, we need to use ImageButton control. It is used to fire an event after clicking on the ImageButton either on the client or server-side. We can set the image, which we want on the button. This image button will respond to the mouse click as soon as we click. When we click the image button control, it raises both the events that click and command events.
Syntax:
<asp:ImageButton ID="ImageButton_new" runat="server" />How to Create ImageButton in ASP.NET?
Let us have a look at how we can create an ImageButton in ASP.Net on the web page?
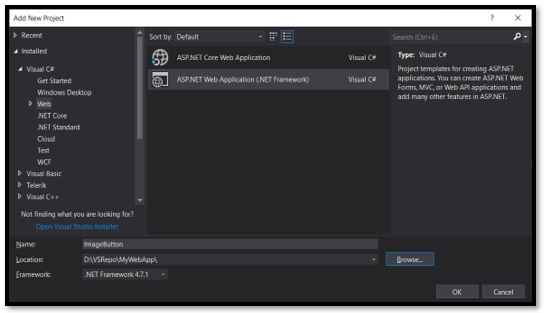
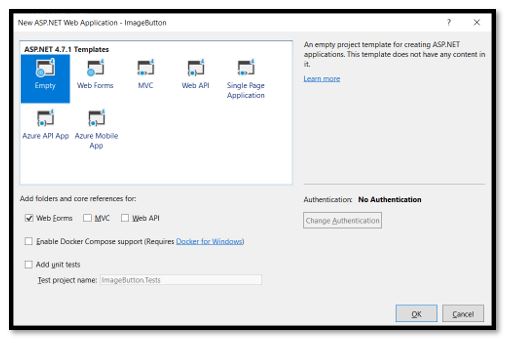
Step 1: Open Visual Studio and create an empty new web application.
Step 2: Create a new web page for the image button display.
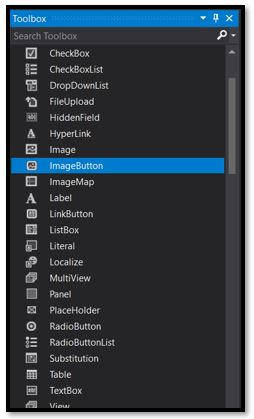
Step 3: Now from the toolbox, we need to drag the ImageButton control and drop it on the web page.
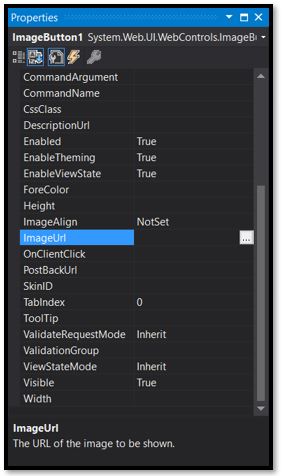
Step 4: After drag and drop of ImageButton control, we need to set the ImageUrl property of the ImageButton. ImageUrl is used to provide the URL so that it can display. Try to provide the related URL which will make it easier.
Step 5: Now select the image, which we want to display on the ImageButton control in asp.net.
Step 6: Properties need to be given for the ImageButton. So create one folder inside the project and give its name as an image. In this folder place the image which we want to set as an ImageButton.
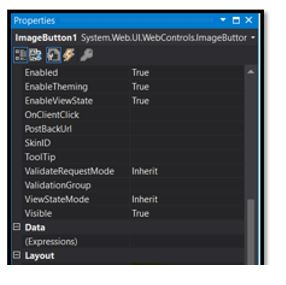
Step 7: To provide the properties press f4 or click on the property window and provide its properties.
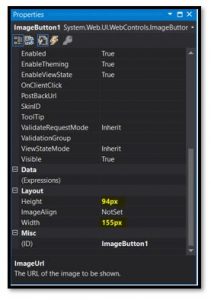
Step 8: Provide height and width for the image from the properties. We can see the yellow highlighted part in the below snippet contains the height and width.
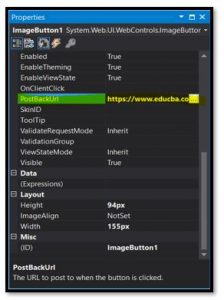
Step 9: Set the PostBackUrl property so that it should be redirected to the destination web page. We have provided www.educba.com URL so that we can use it in our below-given example.
Step 10: After that, we need to write code on ImageButton.
Example of ImageButton in ASP.NET
Now we all know how to create an image button control via the above steps. Let us make it more clearly with the help of an example. See the below code is for displaying the image button.
Code:
ImageButton.aspx
<%@ Page Language="C#" AutoEventWireup="true" CodeBehind="ImageButton.aspx.cs" Inherits="MyCalendar.ImageButton" %>
<!DOCTYPE html>
<html xmlns="http://www.w3.org/1999/xhtml">
<head runat="server">
<title></title>
<style type="text/css">
#form1 {
height: 118px;
}
</style>
</head>
<body>
<form id="form1" runat="server">
Click image to visit Educba website<div>
<br />
</div>
<asp:ImageButton ID="ImageButton1" runat="server" ImageUrl="~\Educba.png" Height="64px" Width="158px" Imagealign=“Left” PostBackUrl="https://www.educba.com/" />
</form>
</body>
</html>
Explanation:
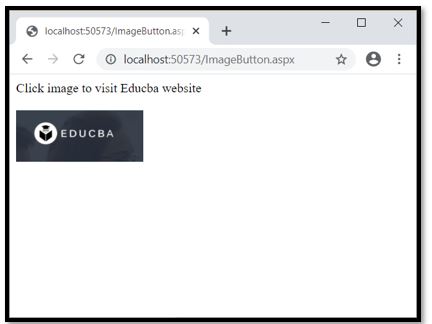
Output for the above script will give us the image, which is clickable. We have provided the image path in “ImageUrl”. It will show the educba.png image on the ImageButton.
Imagealign is used in code to make alignment of the image provided by us. In our code it is aligned to Left that’s why our image will be on the left side of the web page.
Runat is used to set the server-side control that’s why it is set to “Server”. PostbackUrl is used to set the link after we click on the image button. In our case, it will open the www.educba.com.
Therefore, when we run this Script we will be getting the output as below with the image in it:
Now if we click anywhere on the image, it will be redirected to the educba website.
Imagebutton in ASP.Net has certain important properties listed below:
- ID: It is a unique ID for identification purposes.
- ImageUrl: With the help of the image URL, we can set the image path for the image on the image button control.
- AlternateText: If the image is not be displayed on the web page, AlternateText will be displayed.
- PostBackUrl: When we click the image button, it will redirect the other page. PostBackUrl is the path for this page.
- OnClientClick: It will write java script.it will execute the name of the function when the image is clicked.
- Runat: This must be set to “server”. It is used to specify that the control which is on the server-side.
- GenerateEmptyAlternateText: It will generate an empty string as an alternative text when it is empty.
When we click the image (image button) of a web page, Click and Command Events raised. If we want that ImageButton should behave like the Command button then we can use the event handler “OnCommand”.You all must be having one question, what if we want to place multiple image button on the web page of an application. For this, we have CommandName Property by which we can place multiple ImageButton. By default, the value for CommandName is zero.
Syntax for CommandName
[System.Web.UI.Themeable(false)] public string CommandName { get; set; }Any of you have wondered how it is determined that when and where the user Clicked. ASP .NET has an event handler for it namely OnClick, which can determine the coordinates of the image where exactly the user clicks it. Based on the coordinate’s value we can code the response. We need to make a special note that origin is (0, 0) which is located at the upper left corner of the image.
Code-behind in our ASP.NET code runs on the .NET framework which is always on the server-side. so whatever code which is compiled and we want to write on code behind that is .cs or .vb will run on the server-side.
Conclusion
So, from ImageButton in ASP.NET article, we have learned about the ImageButton and its use in ASP.NET. We saw the example of ImageButton. With the help of ImageButton control, we can display an image in a good graphical representation on a button. We can do alignment of the image, with the help of its various properties like its height, width, left alignment or right alignment.
Recommended Articles
This is a guide to ImageButton in ASP.NET. Here we discuss the introduction, how to create ImageButton in ASP.NET? with example in detail. You may also have a look at the following articles to learn more –
