Introduction to InDesign book templates
Adobe InDesign is the most favored software for creating Book templates and multiple documents pages after Page maker amongst the designers. The program has every function and tool required to create and design creative books and magazines. In this article, we will learn how to design book templates and use them in Adobe InDesign. Moreover, we shall also learn the detailed procedure of managing and leading the document & page setup, text, margins, rulers, guide, and every tool used to create a proper book template.
How to Create and Use Book Templates in Indesign?
Creating a book is a complex procedure that involves working with page setup, margins, guides, rulers, texts in multiple documents. To create a book in InDesign, we first create documents and pages that need to be designed for the book. Then we add these pages to the Book we need to publish.
Some of the major points to remember while creating documents for a book are:-
- Margins: – Margins are created on a particular page to adjust text, images, symbols and other artworks in a proper sequence. Also, it helps inappropriate management of document printing.
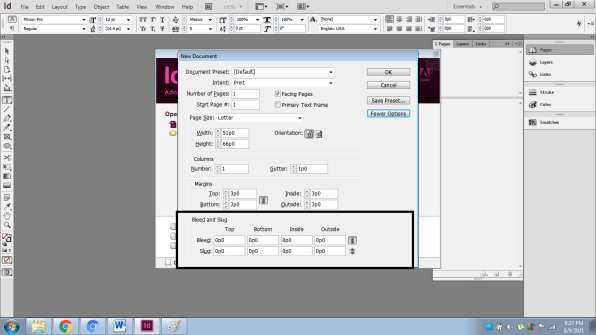
- Bleed: – This is an important page setting tool that helps the user to design a page according to the size and layout. The Bleed area is the portion that will be cropped while printing. Users can use this feature while working with larger images and photos.
- Gutter: – This is an important setting used for two-faced pages. The space between the pages is called Gutter.
- Line spacing: – Space between Lines is Line spacing or Leading. This function is used in text paragraphs. Line spacing should complement the page setup.
How to create a document with multiple pages in InDesign?
To create a document in Adobe InDesign the first step is to plan and execute the document setup. Most of the work depends on the settings that we have placed at the very beginning of creating a page document. Rest of the work is adjusting and creating text, graphics, and images in the document.
Following are the steps involved in creating a document:-
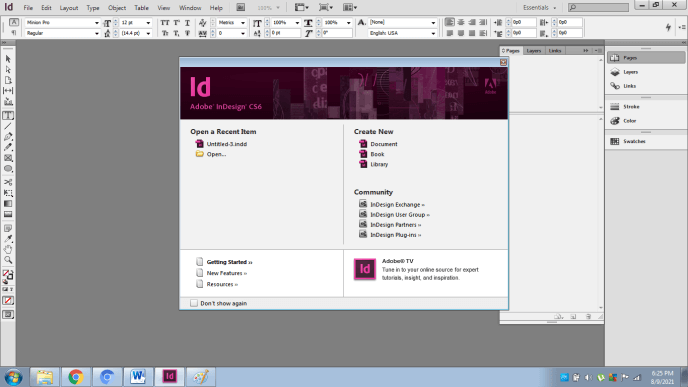
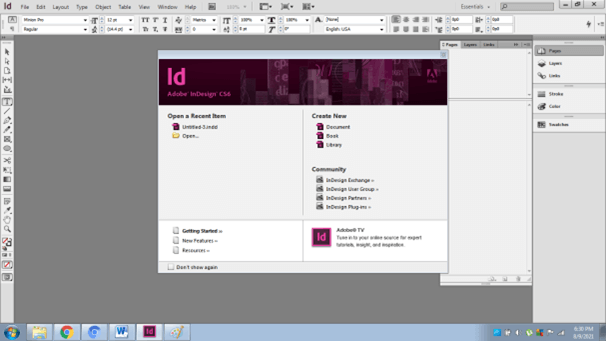
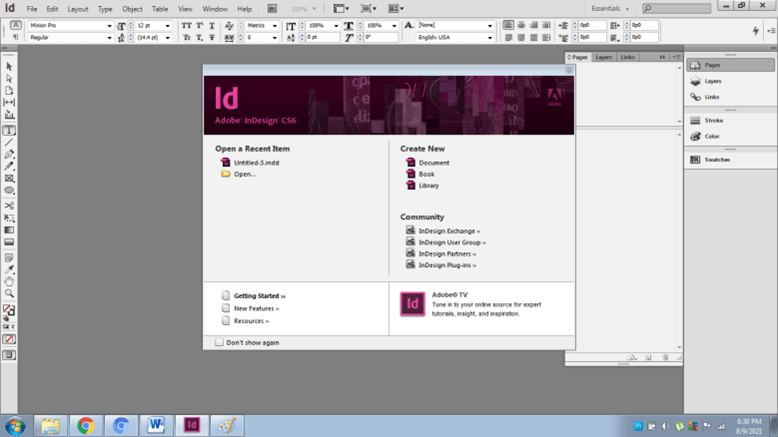
- Open and launch Adobe InDesign
- Create a New Document as shown below. Here, we are creating a new document instead of a new Book.
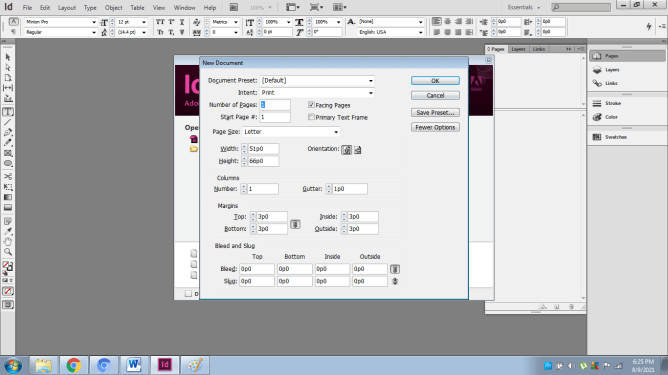
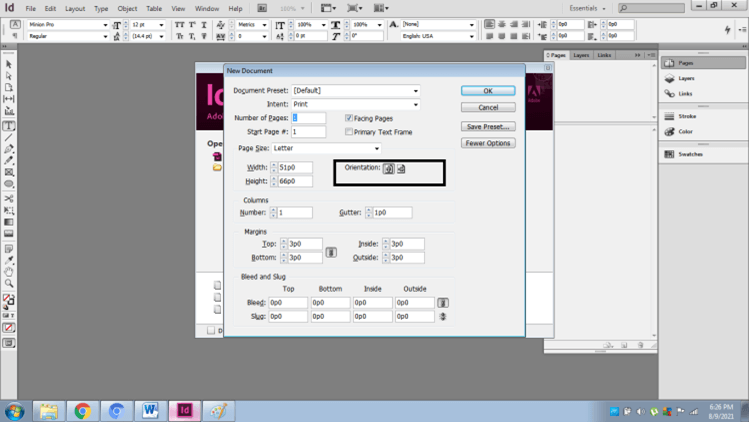
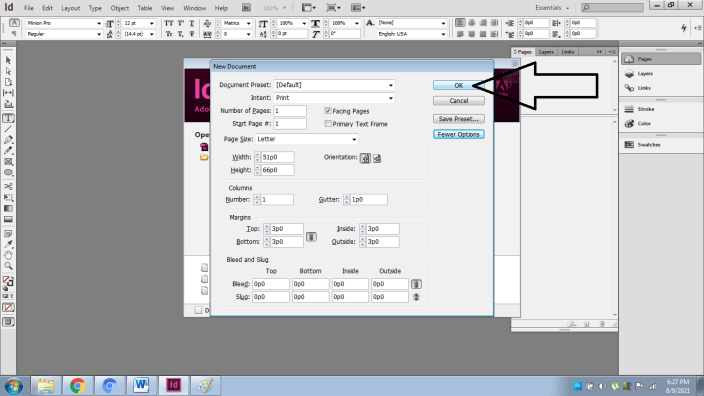
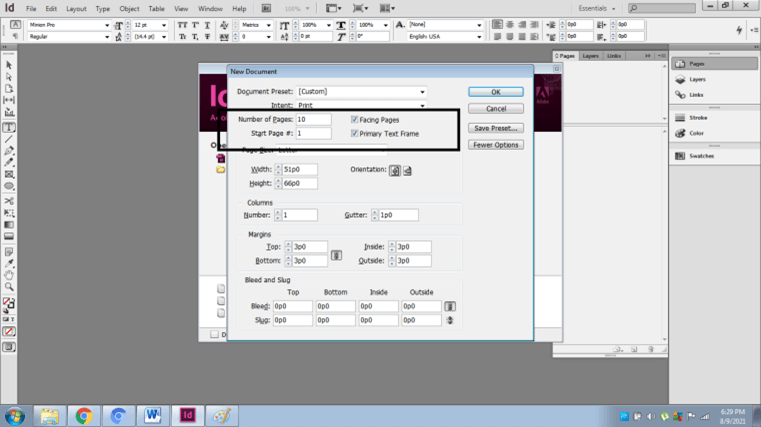
- Now, a new dialogue box will appear as a Document setup. Most of the page settings are settled in this window.
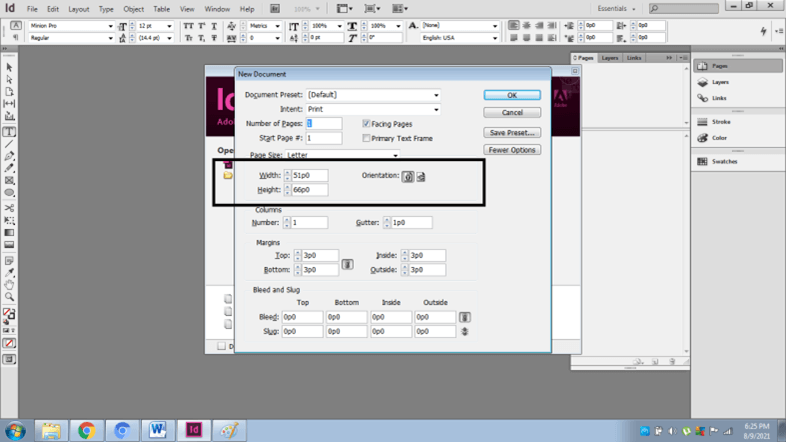
- So, as we can see in the image; we can adjust the Height & width of the pages.
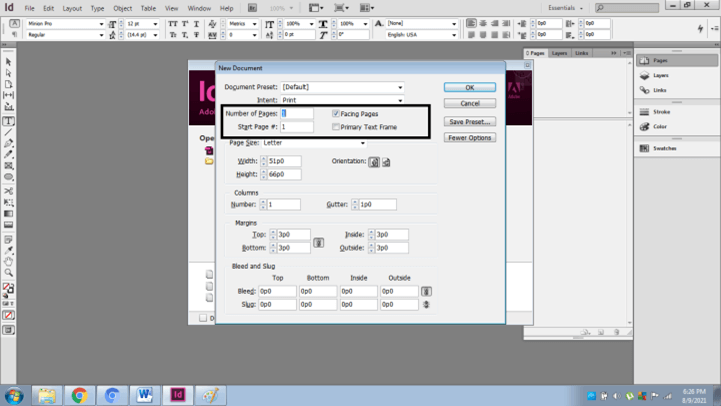
- We have options for selecting the Number of pages and adding pages as a two-faced pages.
- We can also select the orientation of the page. Portrait or landscape.
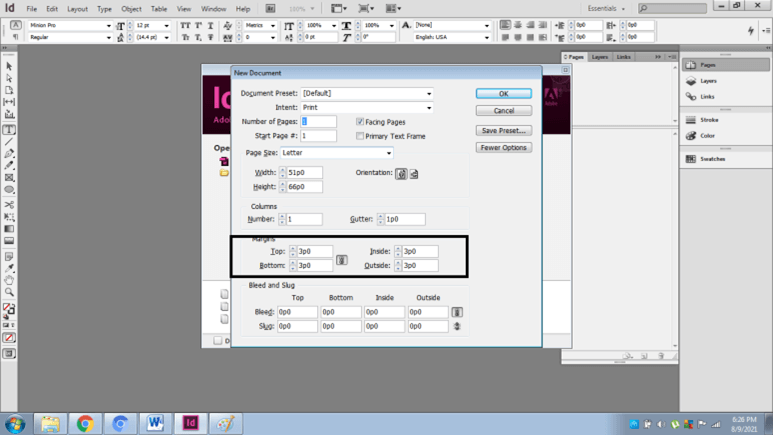
- Next, we can adjust the margins of the page as required.
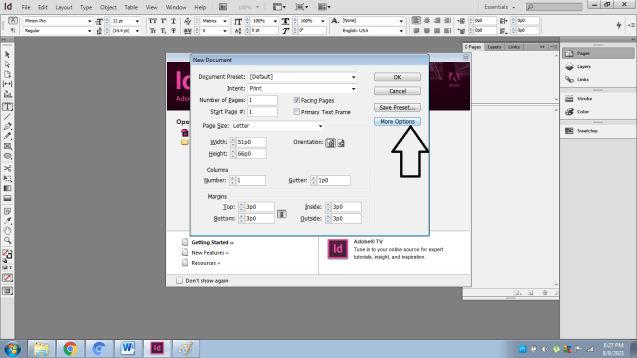
- To set Bleed and Slug, go to More Options in the same window.
- Next click on Ok to create the document.
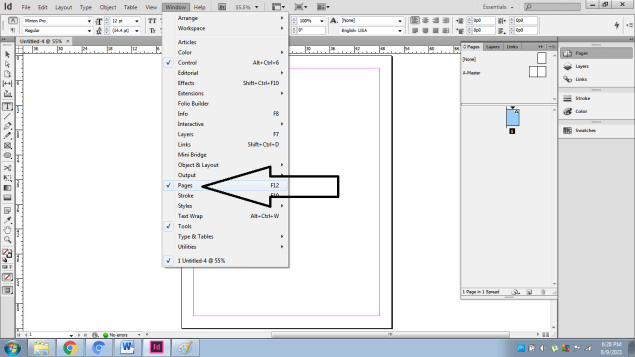
- Go to windows and select Pages to view the Pages Window.
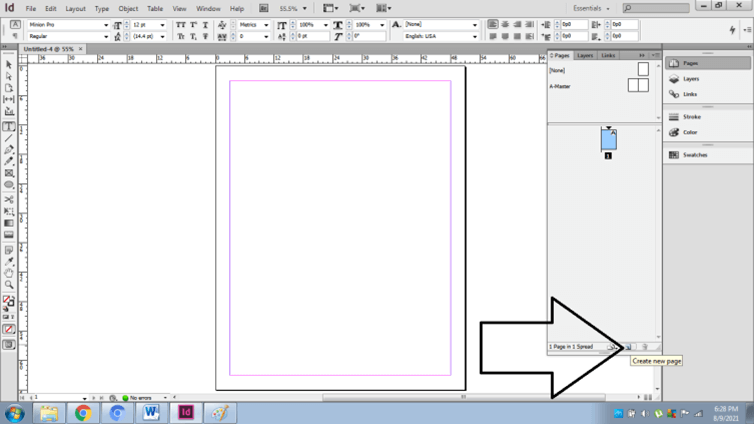
- We can also add pages to the current document using this window and click on Create new Page.
- Now, we can add text and graphic artwork on the pages to create a document.
How to Apply master pages?
Master pages are pages that are not printed but are used to create a set of ordinances for other pages that are created in the document. The user can create multiple master pages and apply the format created on the master page to the active page accordingly.
Following are the steps of creating and applying master pages to active page:-
- Launch InDesign
- Create a new document with ten pages, toggle on the two faced page option and Primary Text Frame and click Ok
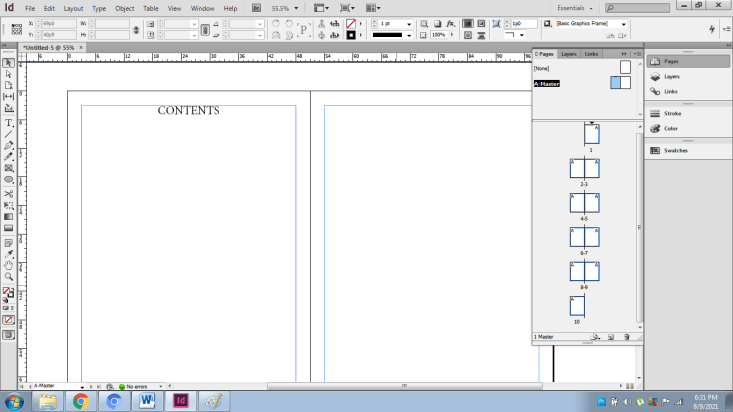
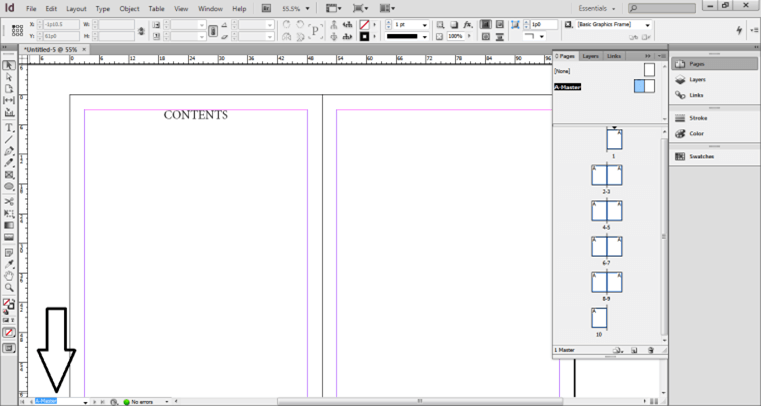
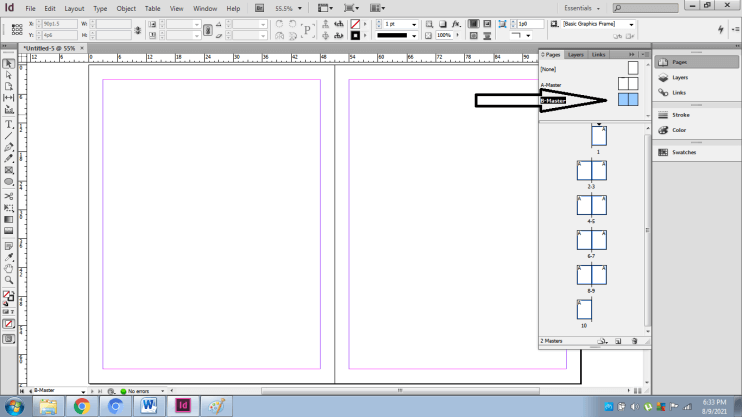
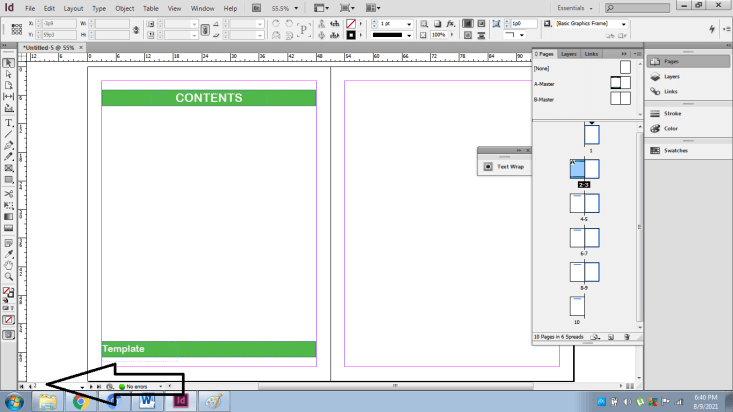
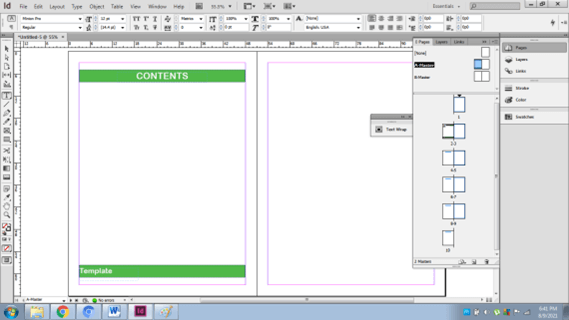
- Now, we will work on the master page by adding text. Make sure that you double click on the master page to work on the same. You can also double check by looking at the bottom panel in the document that shows the page which is active.
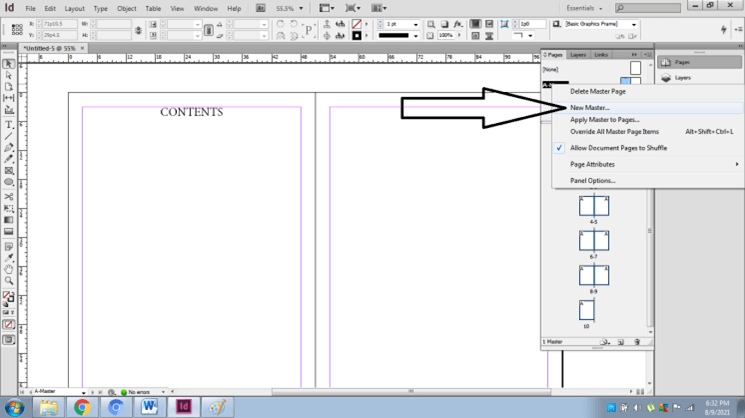
- Next, you can also add a new master page. Right click on the current master page and select New Master to add another master page.
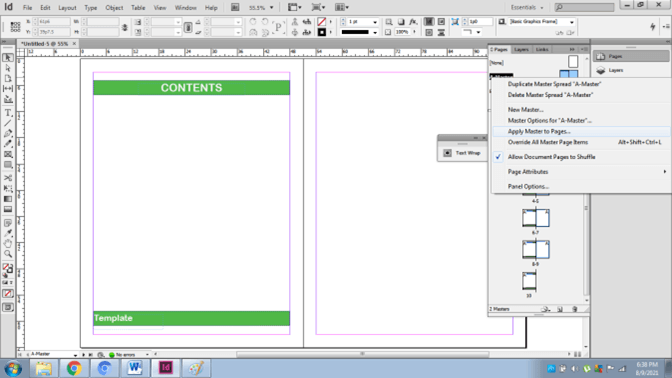
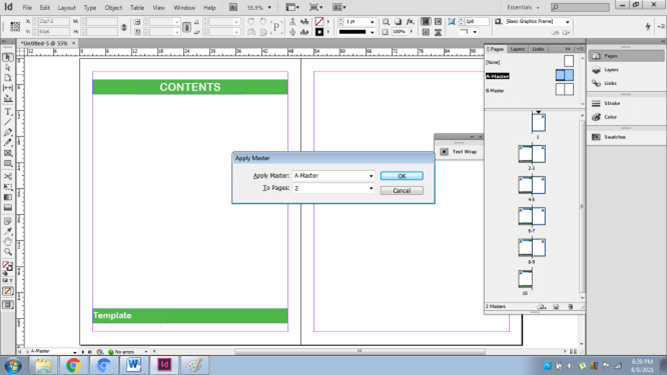
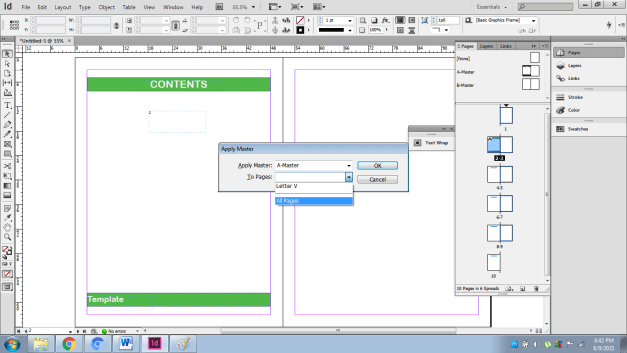
- After adding artworks on the master page, we can apply the format of the master page to the other pages either by dragging the master page to the desired page number or right-click on the master page and select Apply Master Pages To. You will get a dialogue box where we enter the page number on which we need to apply the selected master page.
- Example: –
- Double click on the master page and click on the Type tool.
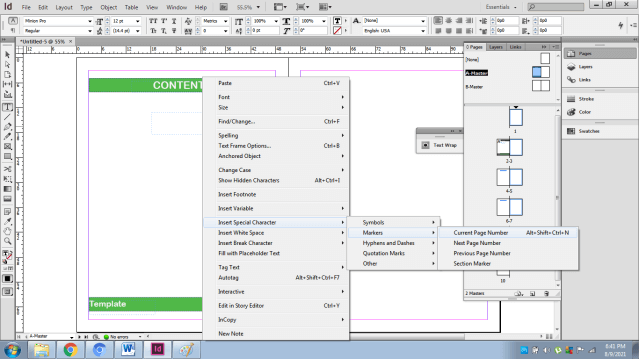
- Create a text box and right click > Insert Special characters> markers> Current page number.
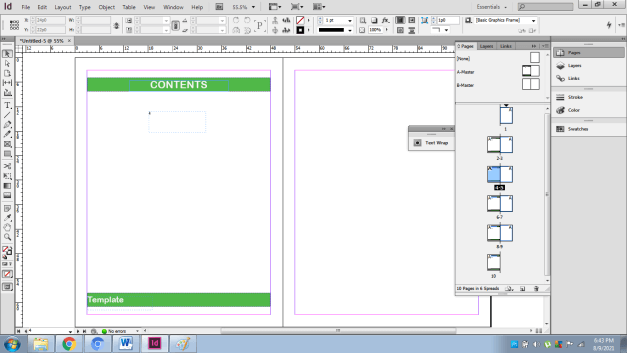
- Now, apply the master page to all the pages and you will see that the page number has appeared in the bottom of each page as directed.
- We can modify the text box at any time using the Type tool.
How to create books and templates?
Basically, books and templates are a group of documents with similar text formats, document styles, symbols and master pages. When we create a book, we first create documents and then add those documents in one book. Doing so helps the user in modifying the pages and their setup more quickly and accurately.
Following are the steps to create a book with InDesign
- Launch InDesign
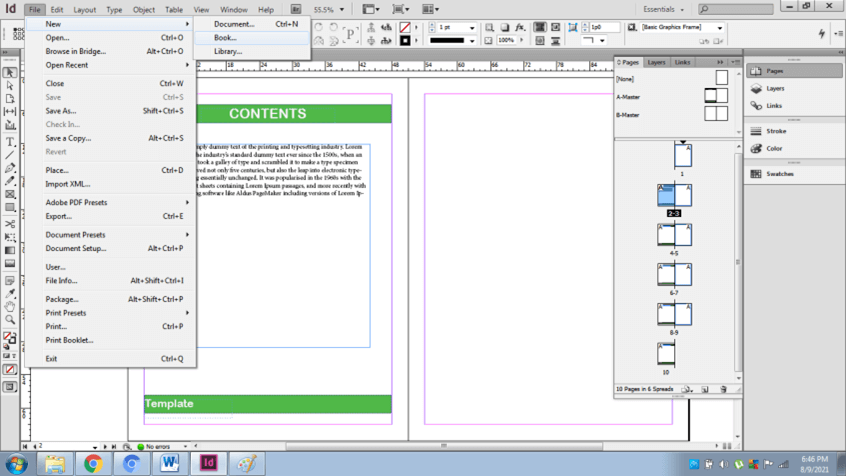
- Go to File> New> Book
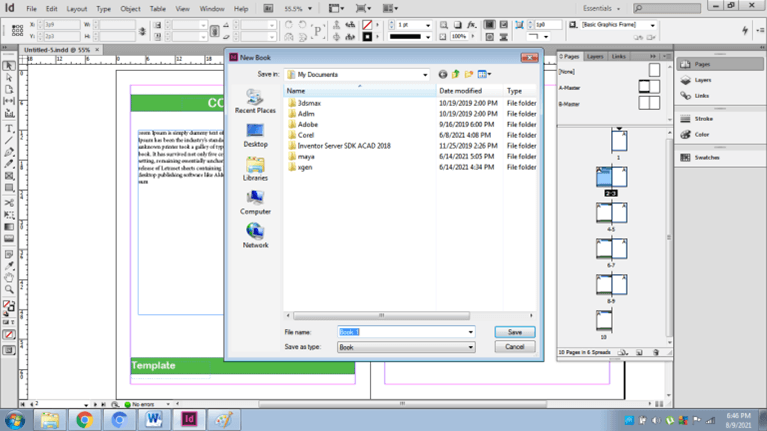
- A dialogue box will appear to save the book
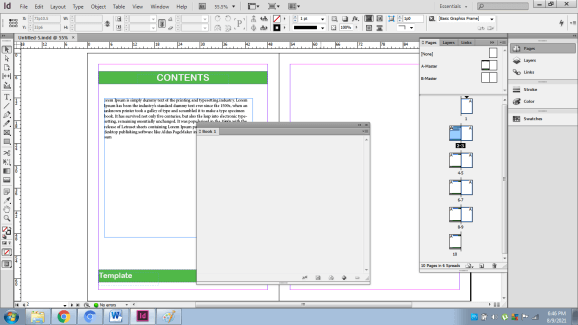
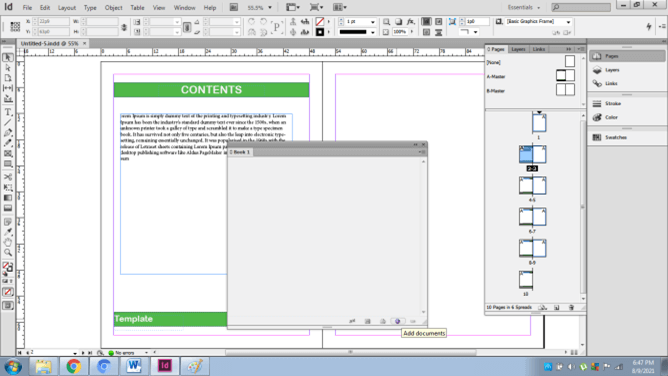
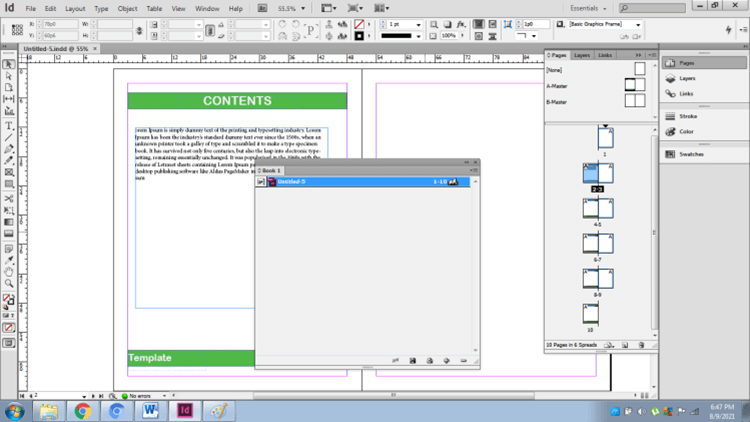
- Now, after saving the book a new dialogue will appear as Books.
- We can add/ remove saved InDesign Documents inside the Book as shown below.
Conclusion – InDesign book templates
Concluding the article, Adobe InDesign is an incredible program when it comes to creating books and templates. It makes the work easier and chronological. The users can easily learn the techniques and methods to create creative books and magazines in InDesign.
Recommended Articles
This is a guide to InDesign book templates. Here we discuss how to design book templates and use them in Adobe InDesign. You may also have a look at the following articles to learn more –

