Introduction to InDesign layers
Layers in Adobe InDesign help the users in categorizing and layouting a particular page or document. The layers function in Adobe InDesign is constructive for creative designers and artists. It helps the designers in placing every artwork systematically and comprehensively. Placing every artwork under proper layers can help the users in editing the designs quickly and rapidly.
How to Create and Use Layers in Indesign?
Like any other graphics program, Layers in Adobe InDesign are simple apparent sheets that are filled by the users with symbols, text, designs, and artworks. Without filling the content, layers are nothing but, only an empty canvas. Layers that are placed at the top in the layer panel are most visible to the users following the corresponding layers. The Layers function in InDesign is a knockout function to be used for locking, editing, moving, and hiding the objects present on the layers.
How to Create a New Layer?
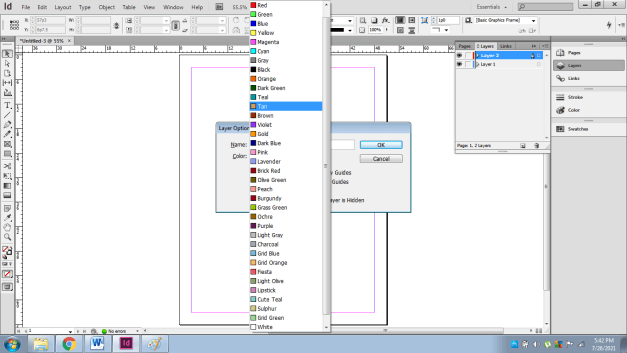
Creating a new layer is easy and simple in Adobe InDesign. The program has a special feature that allows the user to change the indicative color of a particular layer which helps the user to differentiate between several other Layers. InDesign also has other considerate layer options that can be used for quick tasks and assignments.
Following are the steps to create a new layer:-
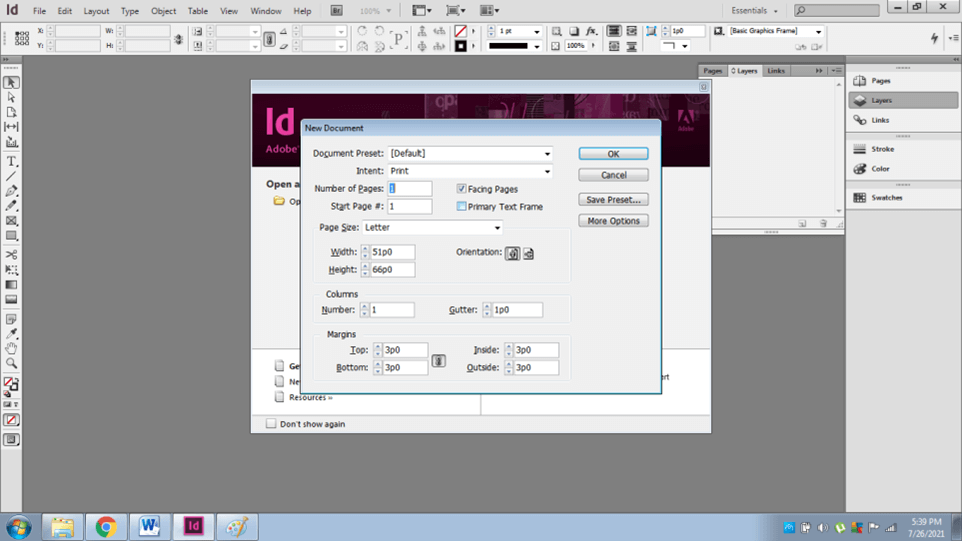
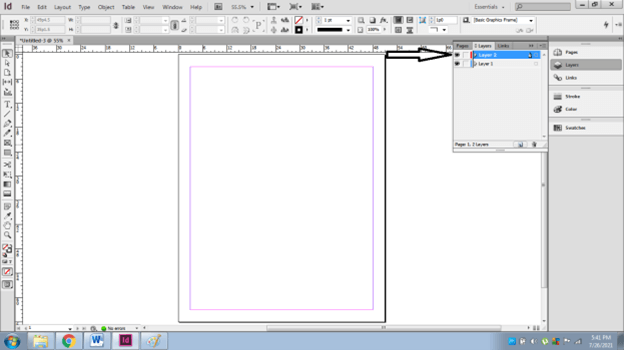
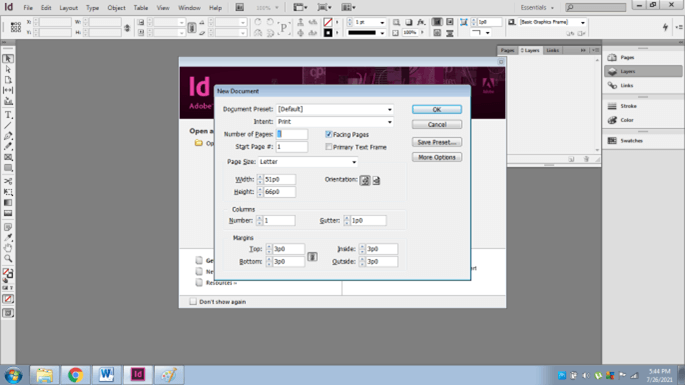
- Create a new document in InDesign as shown below.
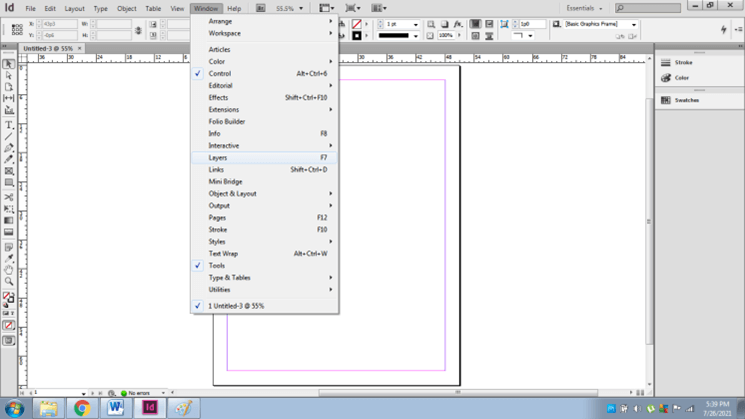
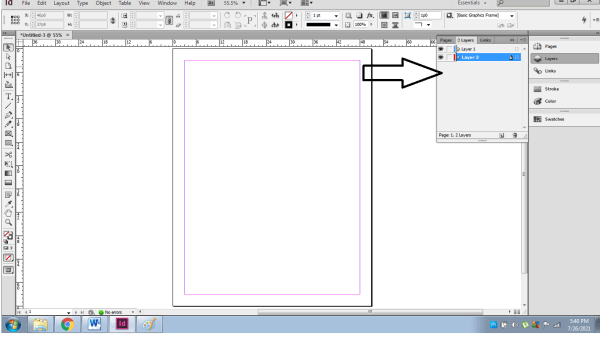
- Go to the Windows panel and select Layers to view the Layers Panel.
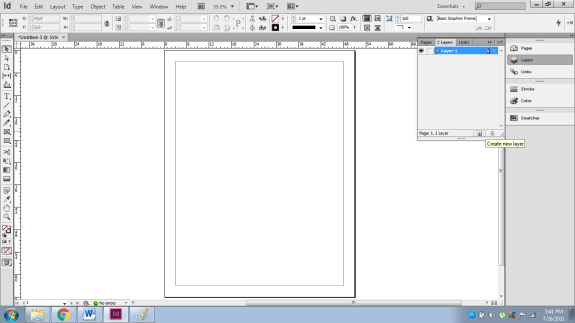
- To create a new layer under the existing layer press the Ctrl key and click on the Create New Layer Option.
- Similarly, to create a new layer above the existing layer press the Shift key and click on the Create New Layer Option.
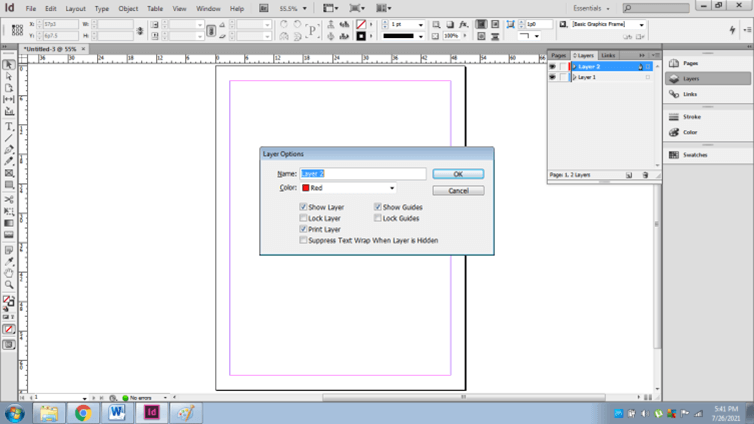
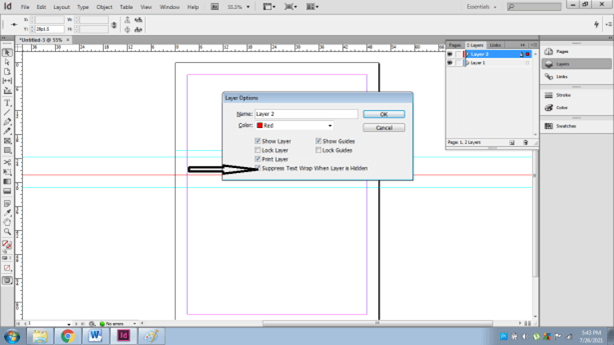
- To edit or view the Layer Option Double click on the selected layer as shown below.
- You will see several options such as:
- Color – to change the description color of the layer. We can click on the drop-down menu to change the colors of the layer.
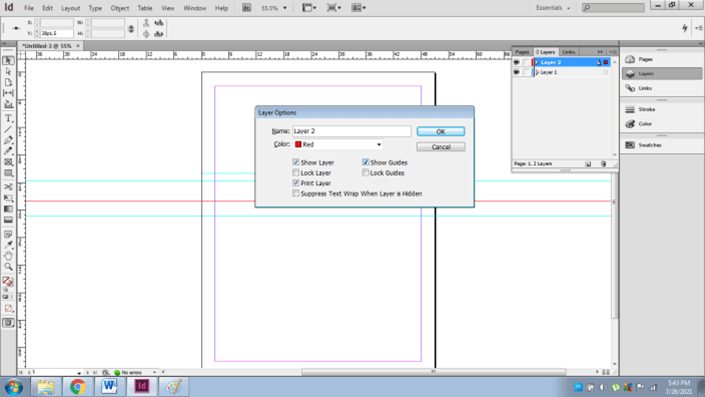
- Show Guides- Guidelines are helpful lines that help the users in the proper arrangement of artworks throughout the document. To see these Guidelines, check the box for the particular layer.
- Show Layer- This option will help in hiding or showing the specific layer. Almost similar to the eye button that helps in a similar function.
- Lock Layer- to lock the layer at the beginning itself. We can use the Lock button to Lock/ Unlock the layer
- Lock Guides: To lock the Guidelines, so that the user doesn’t have to keep on modifying the settings for rulers.
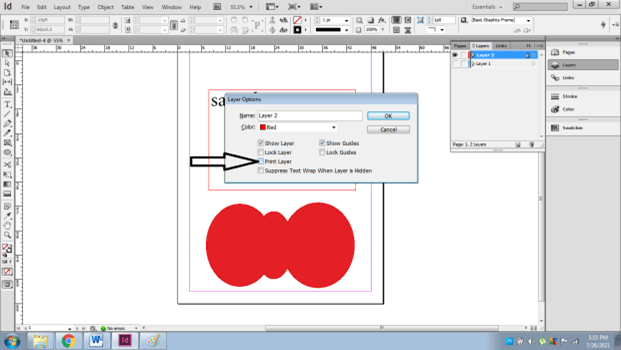
- Print Layer- this option will help the users to select and deselect which layers to be printed and which not.
- Suppress Text wrap when Layer is hidden- this function is helpful when the users require a normal text on other layers while the selected hidden layer has text wrap on the text.
How to use Layers in InDesign
Following are the steps to add, select, move and copy objects from one layer to another.
- Create a new document in InDesign as shown below.
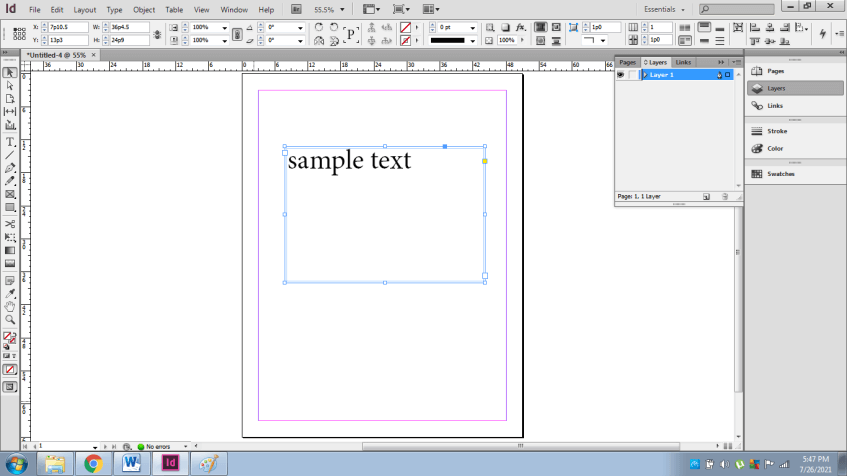
- Create a new layer as a text layer. Write a sample text on this layer.
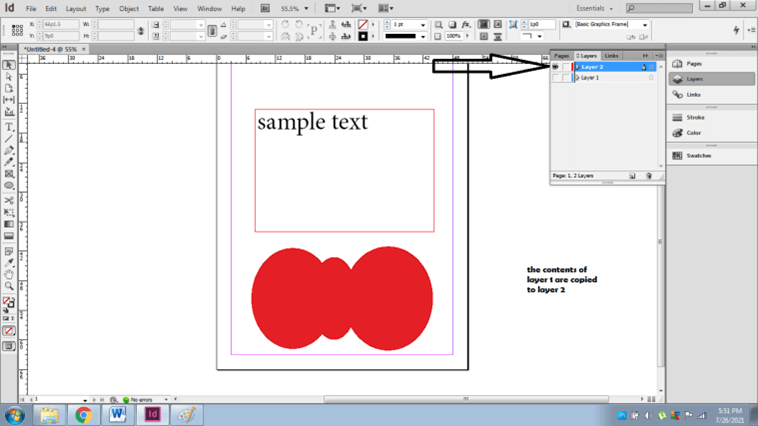
- Create another new layer as “Layer 2” and draw a simple artwork on the layer using the drawing tools. Make sure that the selected layer is unlocked and visible. The users cannot create objects on locked layers or layers that are not visible.
- To copy the contents of the text layer on Layer 2 drag the small box of the text layer to Layer 2.
How to Modify the Layers and Use Effects on Specific Objects?
Continuing with the above example;
- To duplicate Layer 2, right-click on the layer and select Duplicate Layer 2.
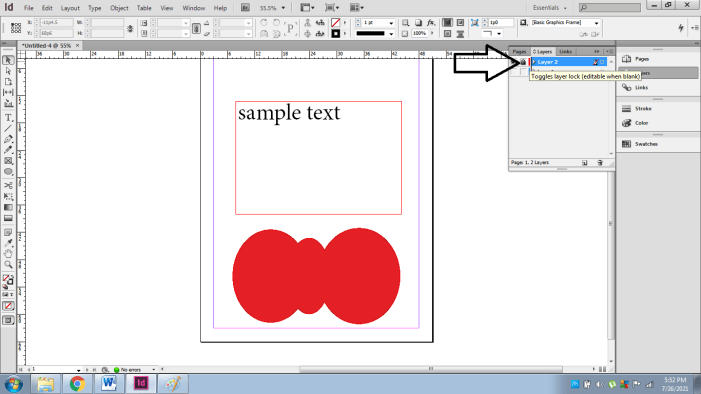
- We can also lock the layer by clicking on the Lock Option present in the 2nd column as shown below.
- Merging layers helps the users to decrease the number of unwanted layers and also reduce the size of the file on the whole. To merge two layers select both the layers and right-click and select Merge as shown below-
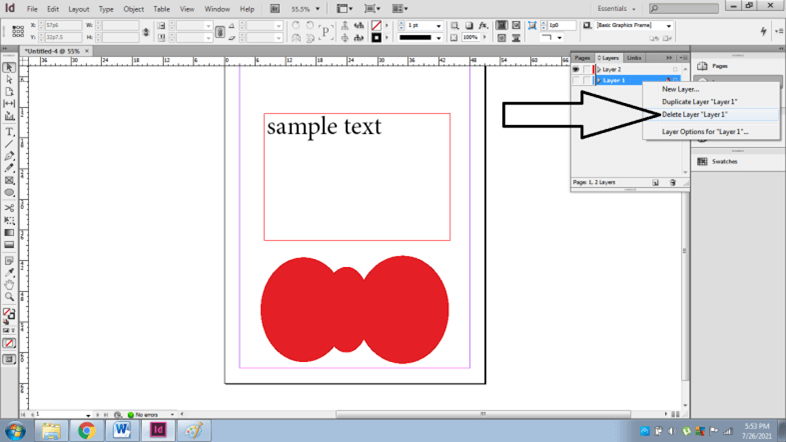
- Similarly, we can delete a particular layer by either dragging the layer to the recycle bin box or right-click on the layer and select the Delete option.
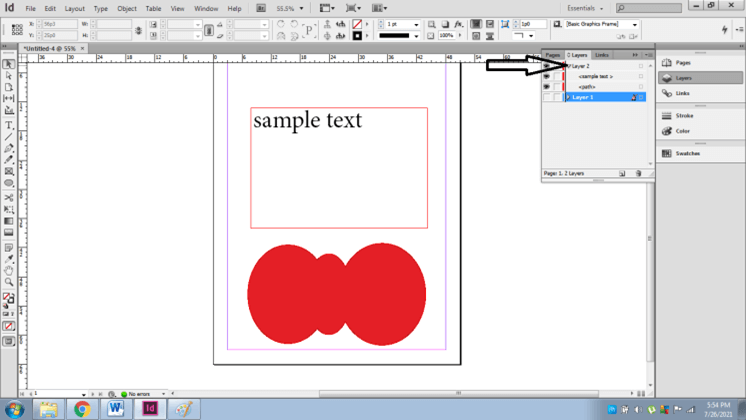
- To view individual objects present inside a layer, click on the small triangle present ahead of the layer name as shown below-
- To remove a layer from printing, double click on the layer and deselect the PRINT LAYER.
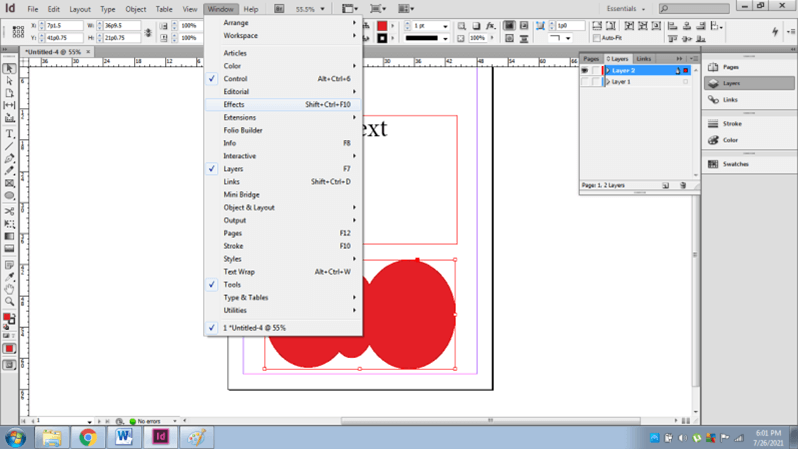
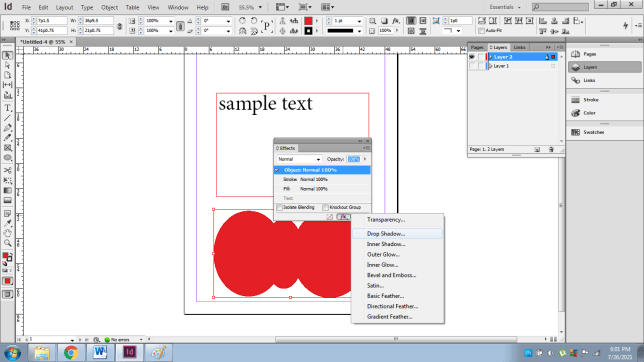
- To add filters to the objects go to Windows > Effects.
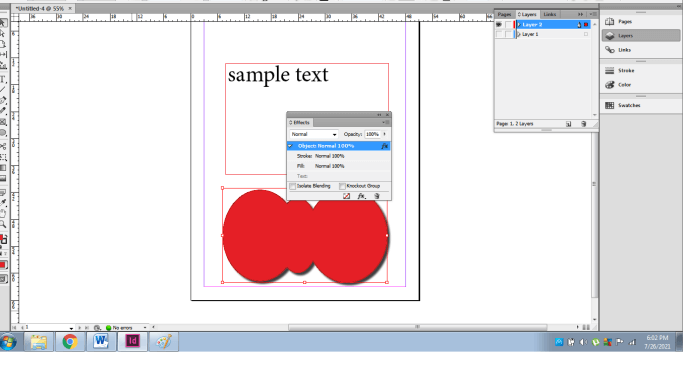
- Make sure the object is selected and apply the effects as required.
Conclusion
Working with layers in InDesign is easier for users if they have experience with other Graphic editing software. Otherwise, beginners may find the functions complex and tough to grasp. However, once learned these functions may prove rewarding and beneficial for the designers. Also, Adobe InDesign has special tools incorporated with Layer Functions that are quick and secure to perform which makes this software different from others.
Recommended Articles
This is a guide to InDesign layers. Here we discuss How to Create and Use Layers in Indesign along with the step by step. You may also have a look at the following articles to learn more –

