Introduction to InDesign Scripts
InDesign Scripts are code of computer language that helps us perform various tasks in just a few simple steps. We can perform simple and complex tasks with specific scripts, and we have a number of built-in scripts in InDesign under the Scripts panel. The coolest thing about the script of this software is that you can create your own scripts or run scripts created by other people for having a result of your desired task. Here in this article, I will tell you how you can use different scripts of script panel in this software and also tell you how you can install any script from external sources.
How to use Scripts in InDesign?
To start using scripts in this software, you need not worry about it. It is very simple to work with it and use it to have our desired result. So let us start our discussion.
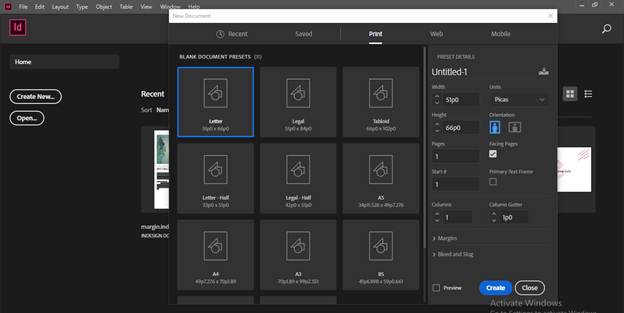
I will start our discussion by taking a new document. I will choose this Letter size document from the New Document dialog box of this software.
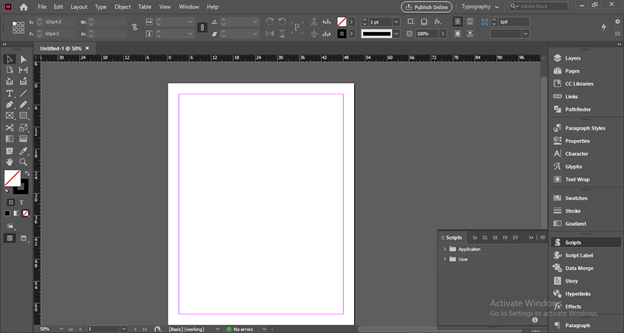
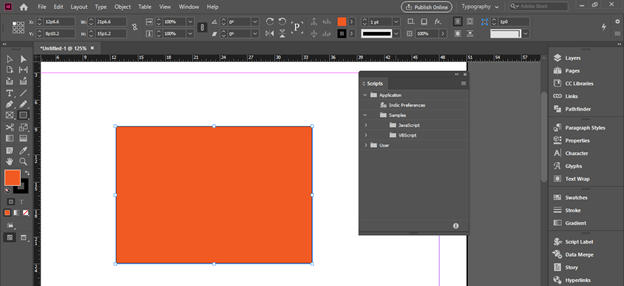
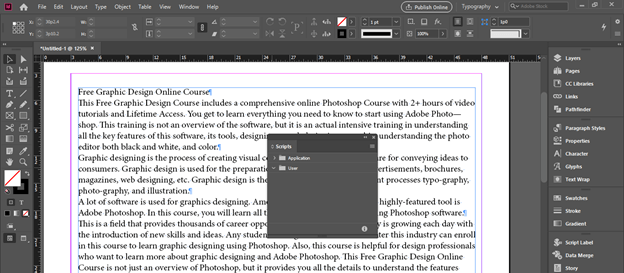
Here at the right side of the user interface of this software, we have a panel section, and in this section, we can find the Script panel.
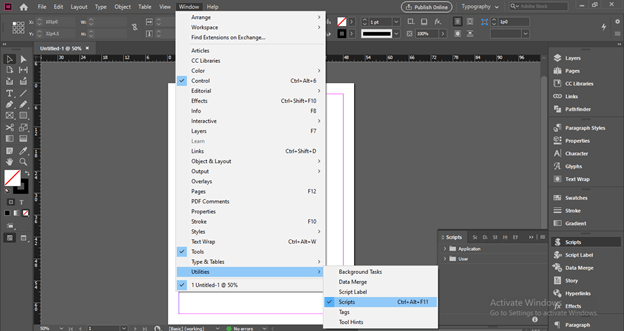
You can also navigate this panel in the Window menu, so click on the Window menu and go to Utilities option of scroll down list. Here in the new scroll-down list of Utilities options, we can find this panel. Ctrl + Alt + F11 is the shortcut key for enabling this panel on our working screen.
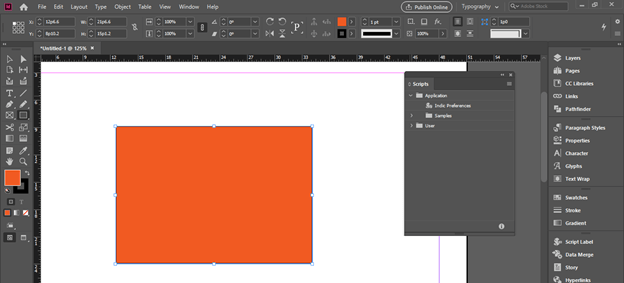
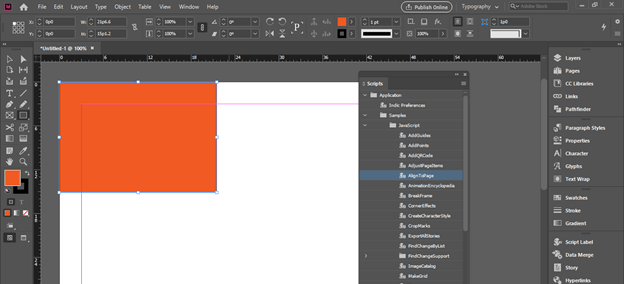
Now let us take the rectangle tool, and I will create this rectangle. I will click on the dropdown arrow button of the Application folder of the Scripts panel, and we have the Sample folder in it.
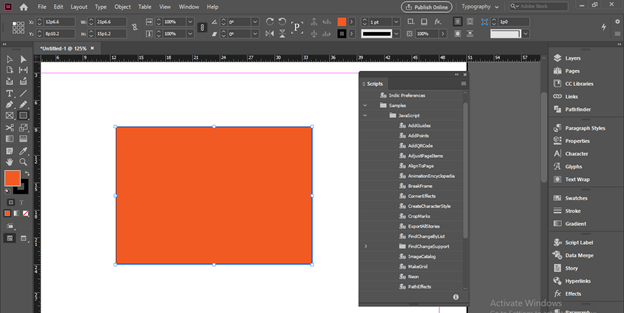
Now click on the dropdown arrow button of the Samples folder, and in it, we have JavaScript and VBScript. You can use the script of any of them.
I will open the JavaScript folder, and you can see there is a number of the script in this list.
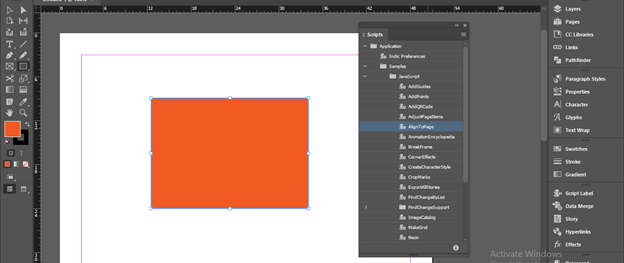
If you want to use any one of them, you have first to select the object on which you want to apply the chosen script, go to the Scripts panel, and double click on your desired script. I will show you this by example. I will first select this rectangle and click on the AlignToPage script of the JavaScript.
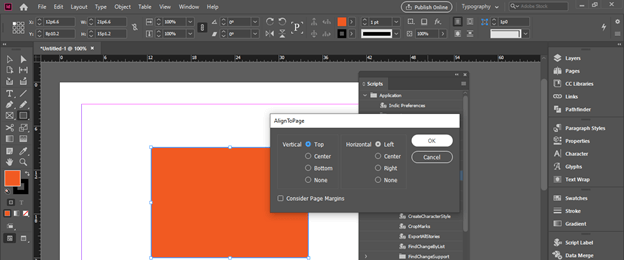
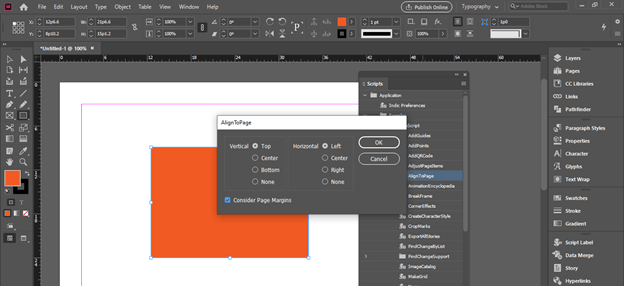
We use this script to align objects in a different manner, such as; you can see there are some options in the panel of AlignToPage script. But, again, I will go with default options this time; it will align our chosen object with the top left corner of the page.
Once I click Ok, it will align like this, but I want to align it with the margin area.
So I will again open this align script panel and enable this ‘Consider Page Margin’ option.
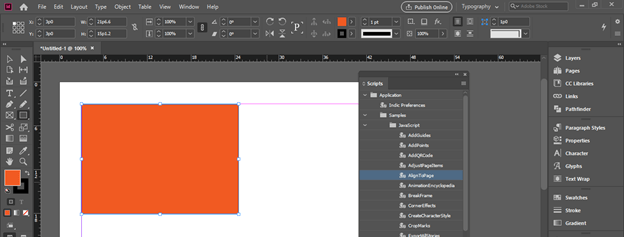
Now, if I click Ok, then it will align with the top left corner of the margin of the page.
Now let me tell you one of the scripts which we can use for text. When we paste text in the text frame of InDesign given by the client, we face many text formatting errors such as there may be an unnecessary gap, hyphens, tabs space, and so on. So with the next script, we can resolve it.
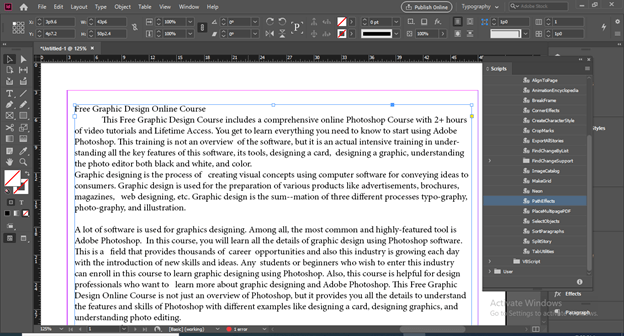
I have pasted this text in the text frame of this software, and you can see it seems this text is perfectly arranged.
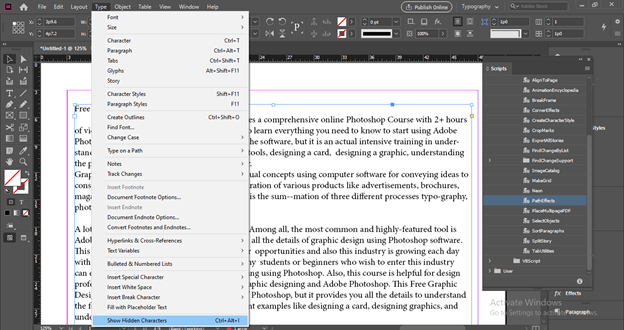
Let me enable hidden characters, and we can enable it from the ‘Show Hidden Characters’ option of the scroll-down list of Type menu.
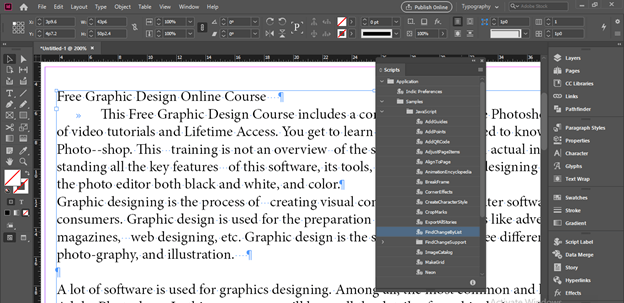
Now you can identify there are unnecessary gaps, hyphens, and tabs. To resolve this, we can double-click on the ‘FindChangeByList’ script.
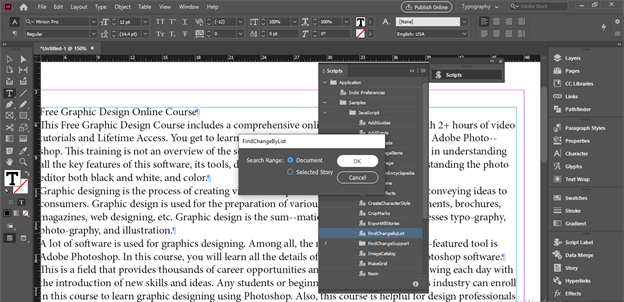
Once we make a click, it will ask, you want to apply this on a document only or selected story. For this time, I will go with the Document option and click Ok.
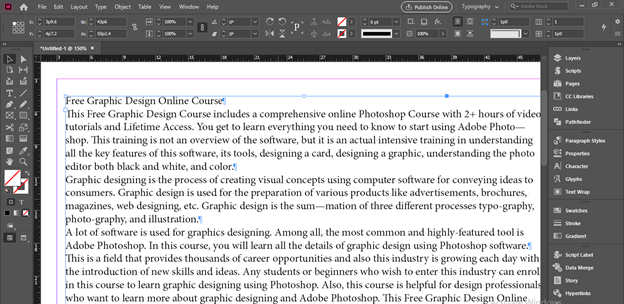
And you can see it resolve all formatting issue, and the text is perfectly arranged according to the type format.
What if you want to have your own script or want to use the downloaded script from an external source? You can also have this in the Scripts panel also, and it will come under the User folder of this Scripts panel, but if you haven’t any external script, then the User folder will be empty.
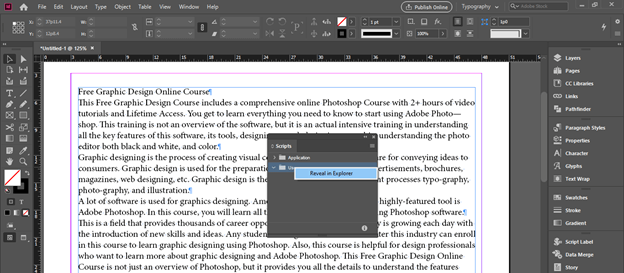
Let me tell you how you can have your desired script here. First, make right-click on the User folder and click on Reveal in Explorer option.
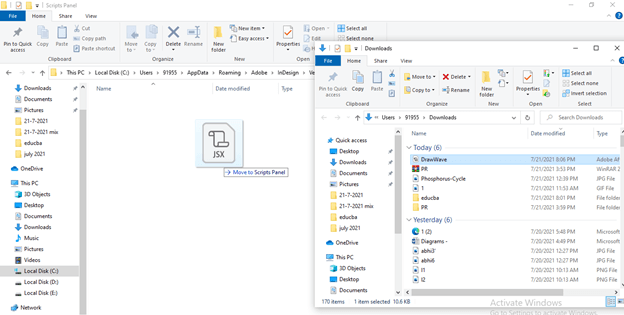
Once we click on this option location, a Scripts Panel folder of InDesign will open.
You can paste the script code of your desired script here in this folder. For example, I have downloaded a script from the internet and past it in the Scripts Panel folder. You can also paste your own written script code if you know about the Java language.
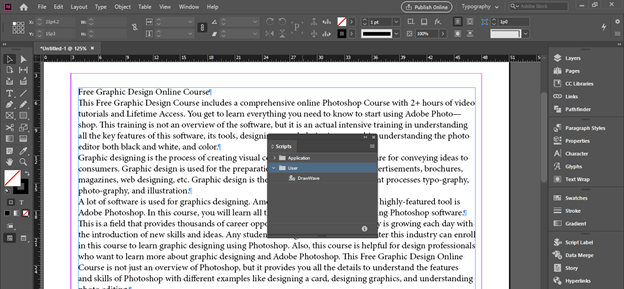
Now you can see there is our downloaded script in the User folder.
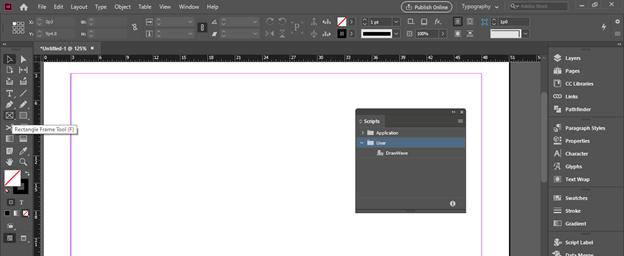
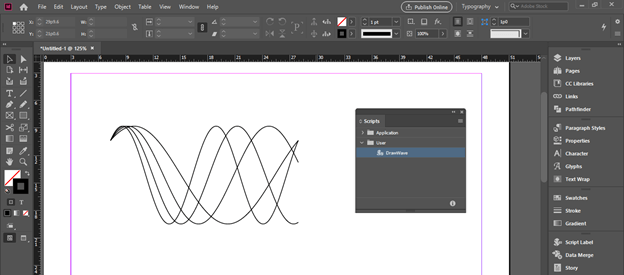
This script is for drawing waves for different data types if you create a design layout for any analysis. But, first, I will take the Frame tool from the tool panel to explain it.
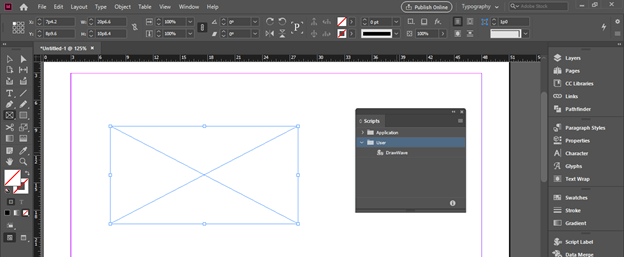
And draw a frame like this because our wave will fit in this frame. So after drawing this frame, I will make double click on this DrawWave script.
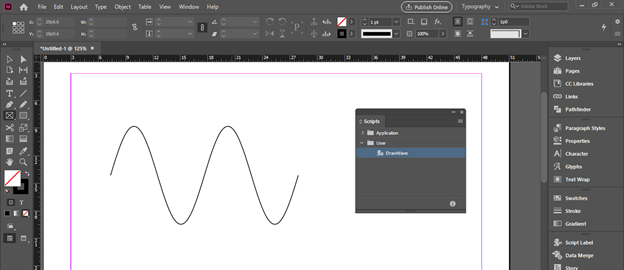
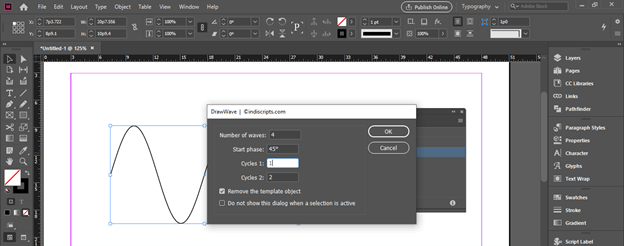
Once I click, this panel will be open. Here we can set a number of waves, phases, and cycles. For example, I will enter the value of a number of waves as 2 and leave the rest parameters the same, then click on the Ok button.
And it will create a wave form like this.
Now I will make some changes in parameters like this.
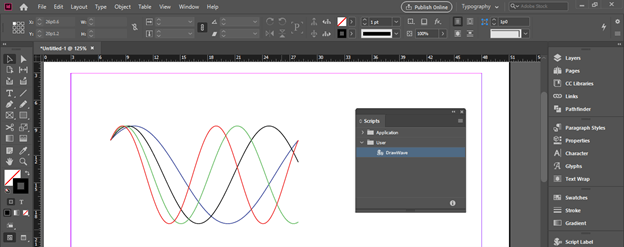
And you can see according to parameters; it gives a different result.
You can change the colors of waves also.
Conclusion
So now you know how you can interact with the built-in script of InDesign and perform any task by using them. In addition, in this article, you learned how to insert your own or downloaded script in the Script panel of this software for using them in your design layout.
Recommended Articles
This is a guide to InDesign scripts. Here we discuss How to use Scripts in InDesign along with the step-by-step in detail. You may also have a look at the following articles to learn more –
