Introduction to Inkscape Image to Vector
Inkscape Image to Vector is a very useful technique of Inkscape, and by using this technique, we can convert any image format into a vector image. The image may be in png or jpeg file formats. In Inkscape, we can convert any image into vector format by using the Trace Bitmap feature of the Path menu of the menu bar, and we also have to make some settings in the parameters of this feature for having our desired vector image result. After having the vector format of the traced image, we can edit it with the help of the Node edit tool of the tool panel. So let me tell you the steps which will get involved in this process.
How to Convert Image to Vector in Inkscape?
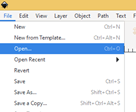
There is one feature in Inkscape through which we can convert images into vectors in few seconds so let us try this feature of this software. For this purpose, I will first place an image in the working interfaces of this software. So go to the File menu of the menu bar and click on the Open option of the drop-down list.
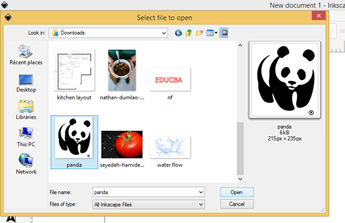
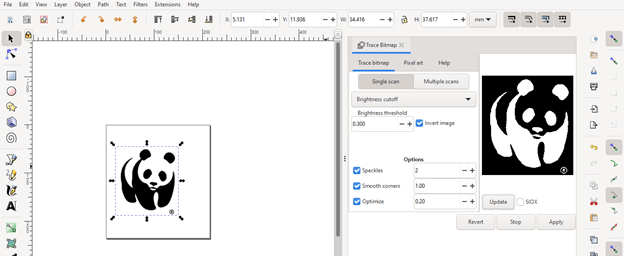
I will take this Panda image for explaining how we can trace black and white images?
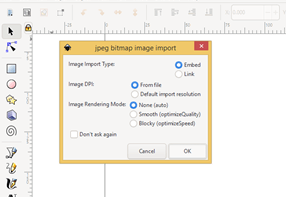
Now click on the Ok button of the import dialog box.
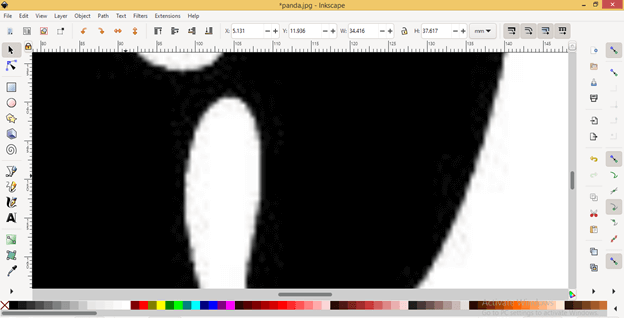
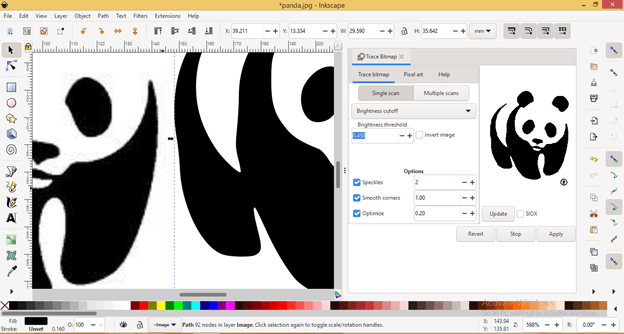
You can see if I zoom this image, it getting pixelates because it is a raster image. So now, I will convert it into a vector image.
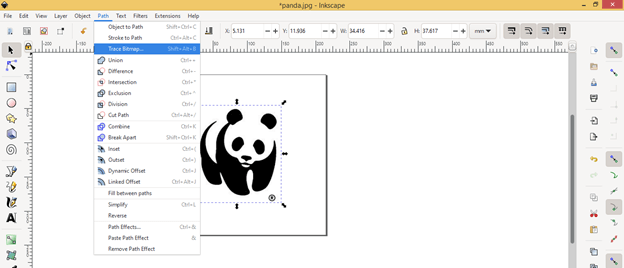
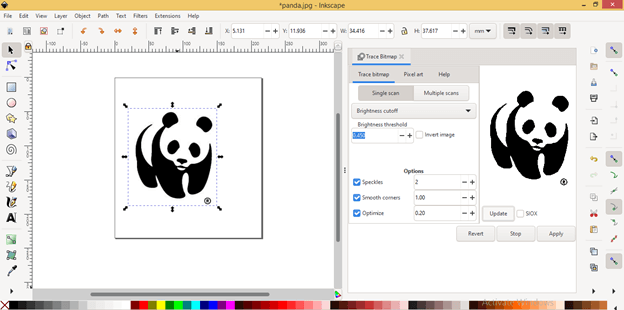
Now select your desired image, go to the Path menu, and then click on the Trace Bitmap option of the drop-down list. I will do this with this panda image.
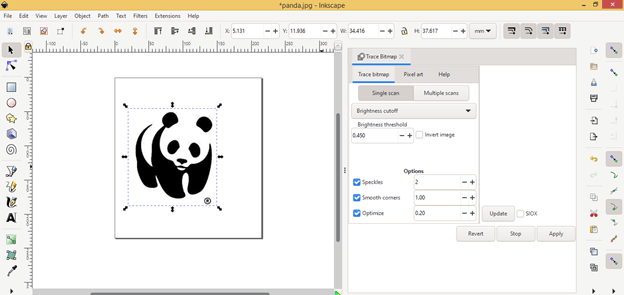
A Trace Bitmap dialog box will open at the right side of the working window.
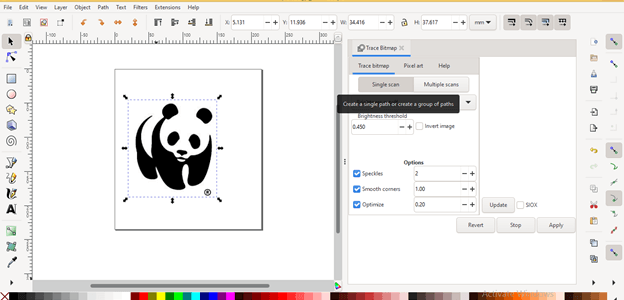
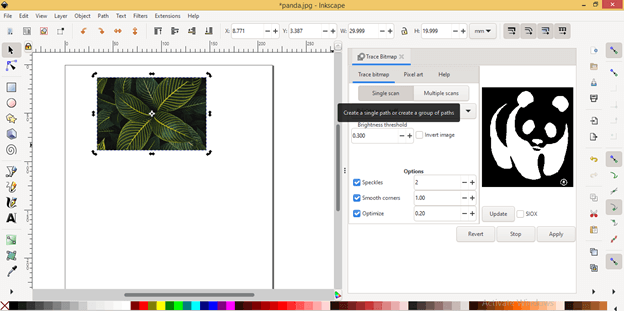
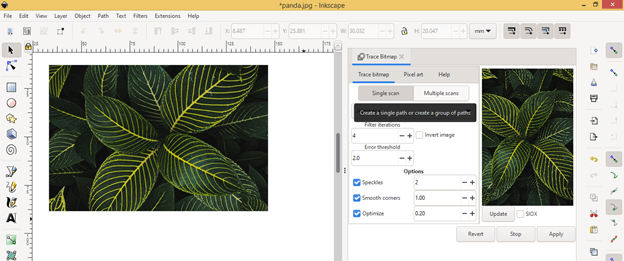
We have different types of parameters in this dialog box, and by making changes in them, we can get various results in tracing for vector images. There is a ‘Single scan’ button through which we can start tracing the selected image. So I will click on it.
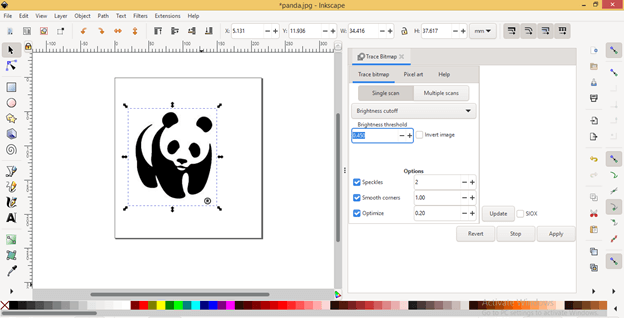
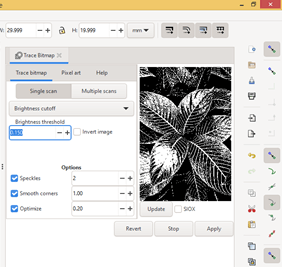
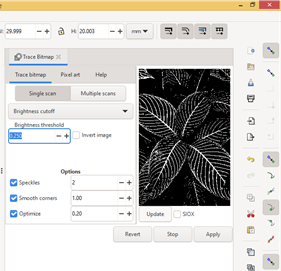
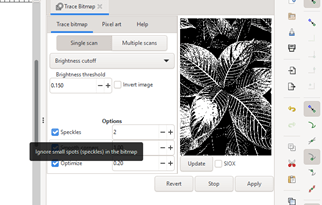
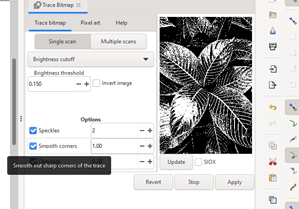
From the Brightness Threshold option, you can control the value of the density of pixels in your image during tracing. So according to requirement we can increase or decrease it.
Once you are done with settings, then click on the Update button in the preview section of this dialog box, and it will show you a preview of your traced image with chosen parameter settings.
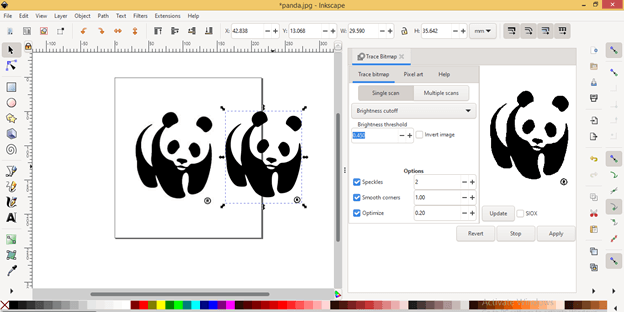
After getting your desired traced result click on Apply button of this dialog box. Now we will have traced images on the source image in different layers. You can see it by moving it from the source image.
You can see the trace layer is in Vector format because I never pixelate on the zooming.
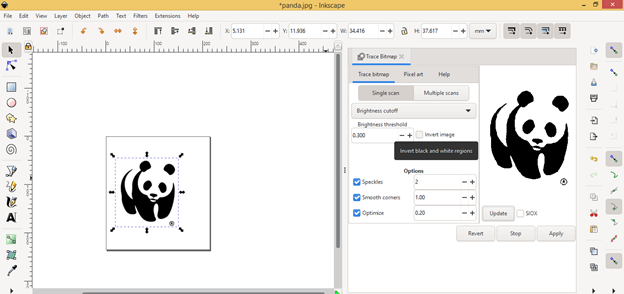
You can invert the traced image if you want, and for that, you have to enable the Invert Image option from this dialog box by clicking on the check box of the Invert Image option.
And click on the update button, then you will have this invert trace of your selected image, which you can use for different purposes in your illustration work.
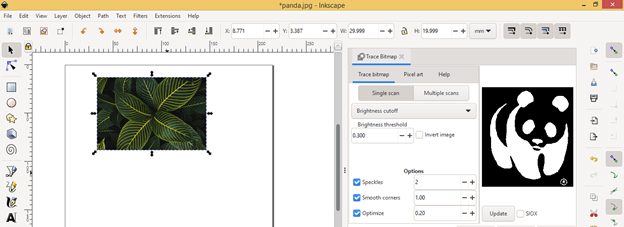
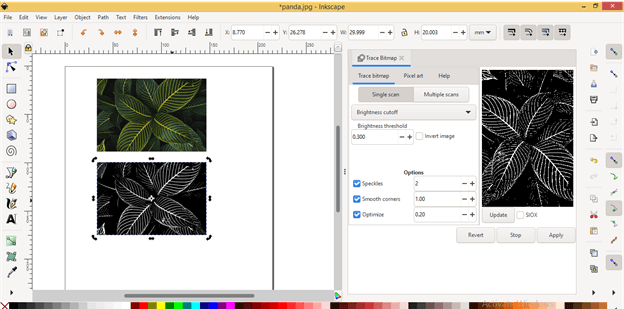
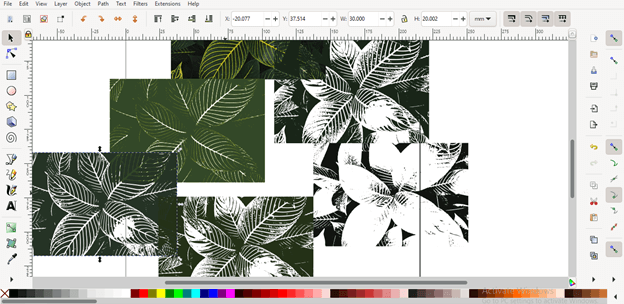
Now let us convert a color image into a vector, and for that purpose, I have taken this beautiful leaves image.
First, click on the Single scan button of the Trace Bitmap dialog box.
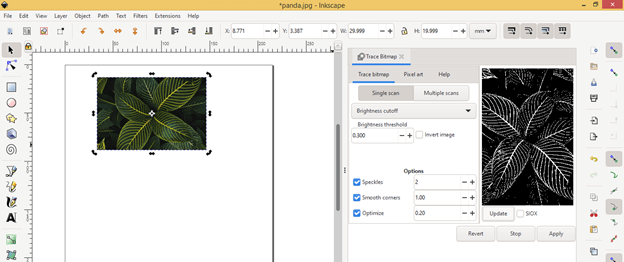
And it will give you this beautiful trace result of the image once we click on the update button.
After applying this traced result, you will find this colour image’s black and white vector form.
You can adjust the threshold for having variations in the traced images.
You can play with these parameters for having more refine results.
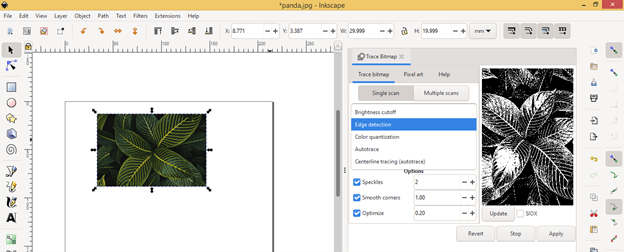
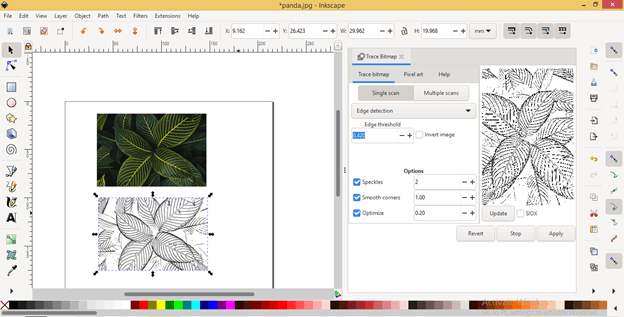
There is an Edge detection option through which we can scan only the edges of the image and get the vector form of those edges. So I will select this option then click on the Single scan button.
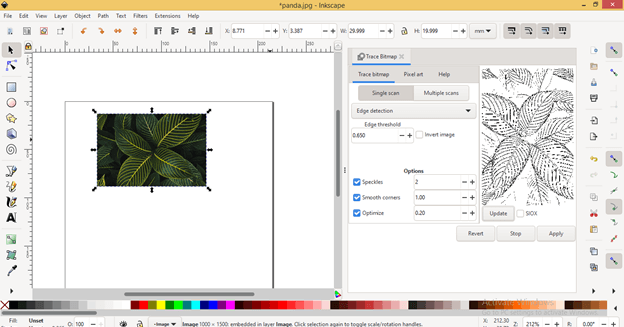
And you can see it gives us the result for tracing of edges of this image.
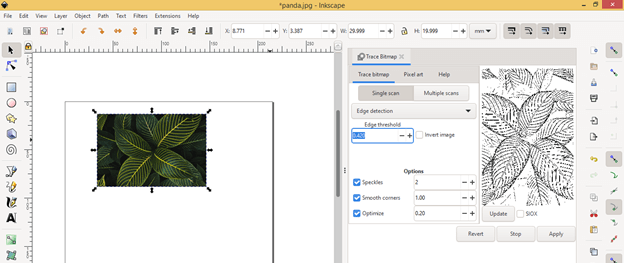
You can also make variations in the Edge threshold for the more refined results.
See, this is a very good result for edge tracing.
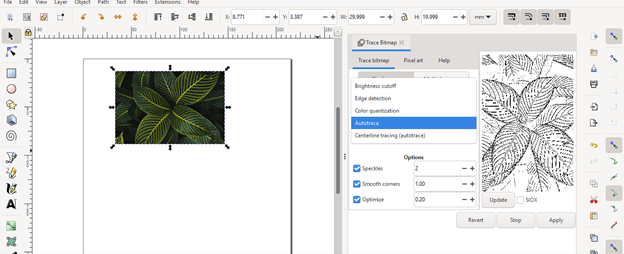
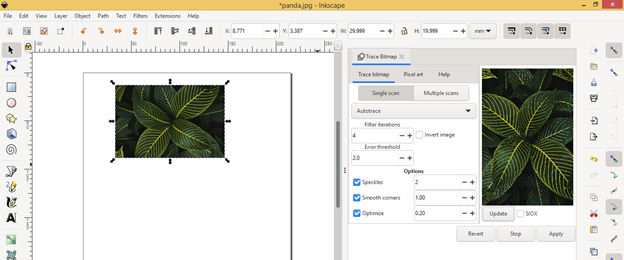
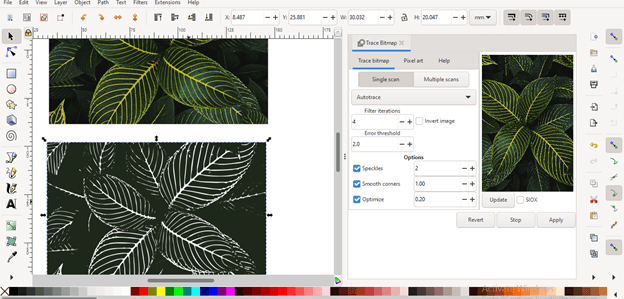
There is also the Autotrace option, and it will trace your image as it is. So click on it.
And after clicking on the Update button, we will get colored traced image because this is color image.
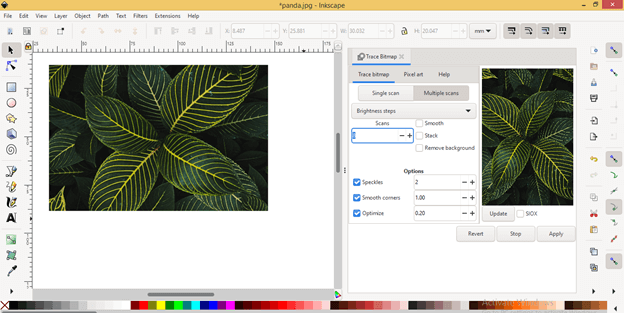
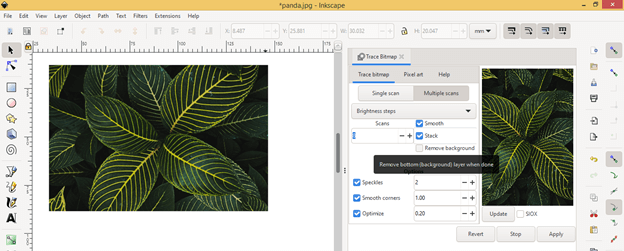
If you are not satisfied with this color tracing, then you can go with the ‘Multiple scans’ option.
Now click on the ‘Multiple scans’ button.
Before clicking on this ‘Multiple scans’ button, you can manage the scan’s value by increasing and decreasing its value from the Scans box. That means if there are 8 as the value of scans, then it will trace your selected image 8 times and give you 8 layers of different shades of color that consist in your image.
If you increase the number of scans, then you will get more refined results, but it may take the time or make your computer slower according to the capacity of your computer system.
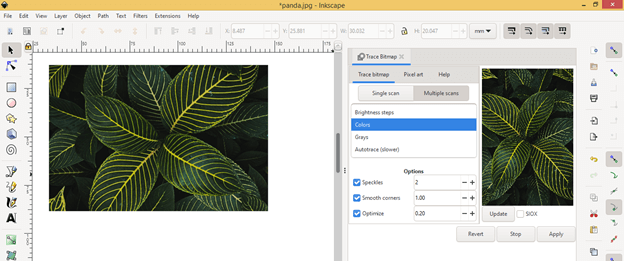
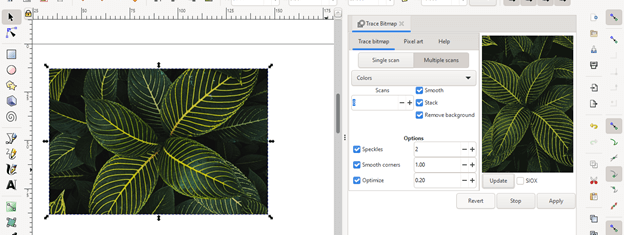
Now here in ‘Multiple scans’, we have the Colors option in the drop-down list of Brightness steps option. So I will choose the Colors option.
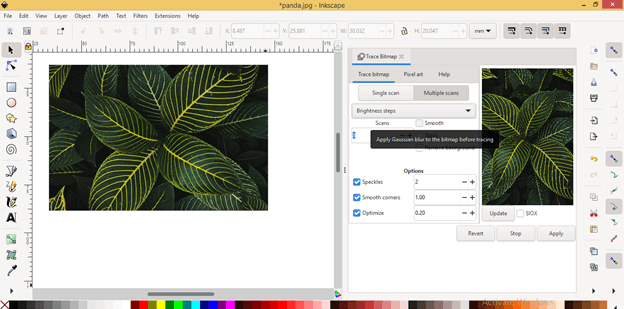
Enable the Smooth option for smooth tracing of paths of your image.
You can enable this Remove Background button if you want to remove the background of your traced image.
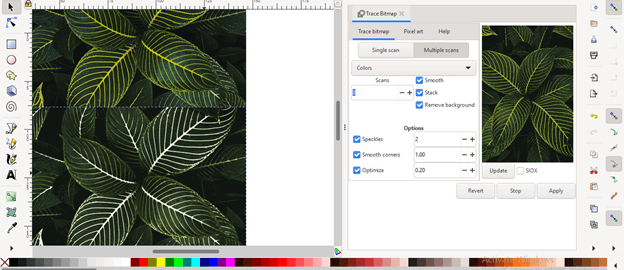
Now click on the Update button, and it will give you traced colored image preview.
Click on Apply button, and you can see it is the most accurate tracing of this image for converting it into a vector format.
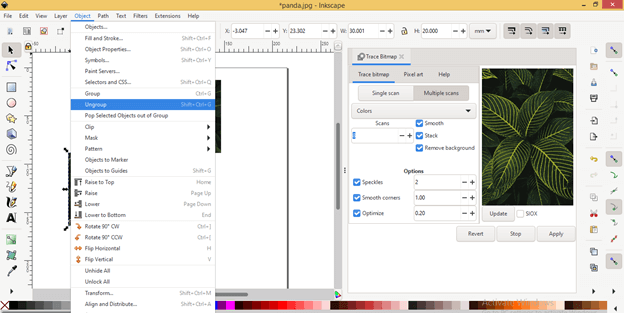
Now select this image and go to the Object menu of the menu bar, then click on the ‘Ungroup’ option of the drop-down list.
Now you can separate each scanned layer, and each has a different color shade. You can use them also as per your requirement separately.
This was all about converting images into vectors in Inkscape.
Conclusion
It told you about the very good feature of this software through which you can convert raster image into vector image format and also edit its node because it will be an editable node after tracing. However, it would help if you explored other parameters of the Trace Bitmap feature of this software for having more commands on image trace and converting them into a vector format.
Recommended Articles
This is a guide to Inkscape image to vector. Here we discuss How to Convert Image to Vector in Inkscape step by step in detail. You may also have a look at the following articles to learn more –
