Updated March 17, 2023
How to Install Cassandra?
The following article provides an outline for How to Install Cassandra? Apache Cassandra is one of the open-source available in the current market, which is entirely free of cost. It is mainly a distributed platform and capability of handling huge data by applying a NoSQL database management system across varieties of available servers. Cassandra is too popular mainly for the critical reason of high availability or, more specifically, avoiding as much as possible of single-point failure mechanism. There are varieties of the version of Cassandra available in the market, but the installation process of them is almost the same for everyone.
Steps to Install Cassandra
There are some very common and critical approaches to install Cassandra anywhere in the developer environment.
Steps to install are given below with proper explanation for two approaches:
1. Direct Downloading
Step 1: As with all the other installation processes, Cassandra also following some specific prerequisites. The installer should need to be ready with those prerequisites before starting the installation of Cassandra. Cassandra normally requires some of the software as prerequisites for installing the same. This kind of application mainly ensuring the proper functioning of Cassandra in available different forms. Two mention applications are DataStax Community and Java Development Kit (JDK).
- DataStax Community: If the user is really willing to work specifically on Cassandra, then they have to install DataStax in their system. It mainly helps in supporting Cassandra in their system. DataStax mainly comes with varieties packages with different features, which helps Cassandra for performing some kind of operations. The datastax community can install from various places; doing a google search can help the developer for finding the proper link. But still, one common link can be given for downloading the same https:.//academy.datastax.com/planet-cassandra/Cassandra.
- Java Development Kit (JDK): JDK is mainly one of the popular Java programming language tool used for writing, compiling, and running any java based application. There have several development kits inside this JDK tool. All those kits sometimes combine together and help Cassandra on performing some specific actions. JDK also can be installed by proper google search, but still following the below link can give the proper address.
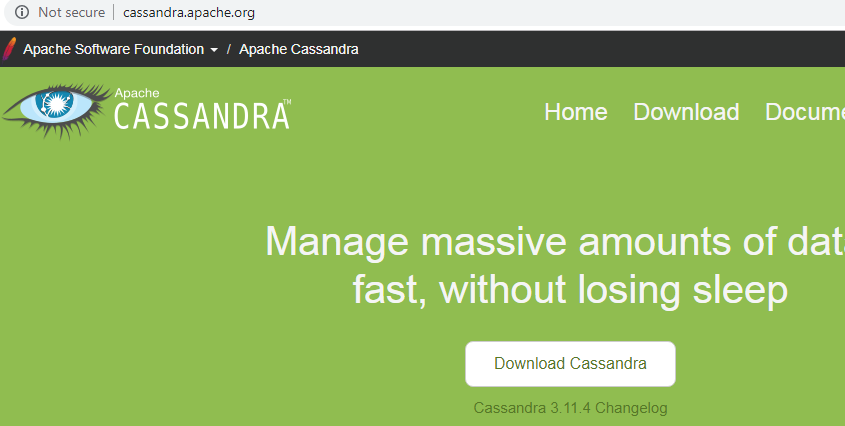
Step 2: For finding the proper link search in google as ‘Apache Cassandra’, there are few links that will come; some of them are not original. Click on the original apache Casandra hyperlink for reaching that specific site to install Apache Cassandra. But still, the proper link can be below https://cassandra.apache.org/.
Step 3: When the installer will go to the above link, it will give one specific page of Apache Cassandra foundation details. There has one specific button name Download Cassandra; the installer needs to click on that download button for downloading the same.
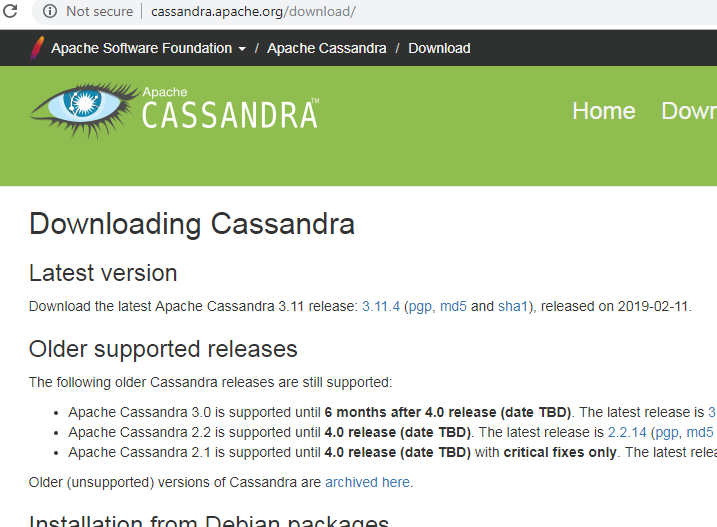
Step 4: Next page will provide information about the entire details of different available versions on Apache Cassandra. It is holding the latest version of the Cassandra in the first row, some of the supported releases which are older but still used by different organizations. But better to go for the latest version of Cassandra for final using.
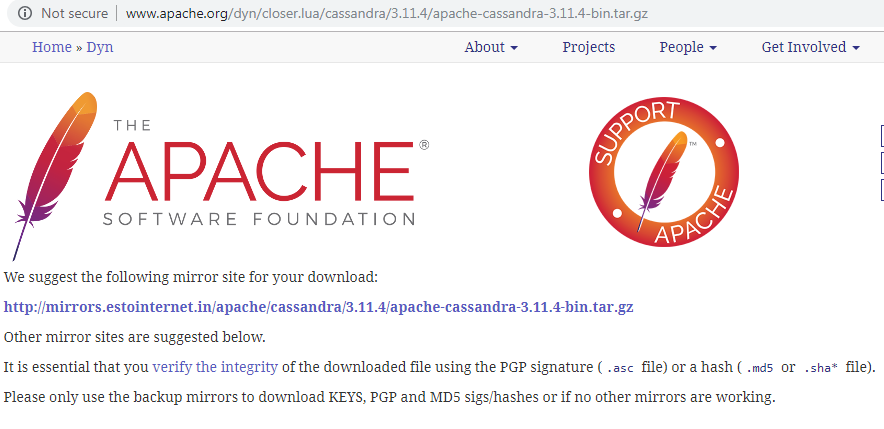
Step 5: After choosing one specific version, the next page will populate of Apache Cassandra foundation. This page is holding one of the specific links which given utility to downloading the Cassandra in compressed file format. Click on this specific link. Cassandra’s compressing file will be downloaded directly in the installer system.
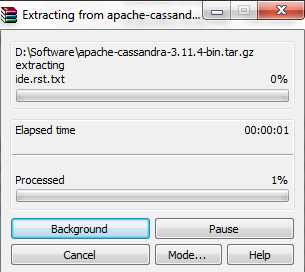
Step 6: After downloading the same in a specific computer location, the installer can unzip the entire folder and open the specific file for understanding in detail. This file can be anything RAR or ZIP depends on software installed in an installer computer system that file can open.
Step 7: After opening that specific ZIP file, it will provide the installer with the entire information inside that compressed file. Now installer can be easily able to decompress or expanding those files in one specific define location of the user system. Click on the ‘Extract To’ button for doing the same. The button can be vary based on the install software on that user system for handling ZIP file.
Step 8: Every tool has been providing one option for given one specific location for extracting entire ZIP file content after a click on the ‘Extract to’ button. The user has full ability to choose one specific location where they want to extract all the folders of that compressed file. Now selecting a location and click OK will give the proper result to the end-user.
Step 9: After clicking ok, all the files available inside that compressed file will decompress and store at one specific mention location of the user system.
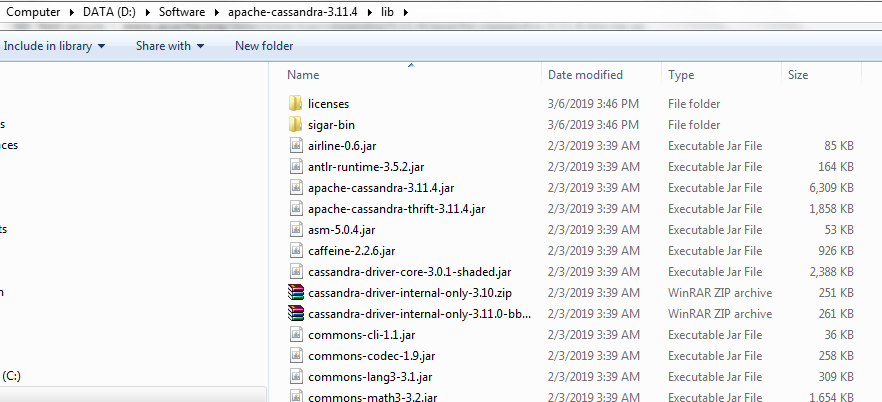
Step 10: After extracting all those files, it is displaying in the system properly on the specified location of the system. The folders will be given one clear idea about the available libraries in any Cassandra database.
Now all the required libraries are available in the following folders. So now the DataStax community will act. The user can be easily able to access those Cassandra-specific libraries by using DataStax and JDK tools. Now for operating Cassandra, a user needs to write several codes that can be done by using DataStax in Cassandra view.
2. Through DataStax
Rather than downloading Cassandra in the same approach, it can be done by using DataStaX community set up easily.
To install Casandra through DataStax Community set up, users need to follow the below steps:
Step 1: Run the setup file of the DataStax community; there have two kinds of version for setting up file available on DataStax; one is for 32 bit and another one for 64 bit. But recommended installing a 64-bit version of the setup file for DataStax Community. After clicking that setup, one welcome page will come, which indicating for clicking on the next button for the go-ahead of the installation process. This page also provides entire information of the Cassandra version, which appending with this DataStax community tool.
Step 2: After clicking on the Next button, one specific license agreement page will come; users need to read and agree with that before going ahead.
Step 3: Clicking on the next button user will get one option for choosing the installation location; normally, it came by default C drive, under program files location.
Step 4: After clicking on the next button user will get two option for starting Cassandra and opscenter automatically. It has two checkboxes, and the user needs to select those and click next for further process.
Step 5: The install button will come on the next page; click on the install button will install the DataStax community, including Cassandra, in the end-user system properly.
Recommended Articles
This has been a guide to How to Install Cassandra? Here we have discussed the basic concept and two different critical approaches to Install Cassandra. You may also look at the following articles to learn more –
