Updated May 5, 2023
Introduction to Install Django
Django is an open-source web framework based on the Python programming language. An independent organization called Django Software Foundation maintains it. The primary goal of Django is to provide ease to complex and data have driven websites. This framework emphasizes the reusability and plug-ability of components, prioritizing less code, low coupling, and rapid development. To install Django, you must first install Python on your local machine. This document also covers the installation of Python.
Steps to Install Django
For installing Django, it needs a stable and good internet connection.
Let us discuss the steps required to install Django:
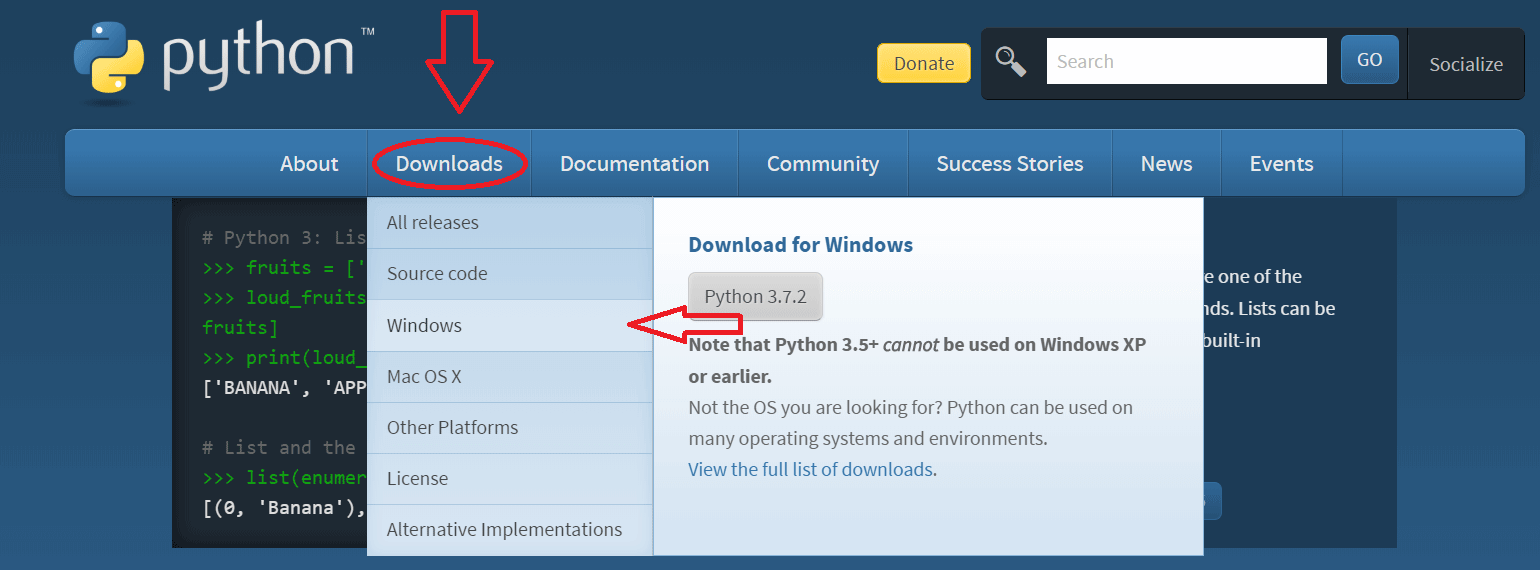
Step 1: First, you should visit the official Python website, provided below:
Step 2: After landing on the above web page, click the downloads button below and select your operating system installed in your local system.
In my case, I have clicked on windows.
Step 3: Upon redirection to another page, you will find the title “Python Releases for Windows” at the very top. Just below that, you will see the latest Python release, displayed as follows:
Click the first link, the Latest Python 3 Release-Python 3.7.2. This is the latest version available now; for this time, you may get the higher version as well but always use the first link.
Step 4: After clicking on the above link, it redirects to other pages where it shows the latest version of Python on the top. Just scroll down you will get the title files under which multiple download options are available, as shown below:
For Windows 64-bit system, select the first Windows x86-64 web-based Installer marked in red and click on that, whereas for 32-bit system, select the last red-marked Windows x86 web-based installer.
Step 5: It will take some time to download the file; when it gets complete, save that installer file. Then, please click on the installer file, but for this, one should have a stable and good internet connection.
Step 6: When you click on the downloaded file, it will start a setup launch. The first step is to select the checkbox and click to tick the “Add Python 3.7 to PATH”, which shows at the very extreme below, marked in red. Then click on Install Now, as shown below. If one doesn’t select Add Python 3.7 to PATH, one has to call Python manually each time, and it will take lots of time, so please tick the checkbox.
Next, you can refer to the below-provided image:
Step 7: When one clicks on the Install button, it will start a warning message “Do you want to make changes in your system” so please click on Yes. It shows for a few systems and a few; it won’t; it depends upon the system.
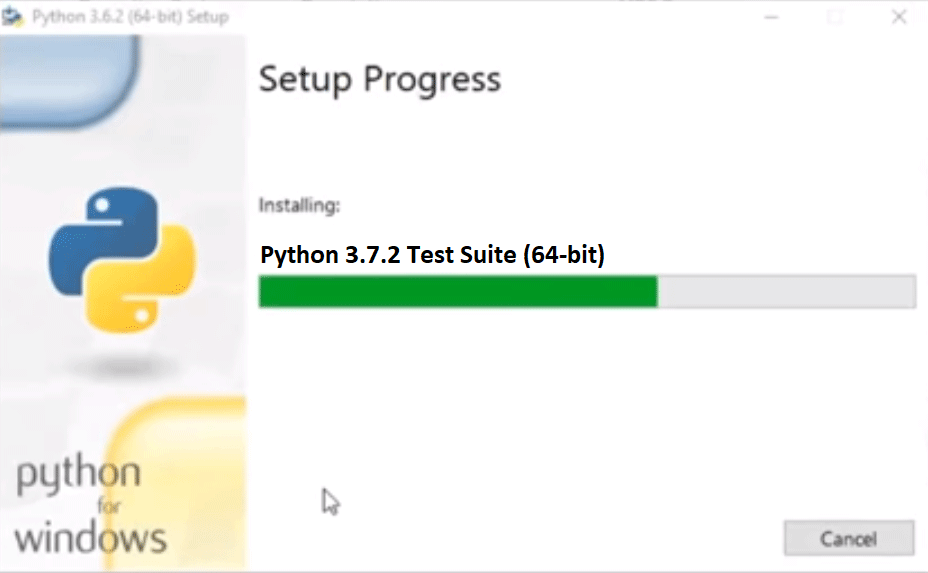
Then Setup progress as installation will start and looks as below:
Step 8: And when it is done then, it shows “Setup was successful” shown below:
Now click on the Close button.
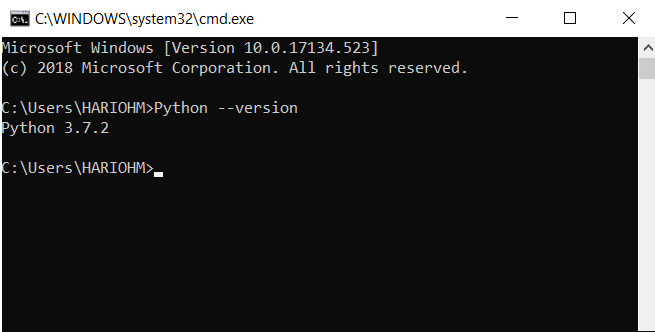
Step 9: To check whether Python is installed successfully or not. Press Windows (Hold this button then) + R (button from keyboard), and it will open the Run command. Type “cmd” and press the OK button.
Step 10: It will open the command prompt.
Code:
Python --versionOutput:
If Python is successfully installed, it shows the version; otherwise, it offers an error. This case shows Python 3.7.2, so Python was installed in my system successfully.
Step 11: Then check the current version of the pip. Pip is used to install the other packages in the Python environment.
Code:
pip --versionIt will show the installed version of the pip as shown below:
Output:
Step 12: Now we’re ready to install Django because we have set up the environment to install Django. Please use the given URL to open other web pages for Django installation: https://docs.djangoproject.com/en/2.1/howto/windows/
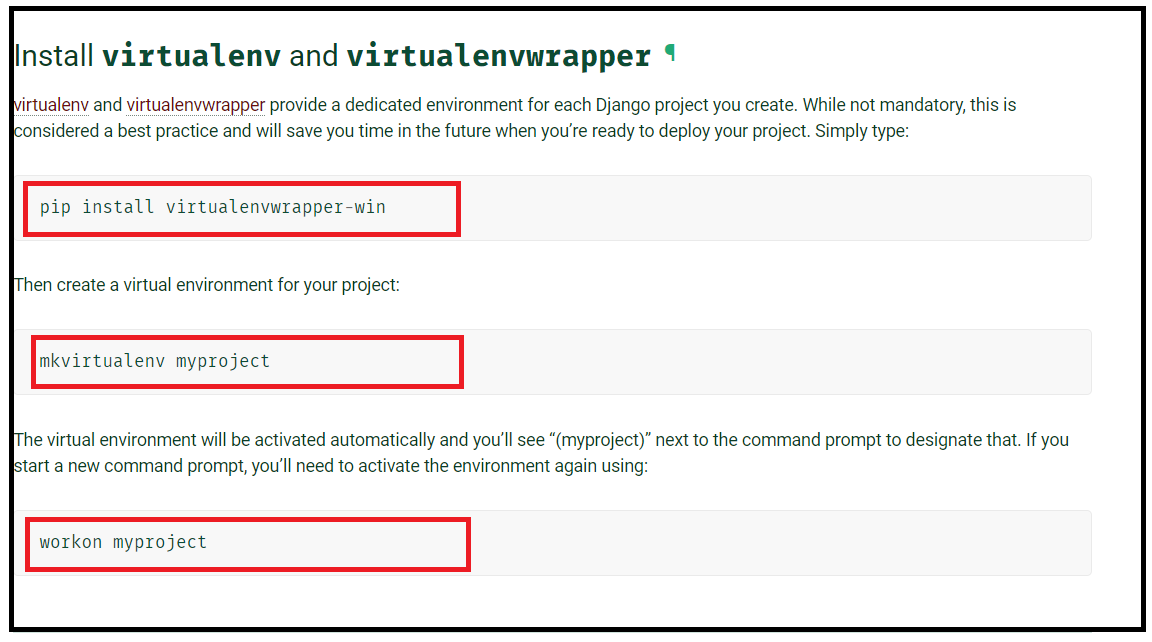
Step 13: When the web page opens, scroll down and stop where it shows “Install virtualenv and virtualenvwrapper title”, shown just above. One needs to use three commands which are marked in red. First, one needs to install the virtualenv and virtualenvwrapper to provide the dedicated virtual environment for Django. Below this title, code is available to install the virtual wrapper.
Code:
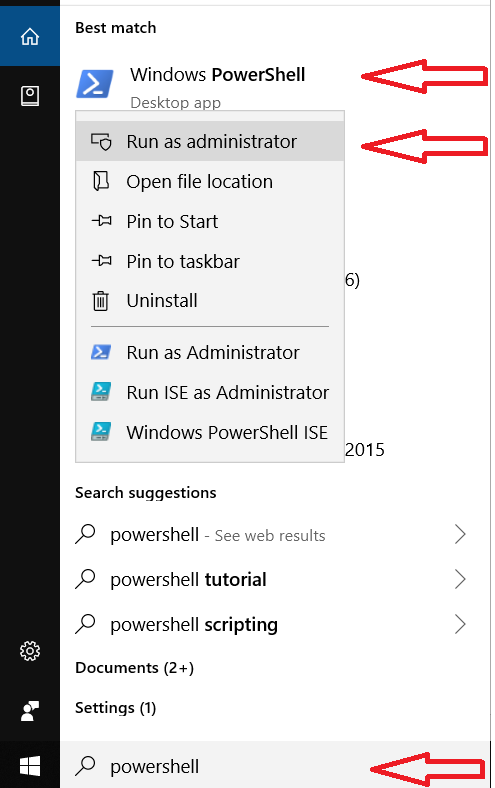
pip install virtualenvwrapper-winStep 14: Type Powershell in the Windows search bar, and it gives the result Windows Powershell on top. Then right-click on Windows Powershell and click Run as administrator shown as:
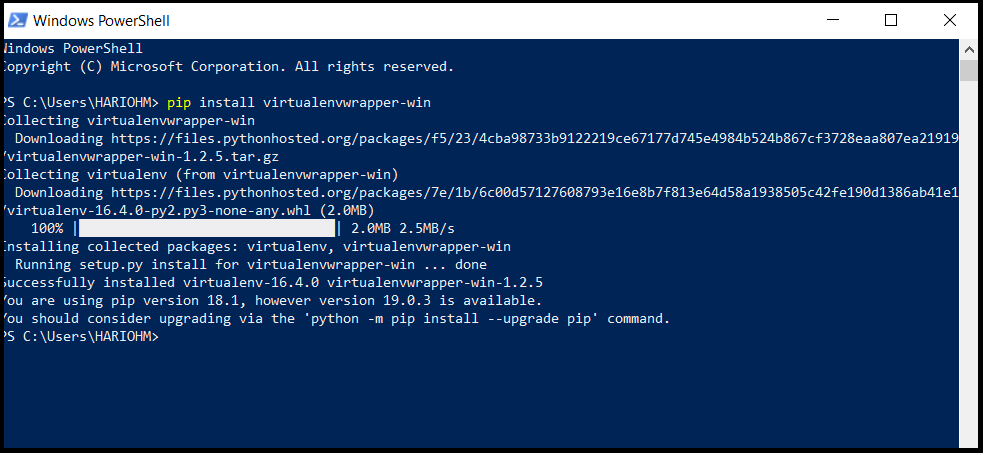
Step 15: It will open the power shell and then type the code pip install virtualenvwrapper-win given in the 13th step. It will take some time to install the virtual wrapper environment in Windows.
The virtual wrapper environment is installed successfully.
Step 16: Then, create a virtual environment for a Django project. The code is available in the URL: https://docs.djangoproject.com/en/2.1/howto/windows/
Type or copy the code from the webpage into the Windows PowerShell, as provided below:
Code:
mkvirtualenv myprojectIt will create a virtual environment and be shown as:
Output:
Step 17: Now activate the virtual environment. So copy the code from the given URL or from below and type in Windows Powershell.
Code:
workon myprojectOutput:
Now my virtual environment is ready for the installation of Django.
Step 18: Now, finally, install the Django using the pip command as shown below:
Code:
pip install DjangoOutput:
Before proceeding with the installation, ensure that you have prepared your virtual environment, as stated in step 17. The installation process may take some time.
Step 19: Now, Django is installed successfully. To verify the Django installation, type the following code in Windows Powershell as given below:
Code:
django-admin --versionOutput:
If it shows the version of Django, it means Django is installed successfully. If not, then please check the previous step. Here it shows 2.1.7, which is now the latest Django version.
Recommended Articles
We hope that this EDUCBA information on “Install django” was beneficial to you. You can view EDUCBA’s recommended articles for more information.
