Updated July 5, 2023
Overview of Install GRUB
GRUB stands for Grand Unified Bootloader. If you have multiple kernel images installed on your system, you can choose which one to be executed. GRUB shows a splash display screen, is waiting for a couple of seconds unless you enter anything; it loads the default kernel image since given inside the grub configuration file. In this topic, we are going to learn about Install GRUB.
How to Configure and Install GRUB?
Grub configuration file is /boot/grub/grub.conf
It contains kernel and initrd image.
Default boot loader for RHEL6 (Red Hat Enterprise Linux 6) on x86 and x64 systems
Set up the GRUB files into /boot/grub and place them in the boot track:
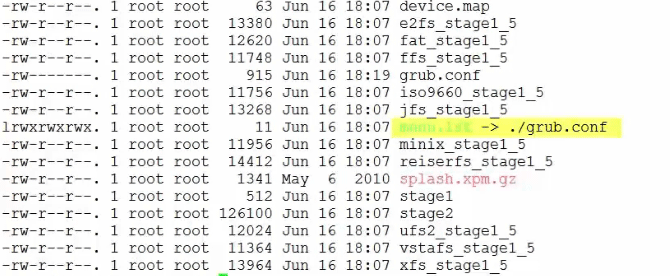
So, if we jump onto a command line here and we login the /boot/grub/ directory and grep 1_5
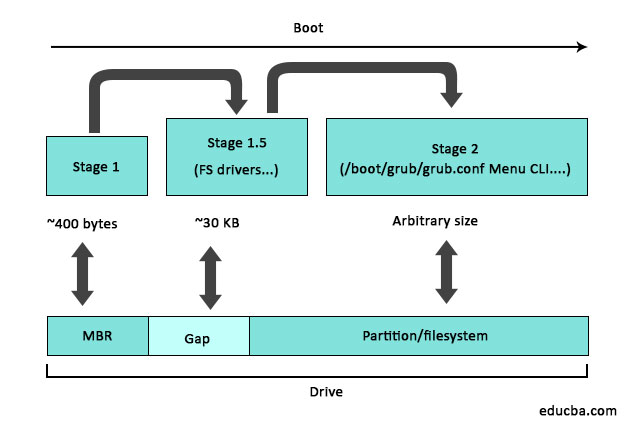
We see a bunch of file system-specific stage 1.5 boot loaders. So one for ext, one for reiser, one for xfs, and more. And interestingly, GRUB access ext2, ext3, and ext4 file system all with the same driver.
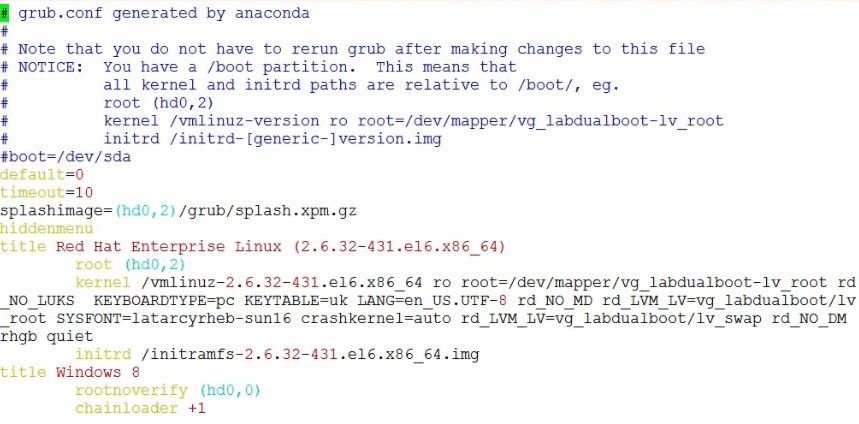
GRUB boot loader configuration is made by editing the /boot/grub/grub.conf file. It is called the bootgrub menu in the command line see below command.
So let’s go see what the file looks like.
It’s a pretty small config file. Let’s break it down into its major component.
At the top here, we have got kind of the global settings,
And then below this at the bottom, we have got the operating system specific settings. Now, in our example, we have got settings for two operating systems, Windows 8 and RHEL 6.
But let’s take a look at the global setting first. Default = 0 here. Well, this tells us that unless we interrupt the boot process and tell GRUB otherwise, it will boot the first operating system option that we have got specified below, so for us, that’s RHEL 6 Timeout = 10 tells GRUB to give us 10 seconds during which we can press a key to interrupt the boot process.
Then splash image, well, that just puts a custom splash image up behind the boot menu, not normally that important other than maybe for branding.
Here, the hidden menu option hides the menu of OS (Operating System) choices unless we hit a key. In fact,
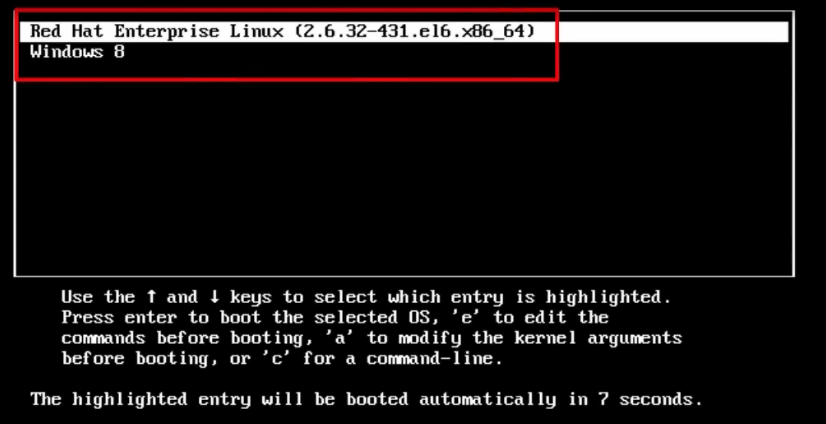
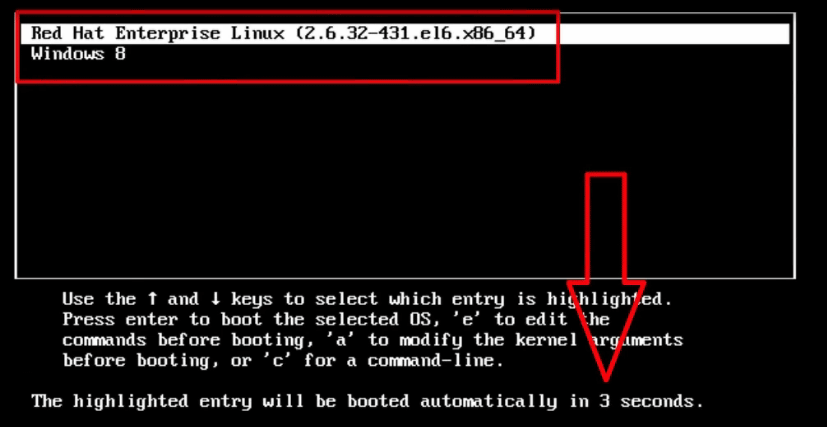
Let’s take a look at what the early boot process looks like with and without this hidden menu option. So, we will look at it first without the hidden menu.
Okay, see here how we can see the menu with the different operating system choices.
And at the bottom, here we have got a timer telling us how long we have got until the boot continues.
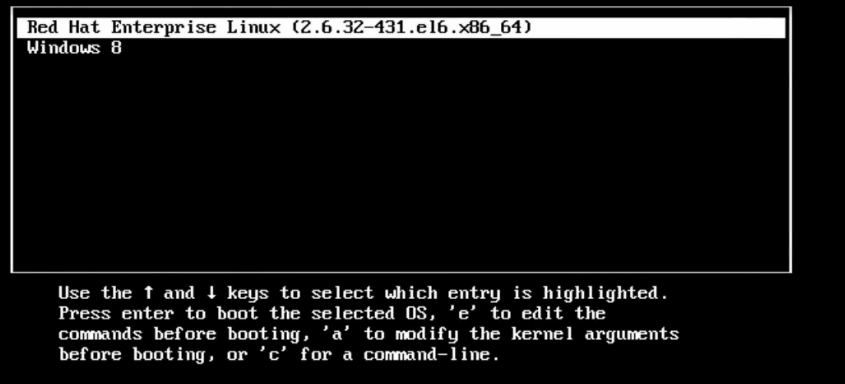
Multi-booting can be a bit of a complicated thing, so a hidden menu lets us hides that menu, and instead, all we get is this.
Okay, if we hit a key, then we get back to the boot menu that we just saw.
If we don’t press a key, then the system just boots, and more often than not, to be honest, the hidden menu option is usually specified. That’s the major global settings. We can add a few more if we need, such as fallback options just in case the default option fails,
Now let’s have a quick look at the operating specific setting. So, back to our GRUB config file, and we have got two operating systems defined, RHEL 6 and Windows 8.
We need a minimum of three lines, title, root, and kernel, for each operating system, and for Linux, we need another line, initrd.
So, the title is arbitrary. You can put pretty much whatever you want in here. We did that with the Windows 8 option. GRUB didn’t recognize the operating system. Just put others, so we manually changed it to Windows 8.
Next, uproot. This allows us to specify the root directory for GRUB.
Now then, by default, the way that GRUB addresses disk drives and partitions are different from the way that the kernel does,
For our RHEL installation here, we have got hd0, 2. Well, first of all, we need parentheses. Then we add the HD, which is short for hard disk.
Now GRUB doesn’t care if it’s a SCSI (Small Computer System Interface) drive. An ID or an ATA drive. It really couldn’t care less. As far as GRUB is concerned, they’re just all hard drives, so GRUB just names them all HD something.
Then the first number here is the device number as per the BIOS, so 0 being the first disk device on the system. And remember GRUB is a proper computer system. It starts counting at 0, not at 1. Then we need a comma, and then we give it the partition number.
Again 0 is the first partition. It’s really important when a working directory with the MBR.
We would use hd0 to address the MBR on the first device, hd1 to address the MBR or the volume boot record on the second device. So, what we have got here is the third partition on the first hard drive on the system,
So drive 0, partition 2.
Now, if the kernel were addressing this device, it would use sda3. And just like the kernel can, GRUB can also address a device without carrying about partitions, so the equivalent of devsda in the instance would be hd0 wrapped in parentheses, of course.
Next up the kernel line. This is where we specify the location of the kernel plus any boot-time parameters that we want to pass to it, and we will spend a bit of time here.
So, first of all, the location of the kernel is specified based on its location within a file system. Remember, by the time we have got to grub.conf we are running with the stage 2 boot loader, which knows all about file systems, so we don’t need to use anything like blocklist notation.
We can simply give it a standard UNIX file system path.
Next, the kernel image is called vmlinuz us the version of the kernel and the architecture, so for us, a version of the 2.6.32 kernel. Yes, it’s old, but it’s rock-solid, and it’s for x86/x64 architectures.
The vm part is a hark back to when virtual memory support was a big thing, and slapping vm at the front told everyone that the system supported virtual memory, and then the z or the zed at the end tells us that the kernel image is a compressed image, which keeps it small.
So, although the kernel itself is a program and it’s written in C with some assembly, it’s stored on our system as a compressed image called vmlinuz.
Now we have got the root file system here on our logical volume, and it’s specified as read-only.
Now, later on in the boot process, it will be remounted as reading/write.
Encryption partition of rd _NO_LUKS
Then for Linux Operating systems, we have got a line here starting with the initrd command.
So, a couple of things about initrd.
First up, it is short for the initial RAM disk, and what it is a disk image that’s loaded with drivers and modules and the likes that the kernel needs to keep the boot process ticking along.
Remember, the kernel is small, and it doesn’t contain drivers for every kind of disk drive in the world. So, this initrd file gets loaded into memory as a temporary root file system hence the name RAM disk, and then the kernel uses it to access and load modules that are needed to do other things in the boot process.
The second thing right about initrd is that initrd is sort of a legacy term for it because these days, at least since the 2.6 kernels, it’s an initramfs image.
The initramfs is an improved form of initrd, so initrd was blocked device image loaded into memory, but it’s accessed like a block device, Linux cached data that was read or written to it.
So we would load initrd into memory.
The initramfs is different; it’s better at a high level.
It’s just mounting that cache, so no duplication.
We have gotten initramfs matching our kernel version and architecture, and that is how GRUB is configured to boot Linux.
Now we have got multiple versions of Linux on our machine RHEL, Fedora, Mint; you name it.
These will be listed here as well in the same way. And GRUB can directly load the Linux kernel; we call this type of booting direct booting or Direct Loading.
GRUB can’t directly load the Windows kernel, So what it does is it loads Windows via a mechanism called Chain Loading
+1 option is down here is what happens then is GRUB starts the boot process but eventually passes control to the Windows boot loader is installed on the first partition of the first hard disk as indicated here by (hd0, 0)
Now, this also indicates that Windows was installed before Linux.
This rootnoverify option here tells GRUB not to mount the partition and check it, and then chainloader +1 tells GRUB to pass control to the program that exists in the first sector of that partition.
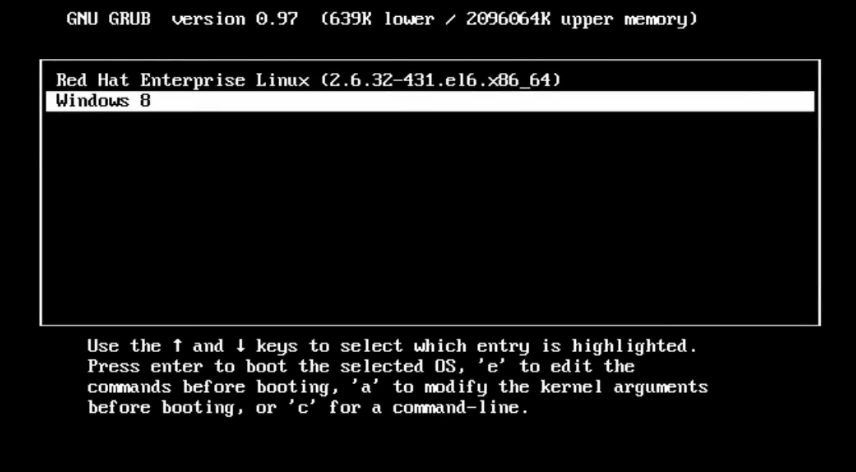
Let’s choose Windows, and off we go.
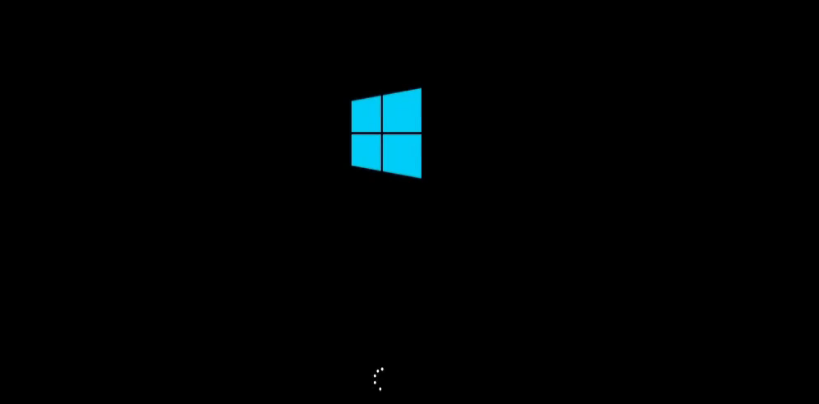
Now, while that boots alright,
When using GRUB with Windows, GRUB gets up to the second stage boot loader. Reads grub.conf and then passes the button to the Windows boot loader.
That’s the basics of multi-booting of dual booting with Linux and Windows using GRUB.
Recommended Articles
This is a guide Install GRUB. Here we discuss How to Configure and Install GRUB and the basics of multi-booting of dual booting with Linux and Windows using GRUB. You may also have a look at the following articles to learn more –

