Updated October 3, 2023
Introduction to Jupyter Notebook
Jupyter Notebook has become a popular tool for interactive computing and data exploration among data scientists, researchers, and developers. It fosters a collaborative and iterative workflow, allowing code, visualizations, and explanatory text to be easily mixed.
Users may create and share documents known as notebooks using the free and open-source online application Jupyter Notebook. A notebook is a cell collection that includes text, photos, equations, code, and visualizations. An interactive and adaptable computing experience is possible thanks to the independence of each cell’s execution. Python is the most popular programming language supported by Jupyter Notebook, although it also supports other languages.
Table of Content
- Introduction to Jupyter Notebook
- Why is the Jupyter Notebook popular?
- System Requirements
- Installing Jupyter Notebook
- Creating a Conda Environment
- Comparison of Jupyter Notebook
Why is the Jupyter Notebook popular?
Jupyter Notebook has grown in popularity owing to its multiple advantages:
- Interactive Computing: Jupyter Notebook encourages interactive computing by executing code in cells. Users may write code, run it, inspect the output, make changes, and re-run it, allowing quick prototyping and experimentation.
- Data Exploration and Visualization: Users may integrate code and visualizations in a single document with Jupyter Notebook. This makes it perfect for data exploration, analysis, and visualization. Notebooks enable users to display results, ideas, and techniques in a unified and interactive format.
- Collaboration and Reproducibility: Jupyter Notebook makes collaboration more accessible by allowing users to share notebooks with others. The results are more reproducible because coworkers or peers may examine, execute, and amend the code and documentation within the notebook.
- Documentation and Communication: Jupyter Notebook is an excellent tool for presenting research results, describing methodology, and documenting code. Its support for rich media types, including mathematics and graphics, enables users to produce aesthetically beautiful and educational papers.
- Extensibility and Ecosystem: To improve its usefulness, Jupyter Notebook offers a robust ecosystem of extensions, libraries, and kernels. Users can customize their environment, add more features, and use a variety of libraries for scientific computing, machine learning, and data analysis.
System Requirements
- Operating System: Windows, macOS, and Linux-based operating systems are all compatible with Jupyter Notebook.
- Memory and Storage: Ensure your computer has enough memory and space to hold the Jupyter Notebook and any datasets or files you’ll be working on.
- Internet Connection: To download and install Jupyter Notebook and any additional packages or dependencies, you must have an internet connection.
- Python: Python must be installed on your computer because Jupyter Notebook is mainly developed in Python.
Installing Jupyter Notebook
1. Using Python
The procedure to install jupyter notebook using Python is described as follows:
- To install Jupyter Notebook, you first need to install Python. To install Python, go to https://www.pythonorg.
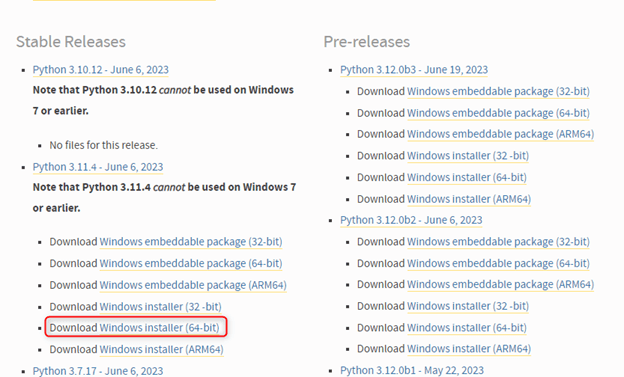
- Linux, macOS, and Windows are just a few of the operating systems that Python is compatible with. Ensure that you choose the appropriate version for your system.
Select the installer that suits your operating system. We have selected 64-bit over here.
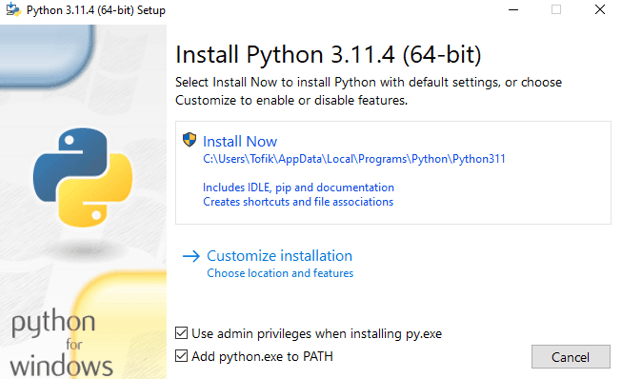
First, you need to see that all checkboxes are ticked; then, click on the Install Now option.
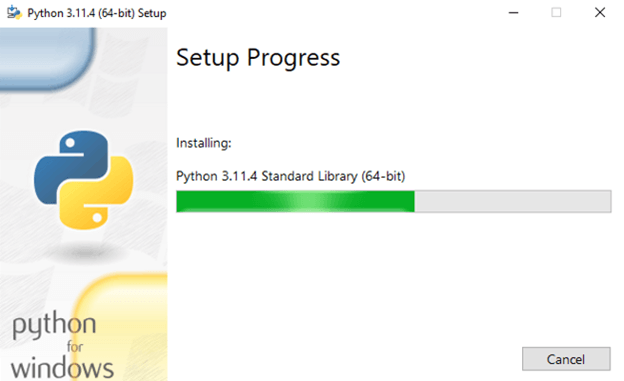
The installation file will be downloaded to your system.
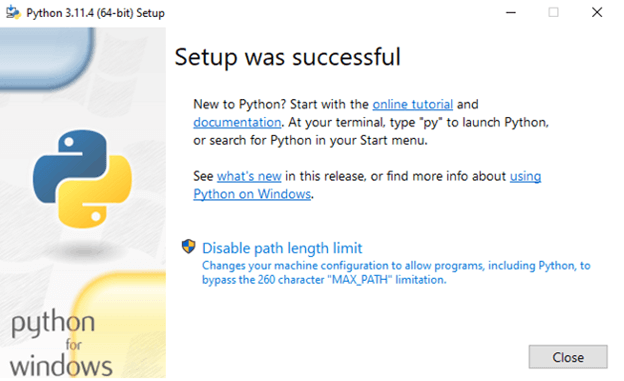
Python has been successfully downloaded and installed on your system.
Once Python is successfully installed, go to This PC > Local Disk(C) > Users > Tofik > AppData > Local > Programs > Python > Python3.11 > Scripts.
Then click on the path, type cmd, and press enter.
The command prompt will appear, and then you must type Python -m pip install jupyter and press enter.
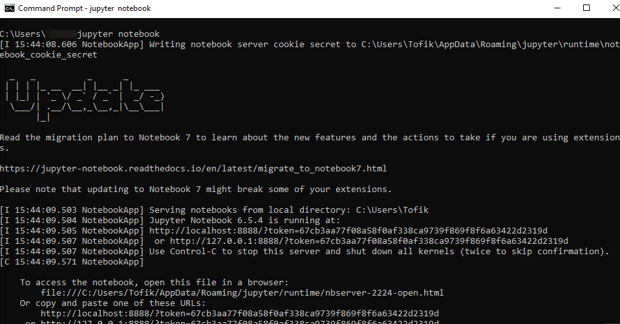
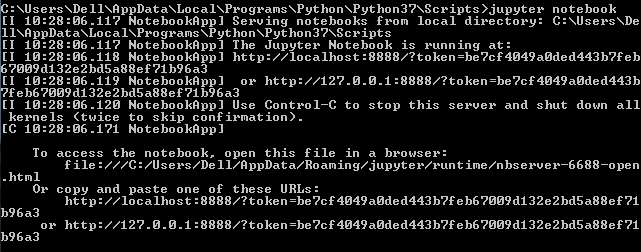
Now we have to type jupyter notebook and press enter. You will see the following command, as mentioned in the screenshot.
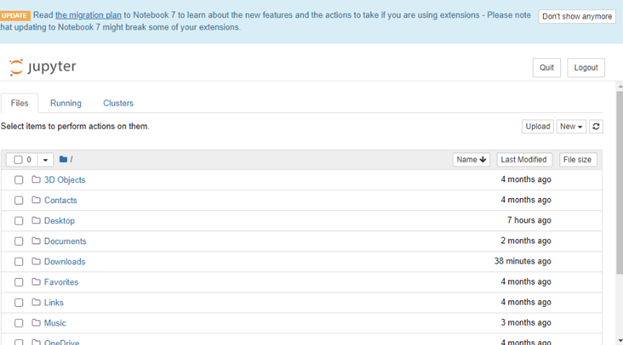
Jupyter Notebook will be installed on your default web browser.
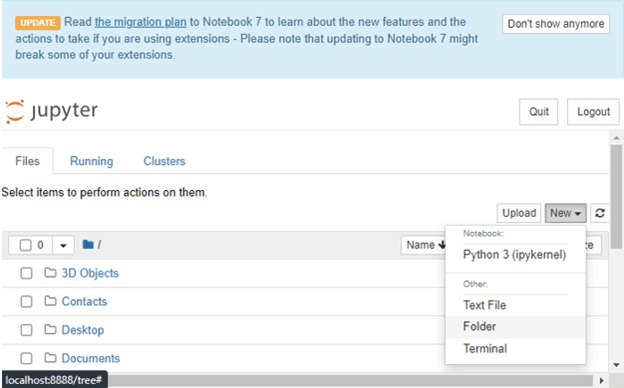
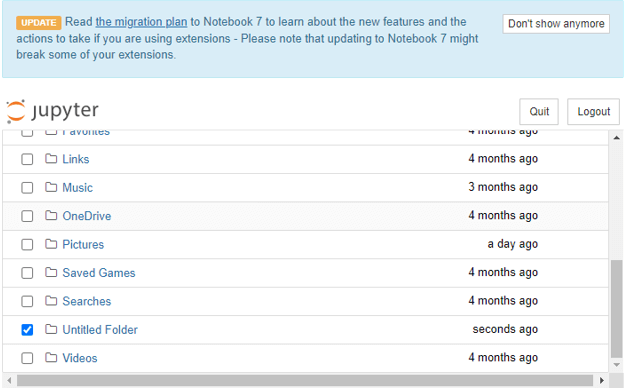
You may create a new notebook in the Jupyter Notebook interface by clicking the “New” button and selecting “File folder” from the dropdown menu.
Select the Untitled folder.
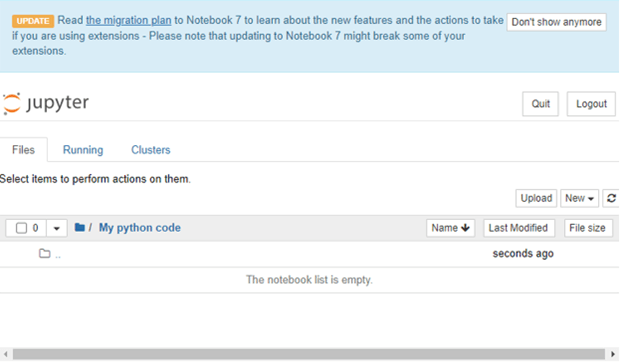
After selecting the Untitled folder, go to Rename and enter a directory name of your choice.
After Entering the directory name, the screen will appear as shown below.
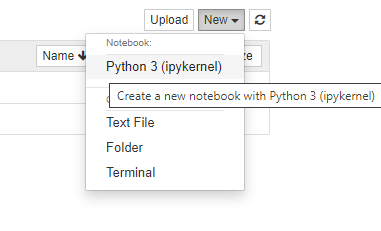
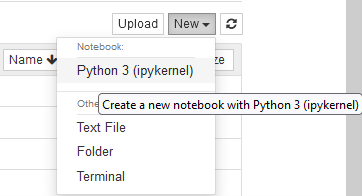
After that, Select New and click on Python 3 from the dropdown menu.
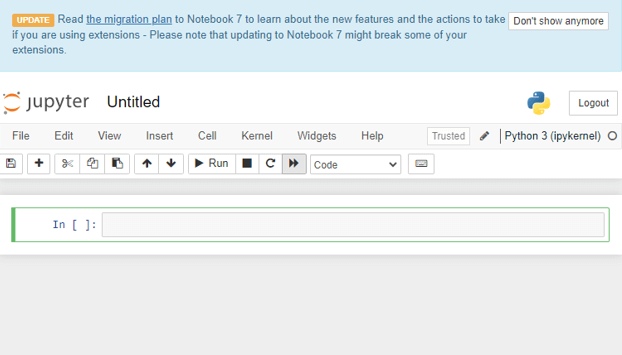
You will find that a new notebook has been created.
2. Using pip
Follow these steps to install Jupyter Notebook using pip:
Open a command prompt or terminal on your computer. For installation, we are going to use the pip command. And for installation, the pip should be upgraded. If you have the latest pip version, move directly to the next step. Or use the below command to upgrade your pip.
Code:
python –m pip install –upgrade pip- After going into the Scripts folder > run the below cmd command:
Code:
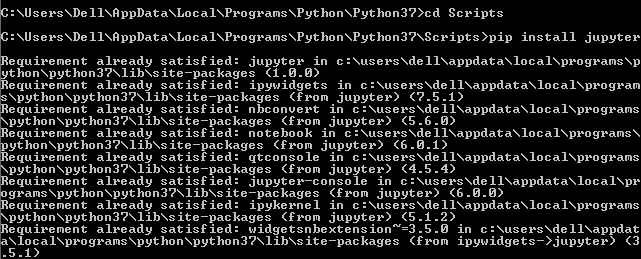
pip install jupyter- Then, it will start downloading the Jupyter, and it will install the Jupyter Notebook.
- After completion, let’s run the Jupyter Notebook using the following command:
Code:
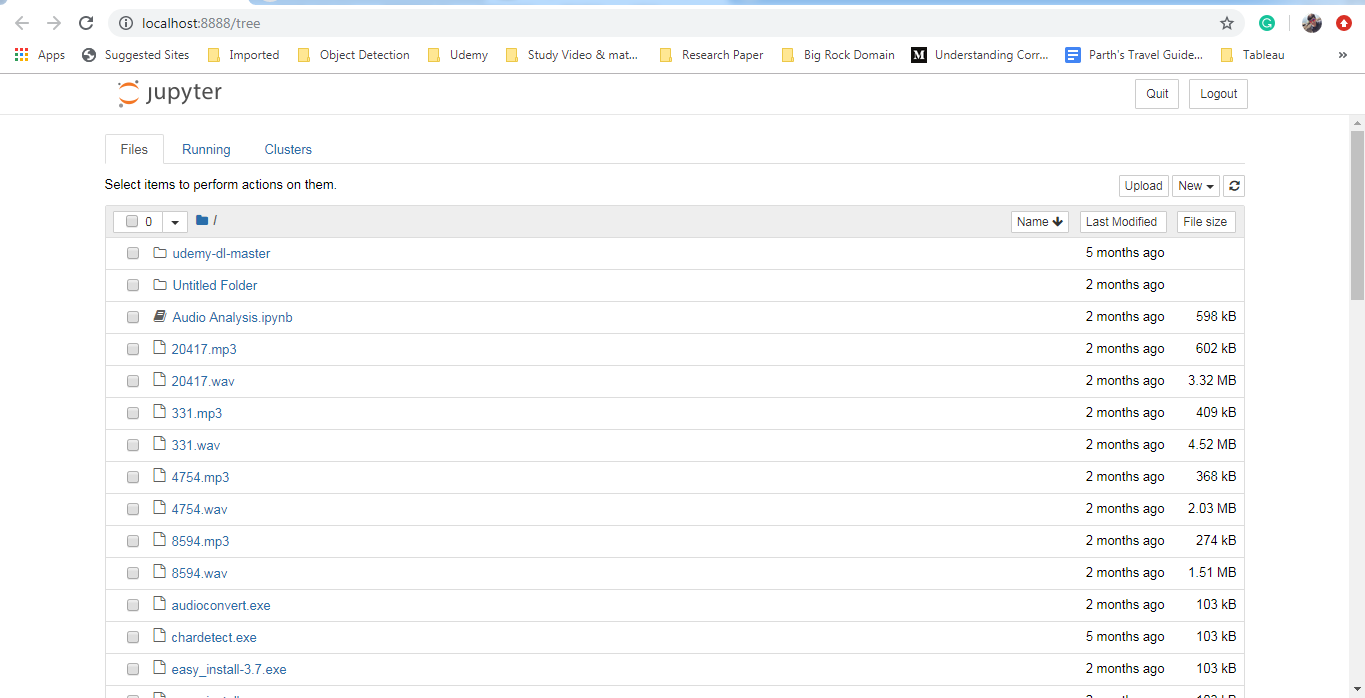
jupyter notebook- After this, it will open the Jupyter Notebook in your default browser.
- You can also open the Jupyter Notebook using the link below: ‘http://localhost:8888/tree.’
- It is mandatory to start Jupyter in the command prompt, and only then will you be able to access it in your browser.
3. Using Anaconda
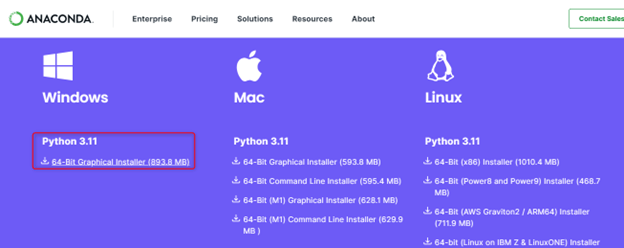
Download the Anaconda from the official website: https://www.anaconda.com/ based on your operating system, as we have selected Windows here.
Select Python 3.11 over here, and your installation process will begin after clicking the installer link.
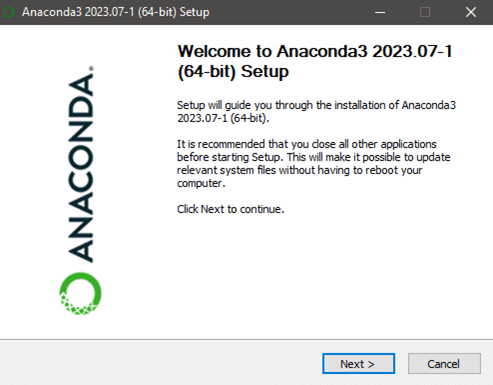
Once the installation is done, you have to begin setting up Anaconda.
Please read the agreement and choose I agree.
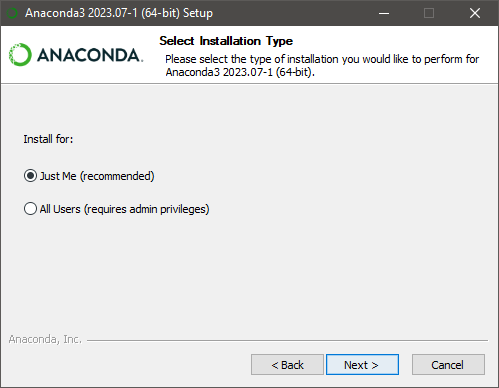
Select the installation type by default; it would be just me, then click next.
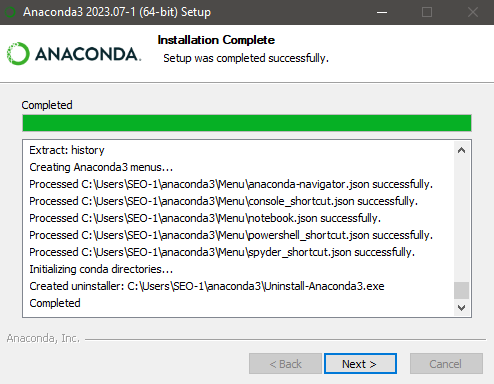
The setup was completed successfully. Now we have to click on Next.
And then click on Finish to complete the setup.
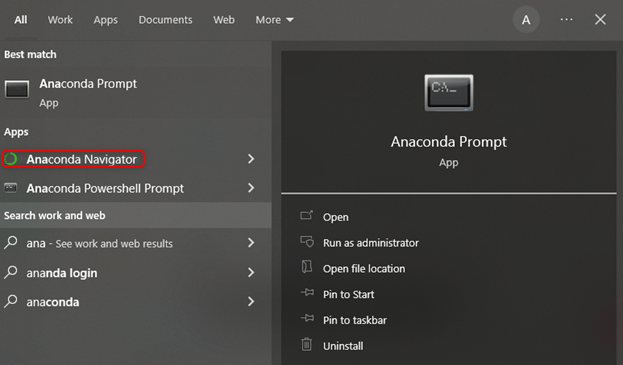
Now, you have to search Anaconda Navigator from the Search bar.
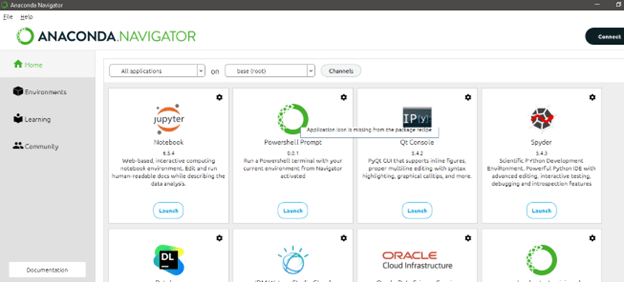
After clicking on Anaconda Navigator, you will get the screen below; select Jupyter Notebook and click Launch.
After that, click on New and Python 3 from the dropdown menu.
You will find that a new notebook has been created.
Creating a Conda Environment
1. Open a Terminal or Command Prompt:
- On Windows: From the Start menu, open the Anaconda Prompt.
- On macOS and Linux: Open the terminal application.
2. Create a New Conda Environment:
To create a new Conda environment, use the following command:
conda create --name myenv1Replace myenv with the name you choose for your environment.
3. Specify Python Version:
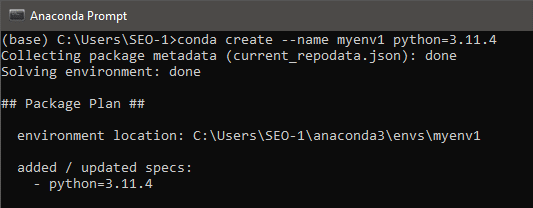
By adding the python= argument and the desired version number, you may select a specific version of Python for your environment. For example:
conda create --name myenv1 python=3.11.44. Install Packages:
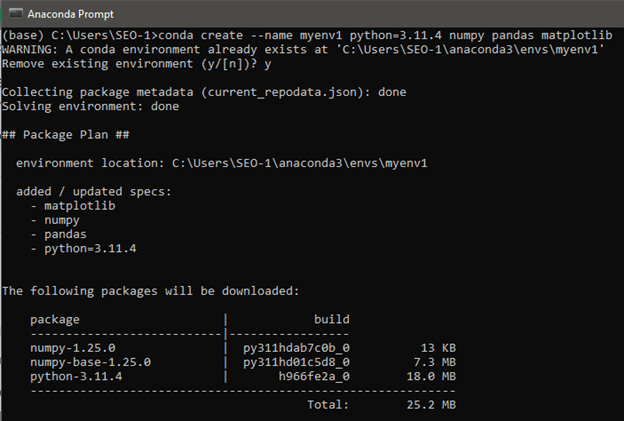
You can specify particular packages to be installed in the environment once created. For example:
conda create --name myenv1 python=3.11.4 numpy pandas matplotlib5. Activate the Environment:
To activate the recently created environment, use the following command:
conda activate myenv1Replace myenv with the name of your environment.
6. Verify the Environment:
To check for the available Conda environments on your system, run the command
conda env listThe * symbol indicates the currently active environment.
7. Deactivate the Environment:
You can deactivate the environment once you’re done with it by using the following command:
conda deactivateTo achieve easier collaboration and reproducibility and avoid conflict between different project requirements, you can follow these steps to create a Conda environment and manage your project’s dependencies and packages separately.
Comparison of Jupyter Notebook Installation Options on Windows
| Criteria | Anaconda | Miniconda | Pip |
| Use Case | Comprehensive data science platform | Minimalistic installation with Conda | Simple and lightweight installation |
| Included Packages | Includes a wide range of data science libraries | Minimal installation, no additional packages | Minimal installation, no additional packages |
| Package Management | Conda for managing packages and environments | Conda for managing packages and environments | Standard Python package manager |
| Installation Size | Larger download and installation | Smaller download and installation | Smallest download and installation |
| Customization | Some packages pre-installed | Install packages as needed | Install packages as needed |
| Environment Management | Easily create isolated environments | Easily create isolated environments | No built-in environment management |
| User Interface | Anaconda Navigator provides a GUI | Command-line-based package management | Command-line-based package management |
| Control and Flexibility | Suitable for beginners and those needing a complete data science environment | It provides the flexibility to install only what you need | Requires more manual package management |
Ultimately, your choice depends on your specific requirements, familiarity with the tools, and whether you prefer a more comprehensive package (Anaconda), a more minimalistic approach with Conda (Miniconda), or a straightforward and lightweight installation (Pip).
Conclusion
Jupyter Notebook is a web application widely used by the developer community, which helps the developer write and share code documents. Developer can access their code and data. Use it to run, look at the code cell’s instant output, and visualize the data. Notebooks are very flexible, interactive, useful, and powerful tools for data scientists.
FAQ
1. Do I need administrator privileges to install Jupyter Notebook?
Answer: Specific installation methods or system-wide installations may require administrator privileges. If you encounter permission errors while installing, attempt to execute the installation commands with administrator or superuser privileges.
2. Can I install Jupyter Notebook on different operating systems?
Answer: Yes, Jupyter Notebook works on Windows, macOS, and Linux systems. To install it, follow the instructions specific to your operating system.
3. Can I use Jupyter Notebook with languages other than Python?
Answer: Jupyter Notebook supports various programming languages, including but not limited to Python. You may utilize Jupyter Notebook as a multi-language computing environment by installing additional kernels for languages such as R, Julia, and others.
4. How do I change the default Jupyter Notebook port?
Answer: You can use the– port option to start Jupyter Notebook on a different port.(e.g., jupyter notebook –port 8080).
Recommended Articles
We hope that this EDUCBA information on “Install Jupyter Notebook” was beneficial to you. You can view EDUCBA’s recommended articles for more information.
