Updated March 16, 2023
Introduction to Install Kotlin
The following article Install Kotlin provides an outline for the installation of Kotlin. Nowadays, Kotlin has become the most preferred programming language for developers of Android applications. Kotlin was developed and created by Jetbrains, the famous company which created top-notch IDEs namely PyCharm, IntelliJ IDEA, ReSharper and more. Kotlin programming language functions on the Java Virtual Machine (JVM), and also be assembled as Machine code or as JavaScript code. Let us look at the ways and the steps to set up Kotlin programming language on our systems.
Prerequisites
To proceed with Kotlin, one should have the basic knowledge of the programming language, Java. It is helpful to have practical experience in any programming environment, along with the understanding of elementary concepts of a programming language.
Setting up Kotlin
Kotlin can be set up in quite a few ways. We can install a compiler for Kotlin and then execute the programs from the command line, as well as install Kotlin and set it up in any IDE like Eclipse or IntelliJ. Let us look at all of these ways separately.
- Setup Kotlin language’s Compiler
- Install Kotlin language in IntelliJ
- Install Kotlin language in Eclipse
1) Installing the Compiler for Kotlin
- Open Github and open the page stating ‘Kotlin releases’
- Go to the Assets section, from the ‘Kotlin releases’ page and download the latest version of the compiler for Kotlin. It will be available as a zip file.
- After downloading the file, unzip the file in a folder from where we have access to write.
- Update the PATH variable with the bin location of Kotlin’s compiler. For example D:\Kotlin-compiler\bin
- To check whether Kotlin compiler has been properly installed, we can run in the command line, the command ‘kotlinc’ to get a ‘Welcome to Kotlin’ message as follows.
- To run a program in Kotlin, we need to create a text file called demo.kt from any preferable editor of our choice. Let the file be as following:
fun main(args: Array<String>) {
println("First program!")
}
After saving the file, we can run the following commands in the command line to execute the Kotlin program.
$ kotlinc demo.kt
$ kotlin DemoKt
First program!
2) Installing Kotlin and setting it up with IntelliJ
We need to have the latest version of the IDE IntelliJ installed in our systems. Other than that, we do not need to install any separate plugins for IntelliJ as Kotlin happens to be packaged with versions of IntelliJ. Let’s look at the steps to run a Kotlin program in IntelliJ.
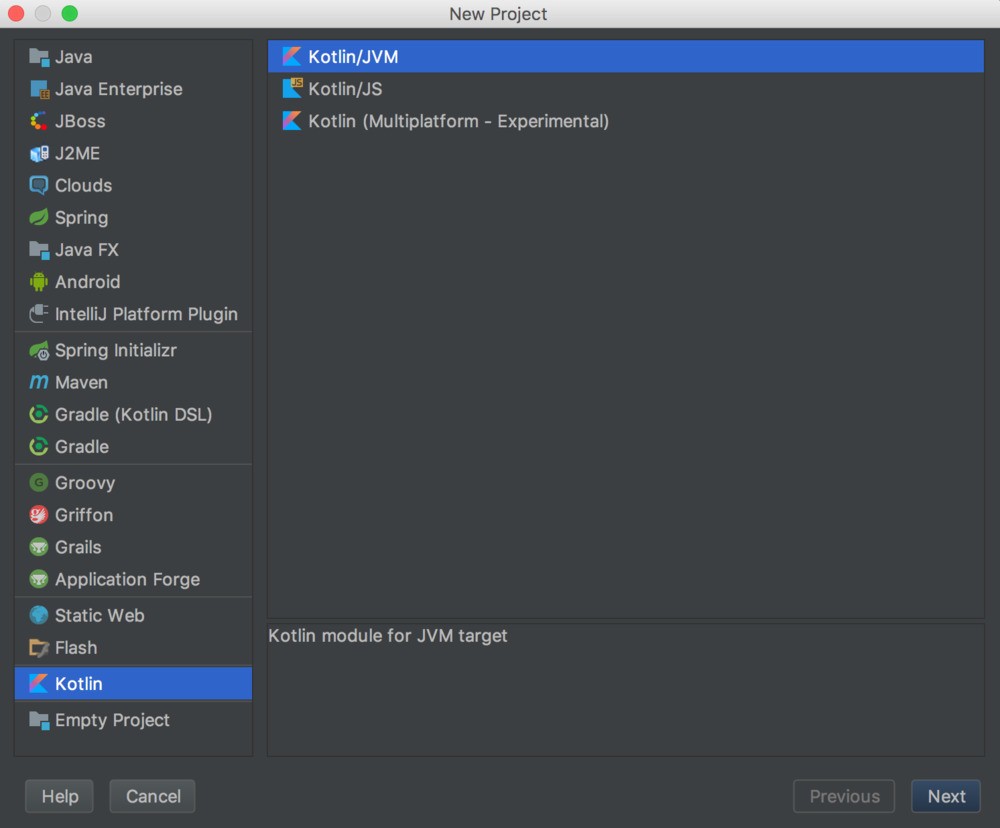
- Select the option “Create New Project” from the welcome screen or from the Menu options as ‘File → New → Project’. In the screen that appears, we need to select ‘Kotlin’ from the left side and proceed to select ‘Kotlin/JVM’ from the right-side options.
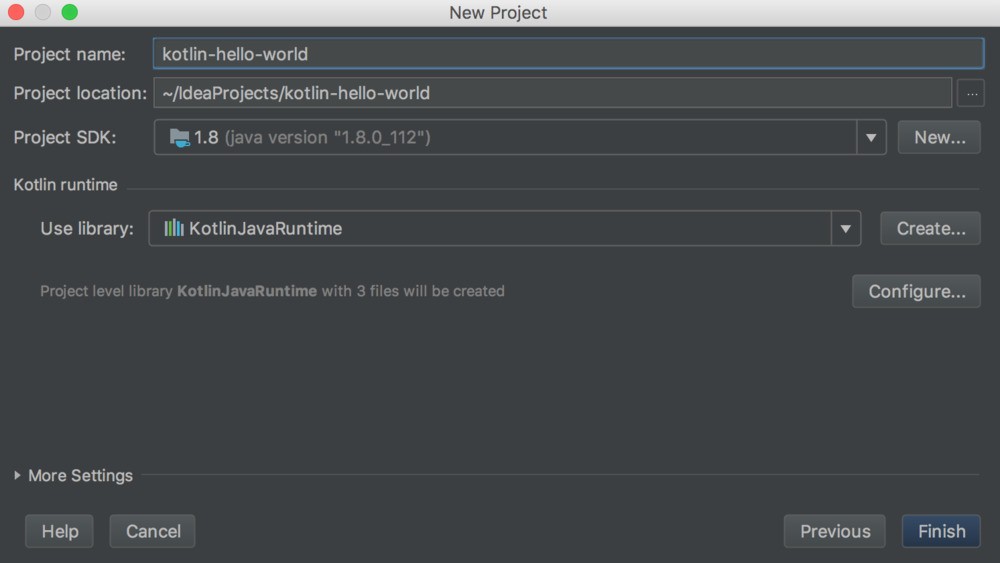
- On clicking next, we get a page where we need to state the name of the project, its location and select Java version (1.6+) in the field mentioned as Project SDK. After entering the details, we can click on Finish to create our new project.
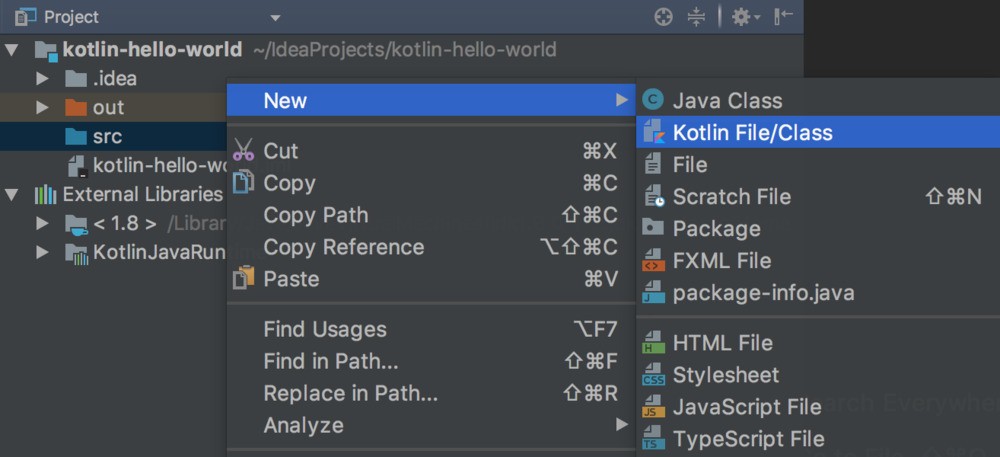
- The next step is to generate a new Kotlin file. This can be done by right-clicking the src folder and selecting the option New → Kotlin File/Class.
- A dialogue box asking the name of the file appears. Let us name our file as HelloWorld.kt and write a print statement in the file.
- Once we are done saving the program, we can run it by either right-clicking our file and choosing the run option, or by clicking the small Kotlinlogo that becomes visible at the side of the main() method of our program.
3) Installing Kotlin and setting it up with Eclipse
We require the latest version of Eclipse to be downloaded in our systems. Once we are done with Eclipse installation, we can follow the below steps to set up Kotlin.
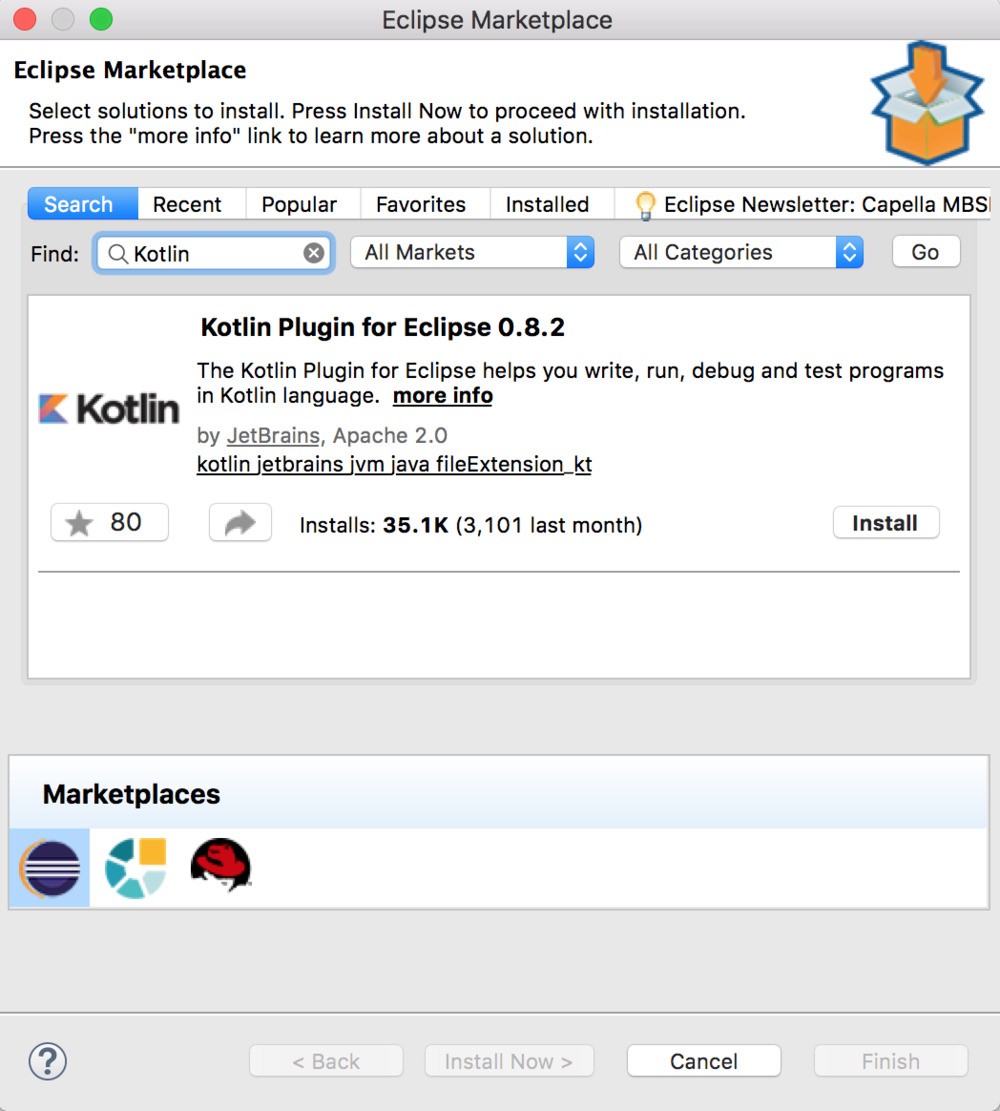
- In Eclipse, we have an Eclipse Marketplace in the Help section. After opening that, we need to search for the keyword ‘Kotlin’ and install the Kotlin Plugin from it.
- After the installation is complete, it is essential to restart our Eclipse.
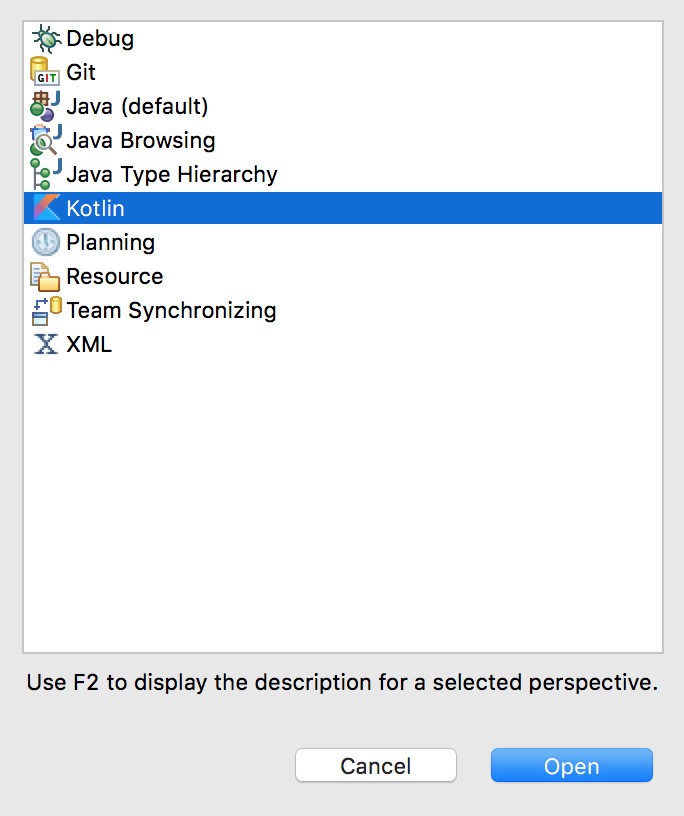
- After Eclipse has restarted, we need to check whether the plugin has been installed correctly or not. To do that, we switch to Kotlin’s perspective. This can be done by performing the following Menu options in Eclipse Window → Perspective → Open Perspective → Other. A-frame opens with Kotlin displayed as a prospective option. Choose Kotlin and then click on the Open button to switch to Kotlin’s perspective.
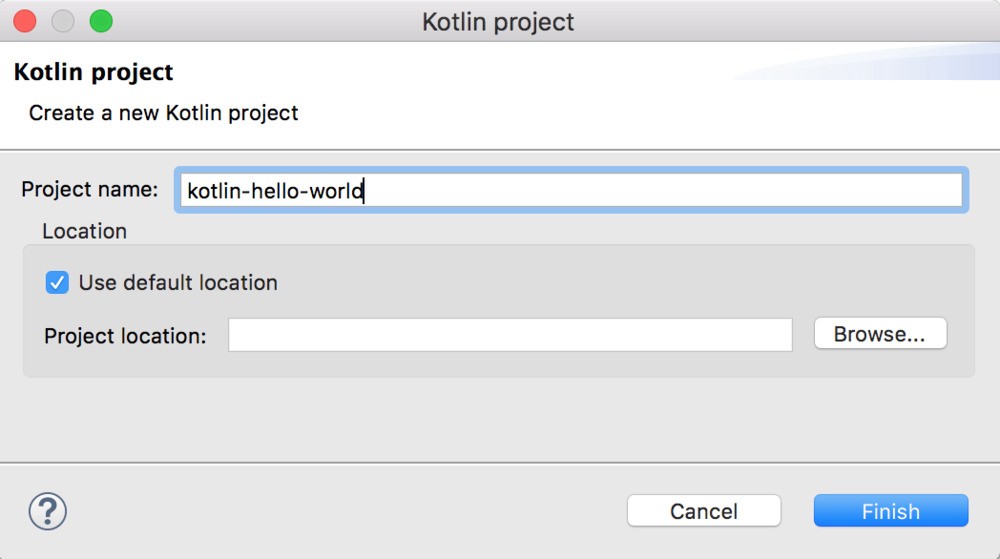
- The next step will be to create a Kotlin project. This can be done by performing the following Menu options File → New → Kotlin Project. A window appears where we need to enter the project name.
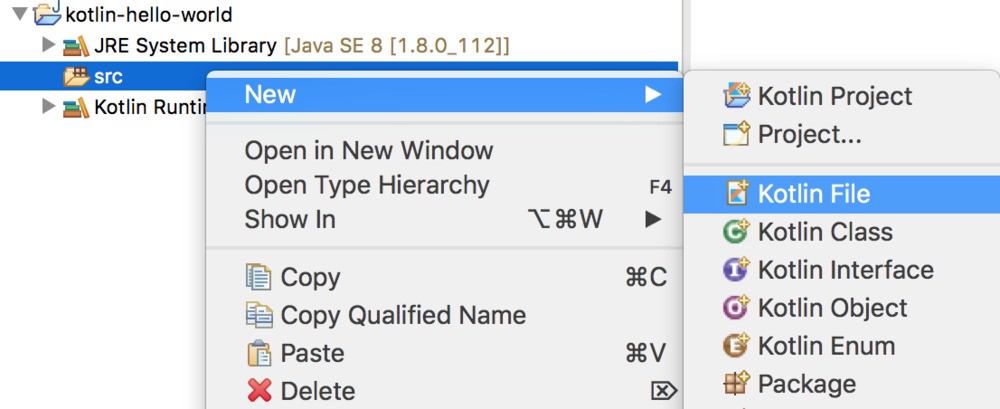
- On clicking Finish, a new Kotlin project is created. Now we will right-click the src folder and create a new file. New → Kotlin File.
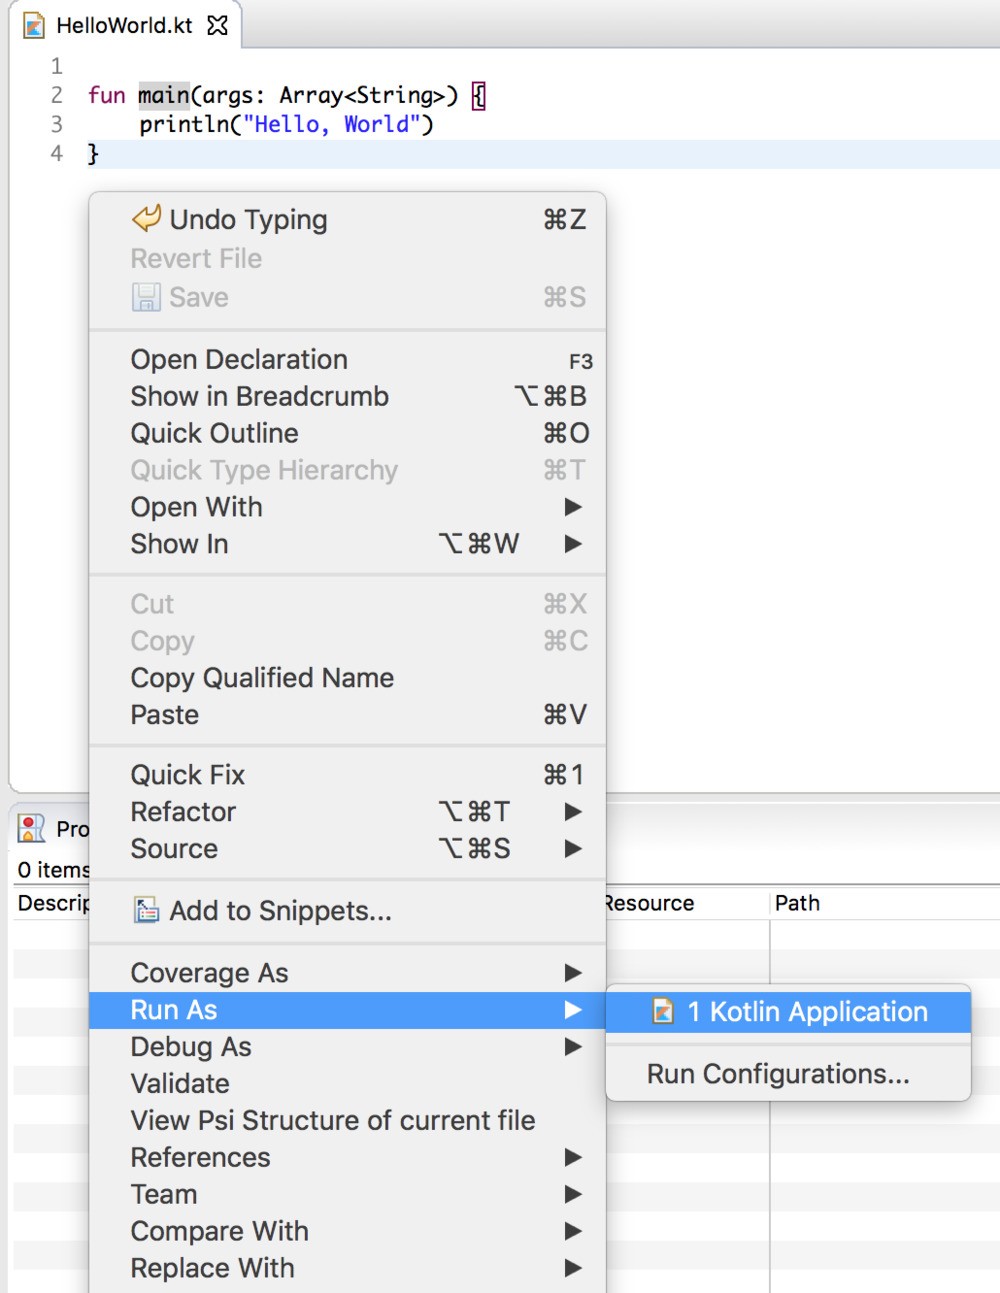
- After creating the file and adding a small print code in the file, we can right-click the source file and select the Run As → Kotlin Application option to execute the program.
Conclusion
In this article, we have seen three different methods to set up Kotlin on our systems, and that we can resort to any of the methods convenient to us. In case of an issue or a requirement change, we can easily switch to another method to use Kotlin at any time!
Recommended Articles
This has been a guide to install Kotlin. Here we discuss what is Install Kotlin, Prerequisites, and Setting up Kotlin respectively. You can also go through our other suggested articles to learn more –
