Updated June 28, 2023

How to Install Splunk?
In this how-to install Splunk post, we will look at all the necessary details and steps required to install Splunk on our machine. We will be discussing installation steps for both Linux as well as Windows operating systems.
At first, we will brief you about the Splunk Components.
Components of Splunk Architecture
- Indexers
- Search Heads
- Forwarders(Universal/Heavy)
- Deployment Server
- License Master
- Master Cluster
Source:
https://goo.gl/images/HbRKbT
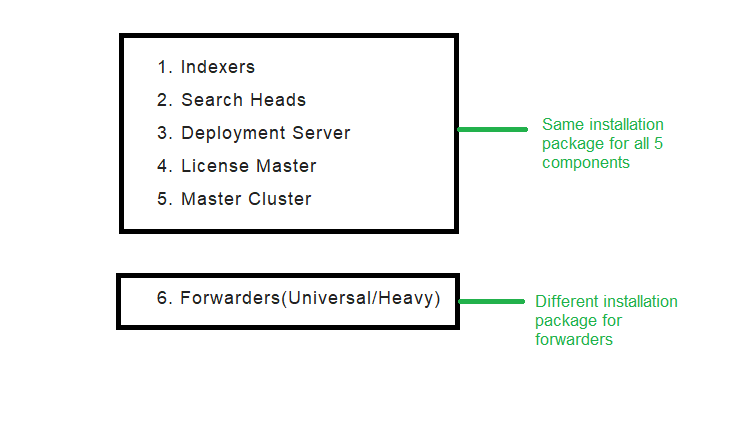
Apart from Forwarders, all other 5 components can be installed from a single Splunk package. After installation, we have to manually configure whether to make the component an Indexer/Search Head/Deployment Server/License Master/Master Cluster.
There are two ways in which we can set up the installation for Splunk Enterprise:
- Standalone Environment – Here, all the Splunk components reside on the same server (except for forwarders as the sole purpose of forwarders is to forward data from an input device to Splunk(Indexer), so it will not make any sense to have the forwarder on the same machine)
- Distributed Environment – Here, all the Splunk Components are distributed on different servers like Indexer on server1, Search Head on server 2, License Master and Deployment Server on server 3 and likewise!
Splunk Core Products
- Splunk Enterprise – On-Premise installation, more administration overhead. Here, you are responsible for all the upgrades, making changes to configuration files and keeping Splunk up and running.
- Splunk Cloud – On Cloud installation, less administration overhead. It is the responsibility of Splunk Incorporation to keep your spunk up and to run.
- Splunk Light – This is the light version of Splunk Enterprise with limited functions and capability.
Install Splunk Enterprise On Windows
1. Go to https://www.splunk.com/
2. Click on Free Splunk in the upper right corner.
Source: From My Browser
3. If you are not logged in or if you do not have an account associated with Splunk, it will ask you to create an account. Please do the required and then log in.
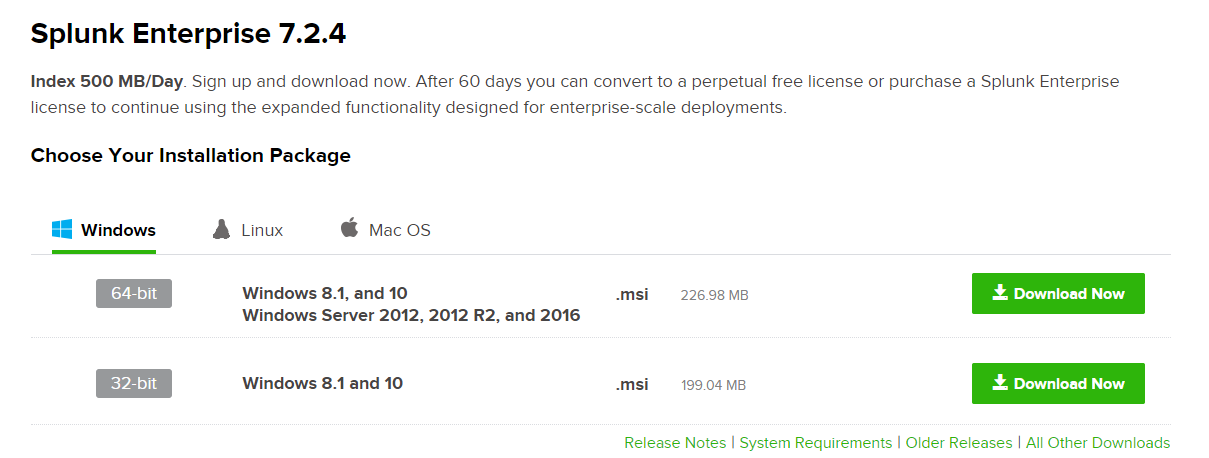
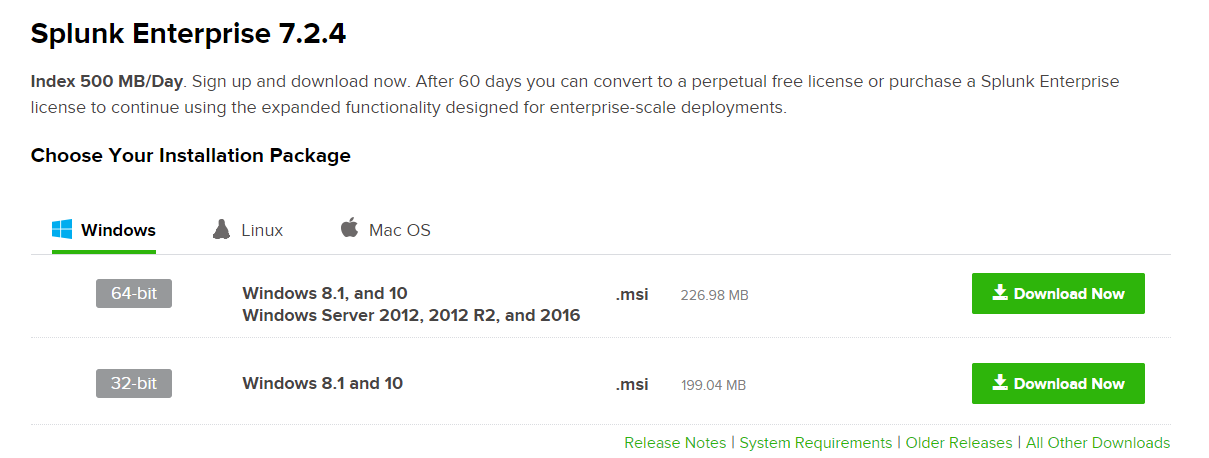
4. Next screen that you will see is.
Source: From My Browser
5. Under the windows tab, click on the download button as per your machine configuration. Once the package is downloaded, run it.
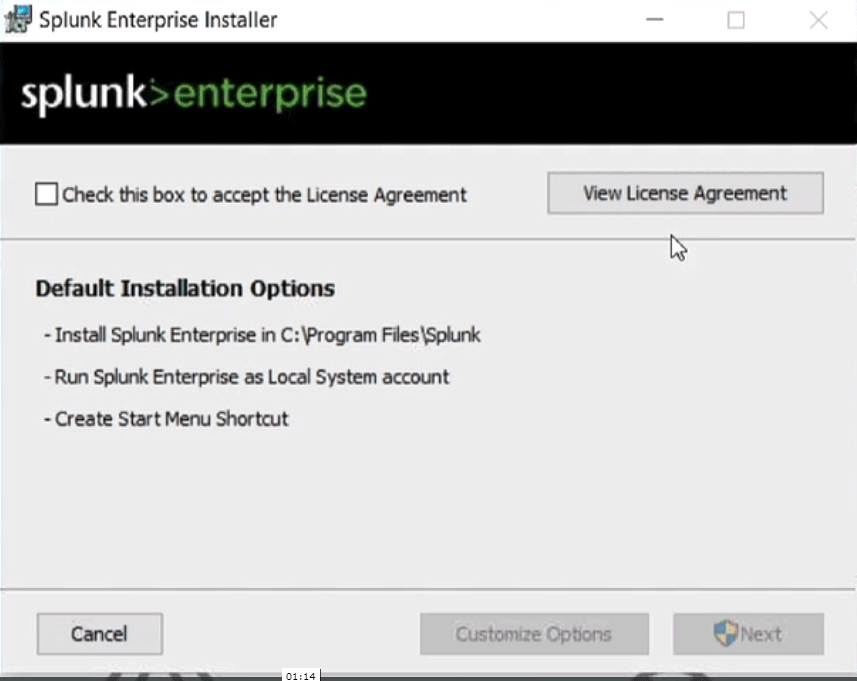
6. Click on the checkbox to accept the license and user agreement. Once the checkbox is ticked, the Customize Options and Next button will get enabled; the customize button will let you chose the folder where you would like your Splunk to get installed, while if you click on Next, it will get installed in the default path.
Source: From My Server
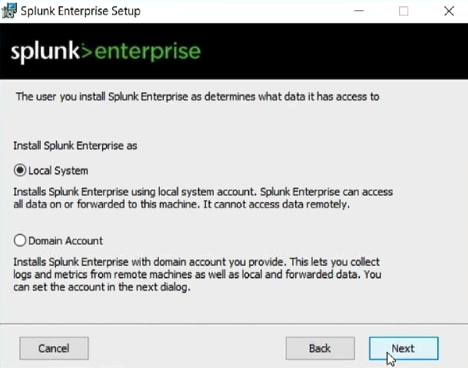
7. Here, we will select the Local System as we are on our local machine.
Source: From My Server
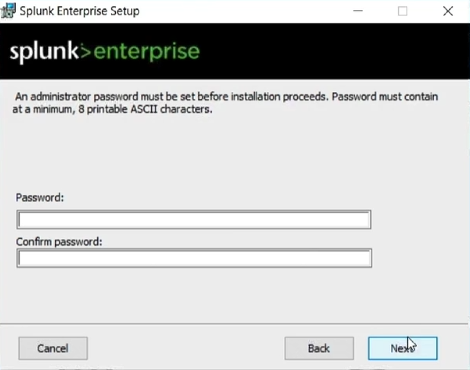
8. Here, please provide your password. You should be able to login to your Splunk instance using this password.
Source: From My Server
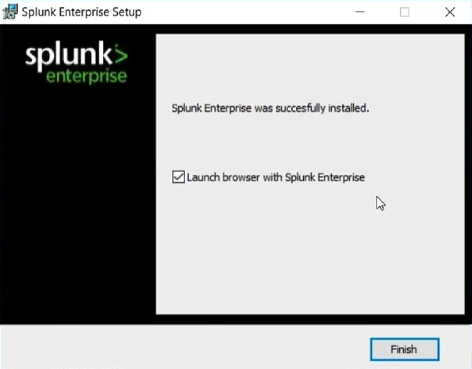
9. Next, click on finish.
Source: From My Server
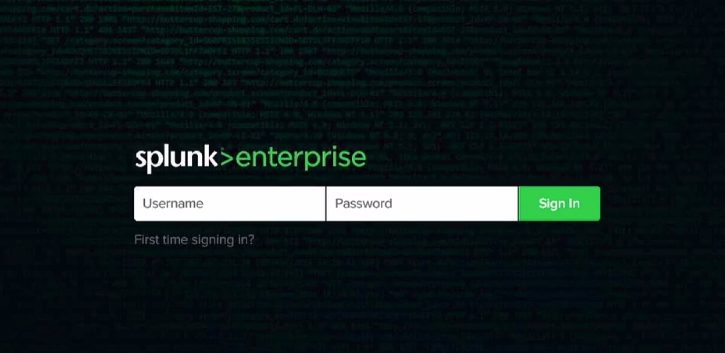
10. Now, you can either open your Splunk instance from your windows programs or by visiting localhost:8000 via your web browser.
Source: From My Server
The username for an administrator is always admin, and the password will be the one that you had provided during the installation process.
Install Splunk Enterprise On Linux
1. Go to https://www.splunk.com/ (You will get at command Line very soon, so please do not worry about these web interfaces, for now, it all will start making sense after a few steps)
2. Click on Free Splunk in the upper right corner.
Source: From My Server
3. If you are not logged in or if you do not have an account associated with Splunk, it will ask you to create an account. Please do the required and then log in.
4. Next screen that you will see is
Source: From My Server
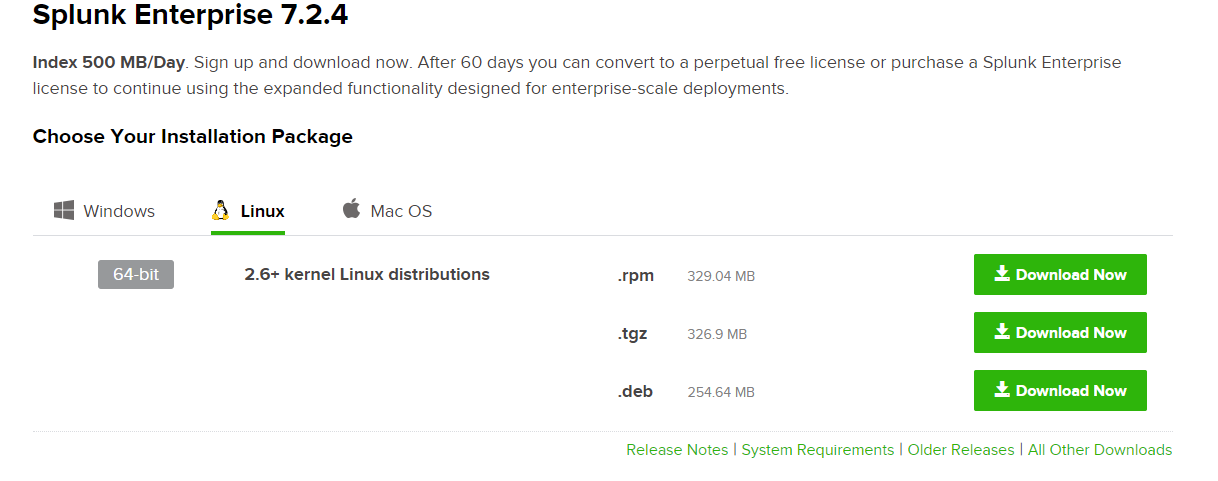
5. Under the Linux tab, click on the Download Now button as per your Linux flavours/distributions that you use.
Source: From My Server
The remaining steps are the same as we had done in Windows installation, as GUI steps are almost the same irrespective of OS.
OR
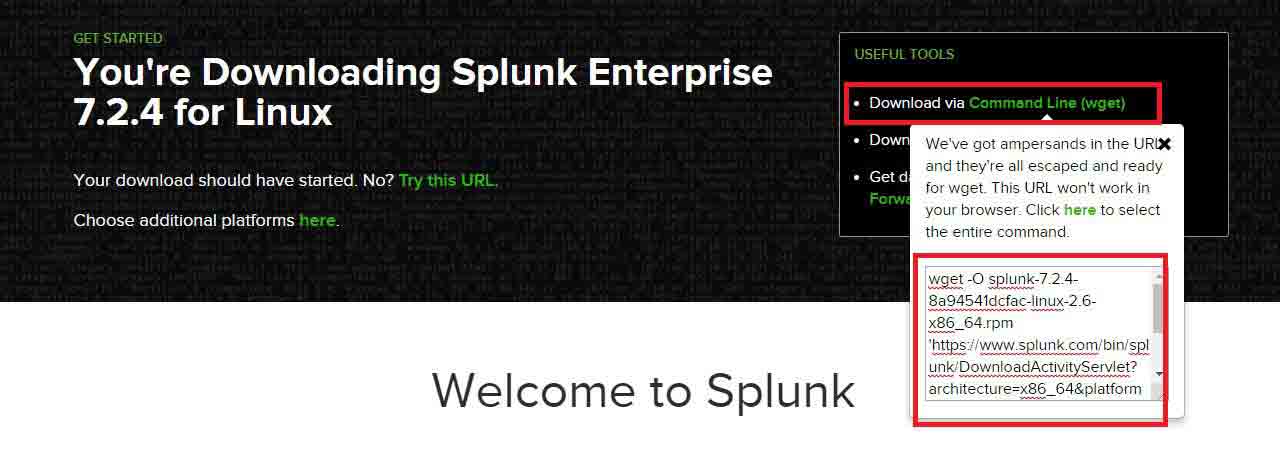
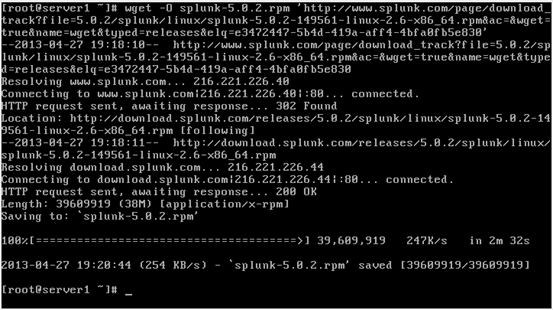
You have an option to download this directly from the command Line/Linux shell. Once you click on the Download Now button, your download will start automatically, but you can cancel the download instead and look for the” Download via Command Line” option. Copy the command and run it in your command line(wget lets you download the package)
Source: From My Server
wget -O Splunk-7.2.4-8a94541dcfac-Linux-2.6-x86_64.rpm
1. Now the rpm package of Splunk is downloaded, it is time to install it
Command :
rpm –ivh splunk-7.2.4-8a94541dcfac-linux-2.6-x86_64.rpm2. Splunk is installed now, and now it is time to start it for the first time. Navigate to the bin directory of Splunk and run the following
Command:
/opt/splunk/bin/splunk start3. Read the license and press the “y” button to agree with the license agreement.
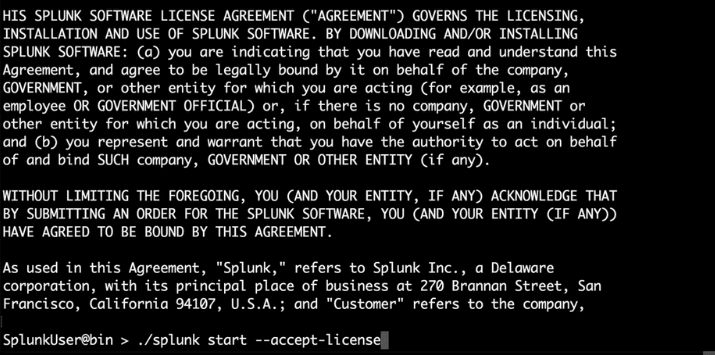
4. There is also another way of directly starting Splunk when you are doing it the first time by accepting the license in one go:
Command:
/opt/splunk/bin/splunk start –accept-licenseOR
./splunk start –accept-license(Assuming you are in the bin directory of Splunk)
Install Splunk Cloud
We have seen an installation of Splunk Enterprise on Windows and Linux platforms, but apart from Splunk Enterprise, Splunk also offers a Cloud version of Splunk, which is known as Splunk Cloud.
While Splunk Enterprise is an on-premise installation, Splunk cloud is fully deployed on the cloud.
Steps for cloud installation:
1. Navigate to https://www.splunk.com/en_us/
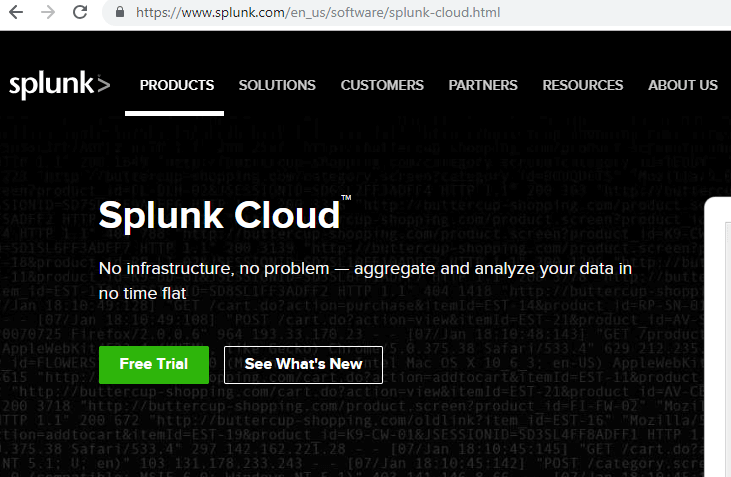
2. Click on “Free Trial”.
Source: From my browser
3. If you are not logged in or if you do not have an account associated with Splunk, it will ask you to create an account. Please do the required and then log in.
4. Once you click on the free trial, the installation will begin on the Splunk cloud server. When finished, click on the top right corner, select your account and from the drop-down, click on “Instances”.
Source: From my browser
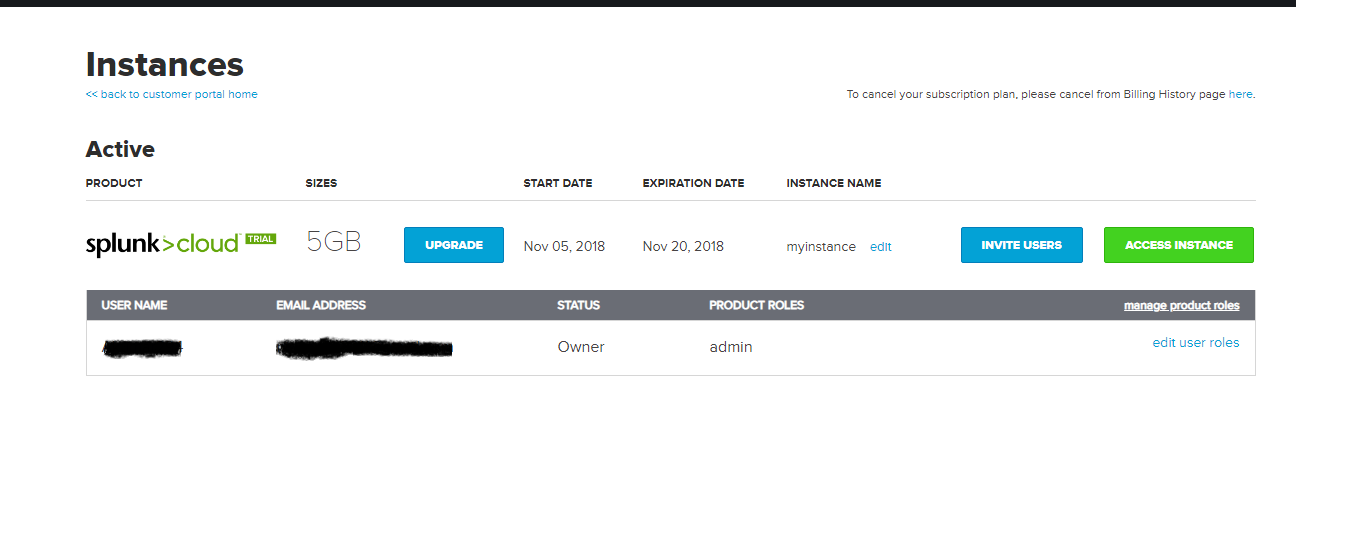
5. Then, you will get redirected to a screen that will look something like the below:
Source: From my browser
6. From here, please click on the Access Instance.
Recommended Articles
We hope that this EDUCBA information on “Install Splunk” was beneficial to you. You can view EDUCBA’s recommended articles for more information.

