Updated December 19, 2023
How to Install Ubuntu?
The following article provides an outline for How to Install Ubuntu. Ubuntu is an Operating system. Ubuntu Release Links. It’s an open-source LINUX distribution based primarily on DEBIAN. Ubuntu is released every 6 months, its Long term support (LTS) releases every 2 years. Ubuntu’s latest release is 18.10; we will work and show the installation process on 18.04 LTS.
It has 3 release types – Desktop, Server, and Core.
Platforms:
- IA-32, AMD64
- ARMhf (ARMv7 + VFPv3-D16)
- ARM64
- Only for servers: POWER8 (ppc64le) and s390x
Getting Started:
A user needs to get a copy of the Ubuntu installation image for USBs or DVDs. These are some of the most preferred options to install Ubuntu.
System Requirement:
- 1 GHz x86 processor (Pentium 4 or better)
- 1 GB of system memory (ram)
- 5 GB of disk space (at least 15 GB is recommended)
- Video support capable of 1024×768 resolution
- Audio support
- An Internet connection (highly recommended, but not required)
Creating a Bootable USB Drive
- Set the USB in your device USB slot.
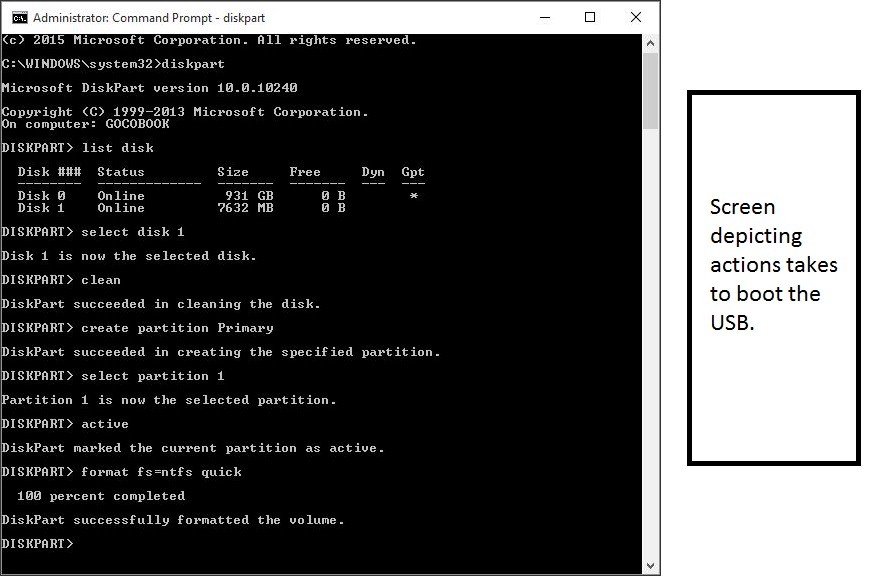
- Open cmd application and ‘Run as administrator from the context menu. A user will get a small window with some actions to perform.
- Type ‘diskpart’ and confirm. This will start the storage device manager.
- Now enter the command ‘list disk’; this will display all the available storage devices.
- Choose your disk from here as a user will have to select the disk to proceed.
- Now enter the command ‘sel nickname.’
- Now enter the command ‘clean’ to delete all the files from the USB.
- Now enter the command ‘create partition primary’ for the main partition (into the disk).
- Now enter the command ‘list pair’ and select ‘sel par 1.’
- Now activate the partition with the command ‘active.’
- Some last adjustments, format the USB using this command.
"format fs=FAT32 label="WINDOWS USB" quick override."- Once the process is finished, users must enter the command “assign’ to automatically assign a drive later to your USB.
- Enter ‘exit’ to close your DiskPart, and then ‘exit’ again to close the command prompt.
This is how the screen looks if everything is rightly done. This bootable USB not only works as installation media but also allow its users to test Ubuntu without avoiding any permanent changes to the computer system. A user can run the entire OS from the USB. So you have the bootable USB drive, let’s see the process to install Ubuntu.
Process To Install Ubuntu
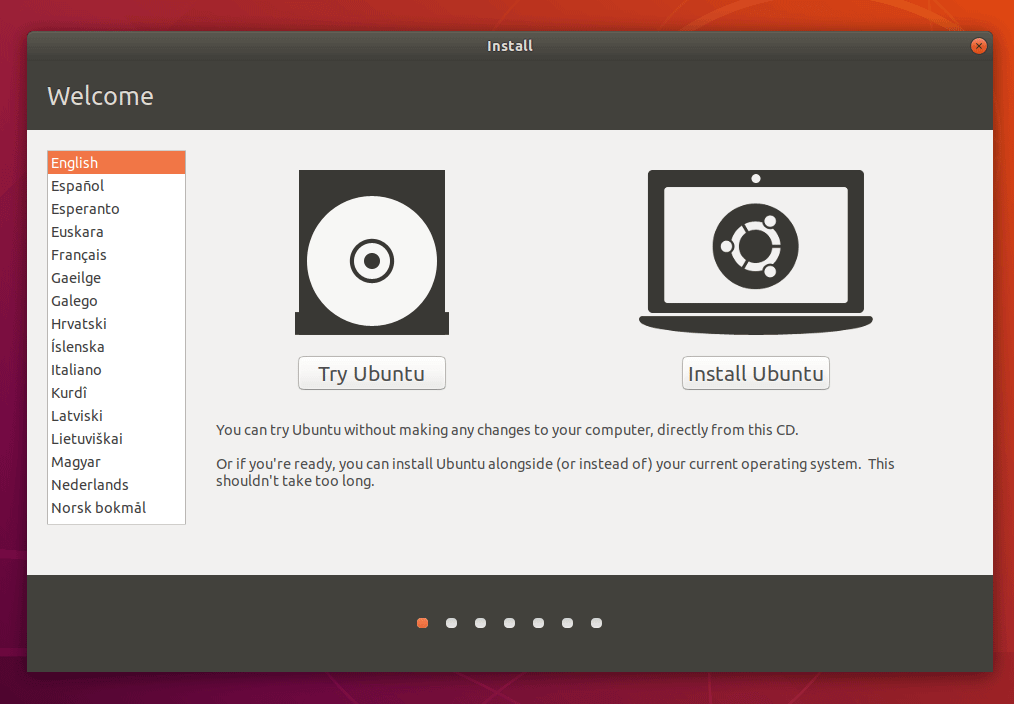
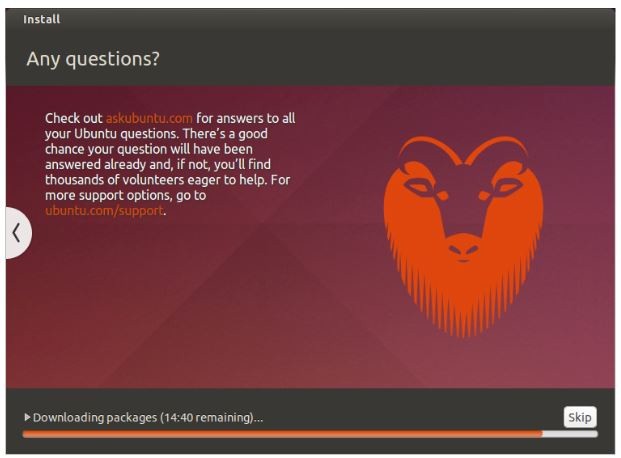
Plug your USB in the computer slot and restart your computer. Once your computer finds this plugged USB stick, you will get a quick loading screen with a Welcome window’. Move ahead by selecting the preferred language, and the screen u will get from now onwards is shown below.
Select the ‘Install Ubuntu’ button; this will start the installation process.
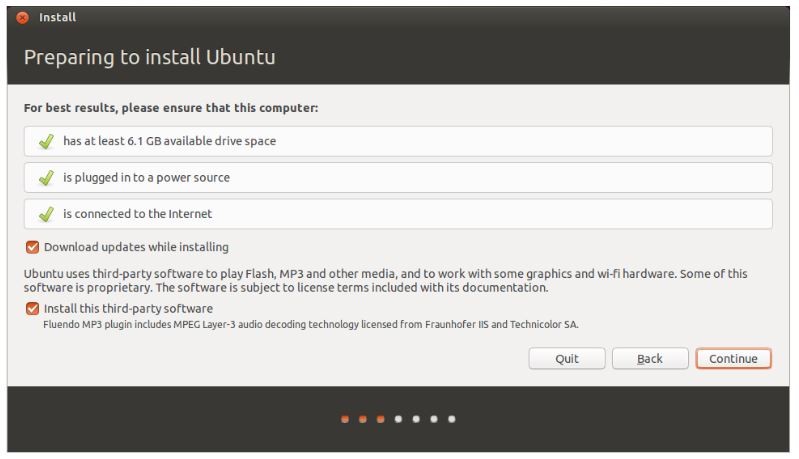
The above screen shows the system recommendation one last time to the users before the installation starts. A user must select the ‘Download updates while installing’ Click Continue to move ahead.
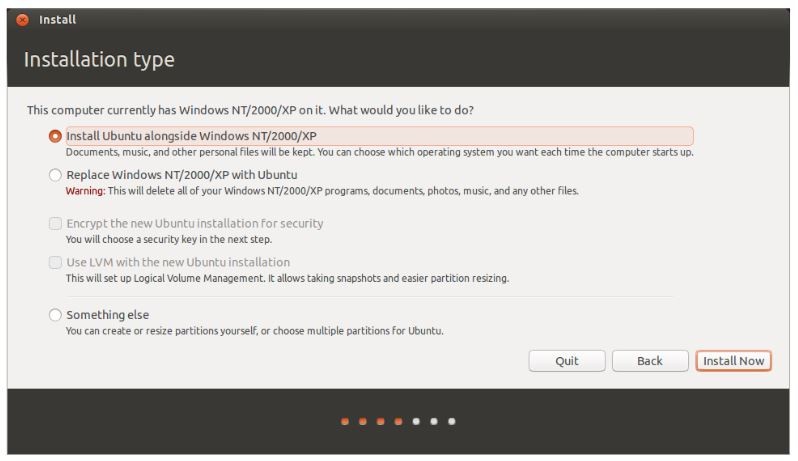
Now, a user has to allocate space; let’s see how. The Ubuntu installer will automatically detect any existing OS installed on your machine.
Some options available are as follows:
- Install alongside other OS
- Upgrade Ubuntu
- Erase and install Ubuntu
- Something Else
We will choose the ‘install alongside other OS’.
Click on ‘Install Now.
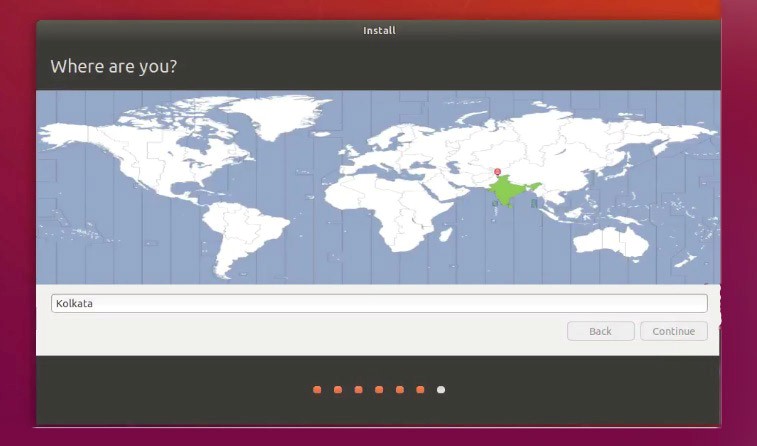
A user will be asked to set his location details with the ‘Where are you’ screen. It contains a world map; just select your location country and click ‘Continue’.
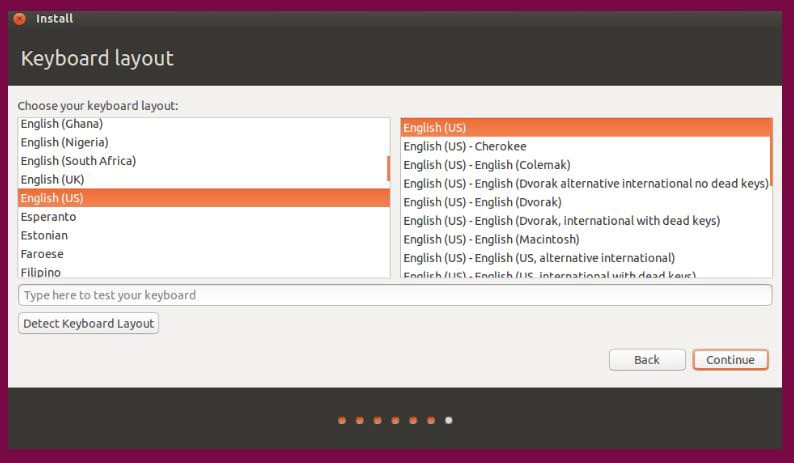
With location been set, you will move to the Keyboard layout screen. Here, a user has to tell Ubuntu the kind of keyboard a user is using. If you are unsure about it, clicks on the ‘Detect Keyboard Layout’ button, this will help Ubuntu suggest some options to continue. On the other hand, if you are good with your selection, then click ‘Continue’.
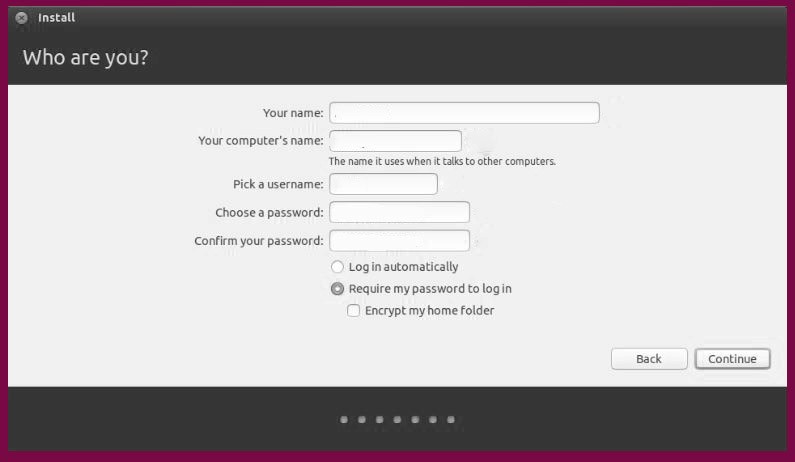
Who are you? A screen is meant to fetch some personal details (including the credentials) from the users. Ubuntu needs to know the account details. After successful configuration, these details will be reflected and used to work.
Here a user has to provide details:
- Name
- What you want to call your computer
- Username details
- Password
- How you want Ubuntu to log in
Options
You have done all your installation work; the last configuration is needed.
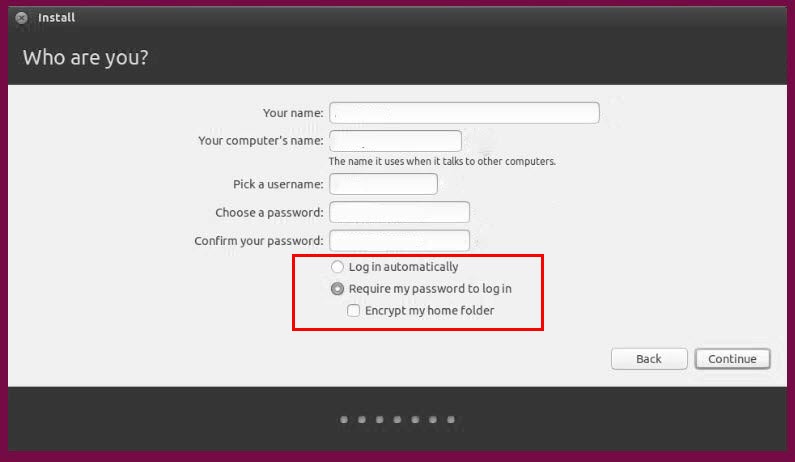
This is the Login option. At the bottom of the screen, a user has two options regarding how to log into Ubuntu.
- Login automatically: Here, Ubuntu will log in to your primary account automatically when you start your device. In this case, you dot have to provide your username and password.
- Require my password to login: This is the default selection. This will provide unauthorized access to your device. After the installation, if a user has opted, this login screen will pop out every time. Any user can have different login credentials for the same computer.
- Encrypt my home folder: This is more secure and has an additional layer of security. By selecting this, Ubuntu will automatically enable encryption on your home folder.
Most of us prefer to use Windows as it is very user-friendly, but there are some limitations of Windows when compared to Ubuntu.
Given below are some facts about how Ubuntu scores over Windows:
- Unlike Windows, Ubuntu is Free.
- Ubuntu is completely customizable; the moment you install Ubuntu, you can see the behavior. You can personalize every single element on your UI/UX like notification sounds, popup styles and layouts, fonts, workspaces, and even animations related to the system.
- Ubuntu is more secure; you can set a password for any number of folders and files.
- Good for development purposes.
- It can be updated without restarting.
- Ubuntu is Open source, unlike Windows.
Recommended Articles
We hope that this EDUCBA information on “Install Ubuntu” was beneficial to you. You can view EDUCBA’s recommended articles for more information.
