Introduction
Ubuntu 24.04, the latest version of the renowned Linux operating system, is designed to deliver superior performance and stability. This makes it an appealing choice for those in search of a dependable computing environment. However, the installation process can be daunting, with its array of unfamiliar terms and concepts, hardware compatibility checks, disk partitioning procedures, BIOS/UEFI settings configurations, and potential troubleshooting. This guide is here to simplify the process, enabling you to install and enjoy Ubuntu 24.04 LTS on your systems effortlessly.
Table of Contents
Prerequisites
Hardware requirements.
- Processor: Ubuntu recommends a minimum of 2 GHz dual-core processor (or better) and suggests using modern processors for a smoother experience.
- RAM: 4GB Minimum, 8GB Recommended
- Storage: For a basic installation, you need at least 25 GB of free disk space. However, allocating more space (40 GB or more) is recommended for storing applications, files, and future updates.
- USB flash: USB drive with at least 8GB capacity.
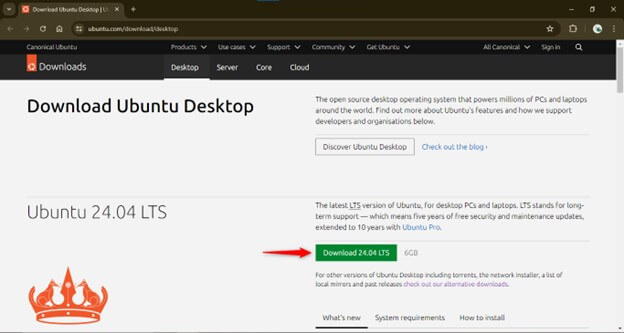
Downloading Ubuntu 24.04 LTS ISO file.
- Download the latest ISO file for Ubuntu Desktop Edition from the official Ubuntu website: Ubuntu -download-desktop.
Software to create a bootable USB drive
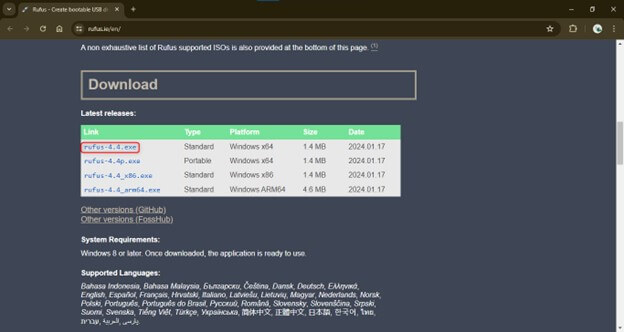
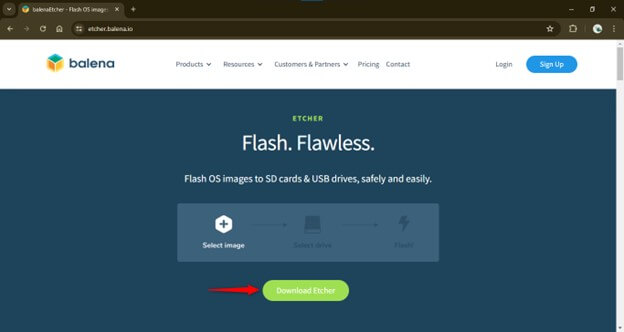
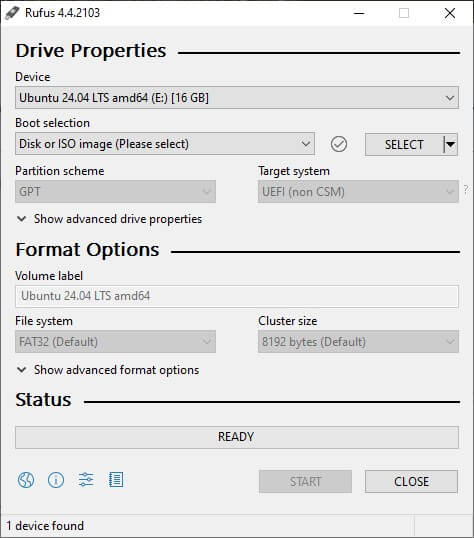
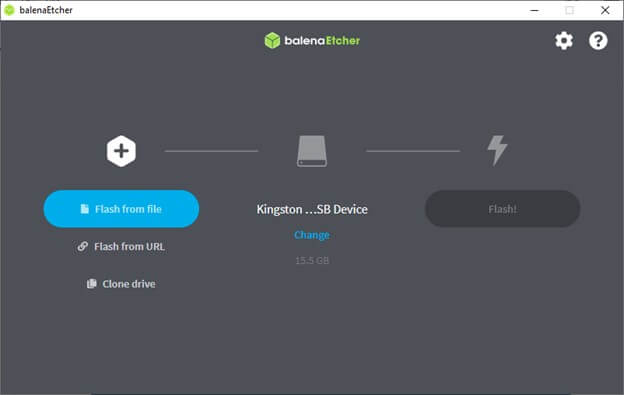
Two popular software options for creating a bootable drive are Rufus (for Windows) and balenaEtcher (for macOS, Linux, and Windows). Both tools offer similar functionality, allowing you to create a bootable drive for installing Ubuntu. Choose the one that best suits your operating system and personal preferences.
Backup Important Data
Before installing Ubuntu 24.04 LTS, it’s crucial to back up any critical data on your computer. This includes documents, photos, videos, and other files you want to keep. We understand how important your data is to you, and we assure you that this step is just a precaution to ensure its safety during installation.
- External hard drive: Transfer your important files to an external hard drive for safekeeping.
Creating a Bootable USB Drive
Download and install the bootable USB creation software.
- Visit the official website of the software you’ve chosen
- For Rufus, visit: Rufus
- For balenaEtcher visit: etcher.balena.io/
Using Rufus (for Windows)
Using balenaEtcher (for macOS, Linux, and Windows)
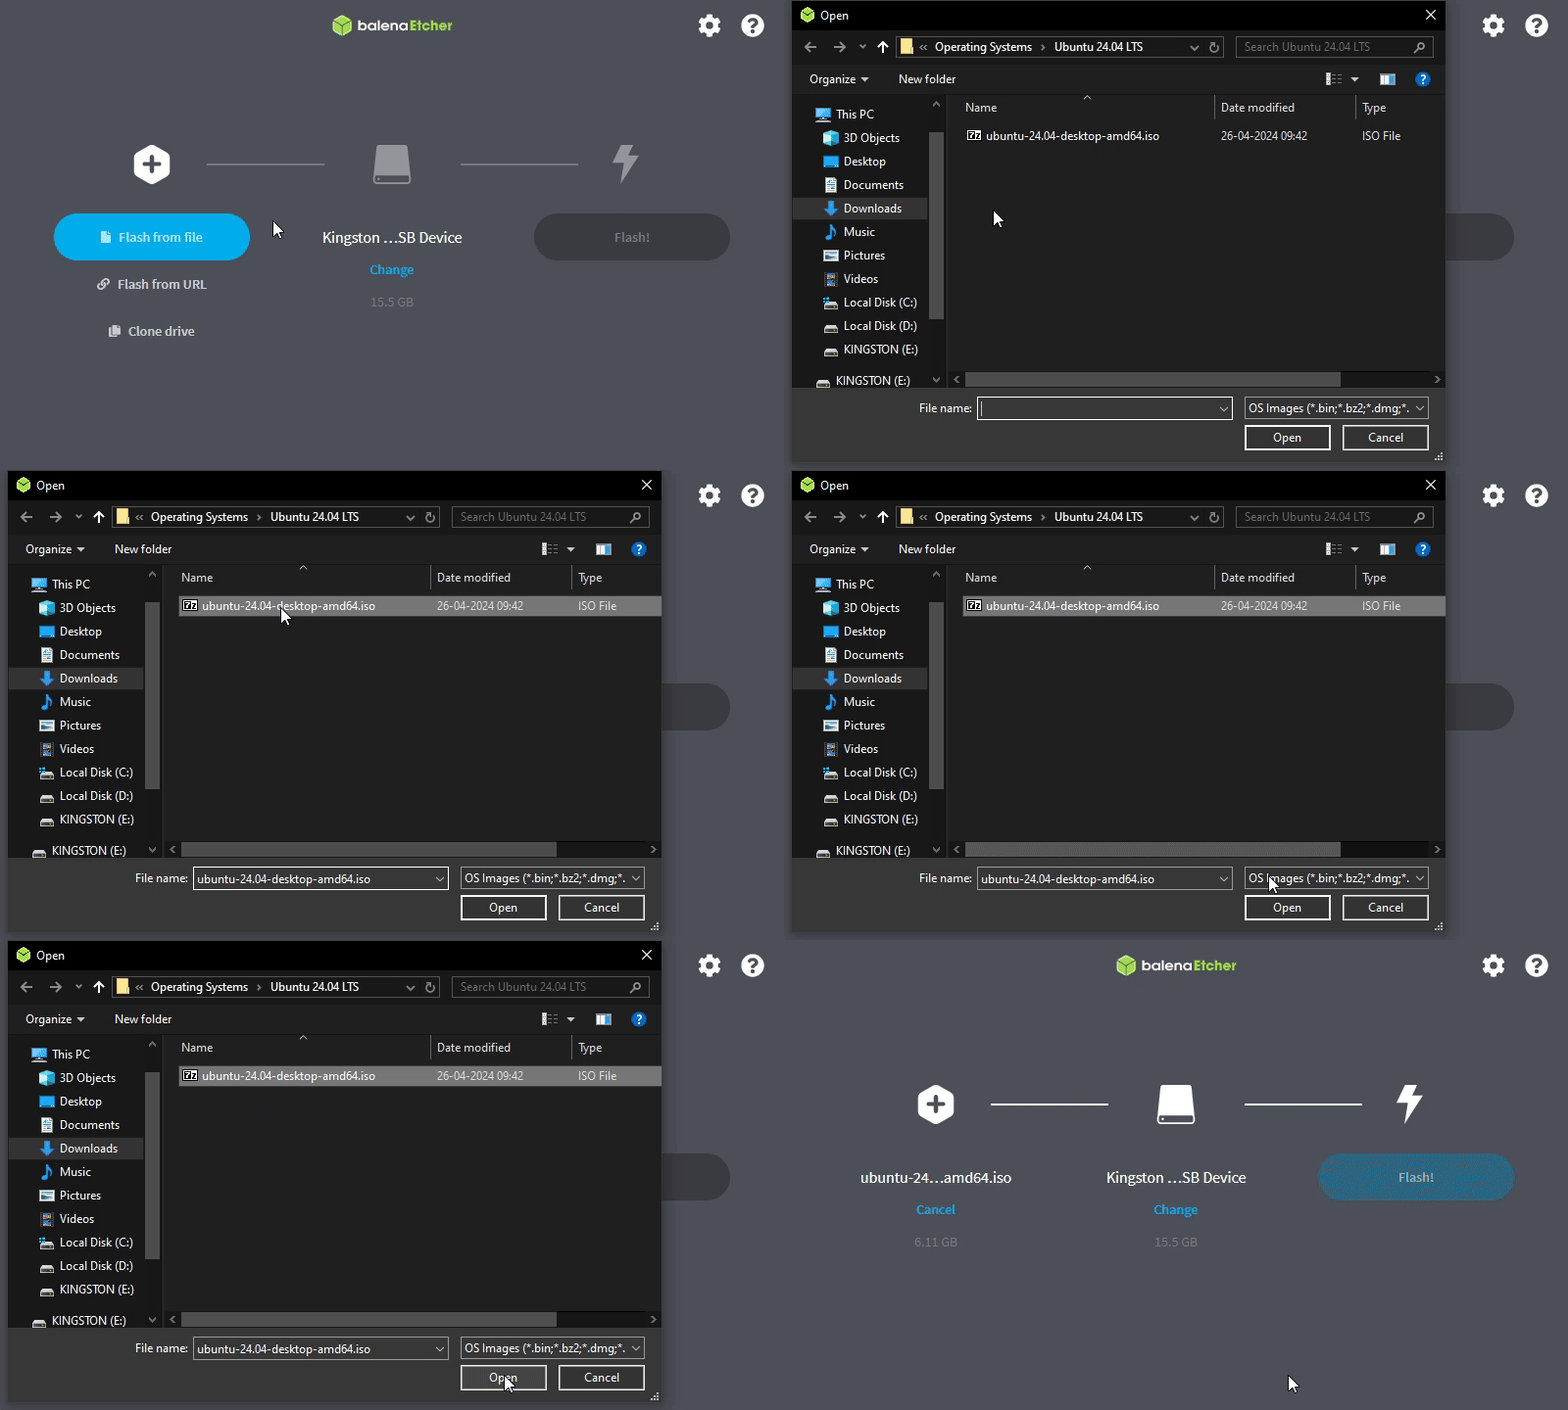
Selecting the downloaded Ubuntu ISO file.
We will be using balenaEtcher to create a bootable drive
- Click on Flash from the file and select the downloaded Ubuntu File
- Choose the USB flash drive and connect it to convert it from a regular USB to a Bootable USB Drive.
- This process will wipe the USB drive and format.
Booting from the USB Drive
Instructions on restarting the computer and entering the boot menu
- Power down your computer
- Insert the bootable USB drive into an available USB port on your computer.
- Power on your computer. Pay close attention to the initial startup screen, where you must press a specific key to enter the boot menu. The key to accessing the boot menu can vary depending on your computer’s manufacturer and BIOS/UEFI firmware version. Some common keys used to access the boot menu include:
- F12
- Esc
- F2
- F10
Press and hold the appropriate key repeatedly when your computer starts to boot. You might see a brief message on the screen indicating the key to press to enter the Setup or Boot Menu.
Navigate the boot menu and select the USB drive.
- Once you press the key successfully, the boot menu options will appear. Depending on your system, this menu might be a primary text-based interface or a more graphical user interface (GUI).
- Using your arrow keys, navigate through the boot menu options. Look for an option that mentions your USB drive by name or model number. It is listed under The boot section.
- Select the USB drive containing the Ubuntu 24.04 installation media.
- Once you’ve highlighted the correct USB drive option, press Enter to boot from the bootable USB drive.
Installing Ubuntu 24.04
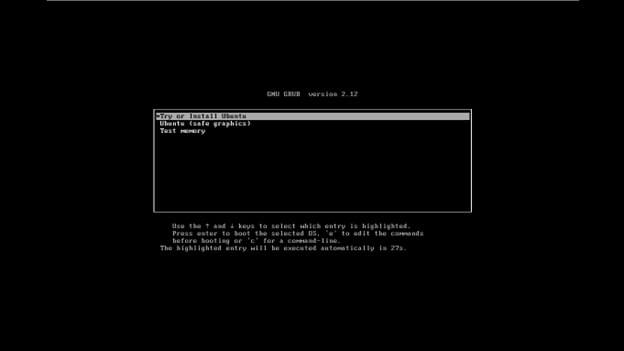
- After booting from the USB, select Try or Install Ubuntu when prompted
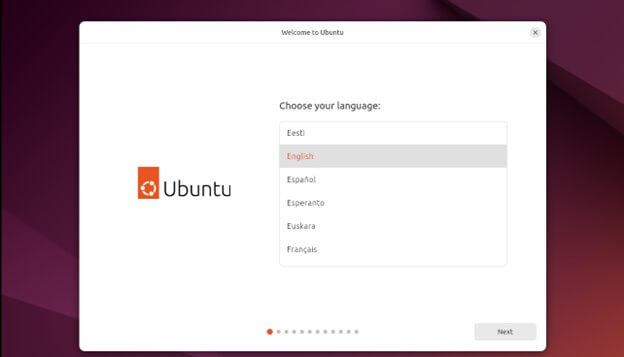
Selecting the installation language and keyboard layout
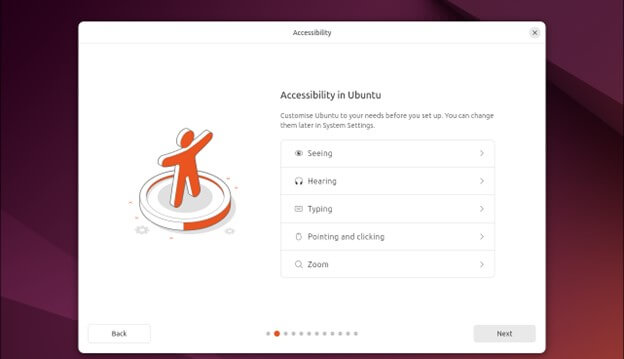
- Ubuntu 24.04 has newly introduced accessibility options with easy access in response to a community request.
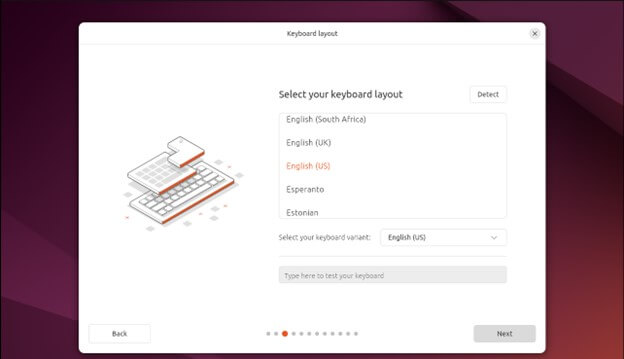
- Select the keyboard layout.
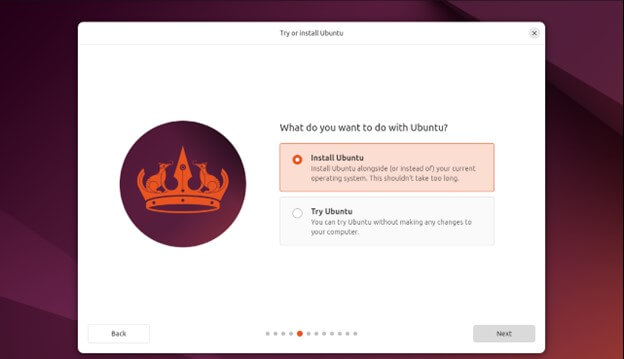
Welcome screen options (Try Ubuntu or Install Ubuntu).
Try Ubuntu: This option allows you to run Ubuntu from the USB drive without installing it. It helps test Ubuntu or access files on your computer before installing.
Install Ubuntu: Select this option to begin the installation process. This option will guide you through installing Ubuntu 24.04 on your computer’s hard drive.
Click on Install Ubuntu
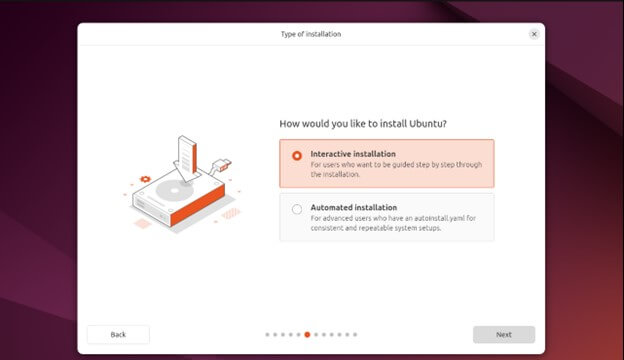
Interactive Installation: This is the traditional method in which the installer guides you through each step, making it easy to set up Ubuntu.
Automated Installation: This method uses a pre-configured file (YAML) to automate the installation without user interaction. They are used to deploy Ubuntu on multiple machines with the same configuration Quickly.
Select Interactive Installation
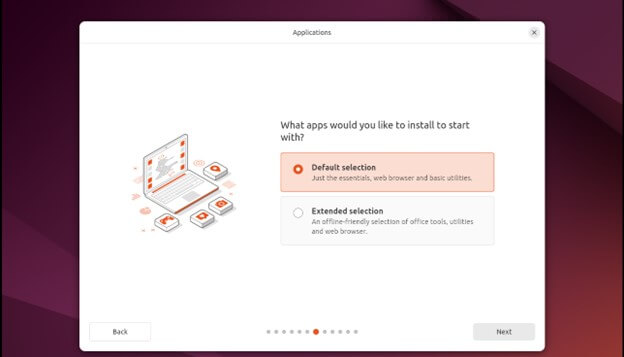
Default selection (previously Minimal): This option offers a leaner installation, ideal for those who prefer a base system with minimal overhead.
Extended selection (previously Normal): This option provides a more comprehensive installation suitable for everyday use. It includes commonly used applications like LibreOffice (office suite), Thunderbird (email client), and essential utilities.
Click Extended Selection
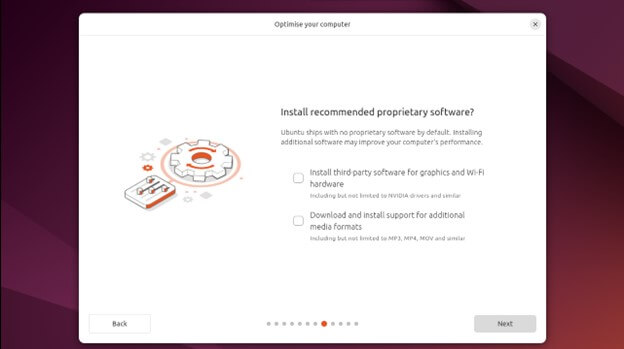
Tick both and click next.
Installation type:
Erase the disk and install Ubuntu.
Erase disk and install Ubuntu: If you select this option, you will see a few choices here. The installer will automatically use the entire disk for Ubuntu.
Manually partition the drive: This option gives you complete control over partitioning your hard drive. You can create separate partitions for the operating system, user data, and other purposes. It’s a powerful feature, but we recommend it for experienced users only, as mistakes can lead to data loss.
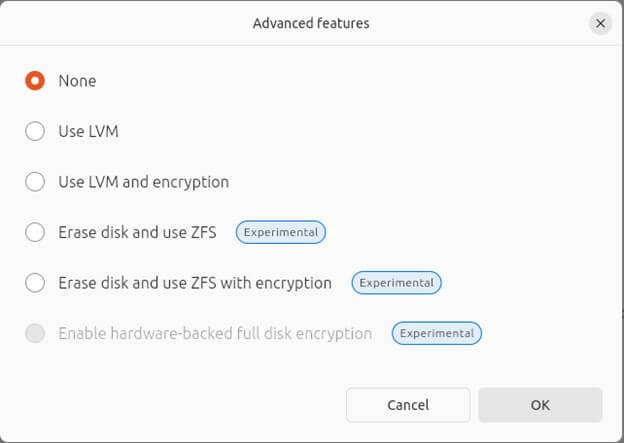
Advance Features
- Use LVM: This stands for Logical Volume Management. It provides an abstraction layer over physical disks. It allows you to create logical volumes that can be resized, moved, or mirrored across physical disks for added flexibility and redundancy in your storage configuration.
- Use LVM and encryption: This combines LVM with full disk encryption for your logical volumes, enhancing data security.
- Erase disk and use ZFS (Experimental): ZFS is an alternative file system to the default Ext4 used in Ubuntu. It offers features like data integrity verification, self-healing, and snapshot capabilities. However, Ubuntu 24.04 considers ZFS experimental, so it recommends testing only in non-critical environments.
- Erase disk and use ZFS with encryption (Experimental): This combines ZFS with full disk encryption, but again, due to the experimental nature of ZFS in Ubuntu 24.04, it’s not recommended for regular use.
- Enable hardware-backed full disk encryption (Experimental): This option utilizes your hardware’s encryption capabilities to encrypt your entire disk. It can improve performance compared to software-based encryption. However, not all hardware may be compatible with it, and it is also labeled experimental.
We proceed with “None.”
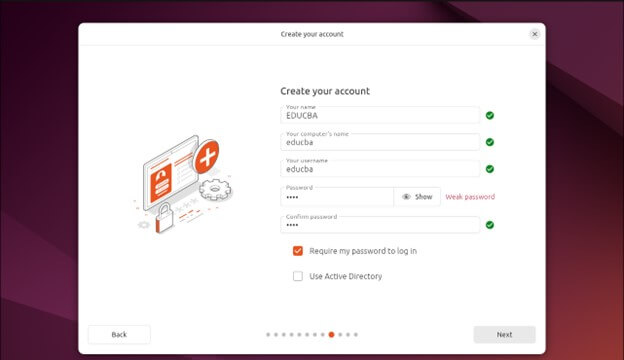
Creating a user account (username and password).
You have to create a user account in this step. This account will be used to log in to your Ubuntu system.
- Your Name: Enter your full name or a desired username for your account.
- Choose a computer name: This is your computer’s name on the network.
- Pick a password: Create a strong password for your account.
Click next.
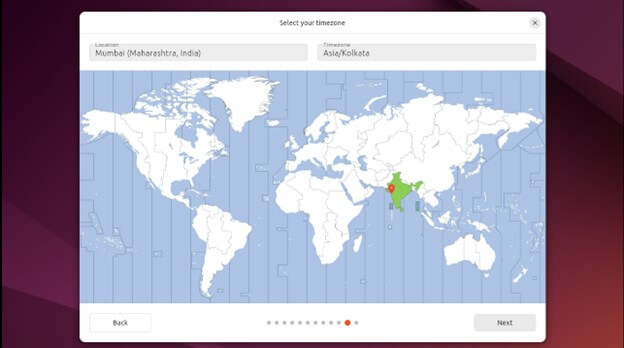
Lastly, select the timezone.
Click next to start the installation process.
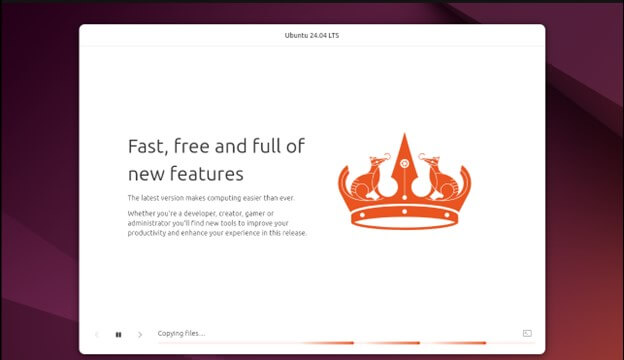
Completing the Installation
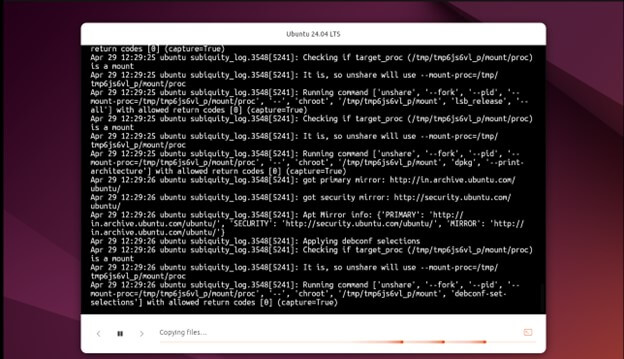
Estimated time.
The estimated time for completion can vary depending on your system’s specifications and the complexity of your chosen installation options (e.g., manual partitioning might take longer). The installer might also display informational messages or perform tasks during this stage. On average, it takes around 15-30 minutes.
Restarting the system.
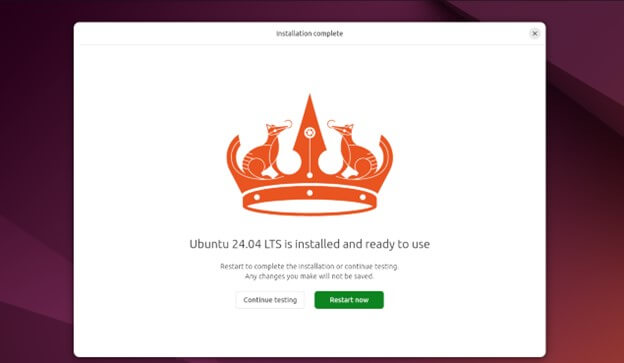
Once the installation is complete, you must restart the system.
Click on Restart now.
During Restart, the system will ask you to remove the bootable media device to proceed with the startup.
Post-Installation Steps
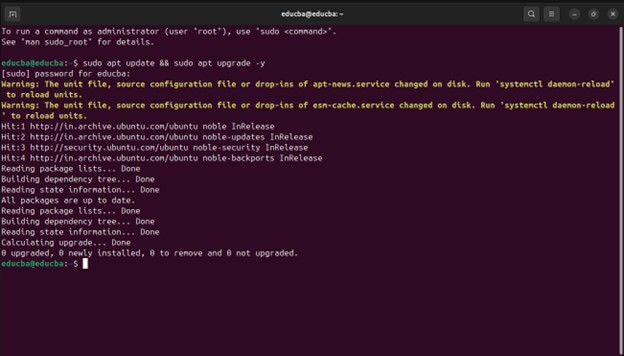
Updating the system
Run command:
sudo apt update && sudo apt upgrade -y
To update your system.
Conclusion
Installing Ubuntu 24.04 is an achievable task with the proper preparation and knowledge. You’re well on your way by ensuring you have the necessary hardware and downloading the Ubuntu ISO file and bootable USB creation software. The installation process walks you through selecting your language, creating a user account, and choosing installation options.
Frequently Asked Questions (FAQs)
Q1. Can I upgrade to Ubuntu 24.04 LTS from an earlier version?
Answer: Ubuntu 23.10 users will have the option to upgrade automatically to 24.04. However, when 24.04.1 LTS launches on August 15, users of 22.04 LTS will also have the option to update automatically.
Q2. Is there a dedicated WSL edition for Windows users?
Answer: Yes! Windows users can explore the dedicated WSL (Windows Subsystem for Linux) edition of Ubuntu 22.04. As of this writing, the Windows Subsystem for Linux of 24.04 is not yet available.
Q3. Can I dual-boot Ubuntu 24.04 LTS with Windows or macOS?
Answer: Yes, you can dual-boot Ubuntu 24.04 LTS with Windows or macOS. You can choose the installation type, including dual-boot alongside existing operating systems during installation.
Q4. Can I install Ubuntu 24.04 LTS on older hardware?
Answer: Yes, Ubuntu 24.04 LTS, designed to run efficiently on a wide range of hardware, also older systems. It offers lighter desktop environment options and minimal system requirements, which makes it suitable for older hardware configurations.
Recommended Articles
We hope that this EDUCBA information on “Ubuntu 24.04 Install” was beneficial to you. You can view EDUCBA’s recommended articles for more information,
