Updated July 7, 2023
Introduction to JavaFX Button
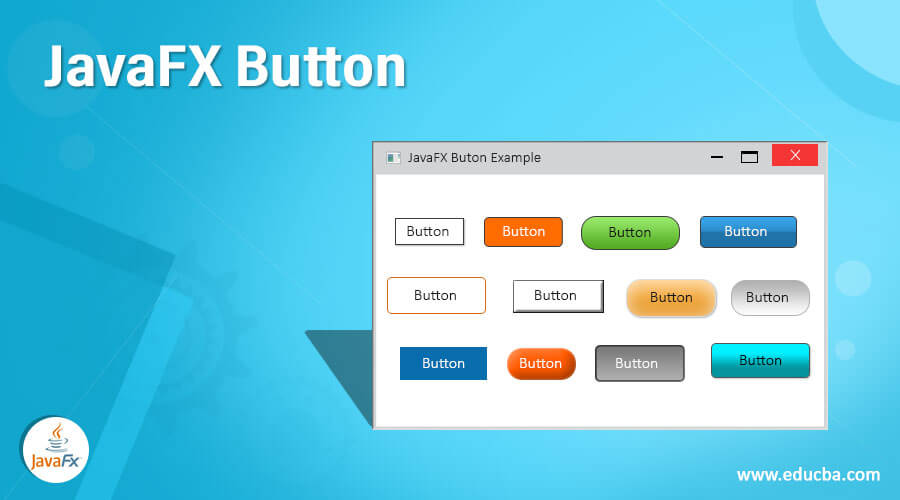
In order to control the behavior of an application, JavaFX uses Button which is represented by the package javafx.scene.control and Button class.
When a user clicks a button, the action corresponding to that will be performed. That corresponding event is handled by the event handler. Buttons can be of image, text, graphics or all of the above. The Button class is an extension of the class Labeled. There are different types of Button in JavaFX. They are:
- Cancel Button: A keyboard VK_ENTER press will be received by this cancel button.
- Normal Button: Normal push button.
- Default Button: A keyboard VK_ENTER press will be received by this default button.
Constructors of JavaFX Button
There are three constructors for the JavaFX button.
1. Button(): A button will be created with an empty string for its label.
// create a button
Button b = new Button();
2. Button(String s): A button will be created with a string s as its label.
// create a button
Button b = new Button(st[a]);
3. Button(String s, icon i): A button will be created with a string s and icon i as its label.
// create a button
Button b = new Button("Sam",a);
Methods
The following are some of the commonly used methods in JavaFX Button.
- isDefaultButton(): defaultButton property’s value will be returned.
- isCancelButton(): cancelButton property’s value will be returned.
- createDefaultSkin(): A new instance of the default button will be created.
- setCancelButton(boolean b): cancelButton property’s value will be set.
- setDefaultButton(boolean b): defaultButton property’s value will be set.
- selectedProperty(): Returns whether the CheckBox is checked or not.
- cancelButtonProperty(): A keyboard VK_ENTER press will be received by this cancel button.
- defaultButtonProperty(): A keyboard VK_ENTER press will be received by this default button.
Examples to Implement JavaFX Button
Now let us see some of the JavaFX programs that implement the JavaFX Button.
Example #1
Java program to demonstrate displaying one button.
Code:
//Java program to display 1 button
import javafx.application.Application;
import javafx.scene.Scene;
import javafx.scene.control.Button;
import javafx.scene.layout.StackPane;
import javafx.stage.Stage;
//sample class
public class JavaFXButtonExample extends Application {
//application starts at this point
@Override
public void start(Stage s)  {
//create a stackpane
StackPane sp = new StackPane();
//create a button
Button b=new Button("This is an example of a button...Please click me !!!");
//create a scene
Scene sc=new Scene(sp,200,200);
//add the button
sp.getChildren().add(b);
//set the scene
s.setScene(sc);
//set the title
s.setTitle("JavaFX Button  Example");
//display the results
s.show();
}
//main method
public static void main(String[] args) {
launch(args);
}
}
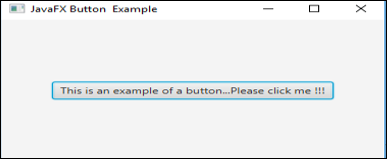
Output:
Explanation:
- First, create a stack pane and then create a button
- Once the button is created, create a scene and add it to the scene graph
- Finally, display the results.
- Here, only one button will be displayed.
Example #2
Java program to display a button with an image.
Code:
//Java program to display 1 button with an image
import javafx.application.Application;
import javafx.scene.Scene;
import javafx.scene.control.Button;
import javafx.scene.layout.StackPane;
import javafx.stage.Stage;
import javafx.scene.image.ImageView;
import java.io.FileInputStream;
import javafx.scene.image.Image;
//sample class
public class JavaFXButtonExample extends Application {
//application starts at this point
@Override
public void start(Stage s) throws Exception   {
//set the title
s.setTitle("JavaFX Button  Example");
// Image Source
//Make sure you have a source image in the specified path
FileInputStream input = new FileInputStream("D:\\EduCBA\\nov\\dndd.png");
//image creation
Image i = new Image(input);
//image view creation
ImageView iv = new ImageView(i);
//create a button
Button b=new Button("This is an example of a button...Please click me !!!", iv);
//create a scene
Scene sc=new Scene(b,200,200);
//set the scene
s.setScene(sc);
//display the results
s.show();
}
//main method
public static void main(String[] args) {
launch(args);
}
}
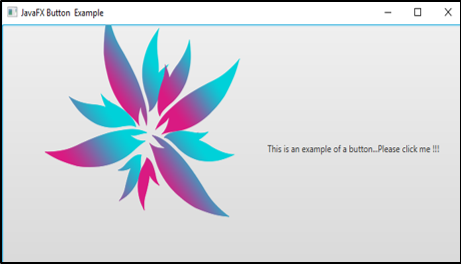
Output:
Explanation:
- First, input an image from the local folder or any other source.
- Then, create a button.
- Once the button is created, create a scene and add it to the scene graph
- Finally, display the results.
- Here, a button with an image will be displayed.
Example #3
Java program to display multiple buttons with an event handler.
Code:
//Java program to display multiple buttons with an event handler
import javafx.application.Application;
import javafx.scene.Scene;
import javafx.stage.Stage;
import javafx.scene.layout.*;
import javafx.event.ActionEvent;
import javafx.event.EventHandler;
import javafx.scene.control.*;
import javafx.scene.control.Button;
//sample class
public class JavaFXButtonExample extends Application {
//  application launches here
public void start(Stage s) throws Exception
{
// Title for the stage is set
s.setTitle(" JavaFX Button Sample ");
//create a cancel button and set it
Button cb=new Button("This is an example of a cancel button...Please click me !!!");
cb.setCancelButton(true);
//create a default button and set it
Button db = new Button("This is an example of a default button...Please click me !!!");
// set default button
db.setDefaultButton(true);
// tile pane is created
TilePane tp = new TilePane();
// label is created
Label lb = new Label(" Click any one button ");
// an event handler creation
EventHandler<ActionEvent> ev = new EventHandler<ActionEvent>() {
public void handle(ActionEvent e)
{
lb.setText(" You have selected cancel button ");
}
};
// an event handler creation
EventHandler<ActionEvent> evn = new EventHandler<ActionEvent>() {
public void handle(ActionEvent e)
{
lb.setText(" You have selected default button ");
}
};
// In button, event is set
cb.setOnAction(ev);
db.setOnAction(evn);
tp.getChildren().add(cb);
tp.getChildren().add(db);
tp.getChildren().add(lb);
// Scene creation and adding it  to the scene graph
//create a scene
Scene sc=new Scene(tp,200,200);
//set the scene
s.setScene(sc);
//display the results
s.show();
}
public static void main(String args[])
{
// launch the application
launch(args);
}
}
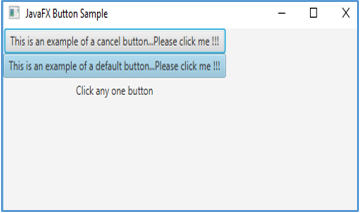
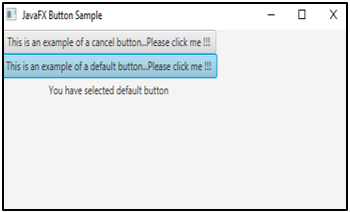
Output:
If any of the buttons is clicked, the output will be as below.
That is, a text will be displayed which mentions which button the user has clicked.
Explanation
- First, Create the buttons
- Once the button is created, specify the action that has to be performed when it is clicked.
- Then, create a scene and add it to the scene graph
- Finally, display the results.
Conclusion
JavaFX uses Button for controlling the behavior of an application where an action will be triggered once it is clicked. Buttons can be of different types such as image, text, graphics or all of the above the same time. Constructors, Methods, and Examples of Button are explained in the above sections in detail.
Recommended Articles
This is a guide to JavaFX Button. Here we discuss the constructors and methods of the JavaFX button along with different examples and code implementation. You can also go through our other suggested articles to learn more –
