Updated June 3, 2023

Introduction to JavaFX Controller
JavaFX controller works based on MVC(Model-View-Controller). JavaFX MVC can be achieved by FXML (EFF-ects eXtended Markup Language). As in HTML, FXML is an XML-based language to develop graphical user interfaces for JavaFX applications. FXML can be used to build an entire GUI application scene or part of a GUI application scene. This FXML allows developers to separate User Interface logic from the business logic. Suppose User Interface in your JavaFX application; then no need to compile the application even if we have done some changes to the application. We can edit the FXML in the editor and re-run the app if we want.
Real-Time Example: Whenever a user wants to change a specific part of the standalone application, courses portion an application. We know new courses always come to the market, so that we can re-compile the code every time. So, in that case, we can use FXML in the controller class.
What is the FXML Controller?
Here, we discuss the FXML controller in JavaFX with an explanation.
Syntax:
<?xml version="1.0" encoding="UTF-8"?>
<?import javafx.scene.layout.HBox?>
<?import javafx.scene.control.Label?>
<HBox>
<children>
<Label text="Hello, Well Come to EDUCBA Online Course"/>
</children>
</HBox>
Explanation:
- You can observe that all components are specified just like HTML
- <HBox> creates a horizontal component.
- <children> tag specifies inside components will be added as children to the above
- <Label> label added to the HBox as children.
- <?import javafx.scene.layout.VBox?>, <?import javafx.scene.control.Label?> importing HBox and Label classes.
1. Importing Classes in FXML Controller
In the FXML controller, we must import classes as below:
Syntax:
<?import javafx.scene.layout.HBox?>2. Loading FXML file in the controller
Loading the FXML file in the controller, we must import javafx.fxml.FXMLLoader package.
Syntax:
FXMLLoader fxmlLoader = new FXMLLoader();//creating FXMLLoader object
fxmlLoader.setLocation(new URL("path/fileName.fxml"));//accessing FXML file
How Does FXML Controller Work in JavaFX?
We can set the controller class for the FXML document. The FXML controller class can bind the Graphical User Interface components declared within the FXML file together, making the controller object a mediator. We can set the controller for FXML in 2 ways:
1. Specifying Inside the FXML File Directly
Following is a syntax to Specify inside the FXML file directly.
Syntax:
<?xml version="1.0" encoding="UTF-8"?>
<?import javafx.scene.layout.HBox?>
<?import javafx.scene.control.Button?>
<HBox xmlns:fx="http://javafx.com/fxml" fx:controller="com.jenkov.javafx.ClassNameOfController" >
<Button text="Press Me"/ onAction="clickMeAction()">
</Button>
</HBox>
Explanation:
- fx: the controller is used to include the controller class.
- Button onAction attribute used for performing clicking action.
2. Creating Separate FXML Controller Class
Following is a syntax to create a separate FXML controller class and include it with the FXML Loader instance to load the FXML file.
Syntax:
ClassNameOfController controllerInstance = new ClassNameOfController();
FXMLLoader fxmlLoader= new FXMLLoader();
fxmlLoader.setControllercontrollerInstance(controllerInstance);
We can also include CSS styles and JavaScript in the FXML file inside the component.
Syntax:
<style>
-fx-property: value;//CSS
</style>
<fx:script>
//JavaScript logic
</fx:script>
Examples of JavaFX Controller
This tutorial will create all the FXML and controller classes separately for better understanding.
Example #1 – FXML Controller with Label and Field
FXML Code:
FXMLLabelTextFieldController.fxml
<?import javafx.scene.layout.HBox?>
<?import javafx.scene.control.Label?>
<?import javafx.scene.control.TextField?>
<HBox>
<Label text="First Name" />
<TextField text="enter your name" />
<Label text="Last Name" />
<TextField text="enter your last name" />
<Label text="Mobile Number" />
<TextField text="enter your mobile number" />
</HBox>
JavaFX Code:
FXMLLabelTextFieldController.java
package com.fxml.controller;
import java.io.FileInputStream;
import java.io.IOException;
import javafx.application.Application;
import javafx.fxml.FXMLLoader;
import javafx.scene.Scene;
import javafx.scene.layout.HBox;
import javafx.stage.Stage;
public class FXMLController extends Application {
@Override
public void start(Stage outStage) throws IOException {
// Setting title to screen
outStage.setTitle("FXML Controller Demo");
// Creating FXML Loader instance
FXMLLoader loader = new FXMLLoader();
// FXML path
String fxmlActualPath = "C://Users//paramesh//Desktop//Desktop//Verinon Purpose//FXMLController//src//com//fxml//controller/FXMLController.fxml";
// Setting FXML path
FileInputStream fxmlStream = new FileInputStream(fxmlActualPath);
// Creating VBox to add FXML label and text fields
HBox hBox = (HBox) loader.load(fxmlStream);
// Creating scene
Scene screen = new Scene(hBox);
// Setting screen stage
outStage.setScene(screen);
// Showing the screen
outStage.show();
}
public static void main(String[] args) {
//inside JVM launch method calls start method
Application.launch(args);
}
}
Output:
Explanation:
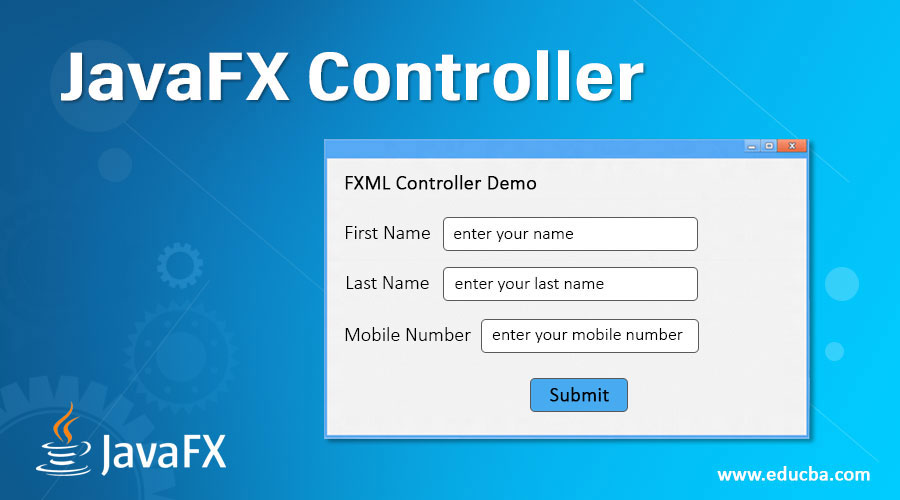
- First, we created an FXML file with HBox, Label, and TextFields and imported them with their packages.
- Next, we created a Controller class and load the FXML file. Then executed.
- On the above screen, you see the output.
Example #2 – FXML Controller with Button and Label
FXML Code:
FXMLAddingButtonsController.fxml
<?import javafx.scene.layout.VBox?>
<?import javafx.scene.control.Label?>
<?import javafx.scene.control.TextField?>
<?import javafx.scene.control.Button?>
<VBox>
<Label text="Button 1" />
<Button text="FirstName Button" />
<Label text="Button 2" />
<Button text="LastName Button" />
<Label text="Button 3" />
<Button text="MobileNumber Button" />
<Label text="Button 4" />
<Button text="Email Button" />
<Label text="Button 5" />
<Button text="Login Button" />
</VBox>
JavaFX Code:
FXMLAddingButtonsController.java
package com.fxml.controller;
import java.io.FileInputStream;
import java.io.IOException;
import javafx.application.Application;
import javafx.fxml.FXMLLoader;
import javafx.scene.Scene;
import javafx.scene.layout.VBox;
import javafx.stage.Stage;
public class FXMLAddingButtonsController extends Application {
@Override
public void start(Stage outStage) throws IOException {
// Setting title to screen
outStage.setTitle("FXML Controller Button with CSS Styles");
// Creating FXML Loader instance
FXMLLoader loader = new FXMLLoader();
// FXML path
String fxmlActualPath = "C://Users//paramesh//Desktop//Desktop//Verinon Purpose//FXMLController//src//com//fxml//controller/FXMLLabelAddingButtonController.fxml";
// Setting FXML path
FileInputStream fxmlStream = new FileInputStream(fxmlActualPath);
// Creating VBox to add FXML label and text fields
VBox vBox = (VBox) loader.load(fxmlStream);
// Creating scene
Scene screen = new Scene(vBox, 500, 500);
// Setting screen stage
outStage.setScene(screen);
// Showing the screen
outStage.show();
}
public static void main(String[] args) {
// inside JVM launch method calls start method
Application.launch(args);
}
}
Output:
Explanation:
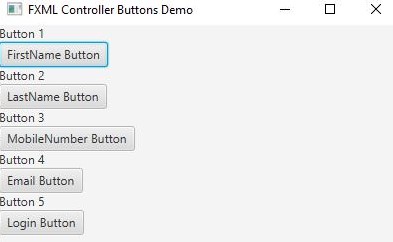
- First, we created an FXML file with VBox and Multiple Buttons and imported them with their packages.
- Next, we created a Controller class and load the FXML file. Then executed.
- On the above screen, you see the output.
Example #3 – FXML Controller Button Action
FXML Code:
FXMLButtonActionController.fxml
<?language JavaScript?><!-- including JavaScript library -->
<?import javafx.scene.layout.VBox?>
<?import javafx.scene.control.Label?>
<?import javafx.scene.control.Button?>
<?import javafx.scene.control.TextField?>
<VBox xmlns:fx="http://javafx.com/fxml/1" xmlns="http://javafx.com/javafx/2.2">
<children>
<Label text="Name :" />
<TextField fx:id="inputText1" text="enter your name"/>
</children>
<children>
<Label text="Email :" />
<TextField fx:id="inputText2" text="enter your email"/>
</children>
<children>
<Button onAction="showDetails()" text="Display Details" />
<Label fx:id="labelOut" />
</children>
<!-- including JavaScript action -->
<fx:script>
function showDetails()
{
labelOut.setText("Name=>"+inputText1.getText()+" Email=>"+inputText2.getText());
}
</fx:script>
</VBox>
JavaFX Code:
FXMLButtonActionController.java
package com.fxml.controller;
import java.io.FileInputStream;
import java.io.IOException;
import javafx.application.Application;
import javafx.fxml.FXMLLoader;
import javafx.scene.Scene;
import javafx.scene.layout.VBox;
import javafx.stage.Stage;
public class FXMLButtonActionController extends Application {
public static void main(String[] args) {
Application.launch(args);
}
@Override
public void start(Stage stage) throws IOException {
// Create the FXMLLoader
FXMLLoader loader = new FXMLLoader();
// Path to the FXML File
String fxmlDocPath = "C://Users//paramesh//Desktop//Desktop//Verinon Purpose//FXMLController//src//com//fxml//controller/FXMLButtonActionController.fxml";
FileInputStream fxmlStream = new FileInputStream(fxmlDocPath);
// Create the Pane and all Details
VBox root = (VBox) loader.load(fxmlStream);
// Create the Scene
Scene scene = new Scene(root,300,300);
// Set the Scene to the Stage
stage.setScene(scene);
// Set the Title to the Stage
stage.setTitle("A simple FXML Example");
// Display the Stage
stage.show();
}
}
Output:
Explanation:
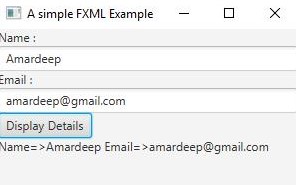
- First, we created an FXML file with VBox, Labels, Text Fields, and Buttons and imported them with their packages.
- Next, we created a Controller class and load the FXML file. Then executed.
- When we click on the Display Details button, the action taken by the JavaFX JavaScript showDetails() method and display in the label area.
- On the above screen, you see the output.
Recommended Articles
This is a guide to JavaFX Controller. Here we discuss the Introduction and how does the FXML controller works in JavaFX, along with examples and code implementation. You may also have a look at the following articles to learn more –


