Updated April 6, 2023

Introduction to JavaFX FXML
JavaFX FXML is defined as a GUI format with XML-based language launched by Oracle Corporation that enables to compose of the GUIs’ layout or the application of GUIs. The Primary purpose of FXML is to define a user interface. Placing XML mark-up here is to describe a component of UI in the hierarchy structure. A controller takes managing interactions by defining components and link them with them. FXML file has an extension .fxml and it is loaded by FXML Loader by JavaFX,
Syntax
JavaFX FXML is created as below
<?xml version="1.0" encoding="UTF-8"?>
<?import javafx.scene.layout.VBox?>
<?import javafx.scene.control.Button?>
<VBox>
<children>
<Button text="This is my official website on FXML"/>
</children>
</VBox>
Here in the above syntax, the first-line includes FXML documents. Next is to include import files and classes; finally, a GUI composition is embedded by creating a VBox component and a button component. <Vbox> creates a vertical component acting as a container for multiple components for positioning.
How does JavaFX FXML work?
JavaFX is used to create the Desktop Application, which allows to code the User-interface by making the application easier. In FXML XML elements are a class, script, property, static. A typical JavaFX FXML works like below:
- FXML document has a user interface of an FXML application.
- FXML Controller handles all the event handling process.
- Next, FXML Loader parses the given FXML document and creates a graph. Simultaneously the Main Class initiates the execution of a Program.
For example, when a user accessing a website, he/she checks with the updated information of their needs; therefore, we need to recompile a code. In such a case FXML controller plays a role.
In this article, I have used NetBeans IDE, which supports JavaFX. This IDE typically provides a visual Layout for designing a UI. Deploying the first JavaFx application is needed. To take up the process:
- Setting Up a New Project by clicking the JavaFX FXML application. The IDE is sectored into three sections.
- Java file: This takes up a java code for an application (Main Application)
- .fxml file: Here FXML source file is created to define a user interface part.
- java: This part includes an event handling process like a mouse and keyboard clicks.
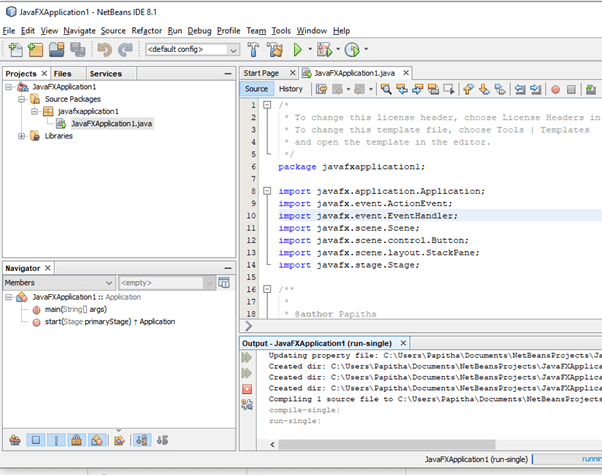
Below is the NetBeans IDE screenshots that support JavaFX. Here we could see three application files in the name JAVAFXApplication1
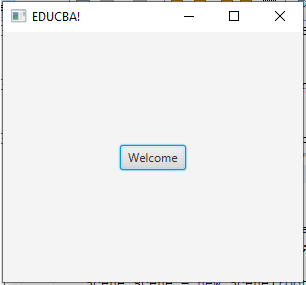
The following image shows the application that executes with the button event handlers. FXML specifies two event handlers, namely script and Controller event handlers. FXML Layout file could be created for more parts; this keeps the controller and views independently. And the scene Builder doesn’t need XML directly to work with. The stage is the main container, and the Scene is the UI elements here.
Generally, the FXML loader loads the .fxml file of the application by the classpath getclass(). During this, it finds the name of the controller. The object created by them could be anywhere, so to make reference, we need to identify the objects with an attribute fx: id. Next, the root element is the sub-class of javafx. scene. layout. Pane. Even we can use two controllers by communicating each window.
Adding Scripts
<fx:script>
function bt_click() {
mainButton.setText("press me!");
}
</fx:script>
We have few labels and button acts dynamically and defined inside <fx:script>
FXML namespaces
<?xml version="1.0" encoding="UTF-8"?>
<?import javafx. scene. layout.VBox?>
<VBox xmlns:fx="http://edujava.com/fxml">
</VBox>
Vbox here is a component that makes a form in a vertical order (child elements). We can insert text, labels, and buttons to create a form Layout. Namespaces are added to the root element.
FXML containing stackPane
<?xml version="1.0" encoding="UTF-8"?>
<?import javafx.scene.text.*?>
<?import javafx.scene.layout.*?>
<StackPane prefHeight="150" prefWidth="150" xmlns:fx="http://javafx.com/fxml/1" fx:controller="counter.Classctrl">
<children>
</Stackpane>
Using Border Panel
<HBox prefHeight="110.0" prefWidth="210.0"
BorderPane.alignment="CENTER">
<children>
<Label text="Square Root:" textFill="Red">
<font>
<Font size="16.0" />
</font>
</Label>
<TextField fx:id="mysample" />
</children>
</HBox>
</top>
</BorderPane>
Adding Component inside FXML file
public class load extends VBox implements Initializable {
@FXML
private void handleAction(ActionEvent eve) {
}
@Override
public void initialize(URL u, ResourceBundle re) {
}
}
FXML annotation is given as
public class layout
@FXML
private TextField txt;
@FXML
private Button btn;
@FXML
private VBox dataContainer;
@FXML
private TableView tab;
Examples
In this section, we will show you how to use javafx.fxml in Net Beans IDE.
The respective Java class is given as
FXMLsample.java
package fxmlsample;
import javafx.application.Application;
import javafx.fxml.FXMLLoader;
import javafx.scene.Parent;
import javafx.scene.Scene;
import javafx.stage.Stage;
public class FXMLsample extends Application {
@Override
public void start(Stage st) throws Exception {
Parent root = FXMLLoader.load(getClass().getResource("FXMLdoc.fxml"));
Scene sc = new Scene(root, 200, 215);
st.setTitle("FXML Welcome");
st.setScene(sc);
st.show();
}
public static void main(String[] args) {
launch(args);
}
}
A simple FXML file containing Grid Pane and text content and by default associated with controller class.
FXMLdoc.fxml
<?xml version="1.0" encoding="UTF-8"?>
<?import java.net.*?>
<?import javafx.geometry.*?>
<?import javafx.scene.control.*?>
<?import javafx.scene.layout.*?>
<?import javafx.scene.text.*?>
<Text text="Welcome Page"
GridPane.columnIndex="0" GridPane.rowIndex="0"
GridPane.columnSpan="3"/>
<GridPane fx:controller="FXMLdoc.FXML_ctrl"
xmlns:fx="http://javafx.com/fxml" alignment="center" hgap="9" vgap="9">
<padding><Insets top="22" right="22" bottom="12" left="22"/></padding>
</GridPane>
Next is the controller class with the response to the FXML file for the UI application
FXML_ctrl.java
package FXMLsample;
import javafx.event.ActionEvent;
import javafx.fxml.FXML;
import javafx.scene.text.Text;
import javafx.scene.control.Label;
public class FXML_ctrl {
@FXML private Text actiontarget;
@FXML protected void handleSubmitButtonAction(ActionEvent event) {
actiontarget.setText("Submit the button");
}
}
Explanation
The above code section shows to run an FXML application by loading a loader. Similarly, we could see how the components get to each other.
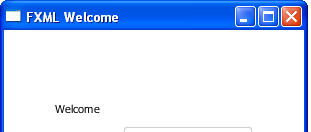
Output:
Features
- They have a large set of built-in GUI components like checkboxes; buttons also come with a built-in charts library to create charts.
- JavaFX FXML is an XML mark-up language and has a rich set of APIs. It’s a powerful tool and keeps the code easier. Used to develop rich Internet applications using java Files.
- JavaFX has CSS styling and gives a declarative layout through FXML.
- FXML uses namespaces with the prefix ‘fx’ in which all elements and attributes are assigned. Also, well simple to debug and modify.
Conclusion
This is all about JavaFX FXML. In this article, we had discussed their definition and how it works with JavaFX, along with the examples. Generally, the basics of JavaFX demonstration would not work wells. To build a larger application, we need a system FXML. Therefore, we have explained how it could be used in the development of JavaFX implementation.
Recommended Articles
This is a guide to JavaFX FXML. Here we discuss the definition and how it works with JavaFX, along with the examples and features. You may also have a look at the following articles to learn more –


